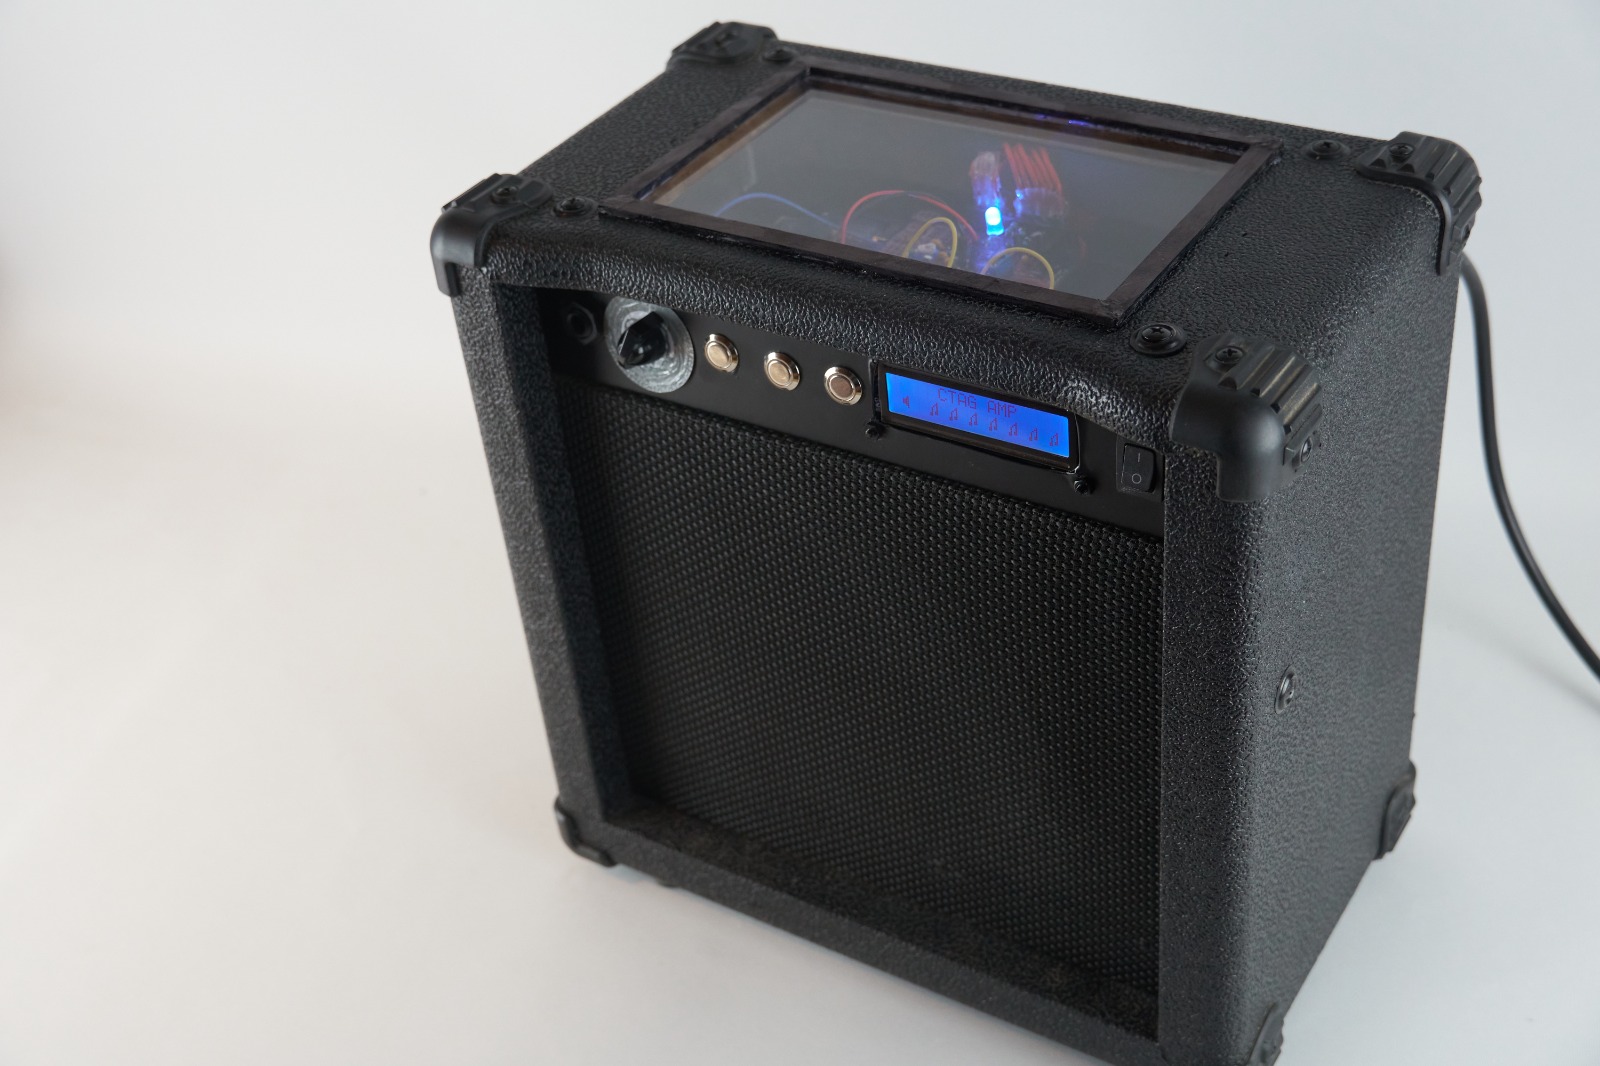
This is a small all in one digital AMP project. The base is an Arduino Uno. The Arduino Uno might not be very powerful but it is remarkable what it is capable of. The AMP is programmable and you are able to design a whole variety of effects. The system is portable because it can be used with a battery. I added the AMP into an old broken guitar AMP but I also tested it with a HIFI speaker. The AMP features a LCD display and buttons to choose the effects. The project was inspired by the guitar pedal from Electrosmash https://www.electrosmash.com/pedalshield-uno.
- All in one guitar amplifier
- Variety of effects
- Display to show level and effect
- Buttons to choose settings
- Portable
Here are two example videos of the AMP. The video shows the sound and basic effects of the AMP.
- Volume
- Boost
- Overdrive
- Hard clipping
- Positive hard clipping
- Positive soft clipping
- Bias level soft clipping
- Bias level hard clipping
- Bias positive hard clipping
- Distortion
- Soft distortion
- Hard distortion
- Reverb
- Crazy sounds
- Waveform generator
- Sine wave
- Triangle wave
- Tremolo
- Sine wave tremolo
- triangle wave tremolo
The Arduino Uno is not very powerful. Especially the memory and core speed are limited resulting in a short reverb for example. It has to be coded very efficiently to get a good performance. It is possible to improve the speed by using a more modern microcontroller like an ESP32.
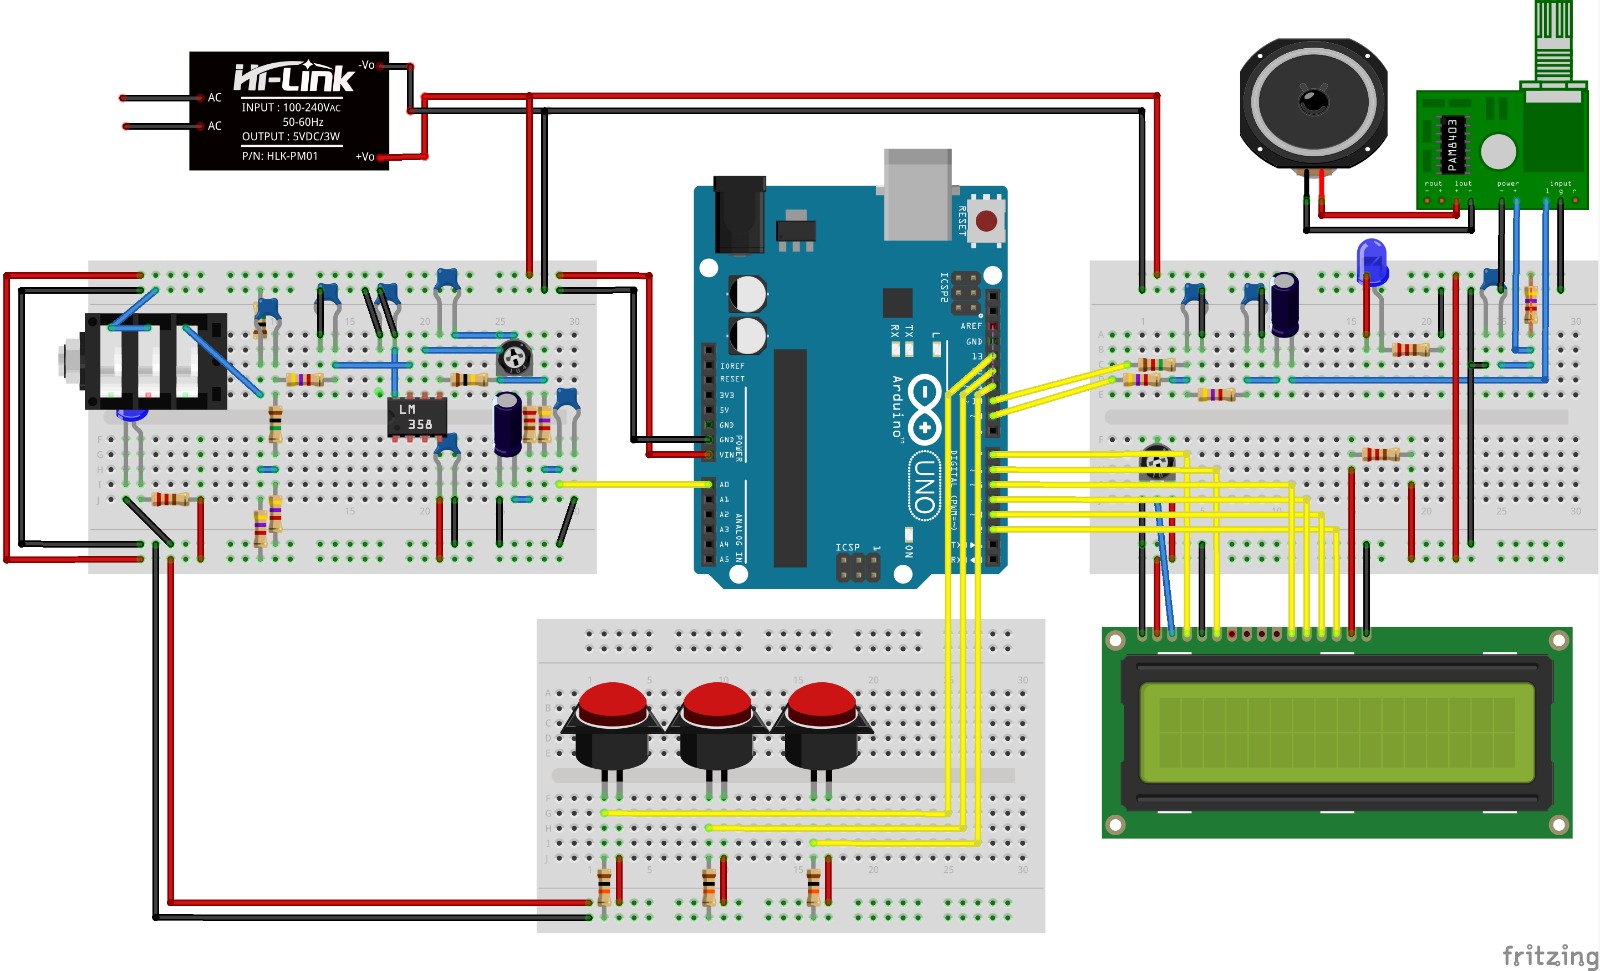
This is the circuit I soldered on Arduino Uno prototype shield.

- C1, C4, C8 = 100nf
- C2, C6, C5, C7 = 6.8nF
- C3 = 270pF
- C9, C10 = 4.7uF electrolytic capacitor
- R1, R4, R11 = 1MOhm
- R2, R3 = 4.5kOhm
- R5, R8, R7, R10, R12 = 4.7kOhm
- R6 = 100kOhm
- R9 = 220kOhm
- P1 = 500k Trimmer
- K1 = screw terminal block
- Arduino Prototype Shield
- Arduino Uno
- I'm using an adapter power supply. But you can use every 5v power supply with enough power.
- Class d AMP for example XH-M177 PAM8403
- MCP6002
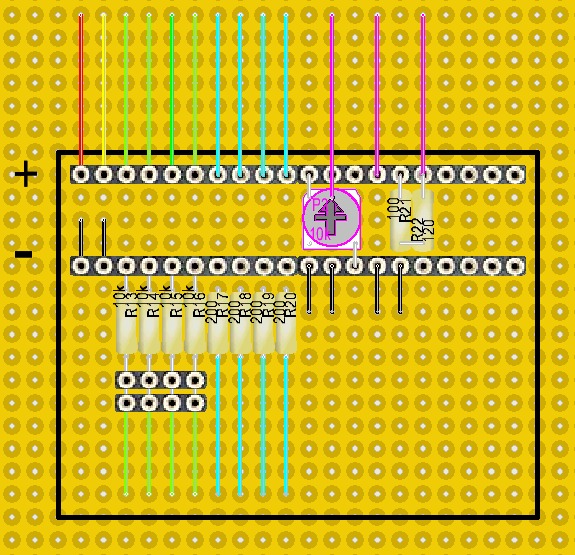
PullDown for the buttons. Resistors for the LEDs. Trimmer for the Display.
-
R13, R14, R15, R16 = 10kOhm
-
R17, R18, R19, R20 = 200Ohm
-
R20 = 100Ohm
-
R21 = 120Ohm
-
P2 = 10k Trimmer
-
red: Arduino power supply
-
yellow: Class D AMP power supply
-
green: Button 1-4
-
lightBlue: Led 1-4 supply
- Arduino IDE
- Code Blocks
- Dia
- Igor Pro
- Physics Toolbox
- Overleaf
- fritzing
- Lochmaster
- Reaper
- VSDC Video Editor