Technical paper
The beer fridge app solves a common issue. Nowadays, most individuals are unaware of the temperature of their hops-containing beverages. The solution is a microcontroller, connected to a thermometer and a relay, which communicates to the users phone through a websocket server.
On the hardware side, I am using an ESP8266 running on the NodeMCU firmware. I am using the Geekcreit development board, which comes with a WiFi module out of the box and can be flashed directly using its micro USB connector. Also, it is insanely cheap.
To control the power supply of the fridge, I am using a pre-assembled relay board. This way, the fridge can be turned on or off by setting the corresponding GPIO pin to high or low.
As a thermometer, I am using a DS18B20 temperature sensor.
To gather a comprehensive overview of all components involved, please see the circuit diagram below:

The software of the beer fridge project consists of three parts:
- The software running on the microcontroller which controls the fridge
- The mobile app running on the users smartphone
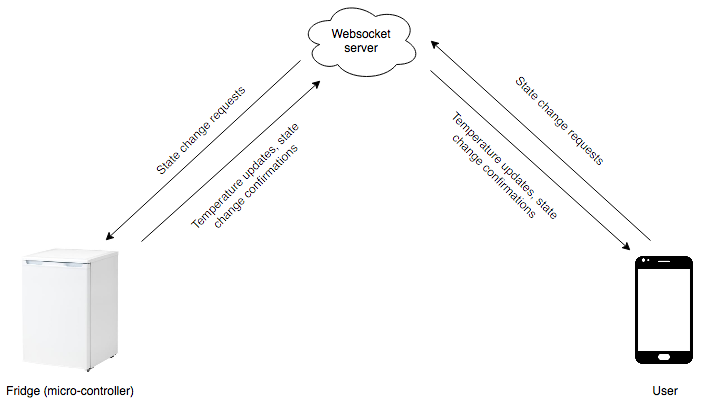
- The websocket server which acts as a hub between the former two
The communication between those three is visualized in the following diagram:
As mentioned above, the micro-controller is running on the NodeMCU firmware. The firmware was built using the cloud builder and includes the following modules:
- DS18B20 for communicating with the temperature sensor
- file for accessing the different script files
- GPIO for reading and writing to the different pins
- net for establishing an internet connection
- node for various utility functions
- SJSON for parsing and generating JSON strings
- timer to schedule the sending of temperature updates
- UART to access the serial port and flash the firmware to the micro-controller
- websocket to connect to the websocket server
- WiFi to connect to WiFi networks
The code itself is spit into three files:
- init.lua which handles the initial connection to the configured WiFi network, connects to the websocket service and sends an initial message.
- application.lua, which contains the actual logic of responding to state change requests and periodically sending a message with the current value of the temperature sensor.
- config.lua, which contains WiFi credentials, the access token for authenticating with the websocket server and the used pins numbers.
The websocket server is written in JavaScript, running on the Node.js run-time environment. Consisting of only ~250 lines of code, it is relatively lightweight, so it contains only of one .js file, which basically takes care of the following tasks:
The script is providing an SSL-encrypted HTTP server with an endpoint (/fridge) that accepts websocket connections.
Since a websocket connection is basically just an HTTP request that stays open for a longer period of time, I am using a HTTP header to authenticate both user and fridge. By reading the X-Auth-Token header, the server both restricts access to the endpoint and manages permissions based on the clients role.
For example, while the fridge may send messages with the temperature key (e.g. {'temperature': 12.3}), users may not send messages like that.
Also, the server takes care of choosing the right recipient(s) for messages sent by clients. Basically, all messages sent by users need to be sent to the fridge and all messages sent by the fridge need to be sent to all connected clients.
Last but not least, the server makes sure that only valid messages are forwarded.
The third component is the mobile app which is being used to turn the fridge on or off and to monitor the current temperature.
The app was built using Flutter and runs on both iOS and Android devices.
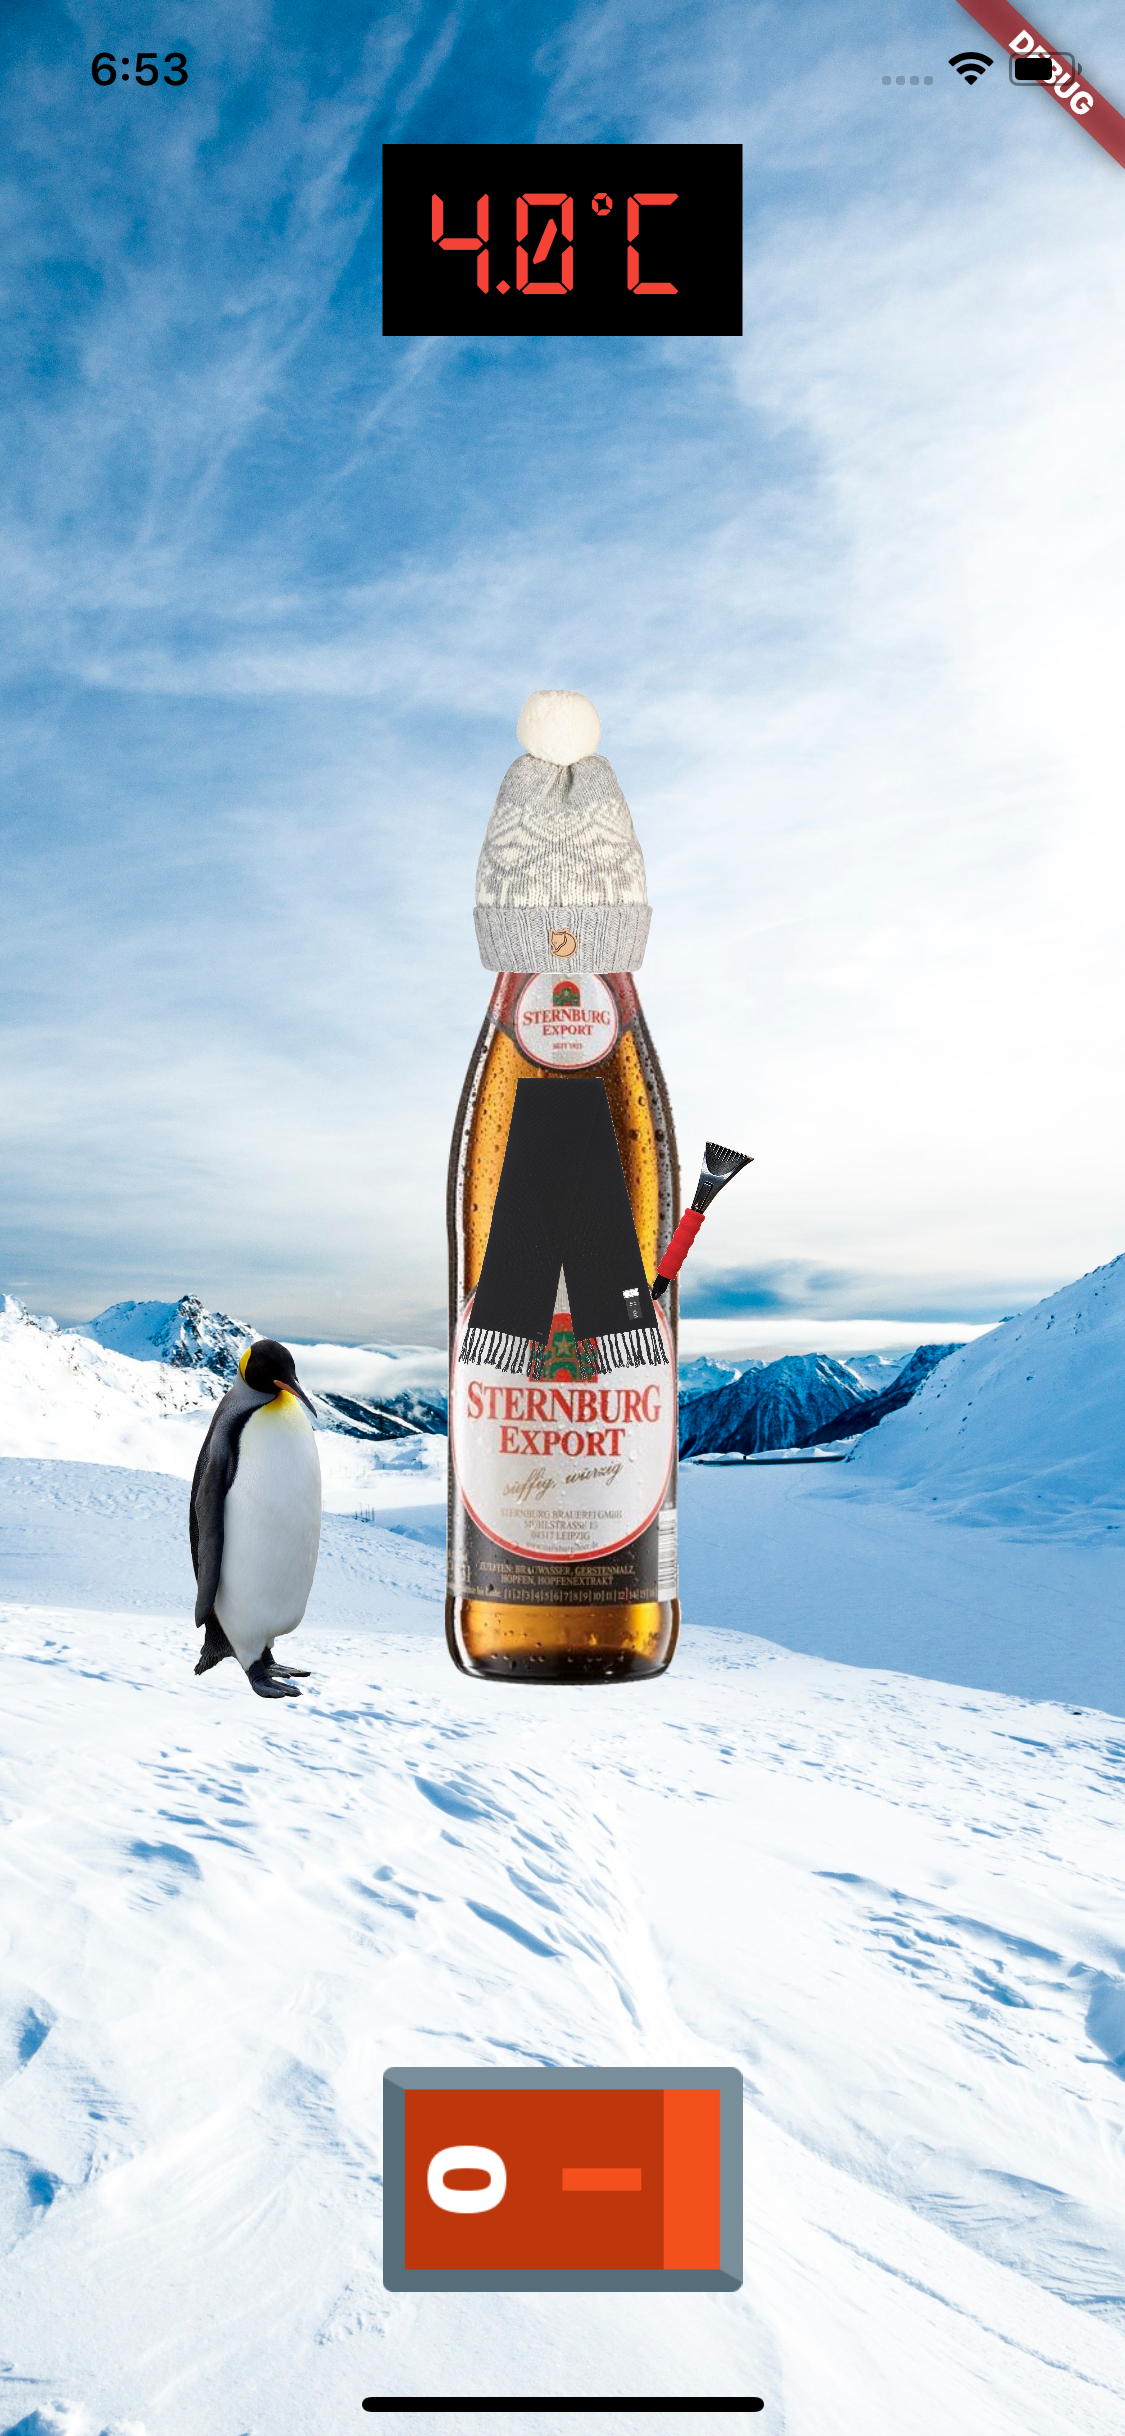
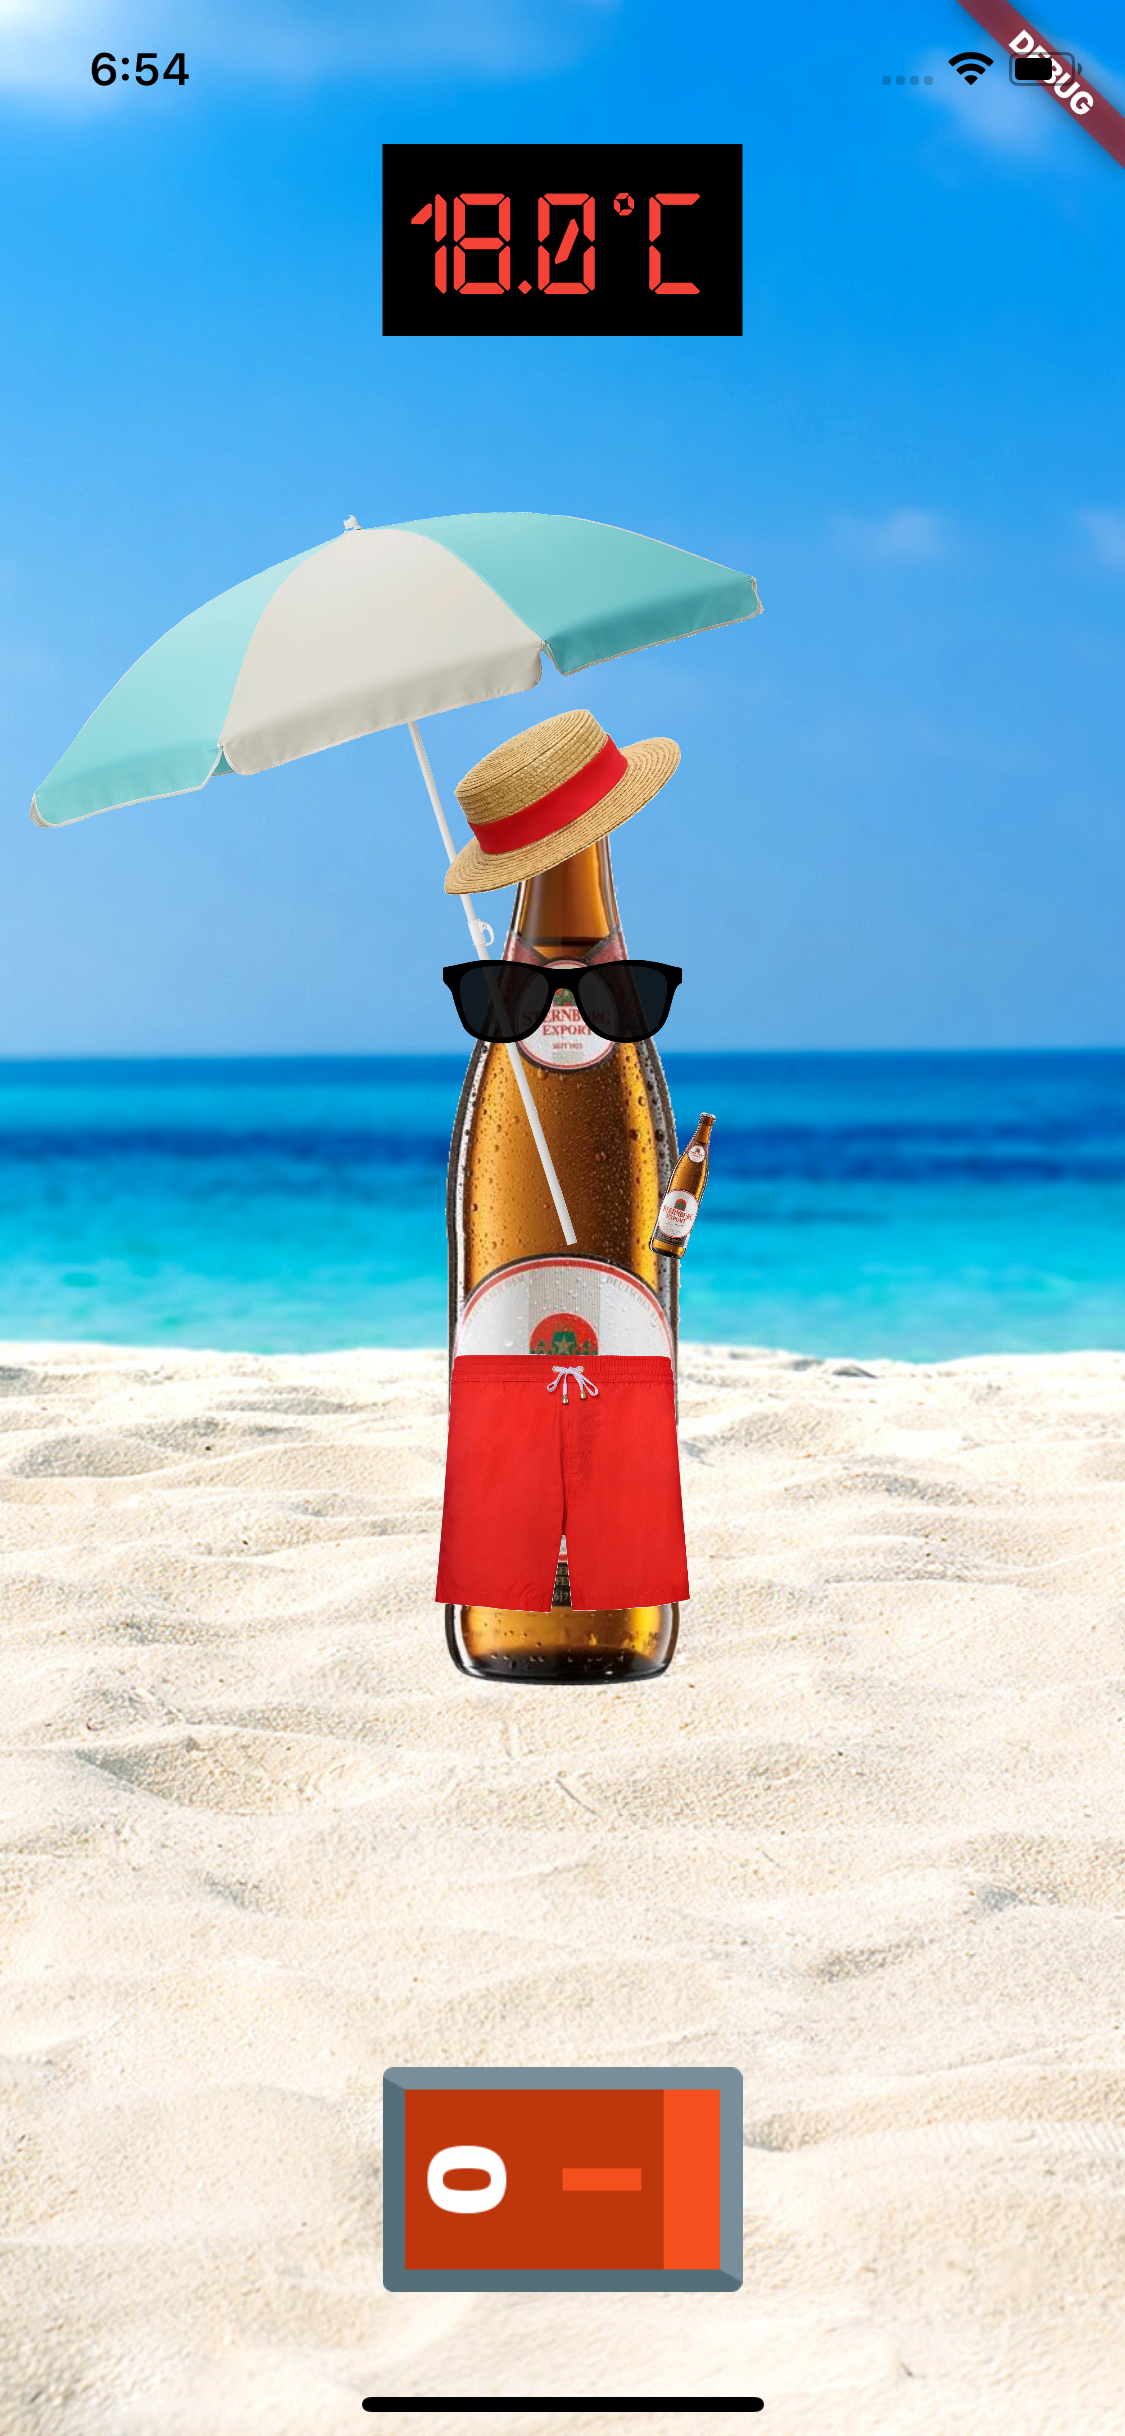
The general appearance of the app depends on the temperature of the beer, the three available themes can be seen below:
| Less than 8°C | Between 8°C and 16°C | More than 16°C |
|---|---|---|
 |
 |
 |
Disclaimer: The web-socket server and controller source code was in seperate repositories, I merged them when I started working on the app. You can find files called log.txt in the controller and websocket folders. Those contain the git log output from the old repositories.