A Matlab tool for collecting and segmenting whole-slide microscope images
Turn on:
- Computer
- Monitor
- Fluorescent lamp (Fluoarc, far left)
- XY Stage (Ludl, left of monitor)
- Microscope (Zeiss, green switch on the right hand side)
- Camera (Cooke, switch on top)
Clean slide with windex and place it onto the stage facing away from you. Move the toggles on the microscope to the Eyepiece position so you can manually focus on the slide.

Open the shutter (black bar, on the right of the Zeiss scope) and use the joystick to position the objective over some brain tissue.
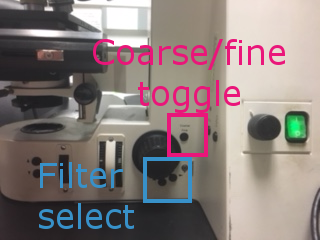
Use the coarse/fine toggle and the focus wheel to drive the Z axis until the brain is in focus. Close the shutter.
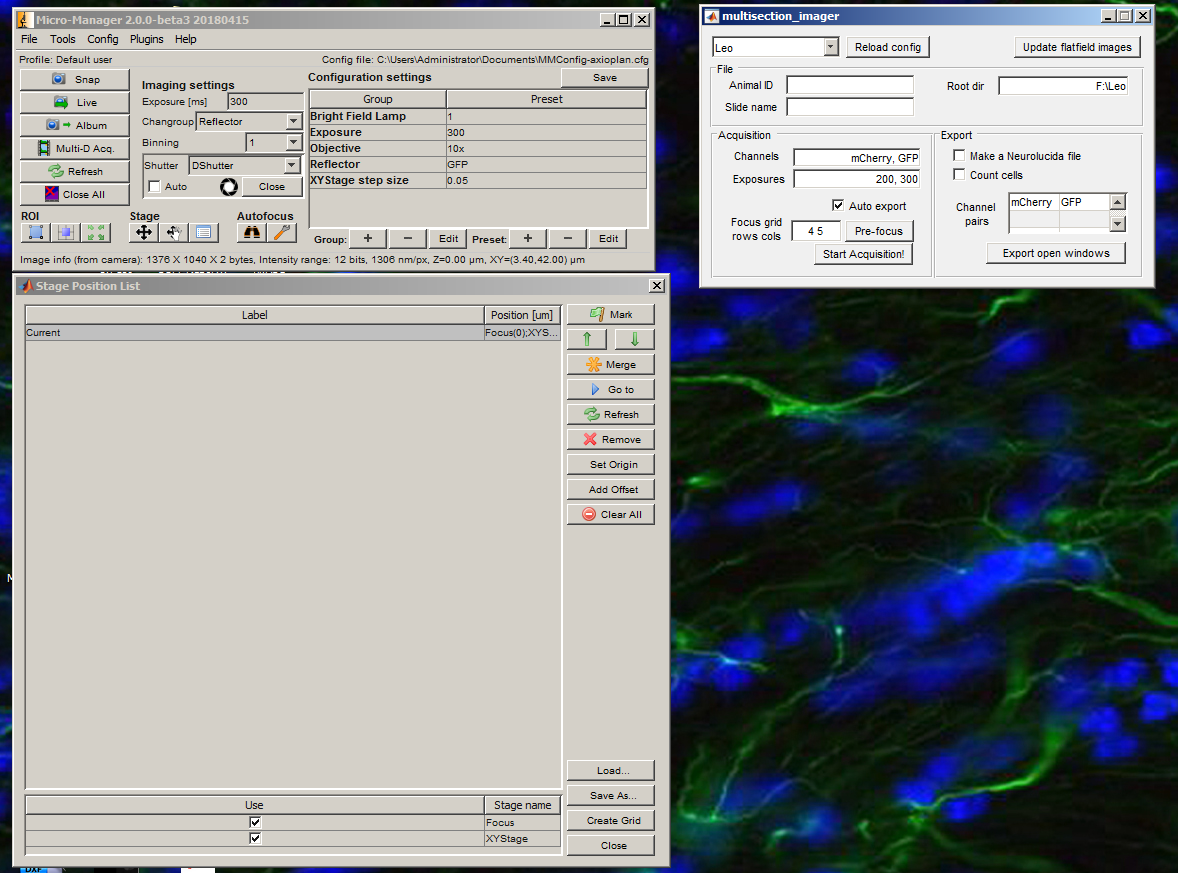
Open MultisectionImager.
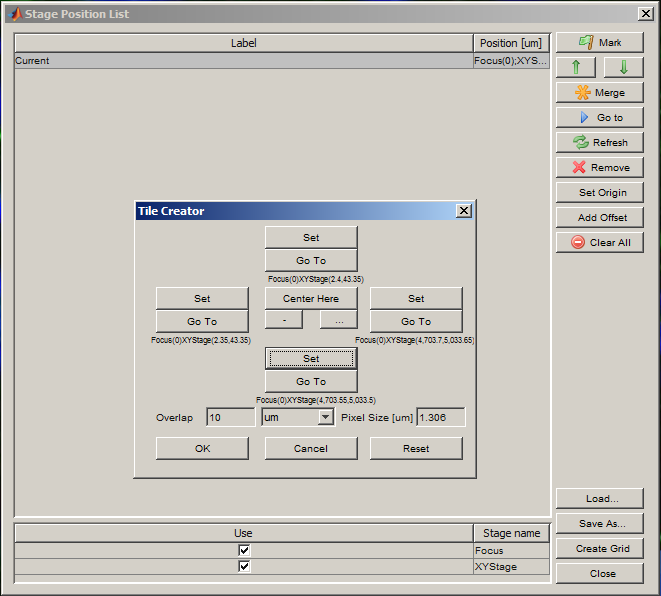
Create a grid for acquisition using the Create Grid button in the Stage Position List window. Use the Set buttons to locate each edge of the slide (use the joystick to move the XY stage). Press OK when all four edges have been set.
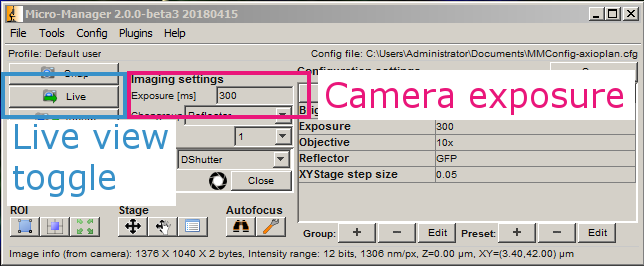
Press Live.
This brings up the live view and histogram windows.
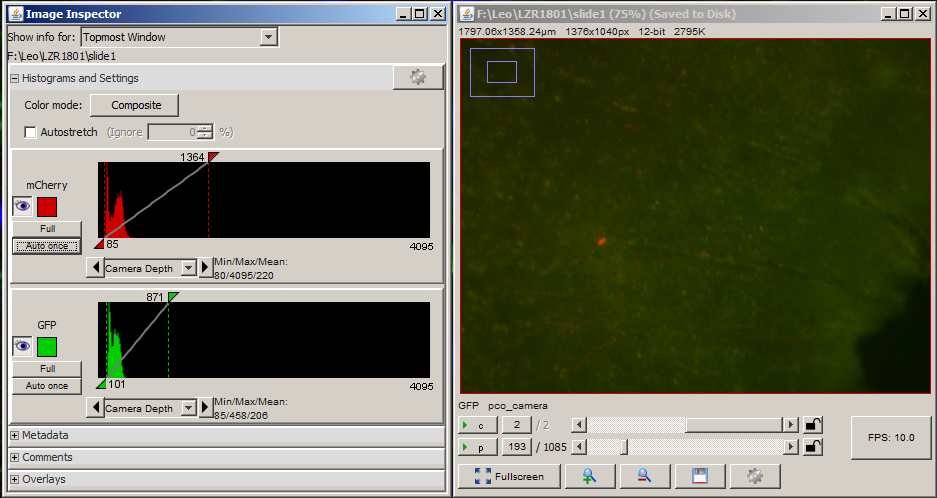
The histogram window shows how the camera is digitizing the light from the microscope. A value of 0 represents black and (for a 12-bit camera) a value of 4095 represents white. If the exposure is too high or too low, then some information about the brightness of the sample is lost.
Open the shutter. For each channel that you want to acquire, adjust the exposure in ms until the values in the histogram fall within the dynamic range of the camera. Then add the channel to the list along with its exposure. Close the shutter when you are done.
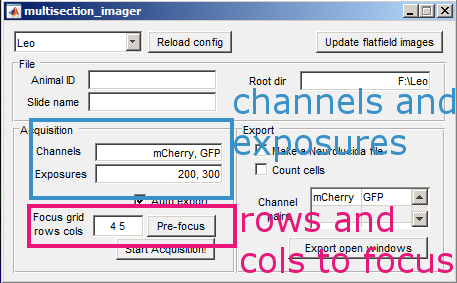
Adjust the rows and columns to the number of brain sections rows and columns on your slide. Then press the Pre focus button.
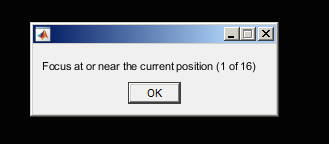
Open the shutter. For each focus site, use the fine focus and live viewer to estimate the best focus for each location. If there is nothing to focus on, move the XY stage to a nearby location before pressing OK. Close the shutter.
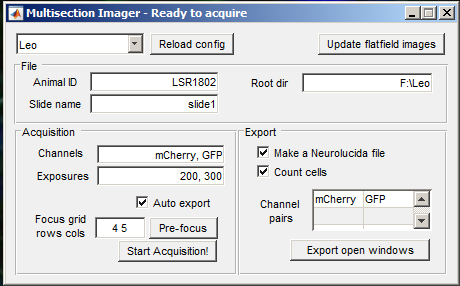
Enter the animal ID and slide name, then the acquisition is ready. Press Start Acquisition! and open the shutter. When the acquisition is finished, you will get a notification. Close the shutter immediately.
If Auto export is selected, then as soon as the acquisition is finished, the export process will begin. Otherwise, it is always possible to open an acquisition later and export manually using Open (Virtual)... followed by Export open windows.
During the export process, the segmentation window will appear, prompting you to select and number the brain sections on your slide.
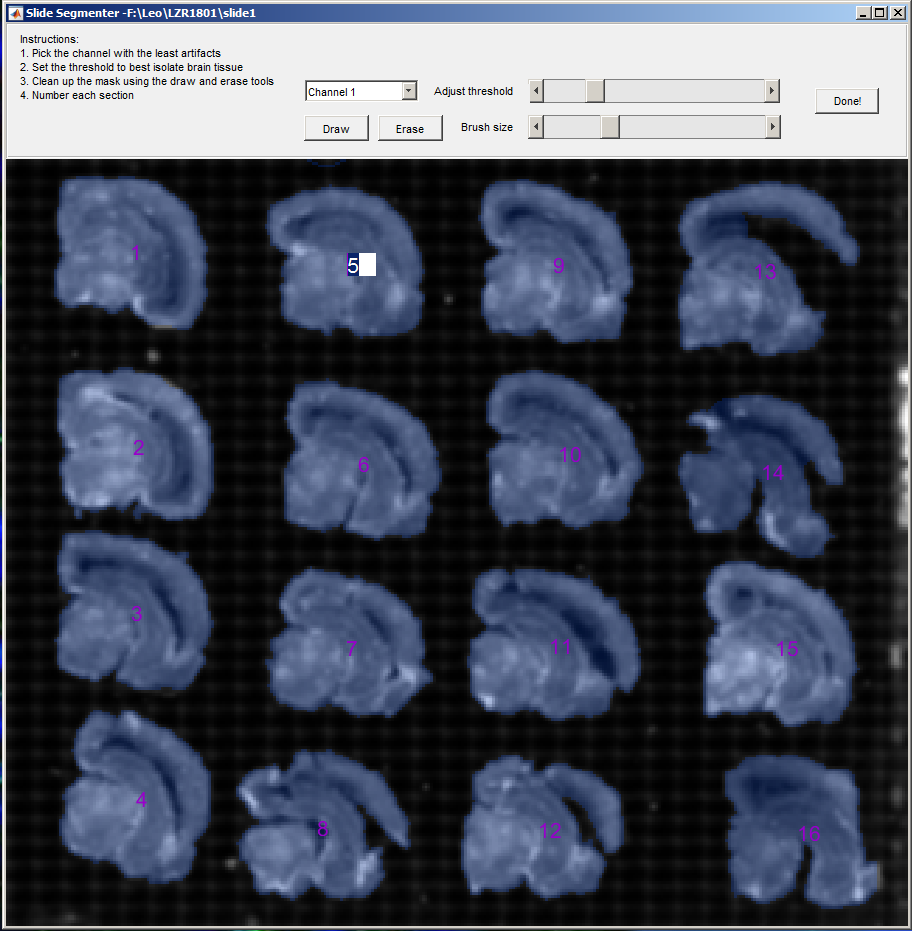
Use the Adjust threshold slider to highlight the majority of the sections. Then use the Draw and Erase tools to cleanup the selection. Finally, adjust the numbers for each section.
Depending on the selections in the MultisectionImager GUI, image files and neurolucida .ASC files will be generated automatically. To count cells, provide each channel where cells might be preset, along with a reference channel in the right column of the Channel pairs table.
When in doubt, close the shutter. We do NOT want to bleach our tissue.
There are 5 filters on the Zeiss microscope
- DIC - brightfield, white light
- BFP - appears violet, can be used for DAPI stains as well
- GFP - appears turquoise
- mCherry - appears green, can be used for mScarlet as well
- DsRed - red, hard to see (we don't use this)
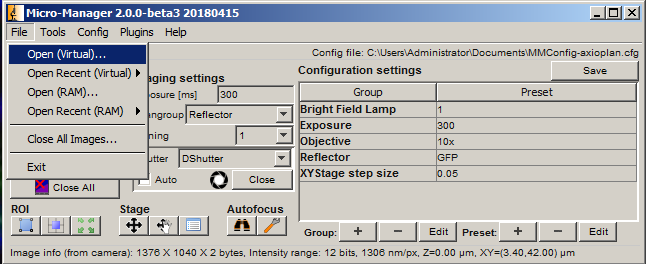
Filters can be changed manually on the scope, or in the main MM window under Reflector
There are 5 objectives
- 1x
- 4x
- 10x - we use this one most often
- 20x
- 63x
If you want to take additional closeup images of a particular region of interest, make sure to change the Objective configuration setting in the MM main window. Use the live view and Snap to Album feature of MicroManager to create an album of interesting snapshots, then save the album manually. See here for details.
The fluorescent lamp must be allowed 5 minutes to cool down after turning it off before restarting.