The pipeline can be run on:
- the command line
- Deploit (recommended)
As all of the available parameters can already be found within the nextflow.config file, an example run of the pipeline on the pipeline may look like this:
nextflow run lifebit-ai/pgx-nfYou can change the input parameters by either changing them in the nextflow.config file or specifying them on the command line eg:
nextflow run main.nf --celllines testdata/annotation/cell_annotation_all.csvDeploit is a bioinformatics platform, developed by Lifebit, where you can run your analysis over the Cloud/AWS.
It is free for indivudal users to sign-up
To run the pipeline once logged in navigate to the pipelines page:
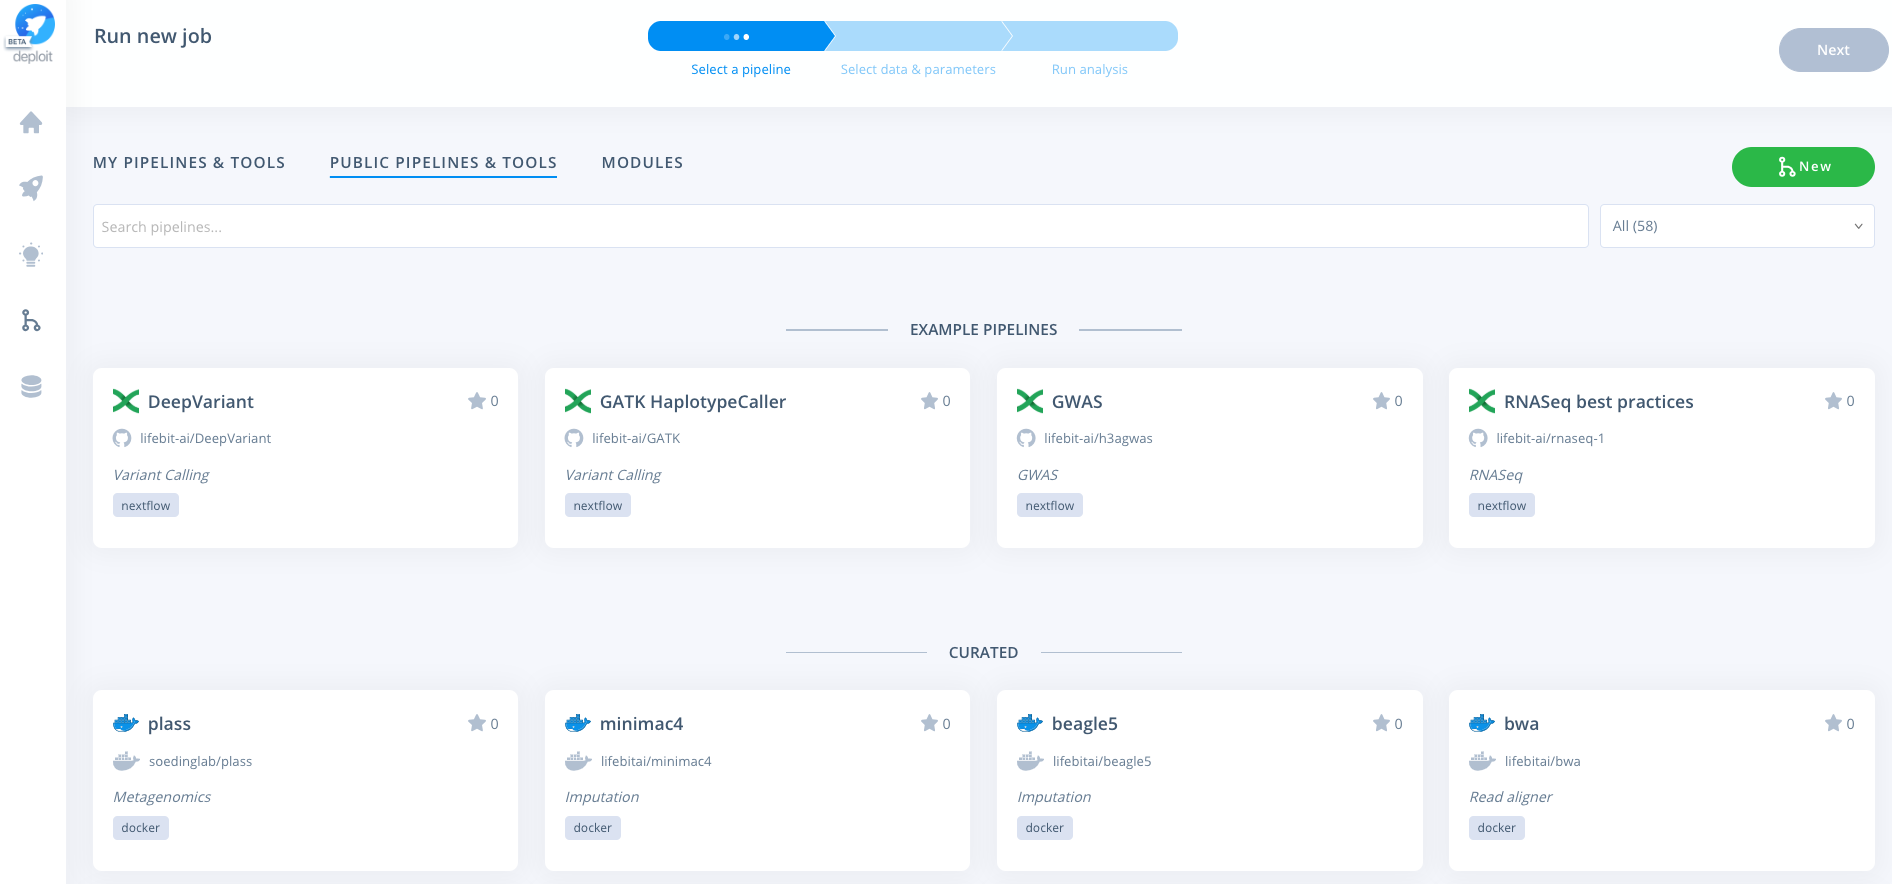
To import the pipeline into Deploit you simply need to copy & paste the GitHub repository URL: https://github.com/lifebit-ai/pgx-nf. To do so follow the steps below:
The pipeline can then be run in three simple steps:
- Find & select the pipeline After importing the pipeline into Deploit you are immediately taken to the input data & parameters page and so might not need to do this. Imported pipelines are found under the
MY PIPELINES & TOOLSsection. The name with be the same as you used to import the pipeline, egpgx-nf. - Enter the data & parameters here you can specify the input parameters & data. You may not need specify any parameters as they are already provided in the
nextflow.configfile. However, you can overwrite the parameters in the config file by specifying parameters on Deploit - Select a project & instance before running the analysis you must select the instance. This determines the available resources & cost. The project allows multiple jobs to be grouped together/organised

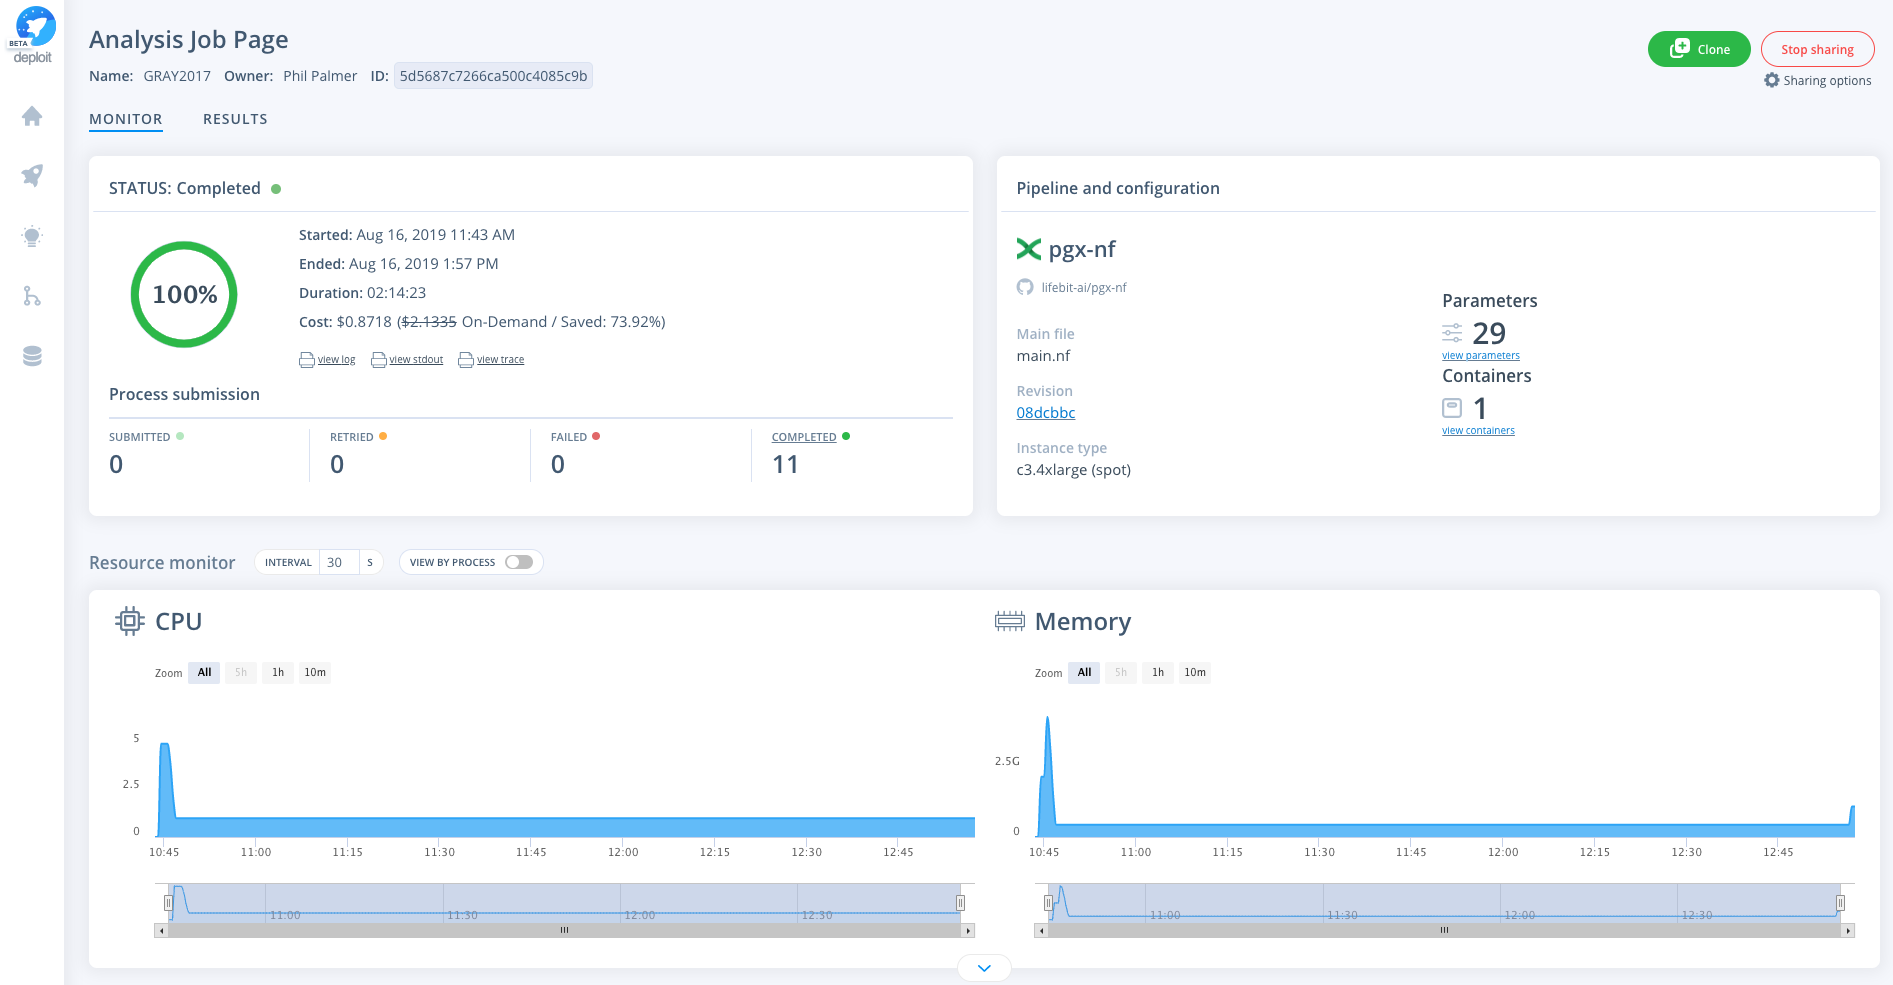
See an example execution of the pipeline on Deploit: