If you ever wonder to overlay your segmentations onto a picture in the smoothiest way, you're in a right place.
pip install segmentation-mask-overlay
Here you can take your segmentation map, put on an image individually or in a company. If you have a bunch of them, they will blend if touch each other.
You can even name them one by one, providing labels.
That's it! As simple as is. Now you are completely ready to laminate images with your segmentation.
import matplotlib.pyplot as plt
import numpy as np
from PIL import Image
from segmentation_mask_overlay import overlay_masks

# [Example] Load image
image = Image.open("cat.jpg").convert("L")
image = np.array(image)

# [Example] Mimic list of masks
masks = []
for i in np.linspace(0, image.shape[1], 10, dtype="int"):
    mask = np.zeros(image.shape, dtype="bool")
    mask[i : i + 100, i : i + 200] = 1
    masks.append(mask)

# [Optional] prepare labels
mask_labels = [f"Mask_{i}" for i in range(len(masks))]

# [Optional] prepare colors
cmap = plt.cm.tab20(np.arange(len(mask_labels)))[..., :-1]

# Laminate your image!
fig = array = overlay_masks(image, np.stack(masks, -1), mask_labels, return_type="mpl")

# Do with that image whatever you want to do.
fig.savefig("cat_masked.png", bbox_inches="tight", dpi=300)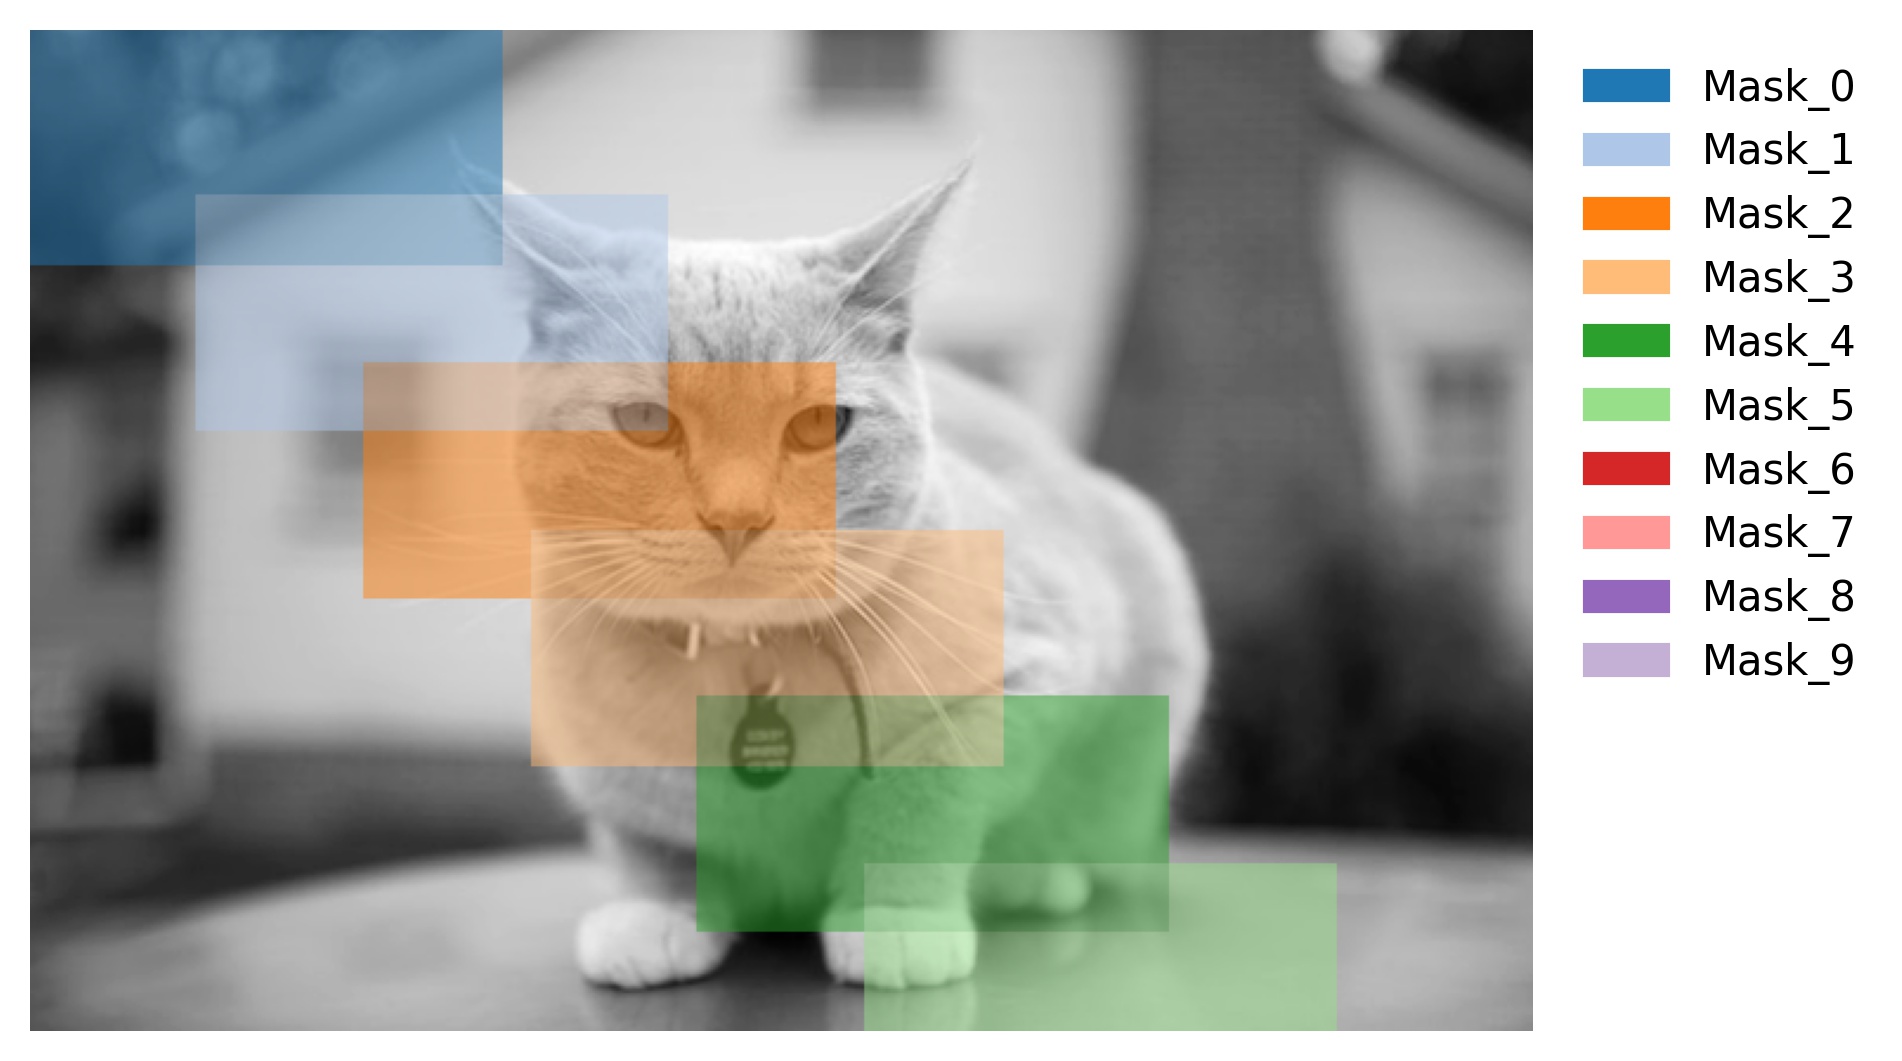
- v0.4.4:
- Dropped mandatory label arg in
overlay_masks() - Added one-channel binary masks handling in
overlay_masks()
- Dropped mandatory label arg in