Check if your sites are online for $7/mo.

- Fork this repository. Make sure you hit the "Watch" button on this Github repository, so you can see when you have to update your own fork.
- Create a branch from
master. - Create the
checkers.ymlfile with all your checkers and commit your changes. - To keep up with
master, switch tomasterand rungit pull. Then switch to your branch and rungit rebase master. This assumes you didn't touch any of the files, so you won't have any merging issues.
You can configure some options; just define the following environment variables.
LOCALE: the locale. Defaults toen. Check available languages at https://github.com/fnando/uptime_checker/tree/master/lib/uptime_checker/localesTIMEZONE: the timezone. Defaults toEtc/UTC.INTERVAL: the number of seconds between each verification. Defaults to30.UPTIME_CHECKER_STORE: the store type you're going to use. Can bedatabaseorredis. Defaults toredis. If you choosedatabase, make sureDATABASE_URLis defined.
You only have to create a checkers.yml file containing all your checkers. Here's an example:
# these are the default notifications
notify: ¬ify
- stdout: ~
- email: john@example.com
- slack: "#core"
- telegram: 12345678
- hipchat: 456789
- twitter: johndoe
checkers:
- name: My Site
url: http://example.com
notify: *notify
status: 200
- name: Other site
url: http://sub.example.com
notify: *notify
status: 200
body: My Other SiteYou can configure the file location by setting the CONFIG_FILE environment variable.
Notice that you can have multiple notifications for the same notifier. Say you also want to send e-mail notification to jane@example.com.
# these are the default notifications
notify: ¬ify
- email: john@example.com
- email: jane@example.com
# ...For more information about the notifiers, keep reading this README.
You can set the minimum number of failures before triggering the notification. By default you'll be notified every time a check fails.
The following example will send notifications only when check fails three times.
checkers:
  - name: My Site
    url: http://example.com
    notify: *notify
min_failures: 3You can deploy uptime_checker to a VPS. If you know how to deploy a Rails application, you won't have any issues deploying uptime_checker.
If you don't, instructions to come. Use Heroku in the meantime.
First, clone this repository.
git clone https://github.com/fnando/uptime_checker.git
Create a new branch. This is required so that you can create your configuration file.
git checkout -b mybranch
Copy the configuration file and commit it.
cp checkers.yml.sample checkers.yml
Change the configuration file and commit it.
git add .
git commit -a -m "Adding configuration."
Now, configure Heroku. Create a new app for this.
heroku create
Now you have to choose your state store type. You may use Redis or PostgreSQL.
For Redis, use the following command:
heroku addons:create heroku-redis
For PostgreSQL, use the following command:
heroku addons:create heroku-postgresql
If you're going to send e-mail notification, you'll need Sendgrid as well.
heroku addons:create sendgrid:starter
Time to deploy:
git push heroku mybranch:master
If you're using PostgreSQL, also run heroku run 'bundle exec sequel -m migrations $DATABASE_URL'.
Scale up the uptime checker worker:
heroku ps:scale worker=1
To make your worker run 24/7 (will cost you $7/month):
heroku dyno:type worker=hobby
To upgrade your branch to the latest version you have to fetch master's changes and rebase onto mybranch.
git checkout master
git pull
git checkout mybranch
git rebase master
After doing the upgrade, deploy it with git push heroku mybranch:master -f.
- Create a bot. The returned API token must be defined as
TELEGRAM_API_TOKENenvironment variable. - Create a new group.
- Add bot to the group you just created.
- Go to @BotFather and
/setprivacytoenabled. You also have to/setjoingroupstodisabled. - Go to the group you created and send a message to the bot; use something like
@YouBotName hello. - Run
ruby setup/telegram.rblocally to get the channel id. You may need to install the dependencies withbundle installbefore doing it so. - Set the notification as
telegram: <chat id>. Sometimes id can be a negative number and this is important.
Example:
# these are the default notifications
notify: ¬ify
- telegram: 12345
checkers:
- name: My Site
url: http://example.com
notify: *notify
status: 200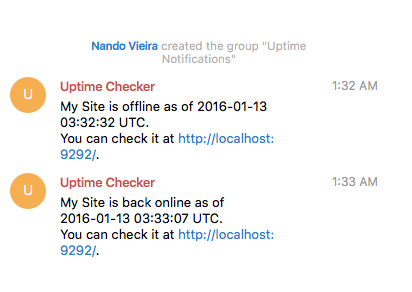
Note: Currently only SendGrid is supported.
- Set your username as
SENDGRID_USERNAMEenvironment variable. - Set your password as
SENDGRID_PASSWORDenvironment variable. - Set the notification as
email: <email address>.
Example:
# these are the default notifications
notify: ¬ify
- email: john@example.com
checkers:
- name: My Site
url: http://example.com
notify: *notify
status: 200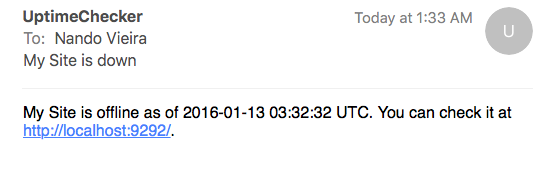
- Create an user for your bot.
- Follow your bot, and make your bot follow you.
- Create a new Twitter application under your bot's account at https://apps.twitter.com/app/new
- Go to "Keys and Access Tokens" and create a new access token.
- Set
TWITTER_CONSUMER_KEY,TWITTER_CONSUMER_SECRET,TWITTER_ACCESS_TOKENandTWITTER_ACCESS_SECRETenvironment variables, all available under "Keys and Access Token". - Set the notification as
twitter: <username>.
Example:
# these are the default notifications
notify: ¬ify
- twitter: johndoe
checkers:
- name: My Site
url: http://example.com
notify: *notify
status: 200
- Create a new bot user at https://my.slack.com/services/new/bot
- Set the API token as the
SLACK_API_TOKENenvironment variable. - Set the channel name as
slack: "#channel".
# these are the default notifications
notify: ¬ify
- slack: "#core"
checkers:
- name: My Site
url: http://example.com
notify: *notify
status: 200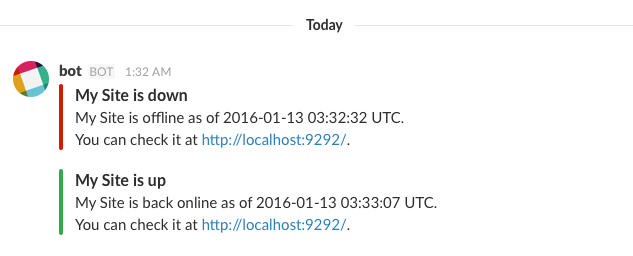
- Create a new bot user.
- Logged in as the bot user, go to
https://<your subdomain>.campfirenow.com/member/editto get the API token, that must be set asCAMPFIRE_API_TOKEN, together with theCAMPFIRE_SUBDOMAIN. - Set the notification as
campfire: <room id>.
# these are the default notifications
notify: ¬ify
- campfire: 123456
checkers:
- name: My Site
url: http://example.com
notify: *notify
status: 200
To be notified through iOS/Android push notifications, you can use Pushover ($5 for a lifetime license). You can also buy a lifetime license for desktop notifications (or use Noti instead).
- Create a new application at https://pushover.net/apps/build
- Set the API token as the
PUSHOVER_APPLICATION_TOKENenvironment variable. - Set the notification as
pushover: <user token>.
To avoid committing your user token, you can set it as an environment variable (e.g. PUSHOVER_JOHN), and then use eRb code like the following:
# these are the default notifications
notify: ¬ify
- pushover: <%= ENV["PUSHOVER_JOHN"] %>
checkers:
- name: My Site
url: http://example.com
notify: *notify
status: 200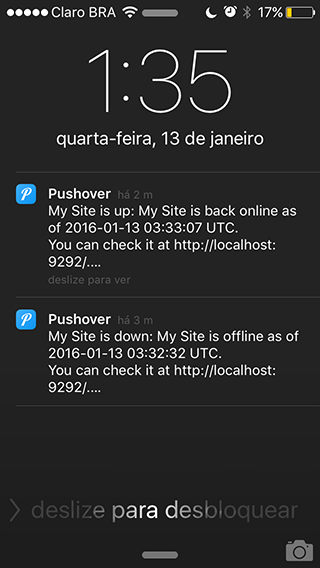
- Create a new application at https://notiapp.com/apps/new
- Set the API as the
NOTI_API_TOKENenvironment variable. - Run
ruby setup/noti.rblocally to get your user token. You may need to install the dependencies withbundle installbefore doing it so. - Set the notification as
noti: <user token>
To avoid committing your user token, you can set it as an environment variable (e.g. NOTI_JOHN), and then use eRb code like the following:
# these are the default notifications
notify: ¬ify
- noti: <%= ENV["NOTI_JOHN"] %>
checkers:
- name: My Site
url: http://example.com
notify: *notify
status: 200