
League Loader is a plugin loader designed specifically for the League of Legends Client.
The League Client is actually an embedded Chromium web browser, and its interface is based on web technology. With League Loader, users can load JavaScript plugins into the Client as dependencies, allowing them to customize/theme the UI/UX, automate task and build a smarter Client.
League Loader was created to solve the problem caused by the big LoL patch in 2021, revived plugins from the death of Mecha. And now, Mecha has since returned as a debugger, but League Loader continues to thrive as the primary way for players looking to enhance their League Client with custom content, smarter functionality, and a personalized look and feel.
- Customize League Client with plugins
- Theme/personalize your Client
- Support modern JavaScript features
- Support built-in and remote DevTools
- Working with LCU APIs be easier
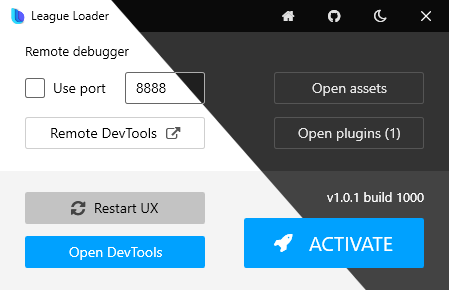
- Download the latest release and extract it
- Run League Loader
- Click ACTIVATE
- Launch League Client and enjoy
To try preview features, you have to build this project or download the newest auto-build in Actions.
To add your first plugin, just create a folder e.g your-plugin in plugins folder. Then create an index.js in your plugin folder.
plugins/
  |__your-plugin/
    |__index.js
This index.js is an entry point of your plugin and will be executed when League Client ready. Put this line to your index, you will see the log in console.
console.log('Hello, League Client!')Please check out these basic plugin templates to start.
We recommend you to use modern JavaScript editors like Visual Studio Code or WebStorm to develop your plugins, it supports intellisense, linter and autocomplete.
To load other scripts, just use import:
plugins/
  |__your-plugin/
    |__index.js
    |__utils.js
// utils.js
export default {
  greet: () => console.log('Hello!')
}

// index.js
import utils from './utils'
utils.greet();
To use
importandexportproperly, please refer this MDN docs.
Top-level await:
let data = await fetch('https://...').then(res => res.text()); Import a ESM library from CDN:
import axios from 'https://esm.run/axios';
axios.get('https://...');
Assets import:
import './theme.css';
// auto-inject CSS

import data from './data.json';
// parsed JSON data

import bgImage from './assets/background.png';
// path to asset
Explicit import:
import QuantifyFontUrl from './assets/Quantify.ttf?url';
// https://plugins/your-plugin/assets/Quantify.ttf

import rawData from './my-data.txt?raw';
// content of my-data.txt in string
With
?raw, your text files must be saved with UTF8 encoding.
Inject custom CSS to override default League's style.
From your plugin entry, use import to add:
import './theme.css';This line will inject CSS code from theme.css next to your index.js.
To use remote theme, e.g from https://example.com/theme.css:
function addCssLink(url) {
  const link = document.createElement('link');
  link.href = url;
  link.type = 'text/css';
  link.rel = 'stylesheet';
  document.head.appendChild(link);
}

window.addEventListener('load', () => {
  addCssLink('https://example.com/theme.css');
});Just use fetch to make LCU requests:
async function acceptMatchFound() {
  await fetch('/lol-matchmaking/v1/ready-check/accept', {
    method: 'POST'
  });
}When the websocket ready, this link tag will appear:
<link rel="riot:plugins:websocket" href="wss://riot:abcDEF0123XYZ@127.0.0.1:12345/">Call this function to subscribe API event:
function subscribe() {
  const uri = document.querySelector('link[rel="riot:plugins:websocket"]').href
  const ws = new WebSocket(uri, 'wamp')

  ws.onopen = () => ws.send(JSON.stringify([5, 'OnJsonApiEvent']))
  ws.onmessage = async message => {
    const data = JSON.parse(message.data)
    console.log(data)
    // ...
  }
}We highly recommend you to use npm project for building plugins. With TypeScript or other languages require transpilation, you need a build tool to build them, Webpack, Rollup or Vite is the best choice.
You can also use any font-end library to build custom UI, e.g React, Preact, Vue, Svelte, SolidJS, etc. With front-end tooling, its hot-reload/HMR will help you to do faster.
Example plugins:
- ./plugins/@default: Vite with SolidJS + SASS + TypeScript
- douugdev/league-a-better-client: Webpack with Preact + SASS + TypeScript
Please note that all packages that are designed to run in NodeJS only could not be used for League Loader plugin.
With build tool, your bundled assets output may have incorrect path. Please refer to next section to make them right.
You can access local resources in assets and plugins folder by using these domain:
//assets/
//plugins/
They are also equivalent to https://assets/ and https://plugins (HTTPS based scheme).
root/
  |__assets/
    |__background.png      ->  //assets/background.png
  |__plugins/
    |__your-plugin/
      |__assets/
        |__some-image.jpg  ->  //plugins/your-plugin/assets/some-image.jpg
- assets folder contains common resources.
- While assets in plugins folder are used for plugin itself.
Follow these steps to contribute to the project:
- Fork it (https://github.com/nomi-san/league-loader/fork)
- Create your feature branch
feat/<branch-name> - Commit your changes
- Push to the branch
- Create a new Pull Request
- documentation and website - the documentation always needs some work, if you discover that something is not documented or can be improved you can create a PR for it, check out LeagueLoader org
- more base/starter plugins - push your plugin with detailed guide to help beginner with ease
- core features - make sure you have a much experience with CEF and low-level programming skill
- javascript features - need too much webdev knowledge
- LeagueLoader - main loader menu UI, written in C# and WPF XAML
- d3d9 - core module (DLL), it hooks libCEF to make everything magical
- plugins - templates for plugin dev beginner
This project requires Visual Studio 2017 with these components:
- Desktop development with C++
- .NET desktop development
- Windows 8.1 SDK
You can also use VS 2019+ and different SDK version.
Build steps:
- Open league-loader.sln
- Right click on the solution -> Restore Nuget Packages
- Set arch to x86
- Right click on each project -> Build
The @default plugin requires:
- NodeJS 16+
- pnpm
Then build it:
pnpm install
pnpm build
