[Installation] SDK .csproj format
This guide shows you how to use the Nullable package
with a project using the new SDK style .csproj format.
This guide requires an installation of Visual Studio 2019 which supports Nullable Reference Types. This can easily be done by updating to the latest version and ensuring that the .NET Core 3.0 SDK is installed.
Create a new .NET Core console application (the .NET Core version doesn't matter).
For the sake of learning something, the project will target .NET Core 3.0 and the traditional
.NET 4.7, i.e. it will multi-target different runtimes.
Double click the {YourProject}.csproj file and replace it with the following code:
<Project Sdk="Microsoft.NET.Sdk">

  <PropertyGroup>
    <OutputType>Exe</OutputType>
    <TargetFrameworks>netcoreapp3.0;net47</TargetFrameworks>
    <LangVersion>8.0</LangVersion>
    <Nullable>enable</Nullable>
  </PropertyGroup>

</Project>
This multi-targets your project and enables C# 8.0 with Nullable Reference Type support.
As a next step, you can install the Nullable package. This can, for example, be done by opening the NuGet package manager by right clicking References > Manage NuGet packages..., searching for "Nullable" and then installing the package that appears.
Alternatively, run one of the following commands:
Install-Package Nullable

--or--

dotnet add package NullableCongratulations - you have done it! You should now be able to use the Nullable Attributes in the
project. Go ahead and try it out by replacing Program.cs with this code:
namespace NullableDemo
{
    using System;
    using System.Diagnostics.CodeAnalysis;

    public class Program
    {
        [AllowNull]
        public static string AllowsNull { get; set; } = "Hello";
        public static string DoesntAllowNull { get; set; } = "Hello";

        public static void Main()
        {
            AllowsNull = null;
            DoesntAllowNull = null; // Should warn.
        }
    }
}
If you have done everything correctly, you can now build your project and use these attributes. Furthermore, the code above should produce a compiler warning at the line with the comment.
If you are interested, you can verify that the attribute code file(s) only get added to the .NET 4.7 build target (after all, .NET Core 3.0 already provides the attributes in the BCL). To do this, ensure that Visual Studio is in the .NET 4.7 context by selecting the value in the box highlighted with an arrow in the image below.
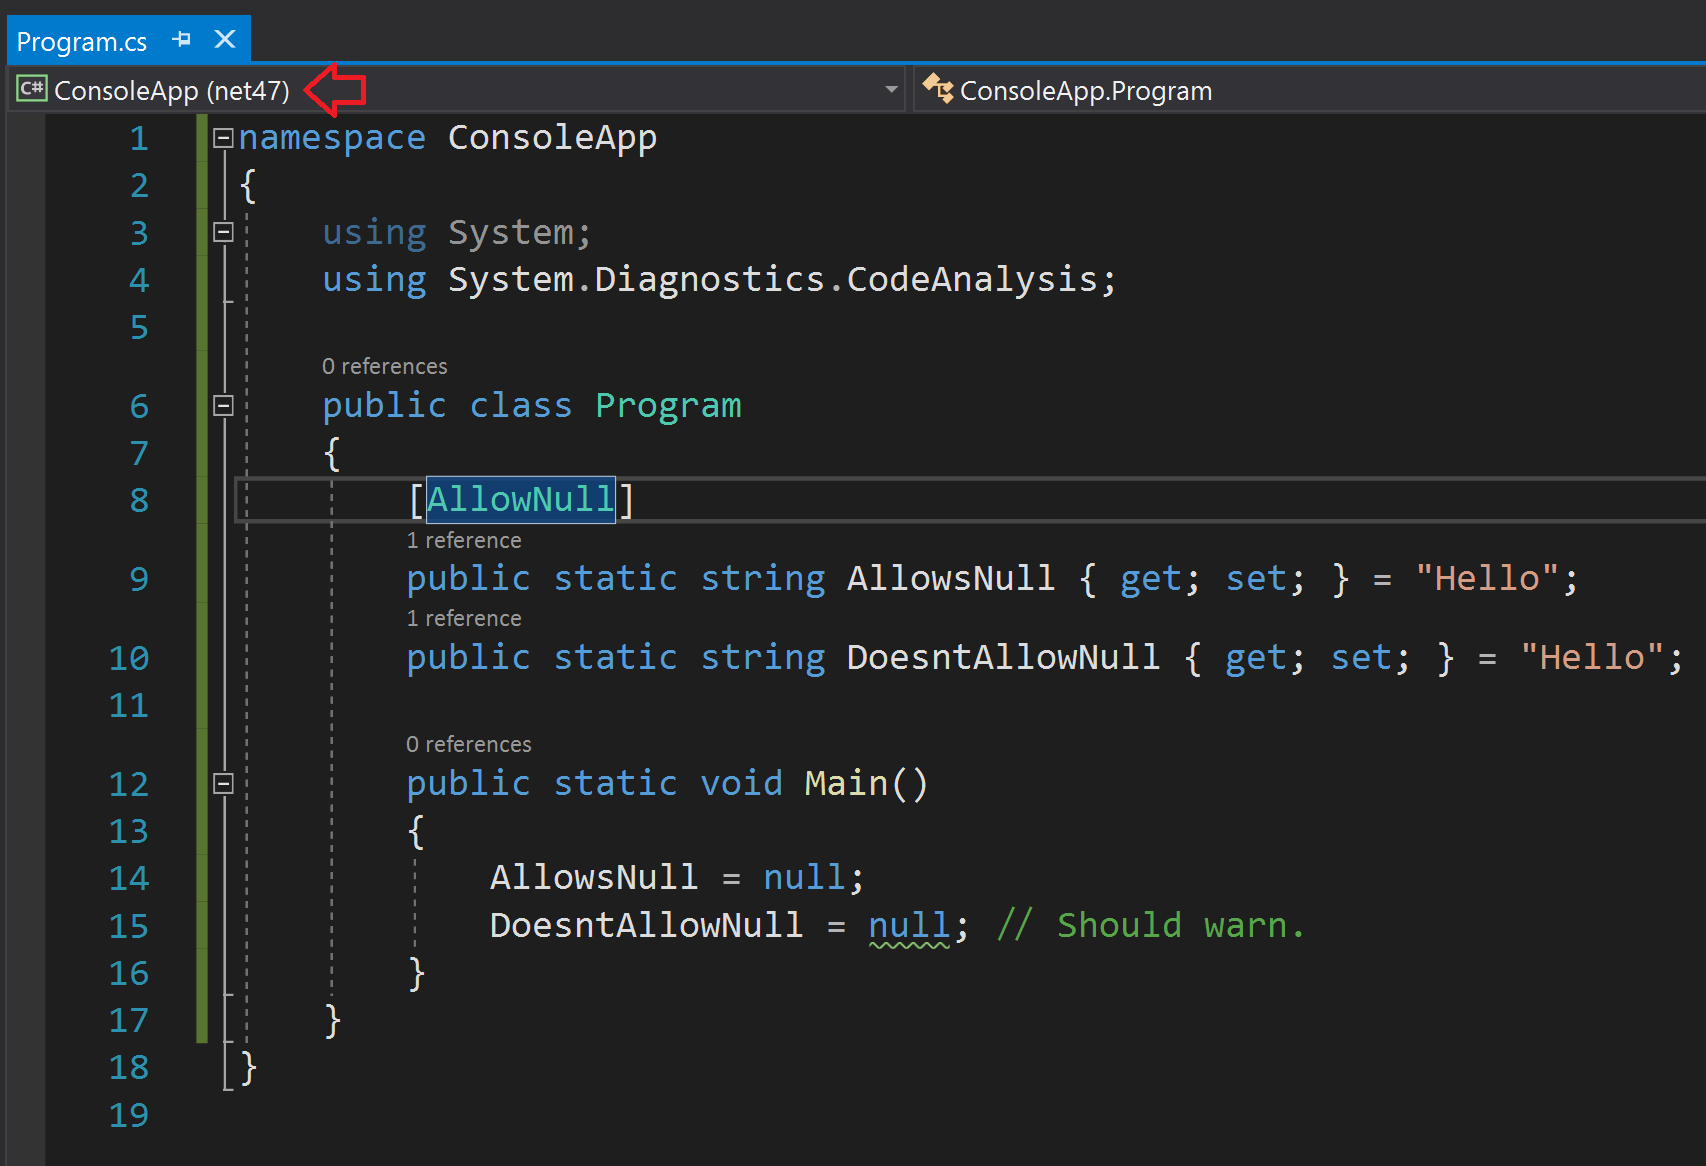
Afterwards, put your cursor on [AllowNull] in the code and press F12. The AllowNullAttribute.cs
file should now be opened and you can see the code that will be compiled together with your project.
If you switch the combo box to .NET Core 3.0, the behavior will change. Instead of opening the
AllowNullAttribute.cs file, Visual Studio will open .NET Core's definition of these attributes.
This happens, because the file no longer gets added to your build!