Installation via Synology DSM
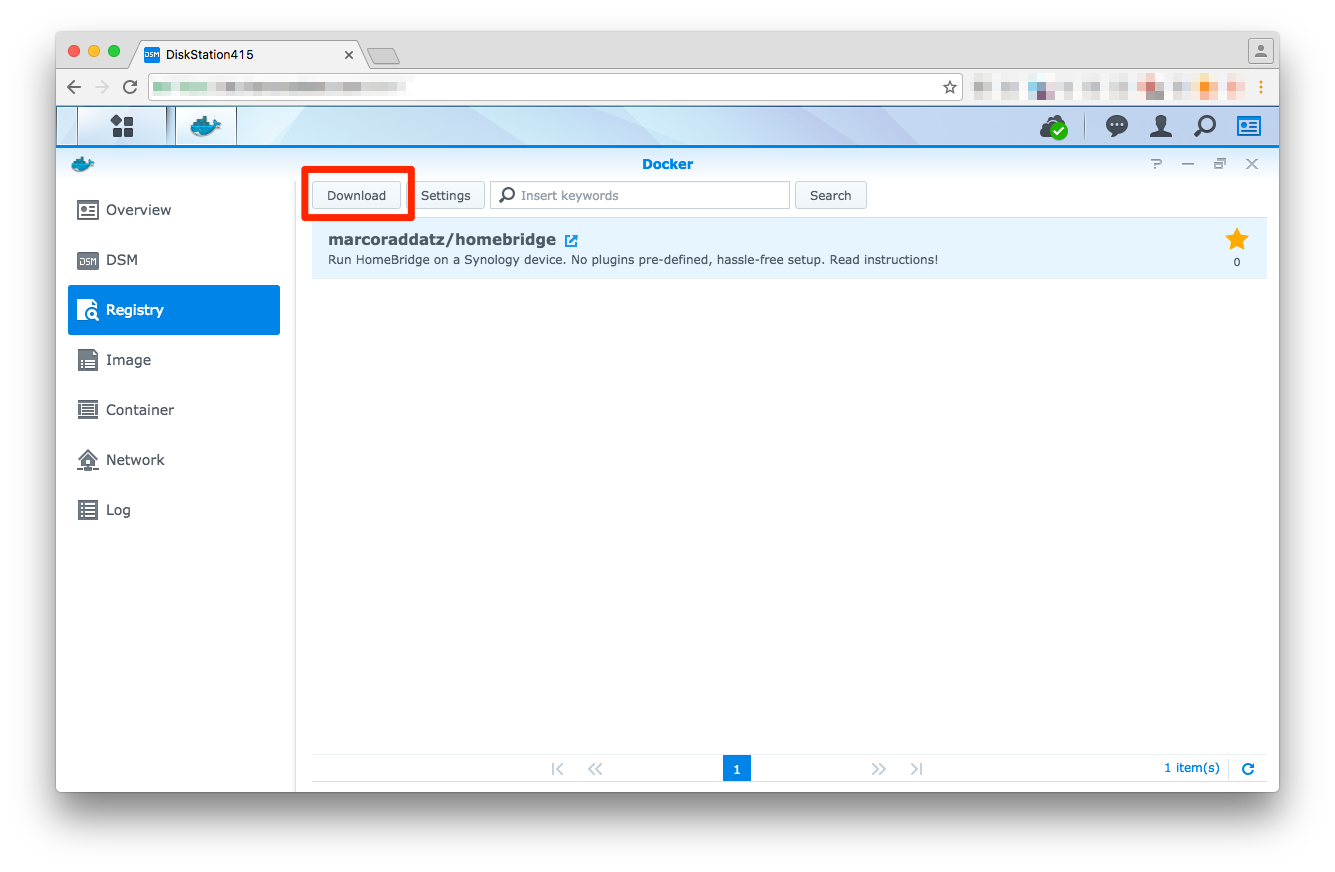
First of all, login to your Synology DSM, open Docker and download marcoraddatz/homebridge from within the registry.
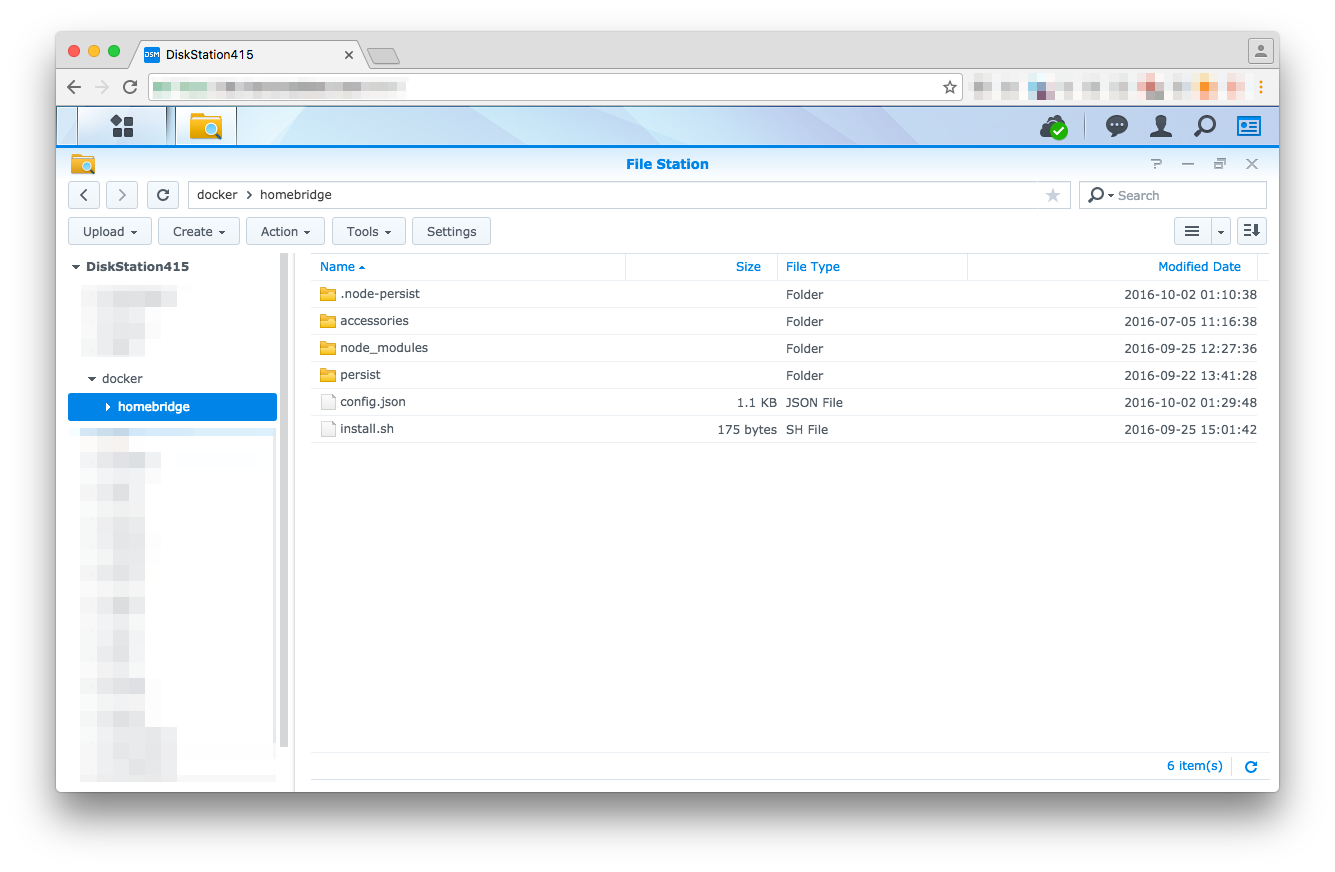
Create a folder via DSM File Station at /volume1/docker/homebridge and put your config.json and either your package.json or install.sh (recommended) in there. If you'd like to develop an own plugin or debug Homebridge, also copy the .env file.
Here are two examples of how your setup files may look like:
{
  "name": "DiskStationHomeBridge",
  "description": "HomeKit support for the impatient.",
  "version": "0.1.1",
  "license": "ISC",
  "dependencies": {
    "homebridge-harmonyhub": "0.2.0-alpha",
    "homebridge-netatmo": "^0.0.4",
    "homebridge-nukiio": "^0.0.3",
    "homebridge-synology": "^0.1.0"
  }
}Note that you can also use this file to install server dependencies!
#!/bin/bash

npm install -gs homebridge-harmonyhub
npm install -gs homebridge-netatmo
npm install -gs homebridge-nukiio
npm install -gs homebridge-synology
Since version 2.1 all commands get executed as root, so this is a good place to install missing dependencies.
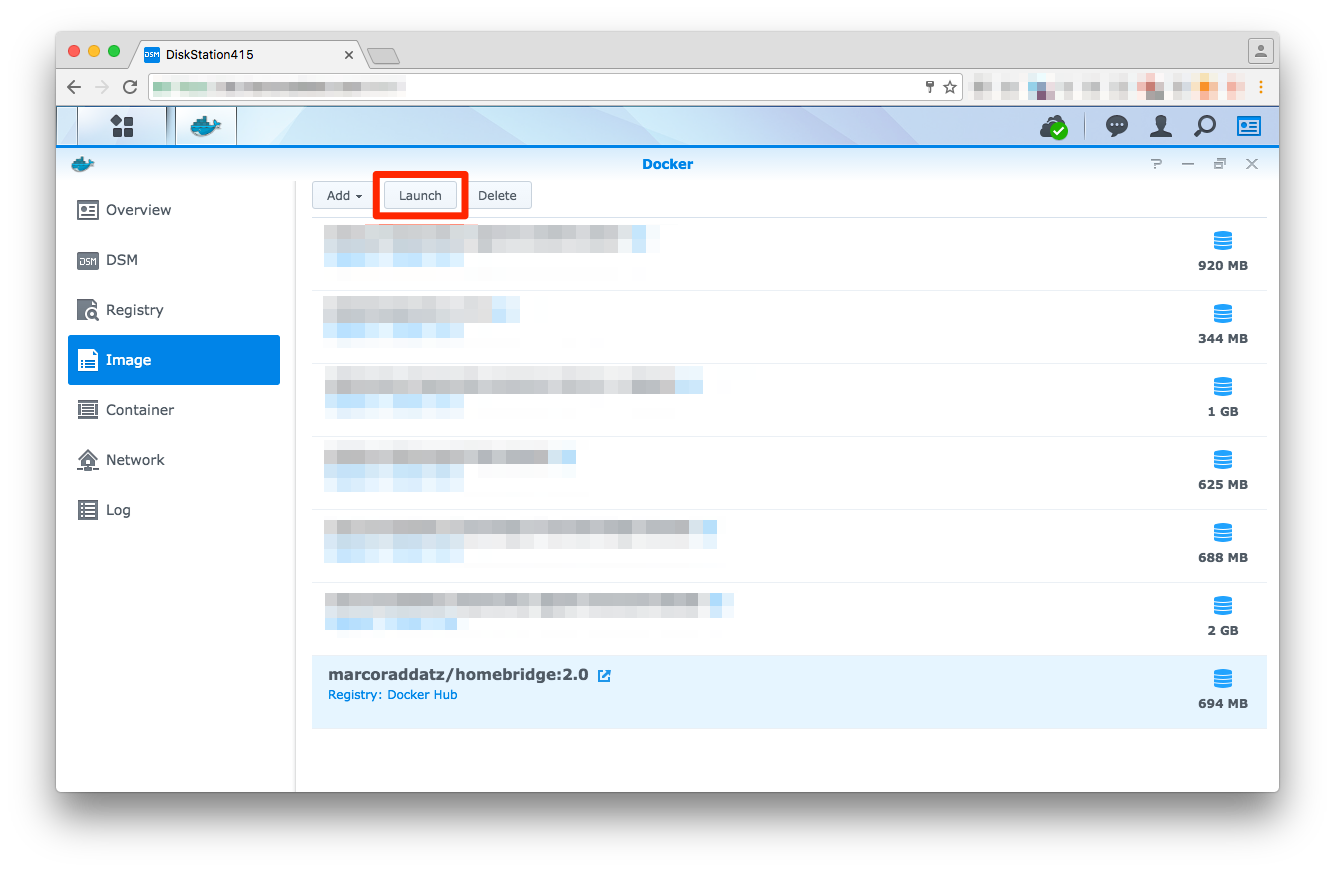
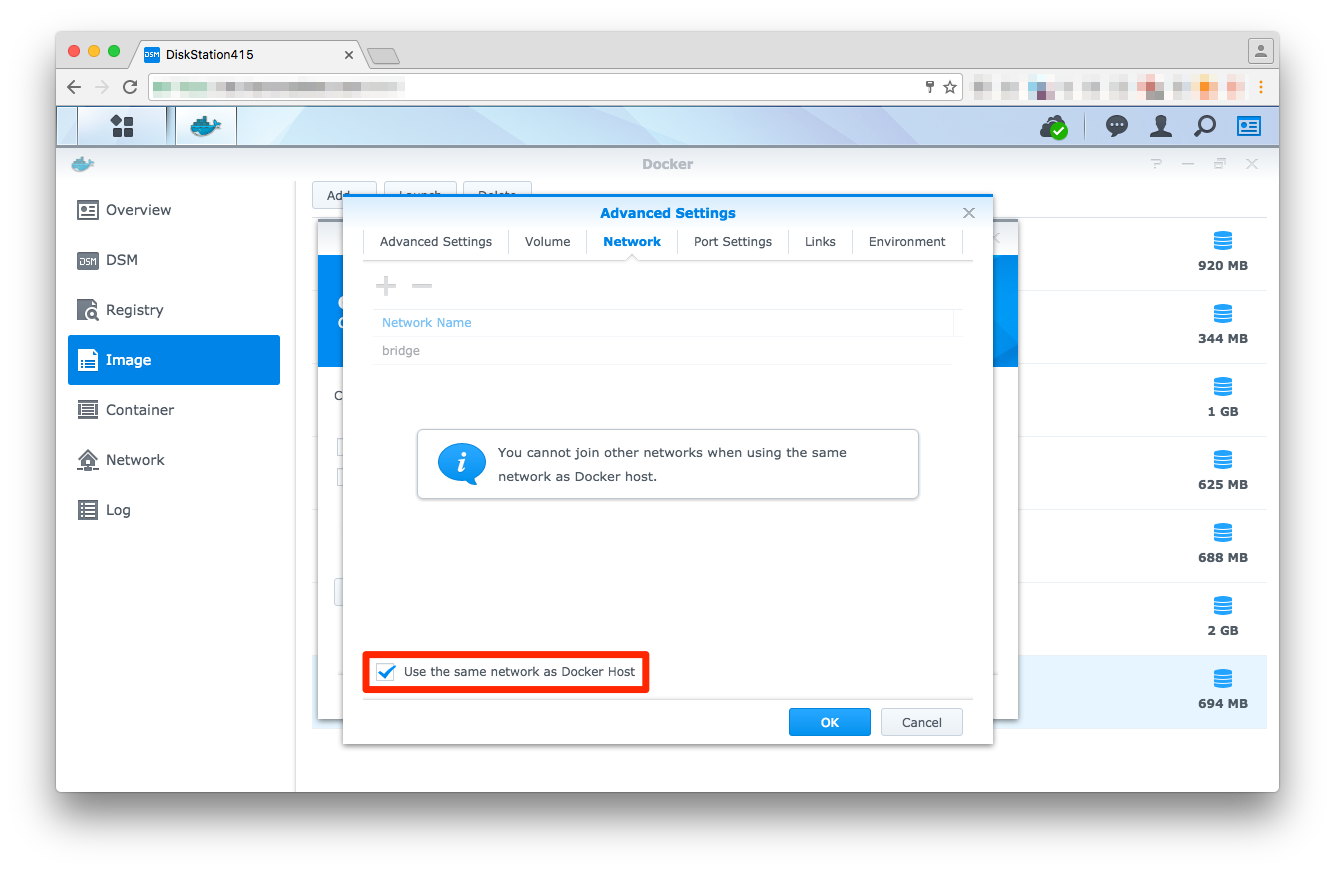
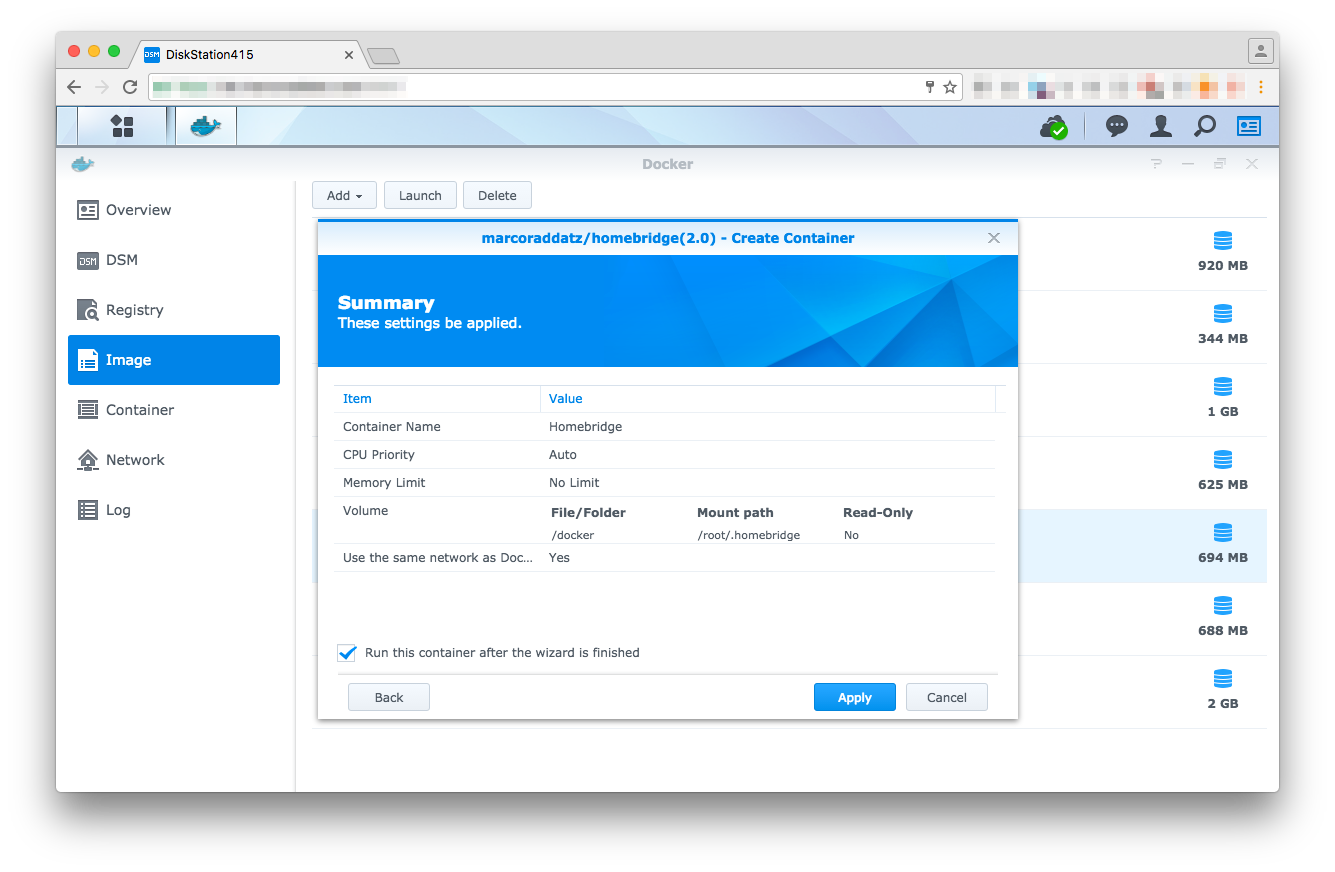
Once the plugins have been set up, the Docker container is ready to launch.
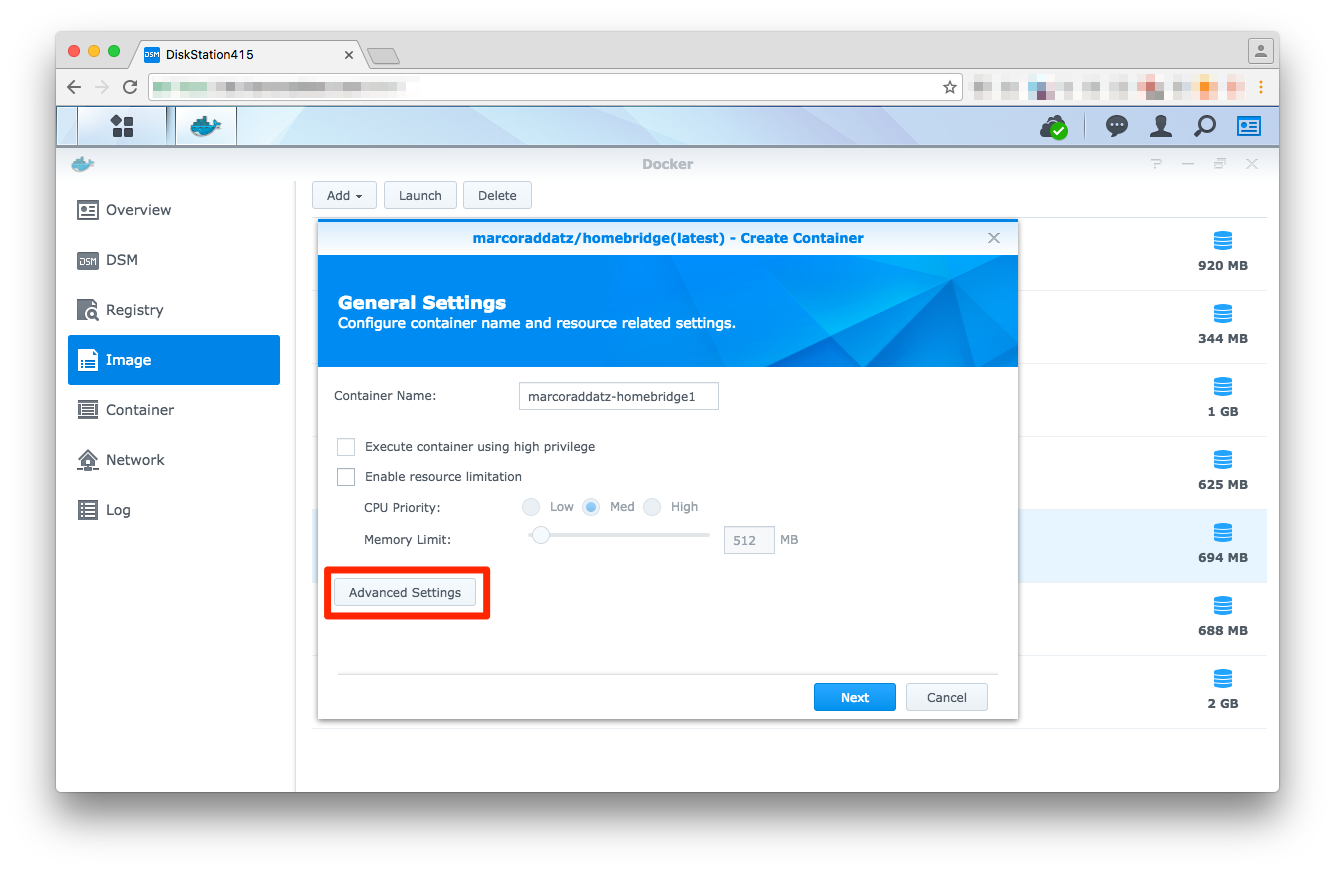
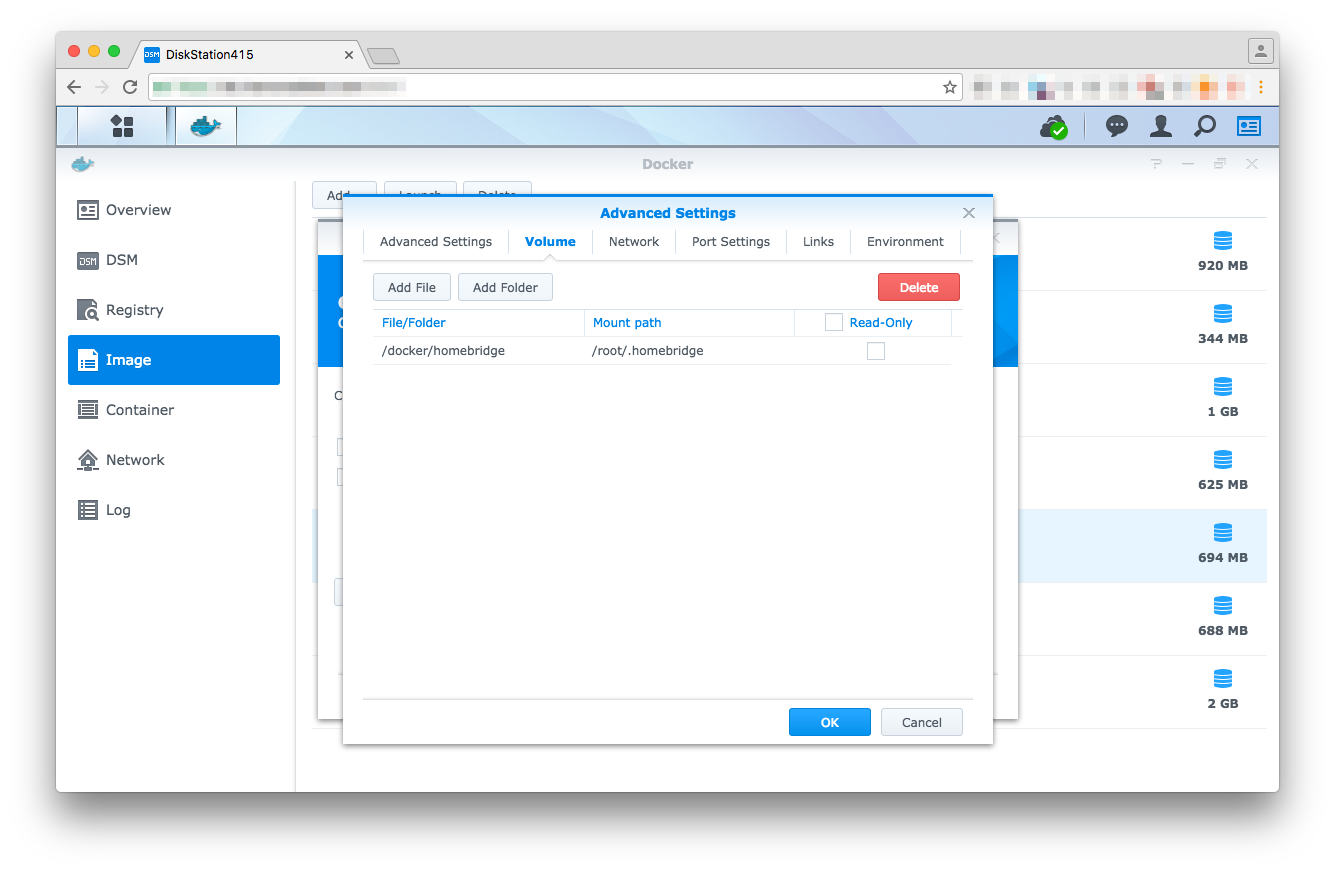
Link the /volume1/docker/homebridge to /root/.homebridge, otherwise, the configuration files won’t be loaded (within DSM the path is only shown as /docker/homebridge.
Once you launch (or restart) the container, Homebridge and all its dependencies will get installed. To verify that Homebridge is running or if an error occurs, you can use the container's log (Container → Details → Log) to receive further information on the process.