
Four Essential Freedoms:
0.The freedom to run the program as you wish, for any purpose (freedom 0).
1.The freedom to study how the program works, and change it so it does
your computing as you wish (freedom 1).
Access to the source code is a precondition for this.
2.The freedom to redistribute copies so you can help others (freedom 2).
3.freedom to distribute copies of your modified versions to others (freedom 3).
This project aims to help students or professionals to learn the main concepts of GNU \ Linux
and free software
Some GNU \ Linux distributions like Debian and RPM will be covered
Installation and configuration of some packages will also be covered
By doing this you can give the whole community a chance to benefit from your changes.
Access to the source code is a precondition for this.
Use vagrant for up machines and execute labs and practice content in this article.
I have published in folder Vagrant a Vagrantfile with what is necessary
for you to upload an environment for studies
Thanks Sue B.V., The Netherlands - Open Sourced 2021 for content of learning
- Marcos Silvestrini
- marcos.silvestrini@gmail.com
- This project is licensed under the MIT License - see the LICENSE.md file for details
- Richard Stallman's
- GNU/Linux FAQ by Richard Stallman
- GNU
- GNU Operating System
- GCC Compiler
- GNU Tar
- GNU Make
- GNU Emacs
- GNU Packages
- GNU/Linux Collection
- GNU Grub Bootloader
- GNU Hurd
- Kernel
- Linux Kernel Man Pages
- Linux Standard Base
- Filesystem Hierarchy Standard
- File Hierarchy Structure
- FSF
- Free Software Directory
- Free Software
- Copyleft
- GPL
- GNU Lesser General Public License
- BSD
- Open Source Initiative
- Creative Commons
- License LTS
- Debian Free Software Guidelines
- X11 Org
- Wayland
- GNU GNOME
- GNOME
- XFCE
- KDE Plasma
- Harmony
- xRDP
- NTP
- Bourne Again Shell
- Shebang
- Environment Variables
- GNU Globbing
- Globbing
- Quoting
- Regular Expressions
- List Linux Distribution
- Distro Watch
- Comparison Linux Distributions
- Download Packages
- Guide Install Packages
- Bugzila
- Command Not Found
- DistroTest
- Bash RC Generator
- Explainshell
- Vim Tutorial
- Linux Shell Scripting Tutorial
- Commands Examples
- Compile Your Kernel
- LPIC-2 201-450 Objectives
- LPIC-2 201-450 Wiki
- LPIC-2 201-450 Learning Material
- LPIC-2 201-450 Simulated Exam By ITexams
type COMMAND
apropos COMMAND
whatis COMMAND --long
whereis COMMAND
COMMAND --help, --h
man COMMAND
Weight: 6
Description:
Candidates should be able to measure hardware resource and network bandwidth,
identify and troubleshoot resource problems.
Key Knowledge Areas: Measure CPU usage Measure memory usage Measure disk I/O Measure network I/O Measure firewalling and routing throughput Map client bandwidth usage Match / correlate system symptoms with likely problems Estimate throughput and identify bottlenecks in a system including networking
swap
blocks in
blocks out
processes blocked on I/O
/var/log/sysstat(debian)
/var/log/sa (rhel)
iostat - Report Central Processing Unit (CPU) statistics and input/output statistics for devices and partitions
#syntax
iostat options interval count

#show cpu and disk statistics
iostat
iostat -h
iostat -t
iostat --pretty
iostat -o JSON
iostat -p sda

#show cpu and disk statistics with count
iostat 1 3
iostat 10 2

#show cpu statistics
iostat -c

#show disk statistics
iostat -d

#show disk statistics in specific directory
iostat -f /var/log#View disk usage
sudo iotop
sudo iotop -u vagrant
sudo iotop -b -u vagrant | head
#View disk usage accumulated
sudo iotop -a -u vagrant#syntaxe
vmstat options delay count
#examples
vmstat
vmstat 2 3
vmstat -S m
#syntaxe
mpstat options delay count

#examples
mpstat
mpstat 2 3
mpstat -o JSON#syntaxe
netstat address_family_options options
#print route table
netstat -r
#IPv6/IPv4 Group Memberships
netstat -g
#lists all network interfaces
netstat -i
#lists a summary of statistics for each protocol, similar to SNMP output
netstat -s
#list tcp connections
netstat -aln --tcp
netstat -al --tcp#syntaxe
ss options filter
#display all listen connections
ss -l
#display all stab connections
ss -tn
#display connections by memory
ss -m
ss -tmn
#display connections by process
ss -p
#display all tcp sockets
ss -t -a
ss -tln
#display all udp sockets
ss -u -a
ss -uln
#display connections by protocol
ss -s
#Display all established ssh connections.
ss -o state established '( dport = :ssh or sport = :ssh )'#show gui with option
iptraf
#init iptraf in specific interface
iptraf -i eth1#show logins
w
#show logins short format
w -s#syntaxe
sar options delay count
#show cpu infos
sar
sar -u
#show load average
sar -q
#show memory infos
sar -rh
#show swap infos
sar -Sh
#show data of interfaces
sar -n DEV
#show disk infos
sar -d
#show infos for specifc day
sar -f /var/log/sysstat/saDAY
sar -f /var/log/sysstat/sa31
#Show tree process full formatting
pstree

#show tree process with PID
pstree -p

#show tree process with commandline args
pstree -a

#show tree process by PID
pstree -a PIDUndertand RSS and VSZ
RSS is the Resident Set Size and is used to show how much memory is allocated to that process and is in RAM.
It does not include memory that is swapped out.
It does include memory from shared libraries as long as the pages from those libraries are actually in memory.
It does include all stack and heap memory.
VSZ is the Virtual Memory Size.
It includes all memory that the process can access, including memory that is swapped out,
memory that is allocated, but not used, and memory that is from shared libraries.
#Select all process full-format listing
ps -ef

#Select by state(S,I,R,D... D equal a block(b) in vmstat)
ps -ely

#To get info about threads:
ps -eLf
ps axms

#get a process by name
ps axu | grep vim

#list process in Dormant ou "Uninterruptible Sleep" state
ps -ely | grep "^D"#list all open files
sudo lsof
#List by filename
lsof /home/vagrant/scripts/network/.ss.sh.swp
#List open files by username
sudo lsof -u vagrant
sudo lsof -t -u vagrant
sudo lsof -u ^root
sudo lsof -u vagrant -c bash #OR
sudo lsof -u vagrant -c bash -a #AND
#List open files by process
sudo lsof -c vim
# kill all process in specif user
kill -9 `lsof -t -u {username}`
#List open files by PID
sudo lsof -p PID
sudo lsof -p ^{process-id}
#List open files containing directory
sudo lsof +D /home
sudo lsof +D /home -c bash -a
#List open files containing directory not recursively
sudo lsof +d /proc
#list process ID open in specific folder
sudo lsof | grep "FOLDER_NAME" | awk '{print $2}'
#Repeat mode
sudo lsof {arguments} -r{time-interval}
sudo lsof -u vagrant -c bash +D /usr/lib -a -r10
sudo lsof -u vagrant -c bash +D /usr/lib -a -r3
#List open files with network protocol
sudo lsof -i
sudo lsof -i tcp
sudo lsof -i udp
#To list all network connections in use by a specific process-id or process name
sudo lsof -i -a -p {process-id}
sudo lsof -i -a -c {process-name}
#List open files by port
sudo lsof -i :22
sudo lsof -i tcp:22
sudo lsof -i udp:323
#List open files by IPv4/IPv6
sudo lsof -i4
sudo lsof -i6
# List open files on NFS
sudo lsof -N
sudo lsof -N -u vagrant -a
# List locked deleted files
sudo lsof {path} | grep deleted
#list tcp connectio,but not in LISTEN
lsof -i tcp|grep -v LISTEN# show human-readable CIFS IO stats in megabytes every 1sec
cifsiostat -h -m 1# show default statistic
nfsiostat
# show with interval and continuous\repeat
nfsiostat 5
nfsiostat 5 10
#specific mount point
nfsiostat 2 5 /particular/mount/point
#Sorting output by operations per second
nfsiostat -s#Explaining %Cpu(s)
us - Time spent in user space
sy - Time spent in kernel space
ni - Time spent running niced user processes (User defined priority)
id - Time spent in idle operations
wa - Time spent on waiting on IO peripherals (eg. disk)
hi - Time spent handling hardware interrupt routines. (Whenever a peripheral unit want attention form the CPU,\
it literally pulls a line, to signal the CPU to service it)
si - Time spent handling software interrupt routines. (a piece of code, calls an interrupt routine...)
st - Time spent on involuntary waits by virtual cpu while hypervisor is servicing another processor\
(stolen from a virtual machine)
#Explaining the columns
PID: Process ID.
USER: The owner of the process.
PR: Process priority.
NI: The nice value of the process.
VIRT: Amount of virtual memory used by the process.
RES: Amount of resident memory used by the process.
SHR: Amount of shared memory used by the process.
S: Status of the process. (See the list below for the values this field can take).
%CPU: The share of CPU time used by the process since the last update.
%MEM: The share of physical memory used.
TIME+: Total CPU time used by the task in hundredths of a second.
COMMAND: The command name or command line (name + options).
#The status of the process can be one of the following:
D: Uninterruptible sleep()
R: Running
S: Sleeping
T: Traced (stopped)
Z: Zombie
#show all process
top
#show process by user
top -u vagrant
#exit Top Command After Specific repetition
top -n 10
#delay time : It tells delay time between screen updates.
top -d seconds.tenths
top -d 100 #delay of 10 seconds
#top process by PID
top -p PID#show all process
htop
#set delay between updates, in tenths of seconds
htop -d 100
#Show processes in tree view
htop -t#show infos
uptime
uptime -p
uptime -s#show infos of memory
free
#output in human form
free -hWeight: 2
Description: Candidates should be able to monitor resource usage to predict future resource needs.
Key Knowledge Areas:
Use monitoring and measurement tools to monitor IT infrastructure usage. Predict capacity break point of a configuration Observe growth rate of capacity usage Graph the trend of capacity usage Awareness of monitoring solutions such as Icinga2, Nagios, collectd, MRTG and Cacti
diagnose
predict growth
resource exhaustion
Icinga is a monitoring system which checks the availability of your network resources, notifies users of outages, and generates performance data for reporting.
apt-get update
apt-get -y install apt-transport-https wget gnupg

wget -O - https://packages.icinga.com/icinga.key | apt-key add -

DIST=$(awk -F"[)(]+" '/VERSION=/ {print $2}' /etc/os-release); \
 echo "deb https://packages.icinga.com/debian icinga-${DIST} main" > \
 /etc/apt/sources.list.d/${DIST}-icinga.list
 echo "deb-src https://packages.icinga.com/debian icinga-${DIST} main" >> \
 /etc/apt/sources.list.d/${DIST}-icinga.list

apt-get update
apt-get install -y icinga2apt-get install monitoring-plugins
#Check if path of check plugins is ok
find / -name check_load
vim /etc/icinga2/constants.conf
#Install MySQL Server
apt-get install mariadb-server mariadb-client
mysql_secure_installation

#Install IDO Feature
apt-get install icinga2-ido-mysql

#Set up MySQL database
mysql -u root -p
GRANT SELECT, INSERT, UPDATE, DELETE, DROP, CREATE VIEW, INDEX, EXECUTE ON icinga.* TO 'icinga'@'localhost' IDENTIFIED BY 'icinga';
quit
mysql -u root -p icinga < /usr/share/icinga2-ido-mysql/schema/mysql.sql

#Enable the IDO MySQL feature
#The package provides a new configuration file that is installed in /etc/icinga2/features-available/ido-mysql.conf.\
#You can update the database credentials in this file.

icinga2 feature enable ido-mysql
systemctl restart icinga2icinga2 api setup
vim /etc/icinga2/conf.d/api-users.conf
systemctl restart icinga2#Install icingaweb2
apt-get install icingaweb2 icingacli
#Install Web server
apt-get install nginx
apt-get install php php-common
#Generate token to configure icingaweb2
icingacli setup token create
#Show token
icingacli setup token show
#Create a database
mysql -u root -p
CREATE DATABASE icingaweb2;
GRANT ALL ON icingaweb2.* TO icingaweb2@localhost IDENTIFIED BY 'CHANGEME';
quit
#Access setup
http://YOUR_IP_OR_HOSTNAME/icingaweb2/setup
https://github.com/icinga/icinga-vagrant
apt update && apt -y full-upgradesudo apt install vim wget curl build-essential unzip openssl libssl-dev apache2 php libapache2-mod-php php-gd libgd-devNAGIOS_VER=$(curl -s https://api.github.com/repos/NagiosEnterprises/nagioscore/releases/latest|grep tag_name | cut -d '"' -f 4)
wget https://github.com/NagiosEnterprises/nagioscore/releases/download/$NAGIOS_VER/$NAGIOS_VER.tar.gz
tar xvzf $NAGIOS_VER.tar.gzcd $NAGIOS_VER
./configure --with-httpd-conf=/etc/apache2/sites-enabledsudo make install-groups-users
sudo usermod -a -G nagios www-dataCompile and Install the main Nagios programs
sudo make all
sudo make installsudo make install-daemoninitsudo make install-commandmodesudo make install-configsudo make install-webconf
sudo a2enmod rewrite cgisudo htpasswd -c /usr/local/nagios/etc/htpasswd.users nagiosadmin
sudo chown www-data:www-data /usr/local/nagios/etc/htpasswd.users
sudo chmod 640 /usr/local/nagios/etc/htpasswd.usersVER=$(curl -s https://api.github.com/repos/nagios-plugins/nagios-plugins/releases/latest|grep tag_name | cut -d '"' -f 4|sed 's/release-//')
wget https://github.com/nagios-plugins/nagios-plugins/releases/download/release-$VER/nagios-plugins-$VER.tar.gz
tar xvf nagios-plugins-$VER.tar.gz
cd nagios-plugins-$VER
./configure --with-nagios-user=nagios --with-nagios-group=nagios
sudo make
sudo make installsudo ufw allow 80
sudo ufw reload
sudo systemctl restart apache2
sudo systemctl start nagios.servicehttp://<IP Address/FQDN>/nagios
user: nagiosadmin
pass: foo- Nagios service not started Verify error in logs(/usr/local/nagios/var/nagios.log,/var/log/message,journalctl -xe) If error is "Caught SIGSEGV, shutting down...", possible no free memory ressource in server. For solution, add more memory ressources or set this value in nagios.cfg: check_for_updates=0 Restart nagios service
#Install pre reqs and collecd in debian
sudo apt install -y \
git \
apache2 \
gzip \
python \
build-essential \
emboss \
bioperl \
ncbi-blast+ \
librrds-perl \
libjson-perl \
libhtml-parser-perl \
libjson-perl \
libtext-csv-perl \
libfile-slurp-perl \
liblwp-protocol-https-perl \
libwww-perl \
libconfig-general-perl \
libregexp-common-perl \
collectd

#Enable the Web module
sudo a2enmod cgi cgid
sudo systemctl restart apache2

#Installing Perl Modules
sudo cpan jSON
sudo cpan CGI

#Enable CGI support for collectd
sudo vim /etc/apache2/sites-available/000-default.conf

<Directory /var/www/html/collectd-web/cgi-bin>
Options Indexes ExecCGI
AllowOverride All
AddHandler cgi-script .cgi
Require all granted
</Directory>

#Apache configuration
sudo vim /etc/apache2/apache2.conf
Include ports.conf

sudo vim /etc/apache2/ports.conf
Listen 0.0.0.0:80

sudo systemctl restart apache2

#Configuring Collectd
sudo vim /etc/collectd/collectd.conf

#Uncomment plugin for network

LoadPlugin network

#By following under network plugin section,
#uncomment the server section and replace 127.0.0.1 to 0.0.0.0.

<Plugin network>
        # server setup:
        <Listen "0.0.0.0" "25826">
        </Listen>
</Plugin>

sudo systemctl restart apache2

#Enable Web Interface
git clone https://github.com/httpdss/collectd-web.git
cd collectd-web/cgi-bin/
chmod +x graphdefs.cgi
cd ..
vim runserver.py

#Replace 127.0.0.1 to 0.0.0.0 in below line.
httpd = BaseHTTPServer.HTTPServer(("127.0.0.1", PORT), Handler)

#It’s time to run the python script to start in background.
./runserver.py &

#Accessing Web UI of Collectd
http://YOUR_IP:8888/#Install packages Debian
sudo apt install -y collectd python build-essential librrds-perl libjson-perl libhtml-parser-perl apache2
#Install packages in RHEL
sudo yum install -y collectd rrdtool rrdtool-perl perl-HTML-Parser perl-JSON
#Modifying Configuration
#Debian
sudo vim /etc/collectd/collectd.conf
#RHEL
sudo vim /etc/collectd.conf
#Below are the changes required in client side.
Hostname "debian-lpic1-201"
FQDNLookup true
LoadPlugin syslog
<Plugin syslog>
LogLevel info
</Plugin>
#Enable the required plugins by removing “#”.
LoadPlugin cpu
LoadPlugin interface
LoadPlugin load
LoadPlugin memory
LoadPlugin network
#Enter the collectd server IP under network plugin and enable all other required plugins.
<Plugin network>
# client setup:
<Server "192.168.0.31" "25826">
</Server>
</Plugin>
<Plugin load>
ReportRelative true
</Plugin>
<Plugin memory>
ValuesAbsolute true
ValuesPercentage false
</Plugin>
#Starting the Client Service
#Finally, enable and start the service.
sudo systemctl start collectd
sudo systemctl enable collectd
#Once service started on client system, switch back to collectd server and reload the interface.
#Now we should get the newly added client in the list.
#Config file debian
/etc/collectd/collectd.conf

#Conf file RHEL
/etc/collectd.conf

# RRD Files(Round Robin Database)
/var/lib/collectd/rrd/HOST_NAMEhttps://hub.docker.com/r/puckel/docker-collectd
sudo apt -y install mrtg snmpd#Step 1: Install Required Packages
sudo apt update
sudo apt install software-properties-common
sudo apt install nginx
sudo apt install curl vim acl composer fping git graphviz imagemagick mariadb-client \
mariadb-server mtr-tiny nginx-full python3-memcache python3-mysqldb snmp snmpd whois php-snmp rrdtool librrds-perl
#Step 2: Install PHP on Debian
sudo apt -y install php php-common
sudo apt -y install php-cli php-fpm php-json php-pdo php-mysql php-zip php-gd \
php-mbstring php-curl php-xml php-pear php-bcmath php-gmp php-ldap
#Step 3: Database Configuration for Cacti
#Login to your DataBase
sudo systemctl enable mysql
sudo systemctl restart mysql
sudo mysql -u root -p
#Create Database and cacti user
CREATE DATABASE cacti;
CREATE USER 'cactiuser'@'localhost' IDENTIFIED BY 'vagrant'; ## Make it strong
GRANT ALL PRIVILEGES ON cacti.* TO 'cactiuser'@'localhost';
FLUSH PRIVILEGES;
EXIT
#Grant database user access to the MySQL TimeZone database and select permission
sudo mysql -u root -p mysql < /usr/share/mysql/mysql_test_data_timezone.sql
sudo mysql -u root -p
GRANT SELECT ON mysql.time_zone_name TO cactiuser@localhost;
ALTER DATABASE cacti CHARACTER SET = 'utf8mb4' COLLATE = 'utf8mb4_unicode_ci';
FLUSH PRIVILEGES;
EXIT
#Open MariaDB file and add the lines below under [mysqld] section for an optimized database
sudo vim /etc/mysql/mariadb.conf.d/50-server.cnf
# Add the following under [mariadb]
[mariadb]
innodb_file_format=Barracuda
innodb_large_prefix=1
collation-server=utf8mb4_unicode_ci
character-set-server=utf8mb4
innodb_doublewrite=OFF
max_heap_table_size=128M
tmp_table_size=128M
join_buffer_size=128M
innodb_buffer_pool_size=1G
innodb_flush_log_at_timeout=3
innodb_read_io_threads=32
innodb_write_io_threads=16
innodb_io_capacity=5000
innodb_io_capacity_max=10000
innodb_buffer_pool_instances=9
#Restart MariaDB
sudo systemctl restart mysql
#Step 4: Configure PHP-FPM for Cacti use
sudo vim /etc/php/*/fpm/php.ini
sudo vim /etc/php/7.4/apache2/php.ini
sudo vim /etc/php/7.4/cli/php.ini
# Under [Date] uncoment the date.timezone line and add your timezone.
date.timezone = Africa/Nairobi ## Input your Time zone
max_execution_time = 300 ## Increase max_execution_time
memory_limit = 512M ## Increase memory limit
#Update the address in which FPM will accept FastCGI requests.
sudo vim /etc/php/*/fpm/pool.d/www.conf
listen = /run/php/php-fpm.sock
#Restart PHP-FPM
sudo systemctl restart php*-fpm.service
#Step 5: Configure Nginx Webserver
#Delete the default page that loads up after fresh installation of Nginx
sudo rm /etc/nginx/sites-enabled/default
#Create a file as shown and add the following in it
sudo vim /etc/nginx/conf.d/cacticonfig.conf
#Paste and modify below data
server {
listen 80;
server_name debian-lpic-201.cacti.com;
root /var/www/html;
index index.php;
access_log /var/log/nginx/cacti_access.log;
error_log /var/log/nginx/cacti_error.log;
charset utf-8;
gzip on;
gzip_types text/css application/javascript text/javascript application/x-javascript image/svg+xml text/plain text/xsd text/xsl text/xml image/x-icon;
location / {
try_files $uri $uri/ /index.php?$query_string;
}
location /api/v0 {
try_files $uri $uri/ /api_v0.php?$query_string;
}
location ~ .php {
include fastcgi.conf;
fastcgi_split_path_info ^(.+.php)(/.+)$;
fastcgi_pass unix:/run/php/php-fpm.sock;
}
location ~ /.ht {
deny all;
}
}
#Restart nginx
sudo systemctl restart nginx
#Step 6: Install Cacti server on Debian 11 / Debian 10
#Download using curl
curl -sLO https://www.cacti.net/downloads/cacti-latest.tar.gz
#Download using wget
wget https://www.cacti.net/downloads/cacti-latest.tar.gz
#After it is done downloading, extract the Cacti archive
tar -zxvf cacti-latest.tar.gz
#Move the files to our web root directory and change the name of the Directory
sudo mv cacti-1* /var/www/html/
sudo mv /var/www/html/cacti-*/ /var/www/html/cacti
#Change ownership for the cacti files
sudo chown -R www-data:www-data /var/www/html/
#Import the default Cacti database data to the Cacti database.
sudo mysql -u root -p cacti < /var/www/html/cacti/cacti.sql
#Open the Cacti configuration file to input database information.
sudo vim /var/www/html/cacti/include/config.php
$database_type = "mysql";
$database_default = "cacti";
$database_hostname = "localhost";
$database_username = "cactiuser";
$database_password = "vagrant";
$database_port = "3306";
$database_ssl = false;
#Validate nginx configurations syntax:
sudo nginx -t
nginx: the configuration file /etc/nginx/nginx.conf syntax is ok
nginx: configuration file /etc/nginx/nginx.conf test is successful
After you are done with the configuration, restart the webserver.
#Restart Nginx
sudo systemctl restart nginx
#Step 7: Edit the crontab file.
#In order for Cacti to poll every few minutes, you may need to add the following in your crontab
sudo vim /etc/cron.d/cacti
*/5 * * * * www-data php /var/www/html/cacti/poller.php > /dev/null 2>&1
#That will cause Cacti to poll every five minutes.
#Step 8: Web installer
#Now head to the web installer and follow the on-screen instructions.
http:// IP or FQDN /cacti
#That should load the installer similar to the one below.
#Enter default username and password which is admin and adminWeight: 2
Description:
Candidates should be able to utilize kernel components that are necessary to specific hardware,
hardware drivers, system resources and requirements. This objective includes implementing different
types of kernel images, identifying stable and development kernels and patches, as well as using kernel modules.
Key Knowledge Areas:
Kernel 2.6.x, 3.x and 4.x documentation
Folder with headers of kernel
Folder with actual source of kernel
Folder with documentation of kernel
Folder with image of kernel
Folder with modules of kernel
zimage: Limited size(512kb), loading in lool memory bzimage: Not limeted size, loading in memory ram
Compress method: gzip
Compress method of kernel sources


#uname - get kernel version
uname -r
Understand versions
Example

5 - Version
4 - Patch level(Major release)
17 - Sub level(Minor release)
2136.300.7 - Extraversion (Distro maintainer-controlled version)
el8uek.x86_64 - Local Version (Distro maintainer-controlled version)\
Get size image of kernel
ls -lh /boot/vmlinuz-`uname -r`Weight: 3
Description: Candidates should be able to properly configure a kernel to include or disable specific features of the Linux kernel as necessary. This objective includes compiling and recompiling the Linux kernel as needed, updating and noting changes in a new kernel, creating an initrd image and installing new kernels.
Key Knowledge Areas:
/usr/src/linux/ Kernel Makefiles Kernel 2.6.x/3.x make targets Customize the current kernel configuration. Build a new kernel and appropriate kernel modules. Install a new kernel and any modules. Ensure that the boot manager can locate the new kernel and associated files. Module configuration files Use DKMS to compile kernel modules. Awareness of dracut
depmod
/usr/src/linux/.config
/lib/modules/kernel-version/
make targets (all, config, xconfig, menuconfig, gconfig, oldconfig,
mrproper, zImage, bzImage, modules, modules_install, rpm-pkg, binrpm-pkg,
module tools
apt-get install -y \
build-essential libelf-dev libssl-dev bc flex bison pkg-config gtk+-2.0 \
gmodule-2.0 libgtk2.0-dev libglib2.0-dev libglade2-dev libncurses-dev#download latest version
cd /usr/src
wget --progress=bar https://cdn.kernel.org/pub/linux/kernel/v5.x/linux-5.18.4.tar.xz
#extract files
tar xJvf linux-5.18.4.tar.xz
#create a simbolic link linux
ln -s linux-5.18.4 linuxcd /usr/src/linux
make config
cd /usr/src/linux
make menuconfig
#Copy your personalized .config for /usr/src/linux/.config

#Then, execute command
cd /usr/src/linux
make oldconfig
#First, enable one graphical environment(GNOME, for example)
cd /usr/src/linux
make xconfig
#First, enable one graphical environment(GNOME, for example)
cd /usr/src/linux
make gconfig
vim /usr/src/linux/Makefile
vim /usr/src/linux/.config
#For the best performance in compiling image, use your default kernel .config
#Example: cp /boot/config-5.10.0-10-amd64 /usr/src/linux/.config

#Path of new image:
#/usr/src/linux/arch/x86/boot/bzImage

#Certificate error debian/certs/debian-uefi-certs.pem
#https://unix.stackexchange.com/questions/293642/attempting-to-compile-kernel-yields-a-certification-error
# Set this line in .config
# From: CONFIG_SYSTEM_TRUSTED_KEYS="debian/certs/debian-uefi-certs.pem"
# To CONFIG_SYSTEM_TRUSTED_KEYS=""

#If not swap enable:
fallocate -l 4G /swapfile
chmod 600 /swapfile
mkswap /swapfile
swapon /swapfile
swapon -s

cd /usr/src/linux
#make allyesconfig -j $(nproc) bzImage
make -j $(nproc) bzImagecd /usr/src/linux
make -j $(nproc) modulescd /usr/src/linux
make modules_installcd /usr/src/linux
make install
#Copy image
cp /usr/src/linux/arch/x86/boot/bzImage /boot/vmlinuz-5.18.4-1111-lpic-201-450

#Generate initrd

#Method 1:
mkinitramfs -o /boot/initrd.img-5.18.41111-lpic-201-450 5.18.4-1111-lpic-201-450

#Method 2:
update-initramfs -c -k 5.18.4-1111-lpic-201-450

#Update grub
update-grub
update-grub2cd /usr/src/linux
make -j $(nproc) deb-pkg
# Install this kernel version in some other GNU\Linux DEbian with command dpkg -i image-xxx-xxx.deb
#WARNNING!!! This process clear a image kernel and files generated in compilation

#Clear kernel image\files generate in proccess of compile kernel
cd /usr/src/linux
make clean

#Clear kernel images\files and .config generate in proccess of compile kernel
cd /usr/src/linux
make mrproper#Generate a initrd in RPM\RHEL
#syntaxe: mkinitrd [ OPTIONS ] [<nitrd-image] <kernel-version>
mkinitrd -f /boot/initrd.img-5.18.41111-lpic-201-450.img 5.18.4-1111-lpic-201-450#update initramfs
dracut --force#Generate a initrd in Debian
mkinitramfs -o /boot/initrd.img-5.18.41111-lpic-201-450 5.18.4-1111-lpic-201-450# Generate kernel image
make -j $(nproc) bzImage
# Compile kernel modules
make -j $(nproc) bzImag
# Install kernel modules
make -j $(nproc) modules_install
# Install kernel
make install
# Generate .deb kernel image and files
make deb-pkg
# Generate .rpm kernel image and files
make rpm-pkg
# Generate only .rpm kernel image
make binrpm-pkg#compress
gzip -v scripts/script1.sh
gzip -v1 scripts/script1.sh
gzip -v9 scripts/script1.sh
gzip -c scripts/script1.sh > scripts/script1.gz
#descompress
gzip -dv picture1.jpg.gz
gunzip -v scripts/script1.gz
#list infos
gzip -l picture1.jpg.gz#compress
bzip2 -v scripts/script1.sh
bzip2 -v1 picture1.jpg
bzip2 -v9 picture1.jpg
#descompress
bunzip2 -v picture1.jpg.bz2
bzip2 -dv picture1.jpg.bz2#install package
sudo apt install -y dkms
#install zfs-dkms for test dkms command in this example
apt install -y zfs-dkms
#list status of dkms modules
dkms status
#remove dkms zfs module
dkms remove zfs/2.0.3 --all
# add dkms zfs module
dkms add zfs/2.0.3 --allWeight: 4
Description:
Candidates should be able to manage and/or query a 2.6.x, 3.x or 4.x kernel and its loadable modules.
Candidates should be able to identify and correct common boot and run time issues.
Candidates should understand device detection and management using udev.
This objective includes troubleshooting udev rules.
Key Knowledge Areas:
Use command-line utilities to get information about the currently running kernel and kernel modules Manually load and unload kernel modules Determine when modules can be unloaded Determine what parameters a module accepts Configure the system to load modules by names other than their file name. /proc filesystem Content of /, /boot/ , and /lib/modules/ Tools and utilities to analyze information about the available hardware udev rules
module configuration files in /etc/
/lib/modules/kernel-version/modules.dep
/etc/sysctl.conf, /etc/sysctl.d/
/proc/sys/kernel/
/sbin/sysctl
/sbin/depmod
/sbin/rmmod
/sbin/modinfo
/bin/dmesg
/sbin/lspci
/usr/bin/lsdev
/sbin/lsmod
/sbin/modprobe
/sbin/insmod
/bin/uname
/usr/bin/lsusb
udevmonitor
udevadm monitor
/etc/udev/
# Show all information
uname -a

# Show kernel name
uname -s

# Print kernel release
uname -r

# Display Kernel build version
uname -v

# Print machine hardware name
uname -m

# Print the network node hostname
uname -n

# Print the processor type (non-portable)
uname -p

# Print the hardware platform (non-portable)
uname -i

# Print the operating system
uname -o# List all runtime files\params
sysctl -a
# Example 1: Set max open files in system
sysctl fs.file-max=400000
# Example 2: Disable ping
echo 1 > /proc/sys/net/ipv4/icmp_echo_ignore_all
# Set max open files in system permanent(after boot)
vim /etc/sysctl.conf
fs.file-max = 400000
#Or put a custom file XX-sysctl.conf in /etc/sysctl.d/ with content fs.file-max = 400000#get some device for examples
id=`lspci | cut -c 1-8 | tail -n 1`
#show all devices connected
lspci
#show detail for specific device
lspci -s $id -v
#show kernel drivers for all devices connected
lspci -k
#show kernel driver for specific device
lspci -s $id -k#install
sudo apt-get install usbutils
sudo yum install usbutils
#get some device for examples
id=`lsusb | cut -c 24-32 | head -n 1`
#show all usb devices connected
lsusb
#show USB device hierarchy as a tree
lsusb -t
#show detail for specific device
lsusb -vd $id#List all devices infos
lsdev# Show messages of kernel ring buffer
dmesg
# Clear the ring buffer
dmesg -C# Probe all modules
depmod -a
# Warn on duplicate dependencies, aliases, symbol versions
depmod -w#show all modules
lsmod#show all info
modinfo video
#show resume info
modinfo -p video# Up module in kernel
insmod /lib/modules/5.4.17-2136.300.7.el8uek.x86_64/misc/vboxsf.ko# Down module in kernel
rmmod /lib/modules/5.4.17-2136.300.7.el8uek.x86_64/misc/vboxsf.ko# Down module in kernel
modprobe -r snd-hda-intel
#Up module in kernel
modprobe snd-hda-intel
# Set parameter of module
modprobe psmouse resync_time=10# Show infos about device
udevadm info /dev/sda
# Monitoring all kernel solicitations
udevadm monitor
/etc/modules.conf #(deprecied)
/etc/modprobe.d/etc/modules
/etc/modules-load.d/# Configuration file
/etc/udev/udev.conf
# Configuration Rules
/etc/udev/rules.d/ #(depreciated in new distros, but active)
/lib/udev/rules.dWeight: 3
Description: Candidates should be able to query and modify the behaviour of system services at various targets / run levels. A thorough understanding of the systemd, SysV Init and the Linux boot process is required. This objective includes interacting with systemd targets and SysV init run levels.
Key Knowledge Areas:
SysV init Systemd Linux Standard Base Specification (LSB)
/etc/inittab
/etc/init.d/
/etc/rc.d/
/usr/lib/systemd/
/etc/systemd/
/run/systemd/
update-rc.d
init and telinit
# Show current runlevel(in /etc/inittab, line id:2:initdefault:)
runlevel# Set runlevel
init 3
telinit 5#Starts unit.
systemctl start apache2.service
#Stops unit.
systemctl stop apache2.service
#Restarts unit.
systemctl restart apache2.service
#Shows the state of unit, including if it is running or not.
systemctl status apache2.service
#Shows active if unit is running or inactive otherwise.
systemctl is-active apache2.service
#Enables unit, that is, unit will load during system initialization.
systemctl enable apache2.service
#unit will not start with the system.
systemctl disable apache2.service
#Verifies if unit starts with the system. The answer is stored in the variable $?.
#The value 0 indicates that unit starts with the system and the value 1 indicates
#that unit does not starts with the system.
systemctl is-enabled apache2.service
# set default runlevel \ target
systemctl default
#alter default runlevel \ default target
systemctl set-default multi-user.target
systemctl isolate multi-user.target
#determine what your system’s default boot target
systemctl get-default
#list all units available
systemctl list-unit-files
#list units available now
systemctl list-units
#list service units only
systemctl list-unit-files --type service
# reload systemd configs
systemctl daemon-reload
#shutdown system
sudo systemctl poweroff
#reboot system
sudo systemctl reboot# To see all local configuration:
systemd-delta
#To see all runtime configuration:
systemd-delta /run
#To see all system unit configuration changes:
systemd-delta systemd/system
#To see all runtime "drop-in" changes for system units:
systemd-delta --type=extended /run/systemd/system# Show all process scripts
chkconfig
# Set script a specific process for off
chkconfig --level 4 network off
# Set script a specific process for on
chkconfig --level 4 network on# Show a specific process
chkconfig --list network
Folder of symbolic links: /etc/rc[RUN_LEVEL_NUMBER].d/
Folder of scripts: /etc/init.d/
S = Start process(Example: S16ssh)
K = Kill process(Example: K90rsyslog)
Number between[S,K][script]: Order of execution script

Runlevel 0
Shuts down the system.\

Runlevel 1
Is a single-user mode, which is used for maintenance or administrative tasks.
You may also see this mode referred to as runlevel S (the S stands for single-user).\

Runlevel 2
Is a multi-user mode.
This runlevel does not use any networking services.\

Runlevel 3
Is a multi-user mode with networking.
This is the normal runlevel you are used to if you use a system that doesn’t boot into a GUI (graphical user interface).\

Runlevel 4
Is not used.
The user can customize this runlevel for their own purposes (which we will cover how to do later in the article).\
Runlevel 5
Is the same as runlevel 3, but it also starts a display manager.
This is the runlevel you are using if you use a system that boots into a GUI.\
Runlevel 6
Reboots the system.\

Runlevel S
Equal a level 1.
The S stands for single-user\

Manually set the RunLevel to Start and Kill a service
# Remove symbolic links before
find  /etc/rc*.d/*collectd* | xargs rm
update-rc.d collectd defaults# Remove symbolic links before
find /etc/rc*.d/*collectd* | xargs rm
# Generate new symbolic links with new levels
update-rc.d collectd start 10 2 3 4 . stop 90 0 1 5 6 .# Remove symbolic links before
find /etc/rc*.d/*collectd* | xargs rm
# Generate new symbolic links with new levels
update-rc.d collectd start 10 2 3 4 5 . stop 90 0 1 6 .

/etc/systemd/system
/run/systemd/system
/lib/systemd/systemWeight: 4
Description: Candidates should be able to properly manipulate a Linux system during both the boot process and during recovery mode. This objective includes using both the init utility and init-related kernel options. Candidates should be able to determine the cause of errors in loading and usage of bootloaders. GRUB version 2 and GRUB Legacy are the bootloaders of interest. Both BIOS and UEFI systems are covered.
Key Knowledge Areas:
BIOS and UEFI NVMe booting GRUB version 2 and Legacy grub shell boot loader start and hand off to kernel kernel loading hardware initialisation and setup daemon/service initialisation and setup Know the different boot loader install locations on a hard disk or removable device. Overwrite standard boot loader options and using boot loader shells. Use systemd rescue and emergency modes.
inittab, telinit and init with SysV init
The contents of /boot/, /boot/grub/ and /boot/efi/
EFI System Partition (ESP)
GRUB
initrd, initramfs
Master boot record(MBR)
systemctl
UEFI shell

The processor will execute the codes contained in BIOS [Basic Input and Output System].
The BIOS is actually a program stored in ROM [Read Only Memory].
The processor runs the instruction located at the memory location CS:IP FFFF:0000 of the BIOS,
which is located at the 0xFFFF0 address.
This memory location is close to the end of the 1MB of system memory accessible in real mode.
It typically contains a jump instruction that transfers execution to the location of the BIOS start-up program.
The BIOS will next run POST [power on self test] to find certain hardware and its working at the basic level.
It compares the hardware settings in the CMOS [Complementary Metal Oxide Semiconductor] to what is
physically on the system. It then initializes the hardware devices.
Once the POST is completed, the processor jumps to a specific, predefined location in RAM.
The instructions located here are relatively simple and basically tell the hardware to go look for a boot device.
MBR stands for Master Boot Record. It is located in the 1st sector of the bootable disk.
Typically /dev/hda or /dev/sda, MBR is less than 512 bytes in size. This has three components:
- primary boot loader info in 1st 446 bytes.
- partition table info in next 64 bytes.
- mbr validation check in last 2 bytes.
It contains information about GRUB (or LILO in old systems).
So, in simple terms MBR loads and executes the GRUB boot loader.
When a boot device is found (let’s assume that it’s a hard disk), the hardware is told to go to the
0th (first) sector (cylinder 0, head 0, sector 0), then load and execute the instructions there.
This is the master boot record, or MBR . So, in simple terms BIOS loads and executes the MBR boot loader.
LILO or GRUB allows the root user to set up the boot process as menu-driven or command-line,
and permits the user to choose from amongst several boot options. It also allows for a default
boot option after a configurable timeout, and current versions are designed to allow booting
from broken Level 1 (mirrored) RAID arrays. It has the ability to create a highly configurable,
“GUI-fied” boot menu, or a simple, text-only, command-line prompt.
Due to the very small amount of data the BIOS can access, most boot loaders load in two stages.
In the first stage of the boot, the BIOS loads a part of the boot loader known as the initial program loader, or IPL.
The IPL interrogates the partition table and subsequently is able to load data wherever it may exist on the various media.
This action is used initially to locate the second stage boot loader, which holds the remainder of the loader.
The second stage boot loader is the real meat of the boot loader; many consider it the only real part of the boot loader.
This contains the more disk-intensive parts of the loader, such as user interfaces and kernel loaders.
These user interfaces can range from a simple command line to the all-singing, all-dancing GUIs.
GRUB stands for GRand Unified Bootloader.
If you have multiple kernel images installed on your system, you can choose which one to be executed.
GRUB displays a splash screen, waits for few seconds, if you don’t enter anything,
it loads the default kernel image as specified in the grub configuration file.
GRUB has the knowledge of the filesystem (the older Linux loader LILO didn’t understand filesystem).
Grub configuration file is /boot/grub/grub.conf (/etc/grub.conf is a link to this).
The following is sample grub.conf of CentOS.
# boot=/dev/sda
default=0
timeout=5
splashimage=(hd0,0)/boot/grub/splash.xpm.gz
hiddenmenu
title CentOS (2.6.18-194.el5PAE)
root (hd0,0)
kernel /boot/vmlinuz-2.6.18-194.el5PAE ro root=LABEL=/
initrd /boot/initrd-2.6.18-194.el5PAE.img
As you notice from the above info, it contains kernel and initrd image.
So, in simple terms GRUB just loads and executes Kernel and initrd images.
Depending on the kernel boot option chosen or set as default, lilo or grub will load that kernel.
When the kernel is loaded, it immediately initializes and configures the computer’s memory and configures
the various hardware attached to the system, including all processors, I/O subsystems, and storage devices.
It then looks for the compressed initrd image in a predetermined location in memory, decompresses it,
mounts it, and loads all necessary drivers.
Next, it initializes virtual devices related to the file system, such as LVM or software RAID before
unmounting the initrd disk image and freeing up all the memory the disk image once occupied.
The kernel then creates a root device, mounts the root partition read-only, and frees any unused memory.
At this point, the kernel is loaded into memory and operational.
Looks at the /etc/inittab file to decide the Linux run level, Following are the available run levels
0 – halt
1 – Single user mode
2 – Multiuser, without NFS
3 – Full multiuser mode
4 – unused
5 – X11
6 – reboot
Init identifies the default initlevel from /etc/inittab and uses that to load all appropriate program.
Execute ‘grep initdefault /etc/inittab’ on your system to identify the default run level If you want
to get into trouble, you can set the default run level to 0 or 6. Since you know what 0 and 6 means,
probably you might not do that. Typically you would set the default run level to either 3 or 5.
The first thing the kernel does after completing the boot process is to execute init program.
The /sbin/init program (also called init) coordinates the rest of the boot process and configures
the environment for the user. Init is the root/parent of all processes executing
on Linux which becomes process number 1.
The first few process Ids are given below:
1 – Init Process
2 – kflushd(bdflush) : Started by update – does a more imperfect sync more frequently
3 – kupdate : Does a sync every 30 seconds
4 – kpiod
5 – kswapd
6 – mdrecoveryd
Processes 2, 3, 4, 5 and 6 are kernel daemons.
The kernel daemons are started after init, so they get process numbers like normal processes do.
But their code and data lives in the kernel’s part of the memory.
Kflushd and Kupdate :- Input and output is done via buffers in memory.
This allows things to run faster and the data in the buffer are written to disk in larger more efficient
chunks.The daemons kflushd and kupdate handle this work. kupdate runs periodically (5 seconds) to
check whether there are any dirty buffers. If there are, it gets kflushd to flush them to disk.
Kswap and Kpiod :- System memory can be better managed by shifting unused parts of running programs
out to the swap partition(s) of the hard disk. Moving this data in and out of memory as needed is done
by kpiod and kswapd. Every second or so, kswapd wakes up to check out the memory situation, and if
something on the disk is needed in memory, or there is not enough free memory, kpiod is called in.
Mdrecoveryd :- mdrecoveryd is part of the Multiple Devices package used for software RAID and
combining multiple disks into one virtual disk Basically it is part of the kernel.
It can be removed from the kernel by deselecting it (CONFIG_BLK_DEV_MD) and recompiling the kernel.
When the Linux system is booting up, you might see various services getting started. For example,
it might say “starting sendmail …. OK”. Those are the runlevel programs, executed from the run level
directory as defined by your run level. Depending on your default init level setting,
the system will execute the programs from one of the following directories.
Run level 0 – /etc/rc.d/rc0.d/
Run level 1 – /etc/rc.d/rc1.d/
Run level 2 – /etc/rc.d/rc2.d/
Run level 3 – /etc/rc.d/rc3.d/
Run level 4 – /etc/rc.d/rc4.d/
Run level 5 – /etc/rc.d/rc5.d/
Run level 6 – /etc/rc.d/rc6.d/
Credit of this content about boot in MBR
https://unixserveradmin.wordpress.com/2012/11/23/linux-bootup-sequence/
#Partition table
GPT

#filesystem type
vfat

#mount point of ESP
/boot/efi# config file grub legacy
/boot/grub/menu.lst
# grub
/boot/grub/grub.cfg
/etc/default/grub
/etc/grub.d
/etc/default/grub.dGrub Grub Legacy

Grub Grub Legacy

Grub Grub Legacy


#find disks
ls

#find kernel images
ls (hd0,msdos1)/

#set root
set root=(hd0,msdos1)

#set kernel
linux /vmlinuz-VERSION root=/dev/DISK_OR_LVM

#set initramfs\initrd
initrd /initrd.img-VERSION

#boot
boot
In this example, we are going to corrupt the kernel image and recover it with a live cd.
# Backup of image
cp /boot/vmlinuz-5.18.9-1.0.0-silvestrini /home/vagrant

# Corrupting the kernel image
tail -n 10000 /boot/vmlinuz-5.18.9-1.0.0-silvestrini > tmp
cp tmp  /boot/vmlinuz-5.18.9-1.0.0-silvestrini

# Boot for validate crash
reboot

# Rescue kernel image with debian live cd
# Set your system to boot in live cd before this tasks

# discovery disks
fdisk -l

# mount / for recovery
mkdir /mnt/recovery
mount /dev/sda1 /mnt/recovery

# recovery backup of kernel image
cp /mnt/recovery/home/vagrant/vmlinuz-5.18.9-1.0.0-silvestrini /mnt/recovery/boot/vmlinuz-5.18.9-1.0.0-silvestrini

# Boot for validate rescue
reboot

# Cheers!!!
In this example, we are going to corrupt the fstab for crash / and /home partitions
#list mount partitions
df | grep sda[1-5]

# edit fstab for cause crash (/ and /home partitions)
vim /etc/fstab #(add some value in UUID of partitions for crash)

# reboot system
reboot

# check mount partitions
df | grep sda[1-5]

# fix fstab (/ and /home partitions)
mount -o remount,rw /dev/sda3 /
vim /etc/fstab #(delete invalid value in UUID of partitions for fix)
reboot

# check mount partitions
df | grep sda[1-5]
warnning: Not execute this tutorial in production environment!!!
#1 - Causing the problem

#list partiotions
fdisk -l

#delete mbr bytes
dd if=/dev/zero of=/dev/sda bs=512 count=1

#reboot system
reboot

#2 - Recovery MBR partition

#boot system with live cd

#list partiotions
fdisk -l

#install testdisk
apt-get install -y testdisk

#use testdisk for recovery\write MRB partition table

#3 - Recovery grub

#boot system with live cd

#mount /boot (X=disk,Y=partition of /boot)
mount /dev/sdXY /mnt

#recovery grub in partition /boot
grub-install --root-directory=/mnt/boot /dev/sdXY

#reboot system
reboot

#4 - Reinstall grub
grub-install /dev/sdXY
update-grub
reboot

#Cheers!!!
Mount point

#install grub
grub-install /dev/sda

#install grub in mount partition(rescue)
grub-install --root-directory=/mnt /dev/sda#list uefi infos
efibootmgr# update configs of grub in file /boot/grub/grub.cfg
update-grub
grub-mkconfig -o /boot/grub/grub.cfgWeight: 2
Description: Candidates should be aware of other bootloaders and their major features.
Key Knowledge Areas:
SYSLINUX, ISOLINUX, PXELINUX Understanding of PXE for both BIOS and UEFI Awareness of systemd-boot and U-Boot
syslinux
extlinux
isolinux.bin
isolinux.cfg
isohdpfx.bin
efiboot.img
pxelinux.0
pxelinux.cfg/
uefi/shim.efi
uefi/grubx64.efi
SYSLINUX is a boot loader for the Linux operating system which runs on an MS-DOS/Windows FAT filesystem.
Used in recovery flash drives
ISOLINUX is a boot loader for Linux/i386 that operates off ISO 9660/El Torito CD-ROMs in "no emulation" mode.
Used in creating live cd\dvd
folder: /boot/isolinux
config: isolinux.cfg
file bootloader: isolinux.bin
Used in native linux filesystems(ext*,brtfs,xfs)
folder: /boot/extlinux or /cdrom/isolinux config: extlinux.cnf
PXELINUX is a Syslinux derivative, for booting from a network server using a network
ROM conforming to the Intel PXE (Pre-Execution Environment) specification
tftp folders: /tftpboot/pxelinux.0 /tftpboot/pxelinux.cfg
systemd-boot, previously called gummiboot (German for: "rubber dinghy"),
is a simple UEFI boot manager which executes configured EFI images.
command: bootctl
U-Boot is both a first-stage and second-stage bootloader.
It is loaded by the system's ROM (e.g. onchip ROM of the ARM CPU) from a supported boot device,
such as an SD card, SATA drive, NOR or NAND flash.
Used in embedded systems
Secure Boot is a UEFI firmware security feature developed by the UEFI Consortium
that ensures only immutable and signed software are loaded during the boot time.
Secure Boot leverages digital signatures to validate the authenticity, source, and integrity of the code that is loaded
files: uefi/shim.efi uefi/grubx64.efi
Weight: 4
Description: Candidates should be able to properly configure and navigate the standard Linux filesystem. This objective includes configuring and mounting various filesystem types.
Key Knowledge Areas:
The concept of the fstab configuration Tools and utilities for handling swap partitions and files Use of UUIDs for identifying and mounting file systems Understanding of systemd mount units
/etc/fstab
/etc/mtab(-> ../proc/self/mounts) - mounted partitions
/proc/mounts (-> self/mounts) - mounted partitions
/proc/swaps ->list of swap partitions
mount and umount
The file /etc/fstab contains descriptions about the filesystems that can be mounted.
This is a text file, where each line describes a filesystem to be mounted, with six fields per line in the following order:
FILESYSTEM MOUNTPOINT TYPE OPTIONS DUMP PASSWhere:
FILESYSTEM
The device containing the filesystem to be mounted. Instead of the device, you can specify the UUID or label of the partition
MOUNTPOINT
Where the filesystem will be mounted.
TYPE
The filesystem type.
OPTIONS
Mount options that will be passed to mount.
DUMP
Indicates whether any ext2, ext3 or ext4 filesystems should be considered for backup by the dump command.
Usually it is zero, meaning they should be ignored.
PASS
When non-zero, defines the order in which the filesystems will be checked on bootup. Usually it is zero. 0=no check in boot 1=check / in boot 2= check others partitions in boot
The mount options on OPTIONS are a comma-separated list of parameters, which can be generic or filesystem specific.
Among the generic ones we have:
atime and noatime
By default, every time a file is read the access time information is updated. Disabling this (with noatime) can speed up disk I/O.
Do not confuse this with the modification time, which is updated every time a file is written to.
auto and noauto
Whether the filesystem can (or can not) be mounted automatically with mount -a.
defaults
This will pass the options rw, suid, dev, exec, auto, nouser and async to mount.
dev and nodev
Whether character or block devices in the mounted filesystem should be interpreted.
exec and noexec
Allow or deny permission to execute binaries on the filesystem.
user and nouser
Allows (or not) an ordinary user to mount the filesystem.
group
Allows a user to mount the filesystem if the user belongs to the same group which owns the device containing it.
owner
Allows a user to mount a filesystem if the user owns the device containing it.
suid and nosuid
Allow, or not, SETUID and SETGID bits to take effect.
ro and rw
Mount a filesystem as read-only or writable.
remount
This will attempt to remount an already mounted filesystem. This is not used on /etc/fstab, but as a parameter to mount -o. For example, to remount the already mounted partition /dev/sdb1 as read-only, you could use the command mount -o remount,ro /dev/sdb1. When remounting, you do not need to specify the filesystem type, only the device name or the mount point.
sync and async
Whether to do all I/O operations to the filesystem synchronously or asynchronously. async is usually the default. The manual page for mount warns that using sync on media with a limited number of write cycles (like flash drives or memory cards) may shorten the life span of the device.
# list actual mount partitions
lsblk --fs

# create partition size 500M
fsdisk /dev/sda
n
p
1
2048
+500M

# build a Linux filesystem ext4 with label FS_EXT4
mkfs.ext4 -L "FS_EXT4" /dev/sda1

# create mount point
mkdir /mnt/fs_ext4

#edit /etc/fstab with mount options
# <file sys> <mount point> <type> <options> <dump> <pass>
/dev/sda1       /mnt/fs_ext        ext4        defaults        0        2

# mount filesystem
mount -a
# edit /etc/fstab with mount options
# <file sys> <mount point> <type> <options> <dump> <pass>
/dev/sda1       /mnt/fs_ext4        ext4        defaults,user        0        2

# mount filesystem
mount /mnt/fs_ext4
# set owner for vagrant
chown vagrant /dev/sda1
ls -l /dev/sda1

# edit /etc/fstab with mount options
# <file sys> <mount point> <type> <options> <dump> <pass>
/dev/sda1       /mnt/fs_ext4        ext4        defaults,owner        0        2

# mount filesystem
mount /mnt/fs_ext4
# list actual mount partitions
lsblk --fs

# edit /etc/fstab with mount options
# <file sys> <mount point> <type> <options> <dump> <pass>
/dev/sda1       /mnt/fs_ext4        ext4        defaults,uid=silvestrini        0        2

# mount filesystem
mount /mnt/fs_ext4
# create partition of type swap with fdisk
fdisk /dev/sdb

# format partition of type swap filesystem
mkswap -L Swap /dev/sdb1

#set permission
chmod 600 /dev/sdb1

# enable swap partition
swapon /dev/sdb1

# enable swap partition persistent after boot
# edit /etc/fstab with mount options
# <file sys> <mount point> <type> <options> <dump> <pass>
/dev/sdb1       swap    swap    defaults        0       0
# alocate file for swap with dd or fallocate
#with dd
dd if=/dev/zero of=/swapfile bs=1024 count=1000
#with falocate
fallocate -l 2G /swapfile

# format partition of type swap filesystem
mkswap /swapfile

#set permission
chmod 600 /swapfile

# enable swap partition
swapon /swapfile

# enable swap partition persistent after boot
# edit /etc/fstab with mount options
# <file sys> <mount point> <type> <options> <dump> <pass>
/swapfile      swap    swap    defaults        0       0
# show all mounted partitions
mount

#show specific mounted filesystem
mount -t ext4

# mount all partitions with auto in /etc/fstab
mount -a


# mount specific partition in fstab
mount /dev/sda1
mount /mnt/share

# mount specific partition
mount /dev/sda1 /mnt/mount_point
mount -t xfs /dev/sdb1 /mnt/fs_xfs
mount -o ro,user,auto,exec /dev/sdc1 /mnt/share

# remount partition with rw
mount -o remount,rw /
mount -o remount,rw /dev/sda1 /

# remount partition with ro
mount -o remount,ro /
mount -o remount,ro /dev/sda1 /# umount all partitions with auto in /etc/fstab
umount -a
#umount specific partition
umount /mnt/test# mount filesystem ext4
#create dir
mkdir /mnt/myfiles
#create unit
cd /etc/systemd/system
vim mnt-myfiles.mount
[Unit]
Description=Mount Point ext4
[Mount]
What=/dev/sdb1
Where=/mnt/myfiles
Type=ext4
Options=defaults
[Install]
WantedBy=graphical.target
#reload daemon
systemctl daemon-reload
#mount point
systemctl start mnt-myfiles.mount
#enable mount in boot
systemctl enable mnt-myfiles.mount
#list all block devices atributes
blkid#list blocks
lsblk
#list filesystems
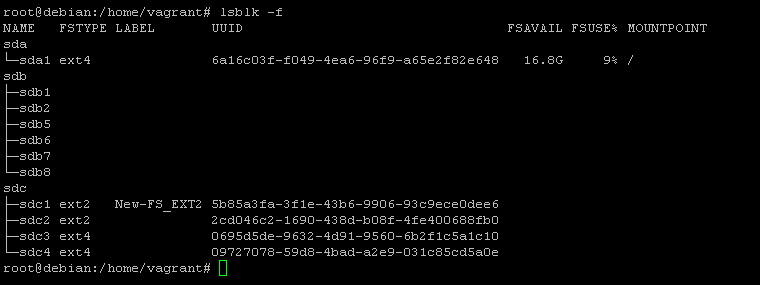
lsblk -f
lsblk -f /dev/sdb
lsblk -f /dev/sdb1#list label of partition
e2label /dev/sda1findfs UUID=F29E-358F
findfs LABEL=FS_VFAT# list all mounted points
findmnt# force sync of cache files
sync# enable swap partition\file
swapon /dev/sda2
swapon /myswapfile
# list swap partition/file
swapon# disable swap partition\file
swapoff/dev/sda2
swapoff /myswapfile#formart partition\file for swap
mkswap -L Swap /dev/sdb1
mkswap /myswap*Weight: 3
Description:
Candidates should be able to properly maintain a Linux filesystem using system utilities.
This objective includes manipulating standard filesystems and monitoring SMART devices.
Key Knowledge Areas:
Tools and utilities to manipulate and ext2, ext3 and ext4 Tools and utilities to perform basic Btrfs operations, including subvolumes and snapshots Tools and utilities to manipulate XFS Awareness of ZFS
mkfs (mkfs.*)
mkswap
fsck (fsck.*)
tune2fs, dumpe2fs and debugfs
btrfs, btrfs-convert
xfs_info, xfs_check, xfs_repair, xfsdump and xfsrestore
smartd, smartctl
#check if is suported
cat /proc/filesystems | grep btrfs

#enable kerbel module for brtfs
modprobe btrfs

#install btrfs tools
apt install -y btrfsmaintenance
apt install -y btrfs-progs

#show btrfs partitions
btrfs filesystem show

#create a subvolume
btrfs subvolume create /mnt/btrfs01/subvolume01
btrfs subvolume create /mnt/btrfs01/subvolume01/subvolume001

#list all subvolumes in partition
btrfs subvolume list /mnt/btrfs01
btrfs subvolume list -t /mnt/btrfs01

#show subvolumes information
btrfs subvolume show /mnt/btrfs01/subvolume01

#mount subvolumes
mount -o subvol=subvolume01 /dev/sdc1  /mnt/mysubvolume01

#create volume snapshot
btrfs subvolume snapshot /mnt/mysubvolume01 /mnt/btrfs01/subvolume01/snapshot-subvolume01

#create raid 1 partition
mkfs.btrfs -d raid1 -f /dev/sda1 /dev/sdc1

#convert ext4 filesystem to btrfs
btrfs-convert /dev/sdb1#install xfs filesystem
apt-get install -y xfsprogs
apt-get install -y xfsdump
#list partition infos
xfs_info /dev/sda1
#check and repair filesystem
xfs_repair /dev/sda1
#xfsdump - generate full backup
xfsdump -l 0 -f /dev/device /path/to/filesystem
#restore xfs filesystem
xfsrestore -f /dev/sdc -S session-ID /path/to/destinationmke2fs supports a wide range of command line parameters and options. Here are some of the most significant ones. All of them also apply to mkfs.ext2, mkfs.ext3 and mkfs.ext4:
-b SIZE Sets the size of the data blocks in the device to SIZE, which can be 1024, 2048 or 4096 bytes per block.
-c Checks the target device for bad blocks before creating the filesystem. You can run a thorough, but much slower check by passing this parameter twice, as in mkfs.ext4 -c -c TARGET.
-d DIRECTORY Copies the contents of the specified directory to the root of the new filesystem. Useful if you need to “pre-populate” the disk with a predefined set of files.
-F Danger, Will Robinson! This option will force mke2fs to create a filesystem, even if the other options passed to it or the target are dangerous or make no sense at all. If specified twice (as in -F -F) it can even be used to create a filesystem on a device which is mounted or in use,which is a very, very bad thing to do.
-L VOLUME_LABEL Will set the volume label to the one specified in VOLUME_LABEL. This label must be at most 16 characters long.
-n This is a truly useful option that simulates the creation of the filesystem, and displays what would be done if executed without the n option. Think of it as a “trial” mode. Good to check things out before actually committing any changes to disk.
-q Quiet mode. mke2fs will run normally, but will not produce any output to the terminal. Useful when running mke2fs from a script.
-U ID This will set the UUID (Universally Unique Identifier) of a partition to the value specified as ID.UUIDs are 128 bit numbers in hexadecimal notation that serve to uniquely identify a partition to the operating system. This number is specified as a 32-digit string in the format 8-4-4-4-12,meaning 8 digits, hyphen, 4 digits, hyphen, 4 digits, hyphen, 4 digits, hyphen, 12 digits, like D249E380-7719-45A1-813C-35186883987E. Instead of an ID you can also specify parameters like clearto clear the filesystem UUID, random, to use a randomly generated UUID, or time to create a time-based UUID.
-V Verbose mode, prints much more information during operation than usual. Useful for debugging purposes.
#sintaxe for mkfs
mkfs.TYPE TARGET
mke2fs -t TYPE TARGET

#Example ext2
mkfs.ext2 /dev/sdc2
mke2fs -t ext2 /dev/sdc2

#Example ext4
mkfs.ext4 /dev/sdc3
mke2fs -t ext4 /dev/sdc3

#Exampple create filesystem, check blocks and copy file in ~/ to new block
mkfs.ext4 -c -d ~/ /dev/sdc3

#Exampple create filesystem ext3 with size block 4096
mkfs.ext4 -b 4096 /dev/sdc4

#Exampple create filesystem ext3 and define label
mkfs.ext2 -L "New-FS_EXT2" /dev/sdc1
Filesystem XFS - mkfs.xfs
mke2fs supports a wide range of command line parameters and options. Here are some of the most significant ones. All of them also apply to mkfs.ext2, mkfs.ext3 and mkfs.ext4:
Package in debian xfsprogs - Utilities for managing the XFS filesystem
-b SIZE Sets the size of the data blocks in the device to SIZE, which can be 1024, 2048 or 4096 bytes per block.
-c Checks the target device for bad blocks before creating the filesystem. You can run a thorough, but much slower check by passing this parameter twice, as in mkfs.ext4 -c -c TARGET.
-d DIRECTORY Copies the contents of the specified directory to the root of the new filesystem. Useful if you need to “pre-populate” the disk with a predefined set of files.
-F Danger, Will Robinson! This option will force mke2fs to create a filesystem, even if the other options passed to it or the target are dangerous or make no sense at all. If specified twice (as in -F -F) it can even be used to create a filesystem on a device which is mounted or in use, which is a very, very bad thing to do.
-L VOLUME_LABEL Will set the volume label to the one specified in VOLUME_LABEL. This label must be at most 16 characters long.
-n This is a truly useful option that simulates the creation of the filesystem, and displays what would be done if executed without the n option. Think of it as a “trial” mode. Good to check things out before actually committing any changes to disk.
-q Quiet mode. mke2fs will run normally, but will not produce any output to the terminal. Useful when running mke2fs from a script.
-U ID This will set the UUID (Universally Unique Identifier) of a partition to the value specified as ID. UUIDs are 128 bit numbers in hexadecimal notation that serve to uniquely identify a partition to the operating system. This number is specified as a 32-digit string in the format 8-4-4-4-12, meaning 8 digits, hyphen, 4 digits, hyphen, 4 digits, hyphen, 4 digits, hyphen, 12 digits, like D249E380-7719-45A1-813C-35186883987E. Instead of an ID you can also specify parameters like clear to clear the filesystem UUID, random, to use a randomly generated UUID, or time to create a time-based UUID.
-V Verbose mode, prints much more information during operation than usual. Useful for debugging purposes.
#sintaxe for mkfs.xfs
mkfs.xfs TARGET

#Example create xfs filesystem
mkfs.xfs -L "New-FS-XFS" /dev/sdb1
FAT Filesystem - mkfs.fat
Package in Debian: dosfstools utilities for making and checking MS-DOS FAT filesystems
-c Checks the target device for bad blocks before creating the filesystem.
-C FILENAME BLOCK_COUNT Will create the file specified in FILENAME and then create a FAT filesystem inside it, effectively creating an empty “disk image”, that can be later written to a device using a utility such as dd or mounted as a loopback device. When using this option, the number of blocks in the filesystem (BLOCK_COUNT) must be specified after the device name.
-F SIZE Selects the size of the FAT (File Allocation Table), between 12, 16 or 32, i.e., between FAT12, FAT16 or FAT32. If not specified, mkfs.fat will select the appropriate option based on the filesystem size.
-n NAME Sets the volume label, or name, for the filesystem. This can be up to 11 characters long, and the default is no name.
-v Verbose mode. Prints much more information than usual, useful for debugging.
#Example create fat filesystem
mkfs.fat -n "New-FS-FAT" /dev/sdb6
exFAT Filesystem
Package in Debian exfat-utils utilities to create, check, label and dump exFAT filesystem
-i VOL_ID Sets the Volume ID to the value specified in VOL_ID. This is a 32-Bit hexadecimal number. If not defined, an ID based on the current time is set.
-n NAME Sets the volume label, or name. This can have up to 15 characters, and the default is no name.
-p SECTOR Specifies the first sector of the first partition on the disk. This is an optional value, and the default is zero.
-s SECTORS Defines the number of physical sectors per cluster of allocation. This must be a power of two, like 1, 2, 4, 8, and so on.
#Example create exFAT filesystem
mkfs.exfat -n "New-FS-exFAT"
Btrfs Filesystem
Package in Debian btrfs-progs
#Example create Brtfs filesystem
mkfs.btrfs -L "New-FS-BTRFS" /dev/sdb5

#create subvolume
btrfs subvolume create /mnt/disk/BKP
# show partition infos
dumpe2fs /dev/sdb1

# show partition infos
dumpe2fs -h /dev/sdb1

# show bad blocks
dumpe2fs -b /dev/sdb1#show all parameters in specific partition
tune2fs -l /dev/sdc1
#convert ext2 to ext3(add journal resource)
tune2fs -j /dev/sdc1
#alter partition label
tune2fs -L New-FS-EXT3 /dev/sdc1
#set Maximum mount count
tune2fs -c10 /dev/sdb1
#set check interval (for execute fsck in 30 days)
tune2fs -i30d /dev/sdb1
#set Reserved block count(for 2%)
tune2fs -m2 /dev/sdb1
#set error-behavior
tune2fs -e remount-ro /dev/nvme0n1p1
tune2fs -e panic /dev/sdb#example get inode infos
debugfs -R 'stat <5>' /dev/sdb1#get bad blocks
badblock /dev/sdb1#check all filesystem mounted
fsck -A
#check file system
fsck /dev/sda1
#force check file system
fsck -f /dev/sda1
fsck -f -t ext4 /dev/sdb1
fsck.xfs -f /dev/sdc1
#check file system and fix it
fsck -f -y /dev/sdb1
#check file system, but not fix it
fsck -n /dev/sdb1
fsck -f -n /dev/sdb1
#check badblocks file system
fsck -f -c /dev/sdb1e2fsck /dev/sdb1#get status\infos about disks
smartctl -i /dev/sda
smartctl -a /dev/sdb
#check health of disk
smartctl -H /dev/sdaWeight: 2
Description:
Candidates should be able to configure automount filesystems using AutoFS.
This objective includes configuring automount for network and device filesystems.
Also included is creating filesystems for devices such as CD-ROMs and a basic feature knowledge of encrypted filesystems.
Key Knowledge Areas:
autofs configuration files Understanding of automount units UDF and ISO9660 tools and utilities Awareness of other CD-ROM filesystems (HFS) Awareness of CD-ROM filesystem extensions (Joliet, Rock Ridge, El Torito) Basic feature knowledge of data encryption (dm-crypt / LUKS)
/etc/auto.master
/etc/auto.[dir]
mkisofs
cryptsetup
#install package
apt-get install -y autofs

#config file \ master map
/etc/auto.master#edit file /etc/auto.master
vim /etc/auto.master
/mnt/myautomount /etc/auto.myautomount --timeout 30
#create file /etc/auto.myautomount and set content
myautomount -fstype=auto :/dev/sdXY
#restart service autofs
systemctl restart autofs.service
#validate automount
cd /mnt/myautomount
df -h /dev/sdXY#create unit for mount
#/etc/systemd/system/mnt-automount.mount
[Unit]
Description= Create Mount With Systemd
[Mount]
What=/dev/sdb1
Where=/mnt/automount
[Install]
WantedBy=multi-user.target
#create unit automount
#/etc/systemd/system/mnt-automount.automount
[Unit]
Description= Create Automount With Systemd
[Automount]
Where=/mnt/automount
TimeoutIdleSec=15
[Install]
WantedBy=multi-user.target
#reload systemctl
systemctl daemon-reload
#start unit
systemctl start mnt-automount.automount
#check status unit
systemctl status mnt-automount.automount#create a iso file with specific folder
mkisofs -o my-home.iso /home/vagrant
#create a iso file with multiples folder
mkisofs -o my-image.iso -graft-points dir1=/home/vagrant dir2=/etc/apt
#create a iso file with Joliet extencion(indicate for Windows isos)
mkisofs -J -o image-joliet.iso /home/vagrant
#create a iso file with Rock Ridge extencion
mkisofs -R -o image-rock.iso /home/vagrant
#create a iso file with UDF filesystem(suported by linux, windows, mac)
mkisofs -udf -o image-rock.iso /home/vagrant#record cdrom to iso file
cdrecord /dev/sr0 debina-image.iso#encrypt partition with LUKS method
cryptsetup -v --verify-passphrase luksFormat /dev/sdb1
#open partition LUKS
cryptsetup open --type luks /dev/sdb1 security-partition
#format partition for mount
mkfs.ext4 -L "SEC-PARTITION" /dev/mapper/security-partition
#show partition status
cryptsetup status security-partition
dmsetup ls
#dump the header information of a LUKS device
cryptsetup luksDump /dev/sdb1
#manual mount security partition
mount /dev/mapper/security-partition /mnt/security-partition
#mount security partition in boot
##create password file for mount
vim /luks-pass-01
YOUR_CRYPTSETUP_PASSWORD_HERE
##edit crypttab
vim /etc/crypttab
# <target name> <source device> <key file> <options>
security-partition /dev/sdb1 /luks-pass-01 luks
##edit fstab
vim /etc/fstab
# <file sys> <mount point> <type> <options> <dump> <pass>
/dev/mapper/security-partition /mnt/security-partition auto defaults 0 0
## add key(limited to 8 keys\password per partition)
cryptsetup luksAddKey /dev/sdb1 /luks-pass-01
##reboot
reboot
#close partition LUKS
umount /dev/mapper/security-partition
cryptsetup close security-partitionWeight: 3
Description:
Candidates should be able to configure and implement software RAID. This objective includes
using and configuring RAID 0, 1 and 5.
Key Knowledge Areas:
Software raid configuration files and utilities
mdadm.conf
mdadm
/proc/mdstat
partition type 0xFD

#create raid0 device
mdadm -v --create /dev/md0 -l0 -n2 /dev/sda1 /dev/sdb1

#format raid0 device
mkfs.ext4 -L "FS_RAID0" /dev/md0

#mount raid0 device
mkdir /mnt/raid0
mount /dev/md0 /mnt/raid0#create raid1 device
mdadm -v --create /dev/md1 -l1 -n2 /dev/sda2 /dev/sdb2
# format raid1 device
mkfs.ext4 -L "FS_RAID1" /dev/md1
# mount raid0 device
mkdir /mnt/raid1
mount /dev/md1 /mnt/raid1#create raid5 device
mdadm -v --create /dev/md0 -l5 -n3 /dev/sda1 /dev/sda2 /dev/sdb1
# format raid5 device
mkfs.ext4 -L "FS_RAID5" /dev/md0
# mount raid5 device
mkdir /mnt/raid5
mount /dev/md0 /mnt/raid5#create raid0
mdadm -v --create /dev/md0 -l0 -n2 /dev/sda1 /dev/sdb1
#create raid1
mdadm -v --create /dev/md0 -l1 -n2 /dev/sda1 /dev/sdb1
#create raid5
mdadm -v --create /dev/md0 -l5 -n5 /dev/sda1 /dev/sdb1 /dev/sdc1
#list raid details
mdadm --detail /dev/md0
cat /proc/mdstat
#up all raid devices
mdadm --assemble --scan
#update file /etc/mdadm.conf or /etc/mdadm/mdadm.conf
mdadm --assemble --scan >> /etc/mdadm/mdadm.conf
#simulate fail in raid1 device
mdadm --manage --fail /dev/md1 /dev/sdb2
#stop raidN device
mdadm --stop /dev/md1
#start raidN device
mdadm --assemble --run /dev/md1
#examine a specific device in raid
mdadm --examine /dev/sda1
#remove specif raid device
mdadm /dev/md1 -r /dev/sdb2
#remove all raid device
mdadm --stop /dev/md1
mdadm --remove /dev/md1
#remove entries in file mdadm.conf
mdadm --zero-superblock /dev/sda2
mdadm --zero-superblock /dev/sdb2
# add raid device
mdadm /dev/md1 -a /dev/sdb2Weight: 2
Description:
Candidates should be able to configure kernel options to support various drives.
This objective includes software tools to view & modify hard disk settings including iSCSI devices.
Key Knowledge Areas:
Tools and utilities to configure DMA for IDE devices including ATAPI and SATA Tools and utilities to configure Solid State Drives including AHCI and NVMe Tools and utilities to manipulate or analyse system resources (e.g. interrupts) Awareness of sdparm command and its uses Tools and utilities for iSCSI Awareness of SAN, including relevant protocols (AoE, FCoE)
hdparm, sdparm
nvme
tune2fs
fstrim
sysctl
/dev/hd*, /dev/sd*, /dev/nvme*
iscsiadm, scsi_id, iscsid and iscsid.conf
WWID, WWN, LUN numbers


#Update system
apt update && sudo apt upgrade

#install targetcli-fb
apt install gsettings-desktop-schemas
apt -y install targetcli-fb -y#create directory for mount device
mkdir /var/lib/iscsi_disks
#mount device
mount -t ext4 /dev/sda /var/lib/iscsi_disks/
#set fstab for persistent
/dev/sda /var/lib/iscsi_disks/ auto defaults 0 0#enter admin console
targetcli
#changing the directory
cd backstores/fileio
#create a disk-image with the name [disk01]
create disk01 /var/lib/iscsi_disks/disk01.img 9GB
#target syntax
#[ iqn.(year)-(month).(reverse of domain name):(any name you like) ]
#create target
cd /iscsi
create iqn.2022-08.local:debian-11.target01
#set network portals
cd iqn.2022-08.local:debian-11.target01/tpg1/portals/
delete 0.0.0.0 3260
create 192.168.0.134#create LUN
cd iqn.2022-08.local:debian-11.target01/tpg1/luns
create /backstores/fileio/disk01
#create initiator node
cd ../acls
create iqn.2022-08.local:node01.initiator01
#set UserID and Password for authentication to the created iSCsi target
cd iqn.2022-08.local:node01.initiator01
set auth userid=username
set auth password=Password01
exit
#view the details of the iSCSI target listening port
ss -napt | grep 3260systemctl start rtslib-fb-targetctl
systemctl enable rtslib-fb-targetctlufw allow 3260/tcpapt -y install open-iscsi#edit the Initiator Name
vim /etc/iscsi/initiatorname.iscsi
iqn.2022-08.local:node01.initiator01
#enable CHAP authentication
vim /etc/iscsi/iscsid.conf
node.session.auth.authmethod = CHAP#edit the file /etc/iscsi/iscsid.conf
vim /etc/iscsi/iscsid.conf
## Set the CHAP username and password. ##
node.session.auth.username = username
node.session.auth.password = Password01
#restart open-iscsi
systemctl restart iscsid open-iscsiiscsiadm -m discovery -t sendtargets -p 192.168.0.134
#result this command is:
# 192.168.0.134:3260,1 iqn.2022-08.local:debian-11.target01
#confirm the status of the discovery
iscsiadm -m node -o show#login in target
iscsiadm -m node --login
#confirm the established session
iscsiadm -m session -o show
#list new device
fdisk -l
lsblk -f
df -h#show infos about device
hdparm /dev/hda
hdparm /dev/sda
#show identification of device
hdparm -i /dev/sda
#measure buffered disk reads
hdparm -t /dev/sda
#measure cached reads
hdparm -T /dev/sda
#get\set mda
hdparm -d1 /dev/hda#show infos scsi\sata devices
sdparm /dev/sda
sdparm -a /dev/sda#list all nvme devices#execute trim in all ssd mount point
fstrim -a#discover available targets from a discovery portals
iscsiadm -m discovery -t sendtargets -p ipaddress
#login to all targets
iscsiadm -m node -l
#Log into a specific target:
iscsiadm -m node -T targetname -p ipaddress -l
#Log out of all targets:
iscsiadm -m node -u
#Log out of a specific target:
iscsiadm -m node -T targetname -p ipaddress -u
#Display information about a target:
iscsiadm -m node -T targetname -p ipaddress
#Display statistics of a target:
iscsiadm -m node -s -T targetname -p ipaddress
#Display a list of all current sessions logged in:
iscsiadm -m session
iscsiadm -m session -P3
#View iSCSI database regarding discovery:
iscsiadm -m discovery -o show
#View iSCSI database regarding targets to login to:
iscsiadm -m node -o show
#View iSCSI database regarding sessions logged in to:
iscsiadm -m session -o show
#When you expand the volume or disk, you might need to rescan. So the below command will help:
iscsiadm -m node -p ipaddress --rescan#show status of iscsi target configuration
tgt-admin --showWeight: 3
Description:
Candidates should be able to create and remove logical volumes, volume groups, and physical volumes.
This objective includes snapshots and resizing logical volumes.
Key Knowledge Areas:
Tools in the /dev/graft suite Resizing, renaming, creating, and removing logical volumes, volume groups, and physical volumes Creating and maintaining snapshots Activating volume groups
/sbin/pv* /sbin/lv* /sbin/vg* mount /dev/mapper/ lvm.conf


fdisk /dev/sdX
t
[1..N]#partition number her
8e #partition type for LVM
w#syntaxe
pvcreate /dev/PARTITION
#Example
pvcreate /dev/sda1
pvs
pvdisplay

#syntaxe
vgcreate VG_new PV

#Example (-s= PE size in MiB)
vgcreate group1 -s2 /dev/sda1 /dev/sda2 /dev/sdb1vgs
vgdisplay

vgchange -a y group1lvcreate -L5G group1 -n lv_test1lvs
lvdisplay
#Format partition
mkfs.ext4 -L FS_LV_TEST1 /dev/mapper/group1-lv_test1
mkfs.btrfs -L FS_LV_TEST2 /dev/mapper/group1-lv_test2

#Mount partition
mkdir /mnt/lv_test1 /mnt/lv_test2
mount /dev/group1/lv_test1 /mnt/lv_test1
mount /dev/group1/lv_test2 /mnt/lv_test2
df -hT
pvremove /dev/sda1vgremove group01lvremove /dev/group01/lv_test01vgextend group01 /dev/sda2#extend lv
lvextend -L9G /dev/group01/lv_test01
#resize fs
e2fsck -f /dev/group01/lv_test01
resize2fs /dev/group01/lv_test01#umount fs
umount /dev/group01/lv_test01
#reduce fs
resize2fs /dev/group01/lv_test01 5G
#mount fs
mount /dev/group01/lv_test01 /mnt/lv_test01
#reduce lv
lvreduce -L5G /dev/group01/lv_test01#remove pv
vgreduce group01 /dev/sdb2vgrename group01 vg_primarylvrename /dev/vg_primary/lv_test1 /dev/vg_primary/lv_applvcreate -L1G -s -n test-snapshot /dev/vg_primary/lv_appWeight: 3
Description:
Candidates should be able to configure a network device to be able to connect to a local,
wired or wireless, and a wide-area network. This objective includes being able to communicate between
various subnets within a single network including both IPv4 and IPv6 networks.
Key Knowledge Areas:
Utilities to configure and manipulate ethernet network interfaces Configuring basic access to wireless networks
ip ifconfig route arp iw iwconfig iwlist

#show network configurations
ifconfig
ifconfig -a
ifconfig eth0

#down interface
ifconfig eth0 down

#up interface
ifconfig eth0 up

#set ip for interface
ifconfig eth0 10.0.0.30 netmask 255.255.255.0
ifconfig eth0:0 192.168.0.160 netmask 255.255.255.0 up
ifconfig eth0 add 172.24.24.20 netmask 255.255.255.0

#set MAC for interface
ifconfig eth0 hw ether 08:08:08:08:08:08#show routes
route -n
route
# add route
route add -net 172.24.24.0/24 gw 192.168.0.1
route add -net 172.24.24.0/24 gw 192.168.0.1 eth1
route add -net 172.24.20.0 netmask 255.255.255.0 gw 192.168.0.2
route add default gw 192.168.0.1
#remove route
route del -net 172.24.24.0/24
route del default#list the interface links available for configuration
ip link
ip link show eth1
#list interfaces available
ip a
ip addr
ip address
ip addr show
ip addr show eth1
#disable or enable an interface.
ip link set dev eth1 down
ip link set dev eth1 up
#configure interface
ip addr add 192.168.5.5/24 dev enp0s8
ip addr add 172.16.15.16/16 dev eth1 label eth1:vlan_prod
ip addr add 2001:db8::10/64 dev enp0s8
#adjust an interface’s MTU
ip link set eth1 mtu 2000
#configure spanning tree options
ip link add link enp0s9 name enp0s9.50 type bridge priority 50
#viewing a routing table ipv4
ip route
#viewing a routing table ipv6
ip -6 route
# add ipv4 route
ip route add 192.168.1.0/24 dev eth0
#del ipv4 route
ip route del 192.168.1.0/24 dev eth0
# add ipv6 route
ip route add 2001:db8:1::/64 via 2001:db8::3
#del ipv6 route
ip route del 2001:db8:1::/64 via 2001:db8::3
# clear configs interface
ip addr flush eth0
# show arp table
ip neigh show
#show arp table
arp
arp -n

#remove arp entry
arp -d 192.168.0.133

# add arp entry
arp -s IP MAC
arp -f FILE_WITH_LIST_IP_MAC#debug mode
arpwatch -d#stop NetworkManager for this examples
systemctl stop NetworkManager
#show status wirelles network
ip link show
iw dev wlp2so link
#scan wirelles network
iw dev wlp2so scan
#up wirelles network
iw dev wlp2sop up#show status wirelles network
iwlist wlp0s2 scanning#show interface infos
iwconfig wlp2s0
#configure SSID
iwconfig wlp2s0 essi TPLINK
#configure password (without WPA)
iwconfig wlp2s0 key s:mypassword
#configure MAC
iwconfig wlp2s0 ap 52:54:00:12:35:02#configure password WPA Wirelles
wpa_passphrase MY-WIRELLES MYPASSWORD >/etc/wpa_supplicant.conf#connect in WPA Wirelles
wpa_supplicant -c /etc/wpa_supplicant.conf -B -d -i wlp2s0#set dynamic ip in interface
dhclient wlp2s0Weight: 4
Description:
Candidates should be able to configure a network device to implement various network authentication schemes.
This objective includes configuring a multi-homed network device and resolving communication problems.
Key Knowledge Areas:
Utilities to manipulate routing tables Utilities to configure and manipulate ethernet network interfaces Utilities to analyze the status of the network devices Utilities to monitor and analyze the TCP/IP traffic
ip
ifconfig
route
arp
ss
netstat
lsof
ping, ping6
nc
tcpdump
nmap

# add route
ip route add 172.32.16.0/24 via 192.168.1.111#flush configs in interface
ip addr flush eth0
#set ip 172.32.16.210
ip addr add 172.32.16.210/24 dev eth0
#Enable Ip forward
sysctl -w net.ipv4.ip_forward
#or
echo 1 > /proc/sys/net/ipv4/ip_forward#flush configs in interface
ip addr flush eth0
#set ip 172.32.16.210
ip addr add 172.32.16.220/24 dev eth0
#set route
ip route add 192.168.1.0/24 via 172.36.16.210#notebook<---->debian
ping 172.36.16.210
#notebook---->centos
ping 172.36.16.220
#simple icmp test ipv4
ping 192.168.0.100
ping -4 192.168.0.100

#simple icmp test ipv6
ping6 2804:431:e7c5:488e:a00:27ff:fe72:19a8/64

#send 3 icmp packages
ping -c3 192.168.0.1#traceroute with UDP package
traceroute 192.168.1.111
traceroute www.google.com
#traceroute with TCP package
traceroute -I 192.168.1.111
#traceroute with UDP package
traceroute -I 192.168.1.111#test connection
netcat 192.168.0.135 80
netcat -zv 192.168.0.135 80
#net connection range port
nc -zv 192.168.0.135 50-100
#open port to connect
nc -l -p 1234#list all connections
netstat
#viewing a routing table ipv4
netstat -r
#viewing a routing table ipv6
netstat -6r
#show listenning ports\sockets udp\tcp
netstat -lu
netstat -lt
netstat -lute
#only established connections
netstat -ute
#only numeric output
netstat -uten
#viewing Current Connections
netstat -tulnp
netstat -tulnp4
netstat -tuln6
#any processes are listening on TCP port 80
netstat -ln | grep ":80"
# find which process is listening on a port
netstat -lnp | grep ":22"
# show interfaces
netstat -i#show trafic of all interfaces
tcpdump
tcpdump -n
tcpdump -n -vvv
tcpdump -n -q
#show icmp packages
tcpdump -n icmp
tcpdump -n icmp -c10
tcpdump -n icmp -c10 -i eth1
#show packages by interface
tcpdump -n -i eth1
tcpdump -n icmp -i eth1
#output packages in file
tcpdump -n -c20 icmp -i eth1 -w tcpdum.pcap
tcpdump -n not port 80 and not port 443 -c 100 -w analise.pcap
#read package file
tcpdump -r tcpdum.pcap
#filter by host
tcpdump -n host www.lpi.org
tcpdump -n host 192.168.0.100 and port 22
tcpdump -n host 192.168.0.100 and not port 22
tcpdump -n host 192.168.0.100 or port 80
tcpdump -n src host www.lpi.org
tcpdump -n src host 192.168.0.100 and port 22
tcpdump -n dst host www.lpi.org
#filter by port
tcpdump -n port 80
tcpdump -n portrange 20-100
tcpdump -n src 80
tcpdump -n dst 80
#filter specifi network
tcpdump -n net 192.168.0.135#scan host
nmap 192.168.0.134
#scan network
nmap 192.168.0.134/24
nmap 192.168.0.134/24 -F
#scan port
nmap 192.168.0.134 -p 22
nmap 192.168.0.1/24 -p20-23,80,443
#scan and show operation system
nmap 192.168.0.100 -O
nmap 192.168.0.100 -O -F
#scan and get version of applications
nmap 192.168.0.134 -sVWeight: 4
Description:
Candidates should be able to identify and correct common network setup issues,
to include knowledge of locations for basic configuration files and commands.
Key Knowledge Areas:
Location and content of access restriction files Utilities to configure and manipulate ethernet network interfaces Utilities to manage routing tables Utilities to list network states. Utilities to gain information about the network configuration Methods of information about the recognized and used hardware devices System initialization files and their contents (SysV init process) Awareness of NetworkManager and its impact on network configuration
ip
ifconfig
route
ss
netstat
/etc/network/, /etc/sysconfig/network-scripts/
ping, ping6
traceroute, traceroute6
mtr
hostname
System log files such as /var/log/syslog, /var/log/messages and the systemd journal
dmesg
/etc/resolv.conf
/etc/hosts
/etc/hostname, /etc/HOSTNAME
/etc/hosts.allow, /etc/hosts.deny
Please, stop\disabled the NetworkManager service for set configurations in permanent mode!!!
systemctl stop networking#configuration directories
/etc/network
/etc/network/interfaces.d
#default configurations files
/etc/network/interfaces
#restart network service
systemctl restart networking#configuration directories
/etc/sysconfig/network-scripts
#defaults configurations files
/etc/sysconfig/network-scripts/ifcfg-INTERFACE_NAME
#gateway configuration
/etc/sysconfig/network
#restart network service
systemctl restart network
systemctl restart network-online-target#configuration directories
/etc/NetworkManager
#open gui configuration
nmtui
#NetworkManager client
nmcli
#show device infos
nmcli device show#show network traffic
mtr
#show network IPV4 or IPV6 traffic
mtr -4
mtr -6
#Use UDP datagrams instead of ICMP ECHO.
mtr -u
#Use TCP SYN packets instead of ICMP ECHO
mtr -T#show hostname
hostname
hostname -f
#show domain
hostname -d
#show ip
hostname -i
hostname -I#lookup example
host www.lpi.org
host lpi.org
host -a lpi.org
#find mx entries
host -t mx lpi.org
#find ns entries
host -t ns lpi.org#find A DNS entry
dig learning.lpi.org
dig learning.lpi.org @8.8.8.8
#find a specifi DNS entry type
dig -t mx lpi.org
dig -t AA lpi.org
dig -t SOA lpi.org
#print only output
dig +short lpi.org
#disabled extension EDNS cookies
dig +nocookie -t MX lpi.org
#looks up the A record for lpi.org and displays only the query and response
dig +noall +answer +question lpi.orgWeight: 2
Description:
Candidates should be able to build and install an executable program from source.
This objective includes being able to unpack a file of sources.
Key Knowledge Areas:
Unpack source code using common compression and archive utilities Understand basics of invoking make to compile programs Apply parameters to a configure script Know where sources are stored by default
/usr/src/
gunzip
gzip
bzip2
xz
tar
configure
make
uname
install
patch
# Archiving
tar -cf scripts.tar foo1.sh foo2.sh
tar -cvf scripts.tar scripts
tar -cf scripts.tar scripts/*
tar cfv tar-file.tar --wildcards bigfile[1-3]
#redirect file to specific folder
tar cvf arquive/logs.tar logs/
#view content
tar -tf scripts.tar
# extract
tar -xf scripts.tar
tar -xvf scripts.tar
# extract to specific folder
tar xvf logs.tar -C new-logs/
#update - Add new version for modify files.Not best practice!
tar -uvf scripts.tar scripts
#update best practice for update tar files
tar -cvf scripts.tar scripts
#compress \ descompress with gzip
tar -czvf scripts.tar.gz scripts
tar -xzvfp scripts.tar.gz
#compress \ descompress with bzip2
tar -cjvf scripts.tar.bz2 scripts
tar -xjvfp scripts.tar.bz2
#compress \ descompress with xz
tar -cJvf scripts.tar.xz scripts
tar -xJvfp scripts.tar.xz#compress
gzip -v scripts/script1.sh
gzip -v1 scripts/script1.sh
gzip -v9 scripts/script1.sh
gzip -c scripts/script1.sh > scripts/script1.gz
#descompress
gzip -dv picture1.jpg.gz
gunzip -v scripts/script1.gz
#list infos
gzip -l picture1.jpg.gz#compress
bzip2 -v scripts/script1.sh
bzip2 -v1 picture1.jpg
bzip2 -v9 picture1.jpg
#descompress
bunzip2 -v picture1.jpg.bz2
bzip2 -dv picture1.jpg.bz2#compress
xz script1.sh
xz -1 bigfile bigfile-xz1
xz -9 bigfile bigfile-xz9
#descompress
unxz picture1.xz
xz -d picture1.xz#Step 1: Download package(some package in internet)
#Example:
cd /usr/local/bin
wget http://links.twibright.com/download/links-2.0.tar.bz2
#Step 2: Extract files(tar or others unpacking daemons)
#Example:
tar xjvfp links-2.0.tar.bz2
#Step 3: Execute configure to configure
cd tar links-2.0
#default
./configure
# with params
./configure --prefix=/opt/test
#Step 4: Execute make to compile package
make
#Step 5: Execute make install to install package
make installThis example use links package.Alter string Keys for KEYS in default.c
#create patch file
cd /usr/local/bin/links-2.0
cp default.c new-default.c
vim new-default.c
#alter string Keys to KEYS and save file
diff -u default.c new-default.c > patch-links-keys
#Apply pacth file
patch < patch-links-keys
#Compile modifications
make
#Validate (see if string Keys have in Uppercase)
./links --helpThis example use links package.Alter string KEYS for Keys in default.c
#Remove pacth file
patch -R < patch-links-keys
#Compile modifications
makeWeight: 3
Description: Candidates should be able to use system tools to back up important system data.
Key Knowledge Areas:
Knowledge about directories that have to be include in backups Awareness of network backup solutions such as Amanda, Bacula, Bareos and BackupPC Knowledge of the benefits and drawbacks of tapes, CDR, disk or other backup media Perform partial and manual backups. Verify the integrity of backup files. Partially or fully restore backups.
/bin/sh
dd
tar
/dev/st*and /dev/nst*
mt
rsync
/dev/st*: The /dev/nst0 device is a non rewinding tape device
/dev/nst*: The /dev/st0 device is a rewinding tape device.
#create a simple backup in disk
tar -cvf backup.tar /etc
#create a simple backup in tape
tar -cvf /dev/st0 /home
tar -cvf /dev/nst0 /var
#create backup for home dir ann exclude ~/Downloads folder
tar zcvpf $HOME/backup-home-`date +%Y-%m-%d`.tgz --exclude=$HOME/Downloads --exclude=$HOME/backup-home*.tgz $HOME
#extract backup
tar -xvf backup.tar
#extract backup in tape
tar -xvf /dev/st0
#create a incremental backup
##create full backup
tar -cvf backup.tar -g control.txt /etc
##create some file for increment in backup
echo "some file 1" >/etc/file1
##create backup incremental 1
tar -cvf backup-incremental-01.tar -g control.txt /etc
##create some file for incrment in backup
cp /var/log/syslog /etc
##create backup incremental 2
tar -cvf backup-incremental-02.tar -g control.txt /etc
#check backups size of backups
ls -lth backup*#create simple backup
find /etc/*.conf | cpio -vo > backup.cpio
#create simple backup and compress
find /etc/*.conf |cpio -o | gzip -c > backup.cpio.gz
find /etc/*.conf |cpio -o | xz -c > backup.cpio.xz
find /etc/*.conf |cpio -o | bzip2 -c > backup.cpio.bz2
#extrac cpio backup file
cpio -ivdm < backup.cpio#create simple backup of partition
dd if=/dev/sdd1 of=backup.img
#restore partition
dd if=backup.img of=/dev/sdXY #(sdXY=[device][partition])#use scp for copy files
scp backup.tar vagrant@192.168.0.135:~/backups
scp -i ~/.ssh/id_ecdsa backup.tar vagrant@192.168.0.135:~/backups
#user tar and ssh for copy
tar cf - /etc | ssh vagrant@192.168.0.135 'cat > ~vagrant/backups/new-backup.tar'#create a backup file remotly
rsync -aruzv /etc vagrant@192.168.0.135:~/backups/rsync-debian-etc
#create a backup file remotly and delete files remote if not have in origin
rsync -aruzv --delete /etc vagrant@192.168.0.135:~/backups/rsync-debian-etc
#create a backup file remotly and use ssh for tranfer file
rsync -e ssh -aruzv /etc vagrant@192.168.0.135:~/backups/rsync-debian-etc#update index and packages
apt update -y && apt upgrade -y
#find package
apt-cache policy backuppc
#install package
apt install backuppcBackupPC uses different protocols to get backup data from devices being backed up:
- smb – used for backing up windows machines
- tar – used for backing up Linux/Unix/MacOSX systems
- rsync – used for backing up Linux/Unix/MacOSX systems. This can also be used to backup Windows systems.
In this tutorial we are going to configure BackupPC to use the rsync protocol as a backup method.
sed -i '/RsyncSshArgs/s/-l root/-l backuppc/' /etc/backuppc/config.pl
#install rsync in server and clients
apt install rsync -yhtpasswd /etc/backuppc/htpasswd backuppc
sed -i 's/local/all granted/' /etc/backuppc/apache.conf
systemctl restart backuppc apache2su backuppc
ssh-keygen -q -t ecdsa -b 521useradd -m backuppc
passwd backuppc
su backuppc
ssh-keygen -q -t ecdsa -b 521ssh-copy-id backuppc@192.168.0.135
#validate key
ssh -l backuppc 192.168.0.135 whoami#update sudoers in server and client server(login as root)
echo "backuppc ALL=NOPASSWD: /usr/bin/rsync" | sudo tee /etc/sudoers.d/backuppc
#To do this, login to client, edit the ssh authorized key file and add the line below
#before the ssh-rsa keyword.
from="backuppc_server_ip",no-agent-forwarding,no-port-forwarding,no-pty
#Replace the backuppc_server_ip with the IP address of the backuppc server.
vim /home/backuppc/.ssh/authorized_keys
from="192.168.0.138",no-agent-forwarding,no-port-forwarding,no-pty ecdsa-sha2-nistp521 AAAAE2VjZHNhLXNoYTItbmlzdHA1MjEAAAAIbmlzdHA1Mj
#Next, you can also configure ssh logins to backuppc user accounts on clients hosts from the BackupPC
#server only. This can be done by editing sshd_config file on the client and configuring as shown below;
sudo vim /etc/ssh/sshd_config
# Add the line below to SSHd configuration to allow login to the client as backuppc
#from the BackupPC server only.
Match Host 192.168.0.138
AllowUsers backuppc
#Reload SSH configurations
systemctl reload sshdhttp://backuppc_server_IP or hostname/backuppcWeight: 1
Description: Candidates should be able to notify the users about current issues related to the system.
Key Knowledge Areas:
Automate communication with users through logon messages Inform active users of system maintenance
/etc/issue
/etc/issue.net
/etc/motd
wall
/sbin/shutdown
systemctl
-
/etc/issue Message before login local
-
/etc/issue.net Message before login remotly
For enable in ssh, configure file /etc/ssh/sshd_config, key Banner.
Example: Banner /etc/issue.net -
/etc/motd Message after login local or remotly
#send message for all users
wall "Helo guys!!!"
#use file with messages
wall < wall-message.txt
cat message | wall
#use command
cat /etc/passwd | wall#reboot system
shutdown -r
shutdown -r now
#reboot without message for users
shutdown -r --no-wall
#reboot system with custom time and message
shutdown -r +7 "Reboot system in 7 minutes..."
#stop system, but not poweroff machine
shutdown --halt
#power off system
shutdown --poweroff