Usage
In the user settings there is a 'Face Recognition' panel where first of all each user must enable the analysis.

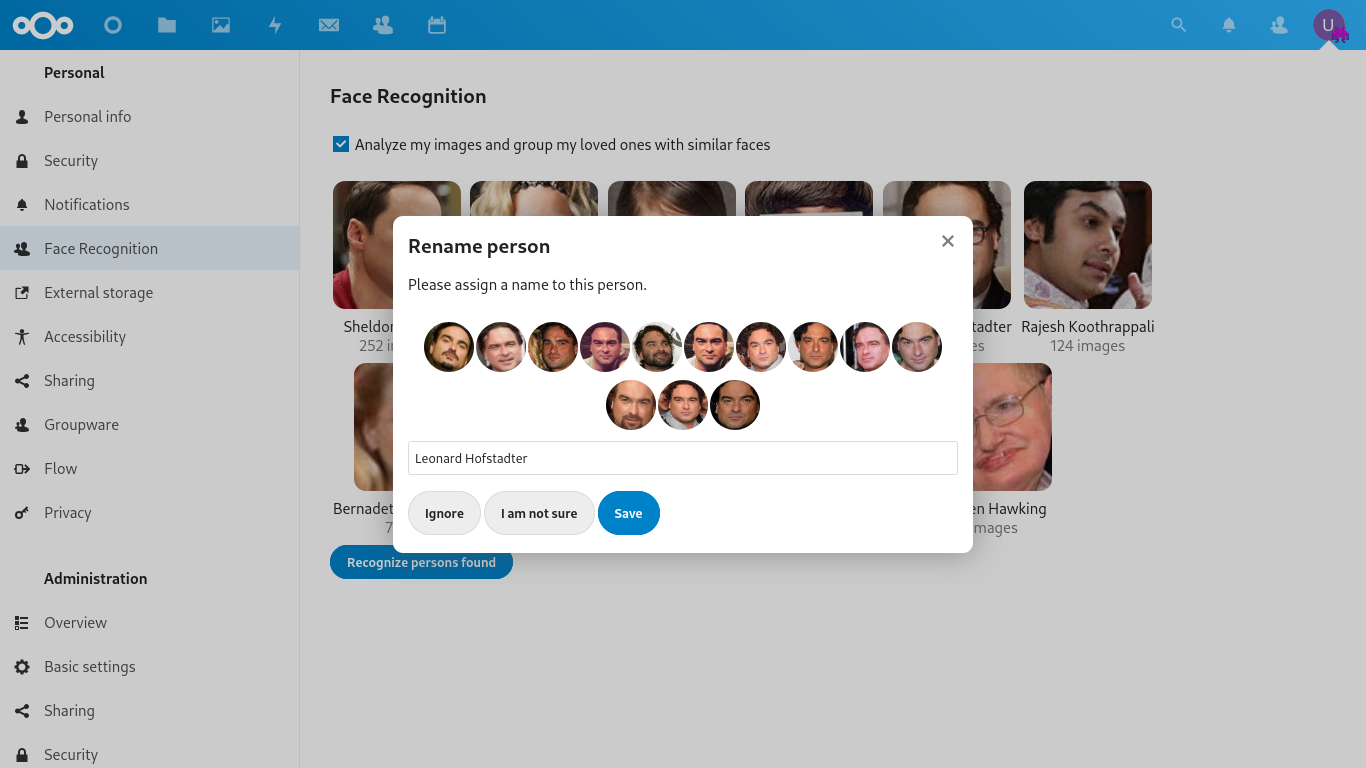
Once enabled, you will progressively see the discovery of your friends, and you can assign them names.
...and you can finally see all your loved ones.

By clicking on any of them, you will see all the photos in which it appears.

- Clicking on the pencil you can assign a new name.
- Clicking on the cross person icon, you can hide this person.
- Clicking on the file thumbnails, you will open the complete image.
In the file application (and also in the photo application) a Persons tab is added, where you will find your friends in each photo. You can rename them, see all the photos of each one, or correct when a person has the wrong name.

If you want to ignore specific folders, you can also disable the analysis with the same tab.

The application also respects the standard files .nomedia or .noimage in each folder that you want ignored. As soon as you put it and you run next analysis, FaceRecognition app will wipe any faces found in that folder and all subfolders of that folder and run clustering again. This will affect all images in root folder and all subfolders of root folder. If/when you want to start processing images from these folder again, simply remove that file and all images will be reprocessed again on next analysis
Unfortunately, you cannot skip/ignore individual images, we support only ignoring folders.