
- A Raspberry Pi Zero W with a working internet connexion, and Raspbian Lite installed.
- A Raspberry Pi Camera Module, activated in raspi-config.
- A case for the Pi Zero with a hole for the GPIO ports on the back, and another one on the front for the camera.
- (Optional) A buzzer module that works on 3.3 or 5V to plug on the GPIO ports.
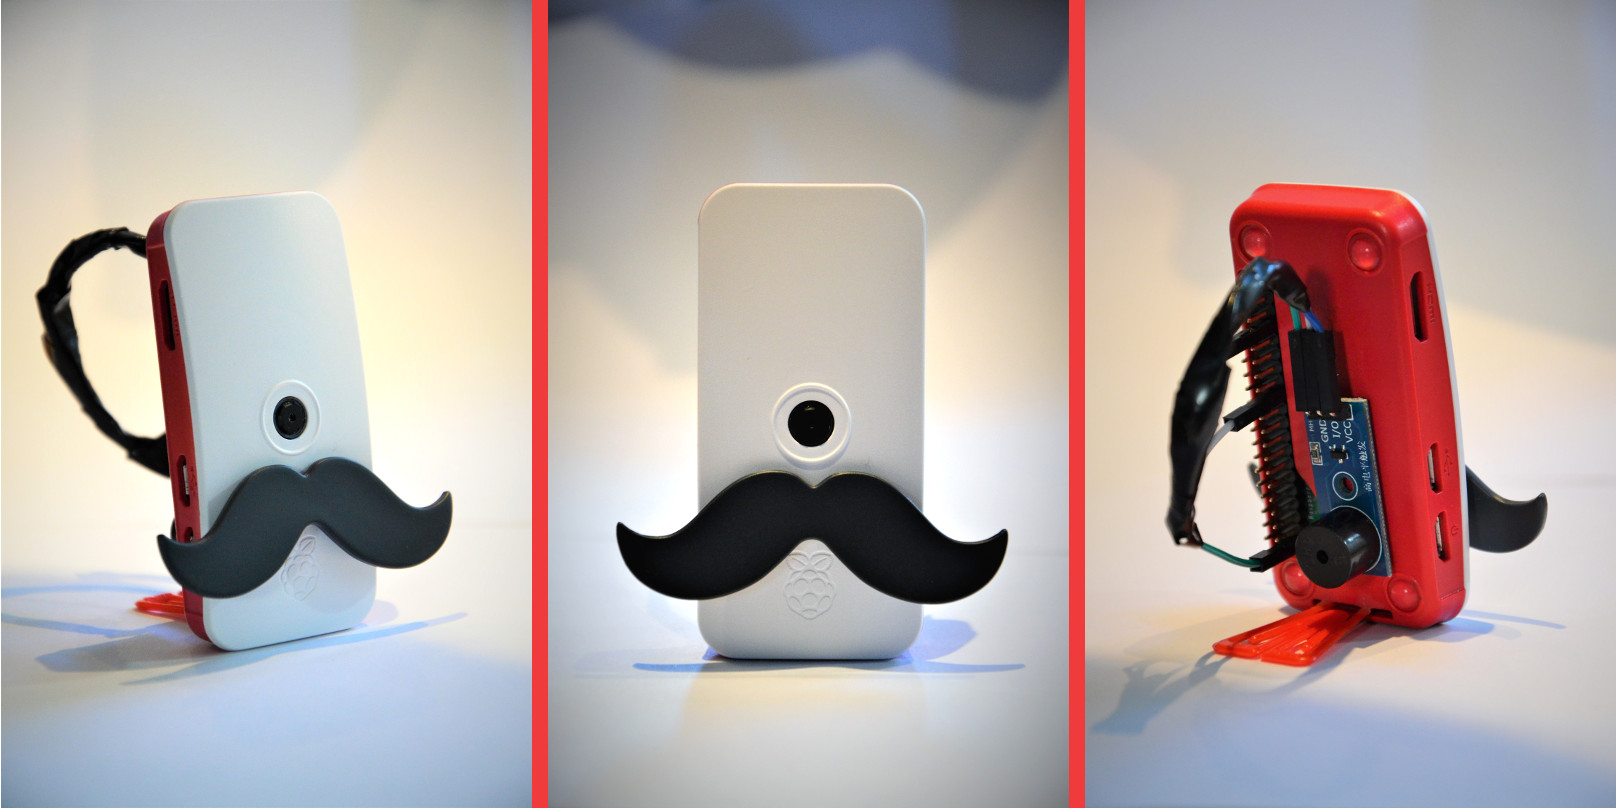
- (Recommended) A magnificent mustache to glue on Jean-Pierre.
The prototype looks like this, but you are encouraged to do far better ;-).
A camera module is not a barcode scanner : it is not made for this and will never be as precise for this specific task.
Moreover, this camera module has a fixed focus, and it's default setting might not fit with the distance you want to scan products from.
To solve this issue, you MIGHT want to change the camera's focus manually by twisting it a bit : Please be advised that using this technique could break your camera, do it at your own risks !
This documentation won't provide a tutorial for doing so as it depends on your camera module model, and there's different ways of doing it.
There is no reason to think it won't, but it hasn't been tested yet.
Jean-Pierre's software has been conceived for the Raspberry Pi Zero W and its limited powers : it should actually work better on a beefier model.
The buzzer module is optional : you can activate it and define on which GPIO pin is it plugged on with Jean-Pierre's configuration assistant.