Auto HUD is a web application to power a Heads Up Display mounted behind a 2-way mirror.
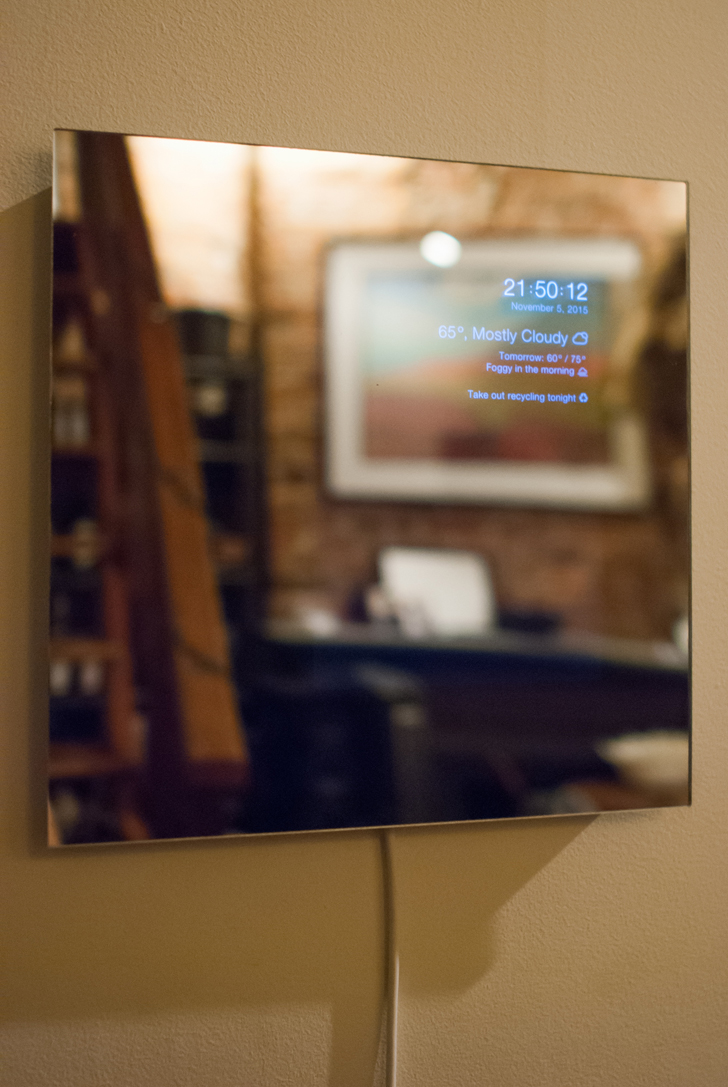
It's auto because bumping a version number on the server will trigger a
client-side refresh (so you don't have to go fetch your display from behind the
mirror and hit "refresh").
The server is written in python with flask, and the client is written in Sass and CoffeeScript, with Underscore templating.
This project was inspired by Hannah Mittelstaedt's lovely HomeMirror.
Current modules include:
- Time and date
- Weather overview for today and tomorrow
- Birthdays
- Chore reminders
- Subway status
- Music playing in the living room
- Notification if the server goes down
The backend is written in python, and uses flask as the server. Dependencies
are listed in requirements.txt. After cloning the project, you can
pip-install them into a fresh Python virtual environment. Assuming that you
already have pip, virtualenv, and virtualenvwrapper installed, run the
following in the project root:
mkvirtualenv auto-hud
workon auto-hud
pip install -r requirements.txt
Then, to start the server, run:
python auto-hud.py
Then visit localhost:5000. But you'll need to add a configuration file before it starts up properly. What configuration file? Glad you asked.
Auto HUD requires two configuration files in the project root to run,
localsettings.py and constants.py. Localsettings contains personal
settings, like api keys and birthdays, and therefore is not included in the
repository. Constants contains non-sensitive sitewide settings, like the order
of modules.
Here is an example localsettings.py file, which you can copy into your
project root. You'll also need to obtain a free api key for
the Dark Sky api, which provides weather data.
# change this number to trigger the client to reload. use if you want to hot
# swap the css, js, or templates
VERSION = "0.000"

# your info for forecast.io
FORECASTIO_API_KEY = "<your api key>"
FORECASTIO_LAT_LONG = "40.676423,-73.980488"

# add birthdays with a tuple of (month, day) as a key, and a list of people and
# their birthyears as the value. accepts multiple people on the same day. years
# are optional.
BIRTHDAYS = {
		(2, 10): [
				{
						'name': 'Edith Clarke',
						'year': 1883
				},
				{
						# Ms. Conwell's birthday is actually May 23, but I changed it here
						# to show how to have multiple people can share a birthday.
						'name': 'Esther M. Conwell'
				}
		],
		(12, 9): [
				{
						'name': 'Grace Hopper',
						'year': 1906
				}
		]
}

# Chores module configuration. Each day gets an array of chores, where each
# chore is a dictionary with the following values:
# - text (str, required): description of the chore that will display
# - icon (str, optional): if present, an icon span will print with this class
# - time_range (list, optional): a start hour (inclusive) and end hour
#     (exclusive) during which to display the chore
CHORES = {
    'Monday': [
    ],
    'Tuesday': [
        {
            'text': 'Take out recycling tonight',
            'icon': 'recycling',
	    'time_range': [8, 21]
        }
    ],
    'Wednesday': [
    ],
    'Thursday': [
        {
            'text': 'Take out recycling tonight',
            'icon': 'recycling'
        },
        {
            'text': 'Today is laundry day!',
            'icon': 'laundry'
        }
    ],
    'Friday': [
    ],
    'Saturday': [
    ],
    'Sunday': [
    ],
}If you'd like to modify the app, you may consider changing a definition in
constants.py. Some of the more interesting constants, and their defaults,
are:
# list your modules here. the order determines the display.
'sections': [
		'time',
		'weather',
		'birthdays',
		'chores',
		'subway',
		'noConnection',
],

# how frequently to update the weather
'weatherPollTime': 1000 * 60 * 5,

# there's also birthdaysPollTime, choresPollTime, and subwayPollTime

# indicate which subway lines you wish to display with a `1`
'subwayLinesToShow': {
		'7':    0,
		'123':  0,
		'456':  0,
		'ACE':  0,
		'BDFM': 1,
		'G':    0,
		'JZ':   0,
		'L':    0,
		'NQR':  1,
		'S':    0,
		'SIR':  0,
},

# what days you'd like to see subway status
'subwayDayRange': [
		'Monday',
		'Tuesday',
		'Wednesday',
		'Thursday',
		'Friday',
],

# a time range during which to display subway status
'subwayTimeRange': [5, 13],
Static files are compiled with gulp, a node.js based build system. Once you
have node and gulp installed, you can run npm install in the project root to
install the packages required to compile the frontend files. Then, run gulp
in the project root to watch for Sass and CoffeeScript changes.
To start the application when your computer boots, you can write a simple script to start flask using the correct python environment, and to log the output. Here's what I am using on OS X:
#!/bin/sh

/Users/mediabox/.virtualenvs/auto-hud/bin/python /Users/mediabox/web/auto-hud/auto-hud.py > /Users/mediabox/Library/Logs/auto-hud.log 2>&1
Then, create a plist file in ~/Library/LaunchAgents/ that runs the script:
<?xml version="1.0" encoding="UTF-8"?>
<!DOCTYPE plist PUBLIC "-//Apple//DTD PLIST 1.0//EN" "http://www.apple.com/DTDs/PropertyList-1.0.dtd">
<plist version="1.0">
<dict>
	<key>Disabled</key>
	<false/>
	<key>KeepAlive</key>
	<true/>
	<key>Label</key>
	<string>auto-hud starter</string>
	<key>Program</key>
	<string>/Users/mediabox/bin/start-auto-hud.sh</string>
	<key>RunAtLoad</key>
	<true/>
	<key>StandardErrorPath</key>
	<string>/tmp/auto-hud-starter.err</string>
	<key>StandardOutPath</key>
	<string>/tmp/auto-hud-starter.out</string>
</dict>
</plist>
Finally, load the plist file into OS X's launch control, and you'll be good to go!
launchctl load ~/Library/LaunchAgents/[your-plist-file].plist
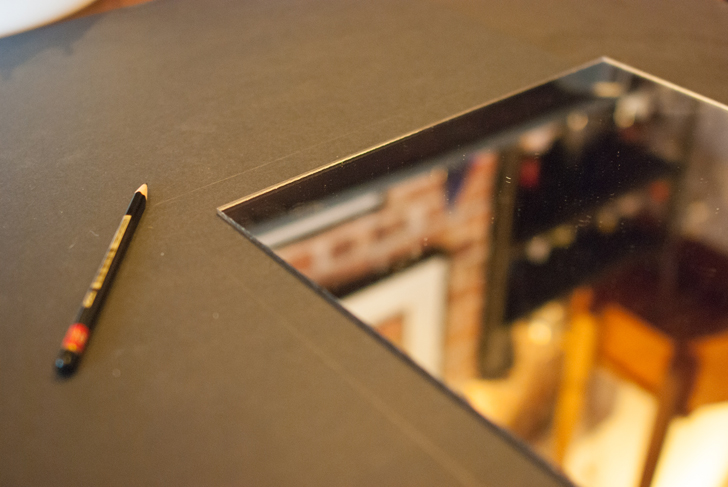
Trace out your mirror on a piece of black 4- or 6-ply posterboard.
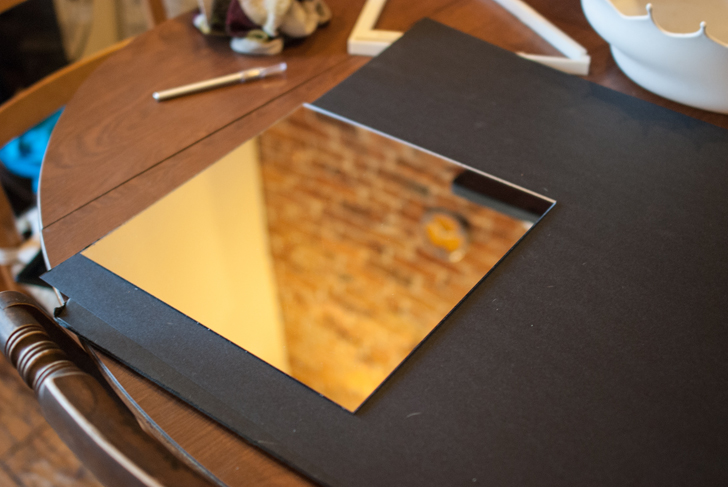
Also trace out where you want your display's screen to end up. Then cut out what you just traced!
Glue the paper to the mirror. I used a spray adhesive, generously coating the paper, laying it against the mirror from one side to the other, and then leaving it with a weight on it overnight. You probably don't want have your thumb on it like in this photo; this was a test run.
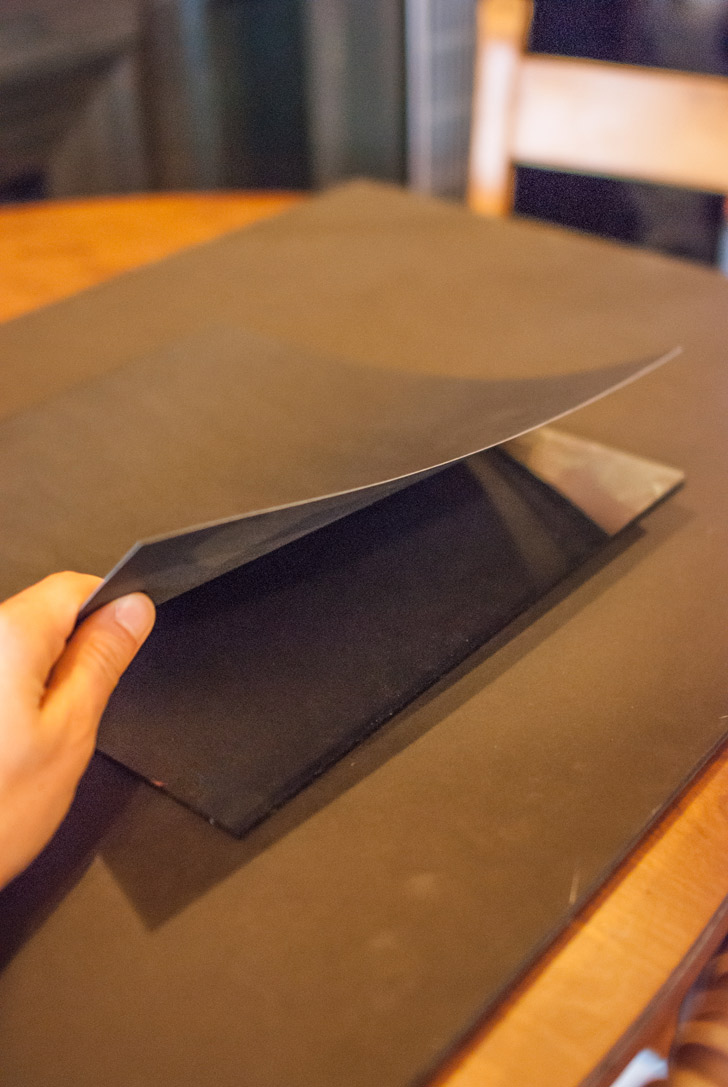
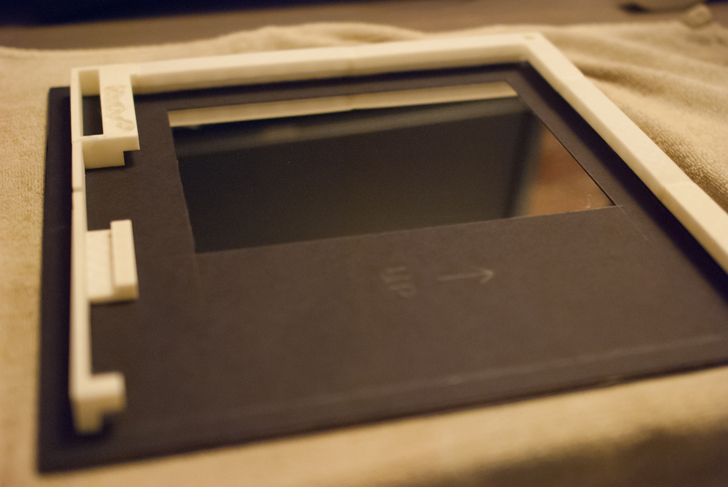
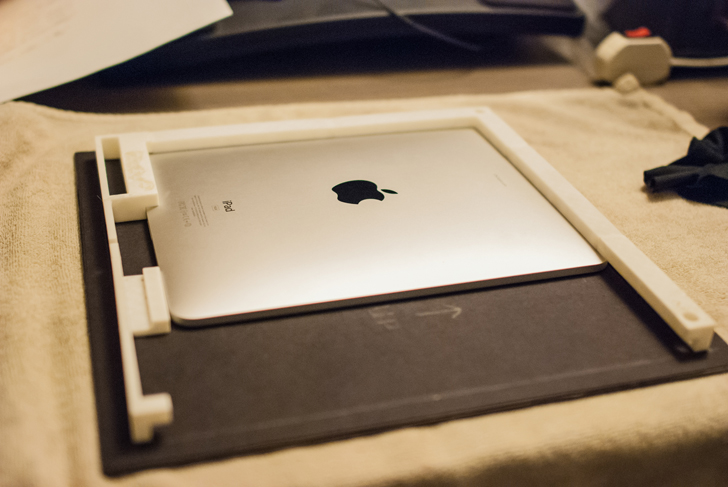
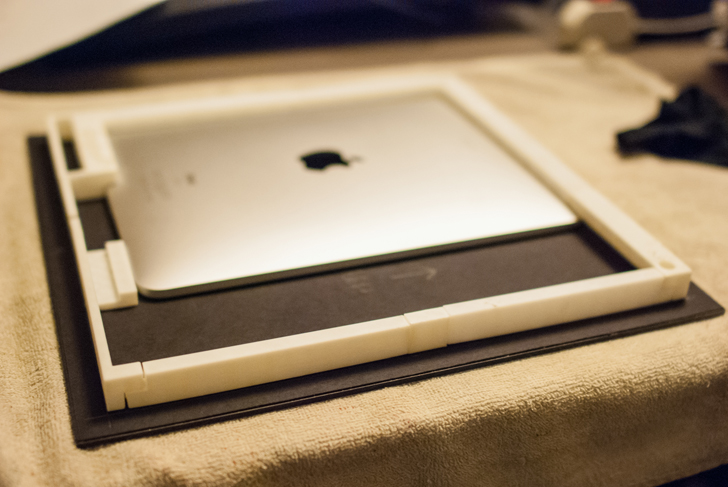
Figure out how to attach your display to the mirror. I opted to 3d print a frame that allows the iPad I used to slide in from the side, with an additional piece that fits in to make it appear even from the outside.
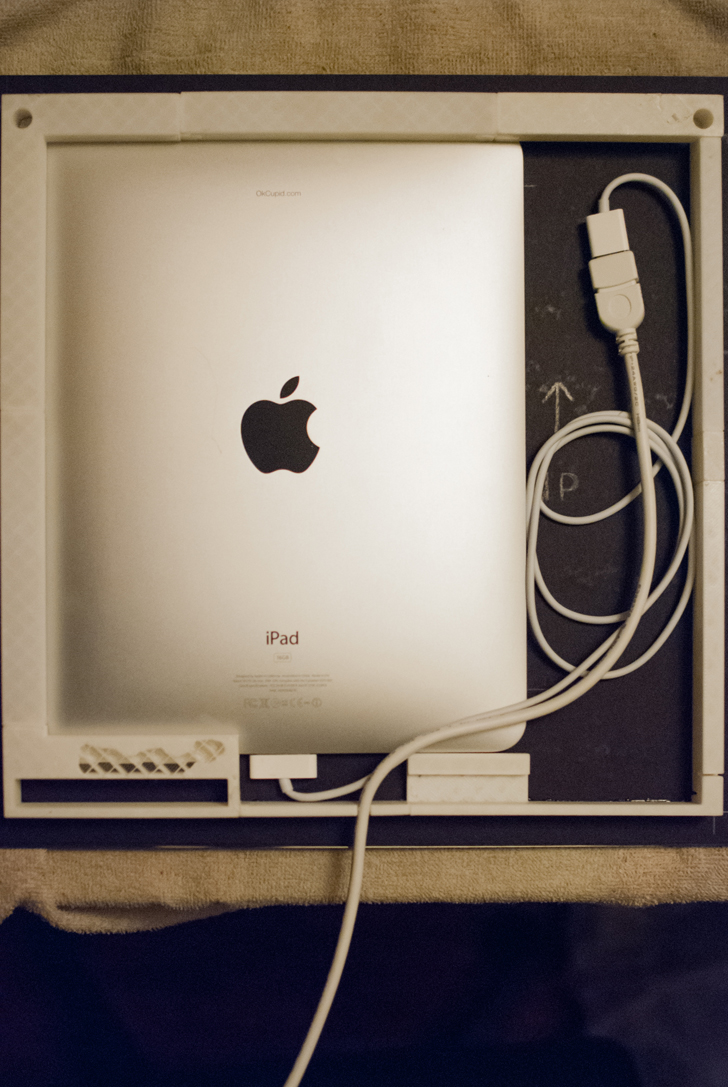
The 3d printed frame was fun to design and print, but also a bit troublesome; the desired dimensions were larger than the printer's printable area, so I had to glue the indiviual pieces together and then glue that to the mirror. But because it was custom designed, I was able to fit it to the display perfectly while leaving channels for cabling, as well and holes in the upper corners for hanging the mirror.
The designs for the frame were written in OpenSCAD and can be found in the repository here.
Glue the frame to the mirror-and-backing assembly. I used E-600 craft adhesive and let it cure for a few days with a weight on it; it feels pretty solid.
Turn on your display, connect it to the server, and make sure you're running in full screen and that the display won't turn off.
Close up the frame, add the power cord, and hang it up!
Here are some mistakes that I made that you can hopefully avoid:
- Don't put tape on your mirror; when you take it off it will take the reflective coating with it.
- When you cut out the paper for the backing, leave a little extra. It is quite hard to glue the paper to the mirror perfectly aligned, but it is quite easy to trim the excess later.
- If you make a frame to hold your device, make sure you leave extra room for its power button. I made mine with a very low tolerance, so it is hard to slide the iPad in without accidentally turning it off by hitting the sleep button on the top.
Like Hannah, I purchased my two way mirror at Canal Platic Center, where a 12" square mirror cost roughly $15. As she said, it is "a beautiful and highly recommended establishment." Hannah has also compiled a list of places to purchase mirrors better than I could: places to buy a two-way mirror.