Using HDR rendering
| Getting Started |
|---|
This lesson covers the basics of High-Dynamic Range (HDR) rendering, tone-mapping, and optionally adding HDR10 wide color gamut (a.k.a. Ultra HD) rendering with DirectX Tool Kit.
First create a new project using the instructions from the previous lessons: Using DeviceResources and Adding the DirectX Tool Kit which we will use for this lesson.
Save the files RenderTexture.h and RenderTexture.cpp to your new project's folder. Using to the top menu and select Project / Add Existing Item.... Select "RenderTexture.h" and hit "OK". Repeat for "RenderTexture.cpp".
Add to the Game.h file to the #include section:
#include "RenderTexture.h"In the Game.h file, add the following variable to the bottom of the Game class's private declarations (right after the m_graphicsMemory variable you already added as part of setup):
std::unique_ptr<DX::RenderTexture> m_hdrScene;
std::unique_ptr<DirectX::ToneMapPostProcess> m_toneMap;
std::unique_ptr<DirectX::DescriptorHeap> m_resourceDescriptors;
std::unique_ptr<DirectX::DescriptorHeap> m_renderDescriptors;

enum Descriptors
{
    SceneTex,
    Count
};

enum RTDescriptors
{
    HDRScene,
    RTCount
};
In the Game.cpp file, modify the Game class constructor:
m_deviceResources = std::make_unique<DX::DeviceResources>(
    DXGI_FORMAT_R10G10B10A2_UNORM);
m_deviceResources->RegisterDeviceNotify(this);

m_hdrScene = std::make_unique<DX::RenderTexture>(
    DXGI_FORMAT_R16G16B16A16_FLOAT);

XMVECTORF32 color;
color.v = XMColorSRGBToRGB(Colors::CornflowerBlue);
m_hdrScene->SetClearColor(color);
We are using
DXGI_FORMAT_R16G16B16A16_FLOATfor the HDR render target. Other reasonable options includeDXGI_FORMAT_R32G32B32A32_FLOATorDXGI_FORMAT_R11G1B10_FLOAT.DXGI_FORMAT_R32G32B32_FLOAT(a 96 bits-per-pixel format) support is often optional for various rendering operations, so might not be supported by your GPU.DXGI_FORMAT_R9G9B9E5_SHAREDEXPis not typically supported for render targets.
In Game.cpp, add to the TODO of CreateDeviceDependentResources after where you have created m_graphicsMemory:
m_resourceDescriptors = std::make_unique<DescriptorHeap>(device,
    Descriptors::Count);

m_renderDescriptors = std::make_unique<DescriptorHeap>(device,
    D3D12_DESCRIPTOR_HEAP_TYPE_RTV,
    D3D12_DESCRIPTOR_HEAP_FLAG_NONE,
    RTDescriptors::RTCount);

m_hdrScene->SetDevice(device,
    m_resourceDescriptors->GetCpuHandle(Descriptors::SceneTex),
    m_renderDescriptors->GetCpuHandle(RTDescriptors::HDRScene));

RenderTargetState rtState(m_deviceResources->GetBackBufferFormat(),
    DXGI_FORMAT_UNKNOWN);

// Set tone-mapper as 'pass-through' for now...
m_toneMap = std::make_unique<ToneMapPostProcess>(device,
    rtState,
    ToneMapPostProcess::None, ToneMapPostProcess::SRGB);
In Game.cpp, add to the TODO of CreateWindowSizeDependentResources:
auto size = m_deviceResources->GetOutputSize();
m_hdrScene->SetWindow(size);

auto sceneTex = m_resourceDescriptors->GetGpuHandle(Descriptors::SceneTex);
m_toneMap->SetHDRSourceTexture(sceneTex);
In Game.cpp, add to the TODO of OnDeviceLost where you added m_graphicsMemory.reset():
m_hdrScene->ReleaseDevice();
m_toneMap.reset();
m_resourceDescriptors.reset();
m_renderDescriptors.reset();
In Game.cpp, modify Clear as follows:
// Clear the views.
auto rtvDescriptor = m_renderDescriptors->GetCpuHandle(RTDescriptors::HDRScene);
auto dsvDescriptor = m_deviceResources->GetDepthStencilView();

commandList->OMSetRenderTargets(1, &rtvDescriptor, FALSE, &dsvDescriptor);
m_hdrScene->Clear(commandList);
commandList->ClearDepthStencilView(dsvDescriptor, D3D12_CLEAR_FLAG_DEPTH, 1.0f, 0, 0, nullptr);
...
In Game.cpp, modify Render as follows:
// Don't try to render anything before the first Update.
if (m_timer.GetFrameCount() == 0)
{
    return;
}

// Prepare the command list to render a new frame.
m_deviceResources->Prepare();

auto commandList = m_deviceResources->GetCommandList();
m_hdrScene->BeginScene(commandList);

Clear();

// TODO: Add your rendering code here.

m_hdrScene->EndScene(commandList);

auto rtvDescriptor = m_deviceResources->GetRenderTargetView();
commandList->OMSetRenderTargets(1, &rtvDescriptor, FALSE, nullptr);

ID3D12DescriptorHeap* heaps[] = { m_resourceDescriptors->Heap() };
commandList->SetDescriptorHeaps(static_cast<UINT>(std::size(heaps)), heaps);

m_toneMap->Process(commandList);

// Show the new frame.
m_deviceResources->Present();
m_graphicsMemory->Commit(m_deviceResources->GetCommandQueue());
Build and run, and the result will be the original 'cornflower blue' screen.
In the Game.h file, add the following variables to the bottom of the Game class's private declarations:
DirectX::SimpleMath::Matrix m_world;
DirectX::SimpleMath::Matrix m_view;
DirectX::SimpleMath::Matrix m_proj;

std::unique_ptr<DirectX::GeometricPrimitive> m_shape;
std::unique_ptr<DirectX::BasicEffect> m_effect;
In Game.cpp, add to the TODO of CreateDeviceDependentResources after where you have created m_graphicsMemory:
RenderTargetState hdrState(m_hdrScene->GetFormat(),
    m_deviceResources->GetDepthBufferFormat());

EffectPipelineStateDescription pd(
    &GeometricPrimitive::VertexType::InputLayout,
    CommonStates::Opaque,
    CommonStates::DepthDefault,
    CommonStates::CullNone,
    hdrState);

m_effect = std::make_unique<BasicEffect>(device, EffectFlags::Lighting, pd);
m_effect->EnableDefaultLighting();

m_shape = GeometricPrimitive::CreateTeapot();

m_world = Matrix::Identity;
In Game.cpp, add to the TODO of CreateWindowSizeDependentResources:
m_view = Matrix::CreateLookAt(Vector3(2.f, 2.f, 2.f),
    Vector3::Zero, Vector3::UnitY);
m_proj = Matrix::CreatePerspectiveFieldOfView(XM_PI / 4.f,
    float(size.right) / float(size.bottom), 0.1f, 10.f);
In Game.cpp, add to the TODO of OnDeviceLost (before the reset of m_graphicsMemory):
m_shape.reset();
m_effect.reset();
In Game.cpp, add to the TODO of Render (before calling m_hdrScene->EndScene(commandList)):
m_effect->SetMatrices(m_world, m_view, m_proj);

m_effect->Apply(commandList);

m_shape->Draw(commandList);
In Game.cpp, add to the TODO of Update:
auto time = static_cast<float>(timer.GetTotalSeconds());
m_world = Matrix::CreateRotationZ(cosf(time) * 2.f);
float colorScale = 1.f + cosf(time);
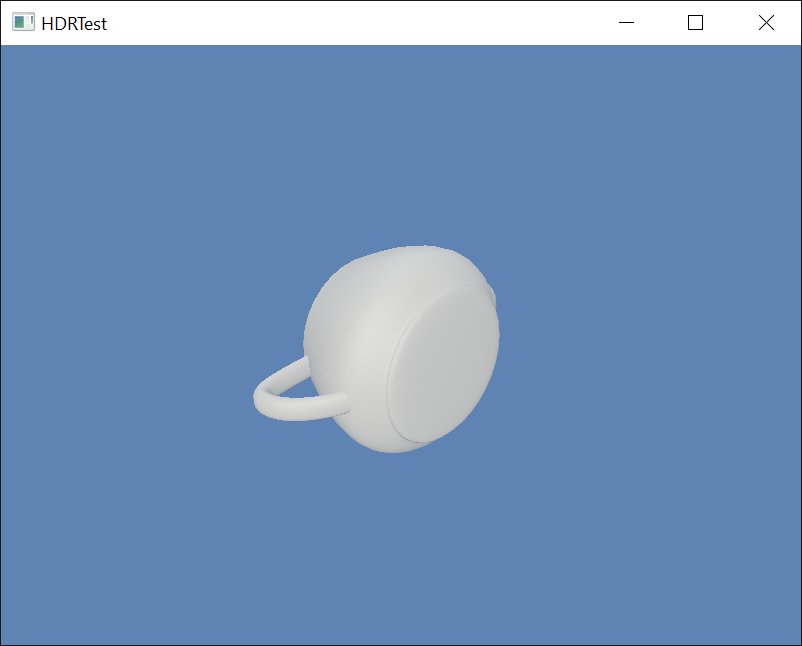
m_effect->SetDiffuseColor(XMVectorSetW(Colors::White * colorScale, 1.f));Build and run to see the scene with a teapot. The color scales between black and white which for now is full saturated.

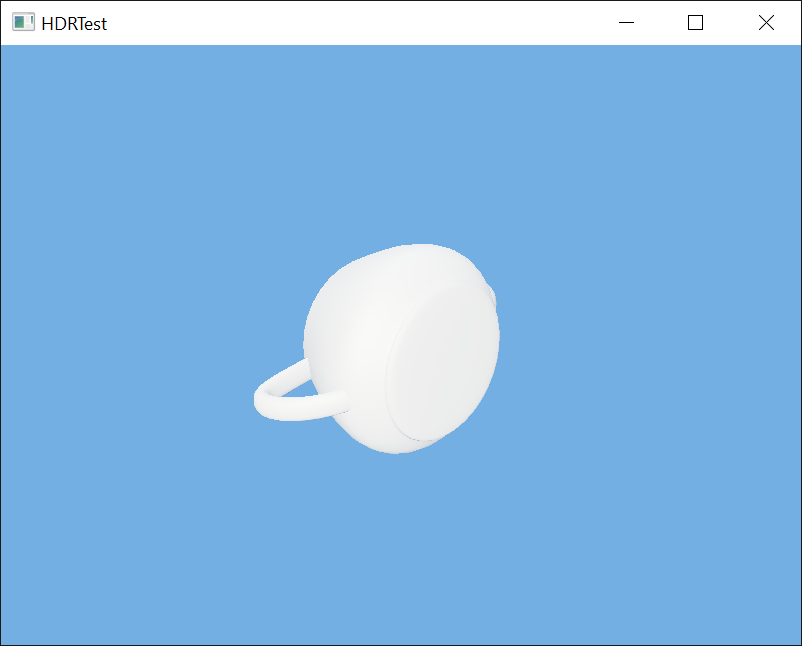
In the previous render, the color values range from 0 to 2, so the teapot over saturates for half the time. To resolve this, we use tone-mapping. In the first case, this uses a Reinhard local operator as follows. In Game.cpp, modify the CreateDeviceDependentResources:
// Set the tone-mapper to use Reinhard
m_toneMap = std::make_unique<ToneMapPostProcess>(device,
    rtState,
    ToneMapPostProcess::Reinhard, ToneMapPostProcess::SRGB);
Build and run to see the colors less intense white.
For a better overall color treatment, you may want to use an ACES Filmic operator instead. In Game.cpp, modify the CreateDeviceDependentResources:
// Set the tone-mapper to ACES Filmic
m_toneMap = std::make_unique<ToneMapPostProcess>(device,
    rtState,
    ToneMapPostProcess::ACESFilmic, ToneMapPostProcess::SRGB);
Build and run to see a slightly different handling.
Next we'll add support for HDR10 wide color gamut rendering.
HDR10 display output requires a 4k UHD monitor connected with HDMI 2.0 to a PC running Windows 10 Creators Update. The code has to be built with the Windows 10 Creators Update SDK (15063) or later.
In the Game.cpp constructor, modify it as follows to use the c_EnableHDR option of DeviceResources:
m_deviceResources = std::make_unique<DX::DeviceResources>(DXGI_FORMAT_R10G10B10A2_UNORM,
    DXGI_FORMAT_D32_FLOAT, 2, D3D_FEATURE_LEVEL_11_0,
    DX::DeviceResources::c_EnableHDR);
You can also use
DXGI_FORMAT_R16G16B16A16_FLOATinstead which means your rendering is always in linear colors, leaving the system to deal with the HDR10 colorspace conversions. This is 'easier' but most games are likely to want to generate the HDR10 signal directly for better control.
In the Game.h file, add the following variable to the bottom of the Game class's private declarations:
std::unique_ptr<DirectX::ToneMapPostProcess> m_toneMapHDR10;
std::unique_ptr<DirectX::ToneMapPostProcess> m_toneMapLinear;
In Game.cpp, modify CreateDeviceDependentResources as follows:
m_toneMap = std::make_unique<ToneMapPostProcess>(device,
    rtState,
    ToneMapPostProcess::ACESFilmic,
    (m_deviceResources->GetBackBufferFormat() == DXGI_FORMAT_R16G16B16A16_FLOAT)
    ? ToneMapPostProcess::Linear : ToneMapPostProcess::SRGB);

m_toneMapHDR10 = std::make_unique<ToneMapPostProcess>(device,
    rtState,
    ToneMapPostProcess::None, ToneMapPostProcess::ST2084);

m_toneMapLinear = std::make_unique<ToneMapPostProcess>(device,
    rtState,
    ToneMapPostProcess::None, ToneMapPostProcess::Linear);
...
In Game.cpp, modify CreateWindowSizeDependentResources as follows:
auto sceneTex = m_resourceDescriptors->GetGpuHandle(Descriptors::SceneTex);
m_toneMap->SetHDRSourceTexture(sceneTex);
m_toneMapHDR10->SetHDRSourceTexture(sceneTex);
m_toneMapLinear->SetHDRSourceTexture(sceneTex);

...
In Game.cpp, add to the TODO of OnDeviceLost:
m_toneMapHDR10.reset();
m_toneMapLinear.reset();
In the Game.cpp file in the Render function, modify the tone-mapping as follows:
auto rtvDescriptor = m_deviceResources->GetRenderTargetView();
commandList->OMSetRenderTargets(1, &rtvDescriptor, FALSE, nullptr);

ID3D12DescriptorHeap* heaps[] = { m_resourceDescriptors->Heap() };
commandList->SetDescriptorHeaps(static_cast<UINT>(std::size(heaps)), heaps);

switch (m_deviceResources->GetColorSpace())
{
default:
    m_toneMap->Process(commandList);
    break;

case DXGI_COLOR_SPACE_RGB_FULL_G2084_NONE_P2020:
    m_toneMapHDR10->Process(commandList);
    break;

case DXGI_COLOR_SPACE_RGB_FULL_G10_NONE_P709:
    // Required if R16G16B16A16_FLOAT is used as display format
    // (otherwise you can omit this case)
    m_toneMapLinear->Process(commandList);
    break;
}

...
Build and run. If the window is on an HDR display, the output will use the DXGI_COLOR_SPACE_RGB_FULL_G2084_NONE_P2020 HDR10 path or the DXGI_COLOR_SPACE_RGB_FULL_G10_NONE_P709 FP16 path. Otherwise it will use the same ACESFilmic sRGB tone-mapping above.
If you don't use DXGI_FORMAT_R16G16B16A16_FLOAT you can simplify the code a bit by removing the m_toneMapLinear variable and it's use, as well as removing the DXGI_COLOR_SPACE_RGB_FULL_G10_NONE_P709 case in Render.
If you have difficulty getting HDR10 output to work on your system, be sure to read HDR and WCG color settings in Windows 10
For this tutorial, we've created very simple presentation path:
graph LR;
   S[Scene] --> |Render| HRT[FP Render Target]
   HRT --> |ToneMap or HDR10 Signal Prep| SC[SwapChain Render Target]
More realistic scenarios involve additional postprocessing and anti-aliasing steps:
graph TD;
   S[Scene] --> |Render| MSAA[MSAA Render Target]
   MSAA --> |Resolve| HRT[FP Render Target]
   HRT --> |PostProcess| HRT
   HRT --> |ToneMap| RT[SDR Render Target]
   RT --> |PostProcess| RT
   RT --> |PostProcess| FRT[Render Target]
   UI --> |Render| FRT
   FRT --> |HDR10 Signal Prep| SC[SwapChain Render Target]
-
The same technique used here for tone-mapping and HDR10 color conversion can be used for other post-processing effects. See PostProcess, BasicPostProcess and DualPostProcess.
-
For HDR10 output, you can select different colorspace transformations for different color grading effects such as using DCI-P3-D65 instead of Rec.709 colorspace as your source or target color primaries. You can also provide a custom color primary rotation matrix. See ToneMapPostProcess for details.
Next lesson: Physically-based rendering
DirectX Tool Kit docs PostProcess, ToneMapPostProcess, and RenderTexture