Laboratory environment for SSB (Secure Scuttlebutt). Using docker containers on a separate docker network to simulate multiple nodes with different configuration profiles.
- Docker installed. (ssb-laboratory has been tested on a MacOS host)
- Clone this repo.
ssb-laboratory was created to enable exploratory testing in the SSB ecosystem of plugins and tools. At the heart there is a command line interface which is used to control the experiments.
Docker is used to provide a quick scratch environment which is reset each time it exits.
The source code and scripts are mounted inside the containers to enable rapid changes of code (on the host) which is then directly reflected inside all running containers.
A typical workflow is to start number of containers and then start the cli inside them. Try something, modify the code on the host and restart the cli inside the containers to test the modification stuff.
Add your own cli commands to src/commands and your own SSB plugins to src/plugins (experiment plugins need to be registered in src/util/server.js).
The Docker image ssb-node needs only be rebuilt if package.json is changed, or if the dockerfile is modified. The yarn cache and node_modules are mounted as docker volumes to save time and avoid having to rebuild node_modules.
When you need to reset the laboratory, just exit the docker containers and spin up a few new ones. All SSB state, like keys, databases etc are stored only in the container and is destroyed when the container exits.
First build the base container. This builds the node modules, which takes a little while. Good thing is that this build
of node_modules is available when a container is created which makes creation very quick. Note: If big changes are made
to package.json it could be a time saver to rebuild the image again instead if updating using yarn install in each
container instance.
./ssb-node.sh build
Now use the start command which sets up volumes and creates a docker network, then starts an instance with the given node name.
./ssb-node.sh start <node_name>
By default no incoming connections are allowed to the node. To enable incoming connections (for simulating a hub/portal) issue:
source script/fw-hub.sh
Now enter the ssb-laboratory CLI:
yarn start
Inside the CLI use,
help
to find out which commands are available.
Scenario: Use ssb-tunnel to send a direct message between two ssb-nodes which are not directly connected
In this scenario we will start three nodes A, B and C, where B will act as a hub/portal letting A and C communicate directly without any direct network contact between them.
Tip: Open three terminal windows and perform the steps in parallel for all three nodes.
The following steps are involved (see the commands in the table below):
- Start three nodes (A, B and C).
- Start node B in portal/hub mode.
- Start node A and C in tunnel mode, connecting to B.
- Lookup up ID of A.
- Send a message to A from C using A's ID as address.
Be careful to execute commands for the steps in the described order, for each ssb-node instance in parallel lockstep.
| Step | Node A | Node B | Node C |
|---|---|---|---|
| 1 | ./ssb-node.sh start ssb-A.local |
./ssb-node.sh start ssb-B.local |
./ssb-node.sh start ssb-C.local |
yarn start |
source script/fw-hub.sh |
yarn start |
|
yarn start |
|||
| 2 | server-start --portal |
||
inspect-address (denote output as $PORTALADDRESS) |
|||
| 3 | server-start --tunnel $PORTALADDRESS |
server-start --tunnel $PORTALADDRESS |
|
| 4 | inspect-id (denote output as $ID_A) |
||
| 5 | chat-tell $ID_A "This is C calling!" |
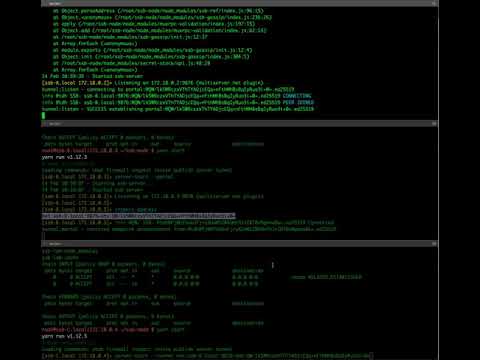
When executing step 5 the message should be printed in A's console.
Check out a screen capture of the steps:
How about trying to send a message back from A to C?
- Invites do not work, could be that the custom app-key is not applied. See issue ssbc/ssb-invite#1.
- Stopping and restarting the server causes IO error to be thrown by
levelupsince locks on db files are not properly released when server is stopped.