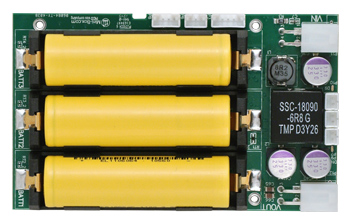
Plug the device in, check the device connection
$ sudo lsusb | grep "d005"
Bus 001 Device 002: ID 04d8:d005 Microchip Technology, Inc.
If no Microchip Technology device shows up, check the usb conection and try again
Install NUT using your prefered package manager. OpenUPS2 requires at least networkupstools 2.7.3 or higher.
e.g on Ubuntu:
$ sudo apt-get install nutIf installing from sources:
sudo apt install build-essential python libtool pkg-config automake
sudo addgroup nut
sudo useradd -M -s /bin/false -g nut ups

git clone git://github.com/networkupstools/nut.git
./autogen.sh
./configure --with-user=ups --with-group=nut
make
sudo make install

sudo cp /usr/local/ups/etc/upsd.conf.sample /usr/local/ups/etc/upsd.conf
sudo cp /usr/local/ups/etc/upsd.users.sample /usr/local/ups/etc/upsd.users
sudo chmod 770 /usr/local/ups/etc/upsd.users
sudo chown root.nut /usr/local/ups/etc/upsd.users
Edit /etc/nut/ups.conf (or /usr/local/ups/etc/ups.conf from sources) and add the following lines at the bottom:
[openups2]
    driver = usbhid-ups
    port = auto
    vendorid = 04d8
    pollfreq = 30
    desc = "Mini-Box OpenUPS2"
    productid = d005
Stop the upsdrvctl service
e.g on Ubuntu:
$ sudo upsdrvctl stopIf installed from sources:
$ sudo /usr/local/ups/sbin/upsdrvctl stopConfigure the driver for the openups2
e.g on Ubuntu:
$ sudo /lib/nut/usbhid-ups -u root -a openups2
If installed from sources:
/usr/local/ups/bin/usbhid-ups -u ups -a openups2
If you get the error "Can’t chdir to /var/run/nut: No such file or directory"
$ sudo mkdir /var/run/nut
$ sudo chown root:nut /var/run/nut
$ chmod 770 /var/run/nutChange the permissions for the USB port
a) Find the bus number and device number for the UPS
$ lsusb | grep "d005"
Bus 001 Device 002: ID 04d8:d005 Microchip Technology, Inc.
b)
$ sudo chmod 0666 /dev/bus/usb/[bus number]/[device number]NOTE: these permissions will need to be reset everytime you restart the computer or unplug the device
OPTIONAL: a UDEV rule can be added to avoid this
$ sudo touch /etc/udev/rules.d/50-usb-openups2.conf
$ echo 'SUBSYSTEM=="usb", ATTR{idProduct}=="d005", MODE="0666"' | sudo tee --append /etc/udev/rules.d/50-usb-openups2.confStart the driver service
e.g on Ubuntu:
$ sudo upsdrvctl startIf installed from sources:
$ sudo /usr/local/ups/sbin/upsdrvctl startStart UPSD
e.g on Ubuntu:
$ sudo upsdIf installed from sources:
sudo /usr/local/ups/sbin/upsd -u ups
NOTE: Recent versions of ubuntu might require editing /etc/nut/nut.conf and
set MODE=standalone
You can now view the live UPS data using your preffered UPSD Client
e.g with the built in UPSC client
$ upsc openups2@localhost
battery.capacity: 100
battery.charge: 100
battery.charge.low: 5
battery.charge.warning: 20
battery.current: 0.000
battery.mfr.date: ?
battery.runtime: 3932100
battery.temperature: 34.22
battery.type: ?
battery.voltage: 10.22
device.mfr: Mini-Box.Com
device.model: OPEN-UPS2
device.serial: LI-ION
device.type: ups
driver.name: usbhid-ups
driver.parameter.pollfreq: 30
driver.parameter.pollinterval: 2
driver.parameter.port: auto
driver.parameter.productid: d005
driver.version: 2.7.1
driver.version.data: openUPS HID 0.1
driver.version.internal: 0.38
input.current: 0.000
input.voltage: 533.95
output.current: 0.000
output.voltage: 488.36
ups.mfr: Mini-Box.Com
ups.model: OPEN-UPS2
ups.productid: d005
ups.serial: LI-ION
ups.status: OL
ups.vendorid: 04d8
If installed from sources:
/usr/local/ups/bin/upsc openups2@localhost
