Welcome to Tutorial Repo of Internet of Things, with Raspberry Pi 3B.
Here you'll find Material you need to get started with Raspberry Pi and Learn IoT with it.

"This repository can be cloned / edited and redistributed under Open Source Licence. Feel Free to Contribute with more sensors and easy to write Cloud applications"
You must have the Image configured by us, to follow the below steps. You must download it from here
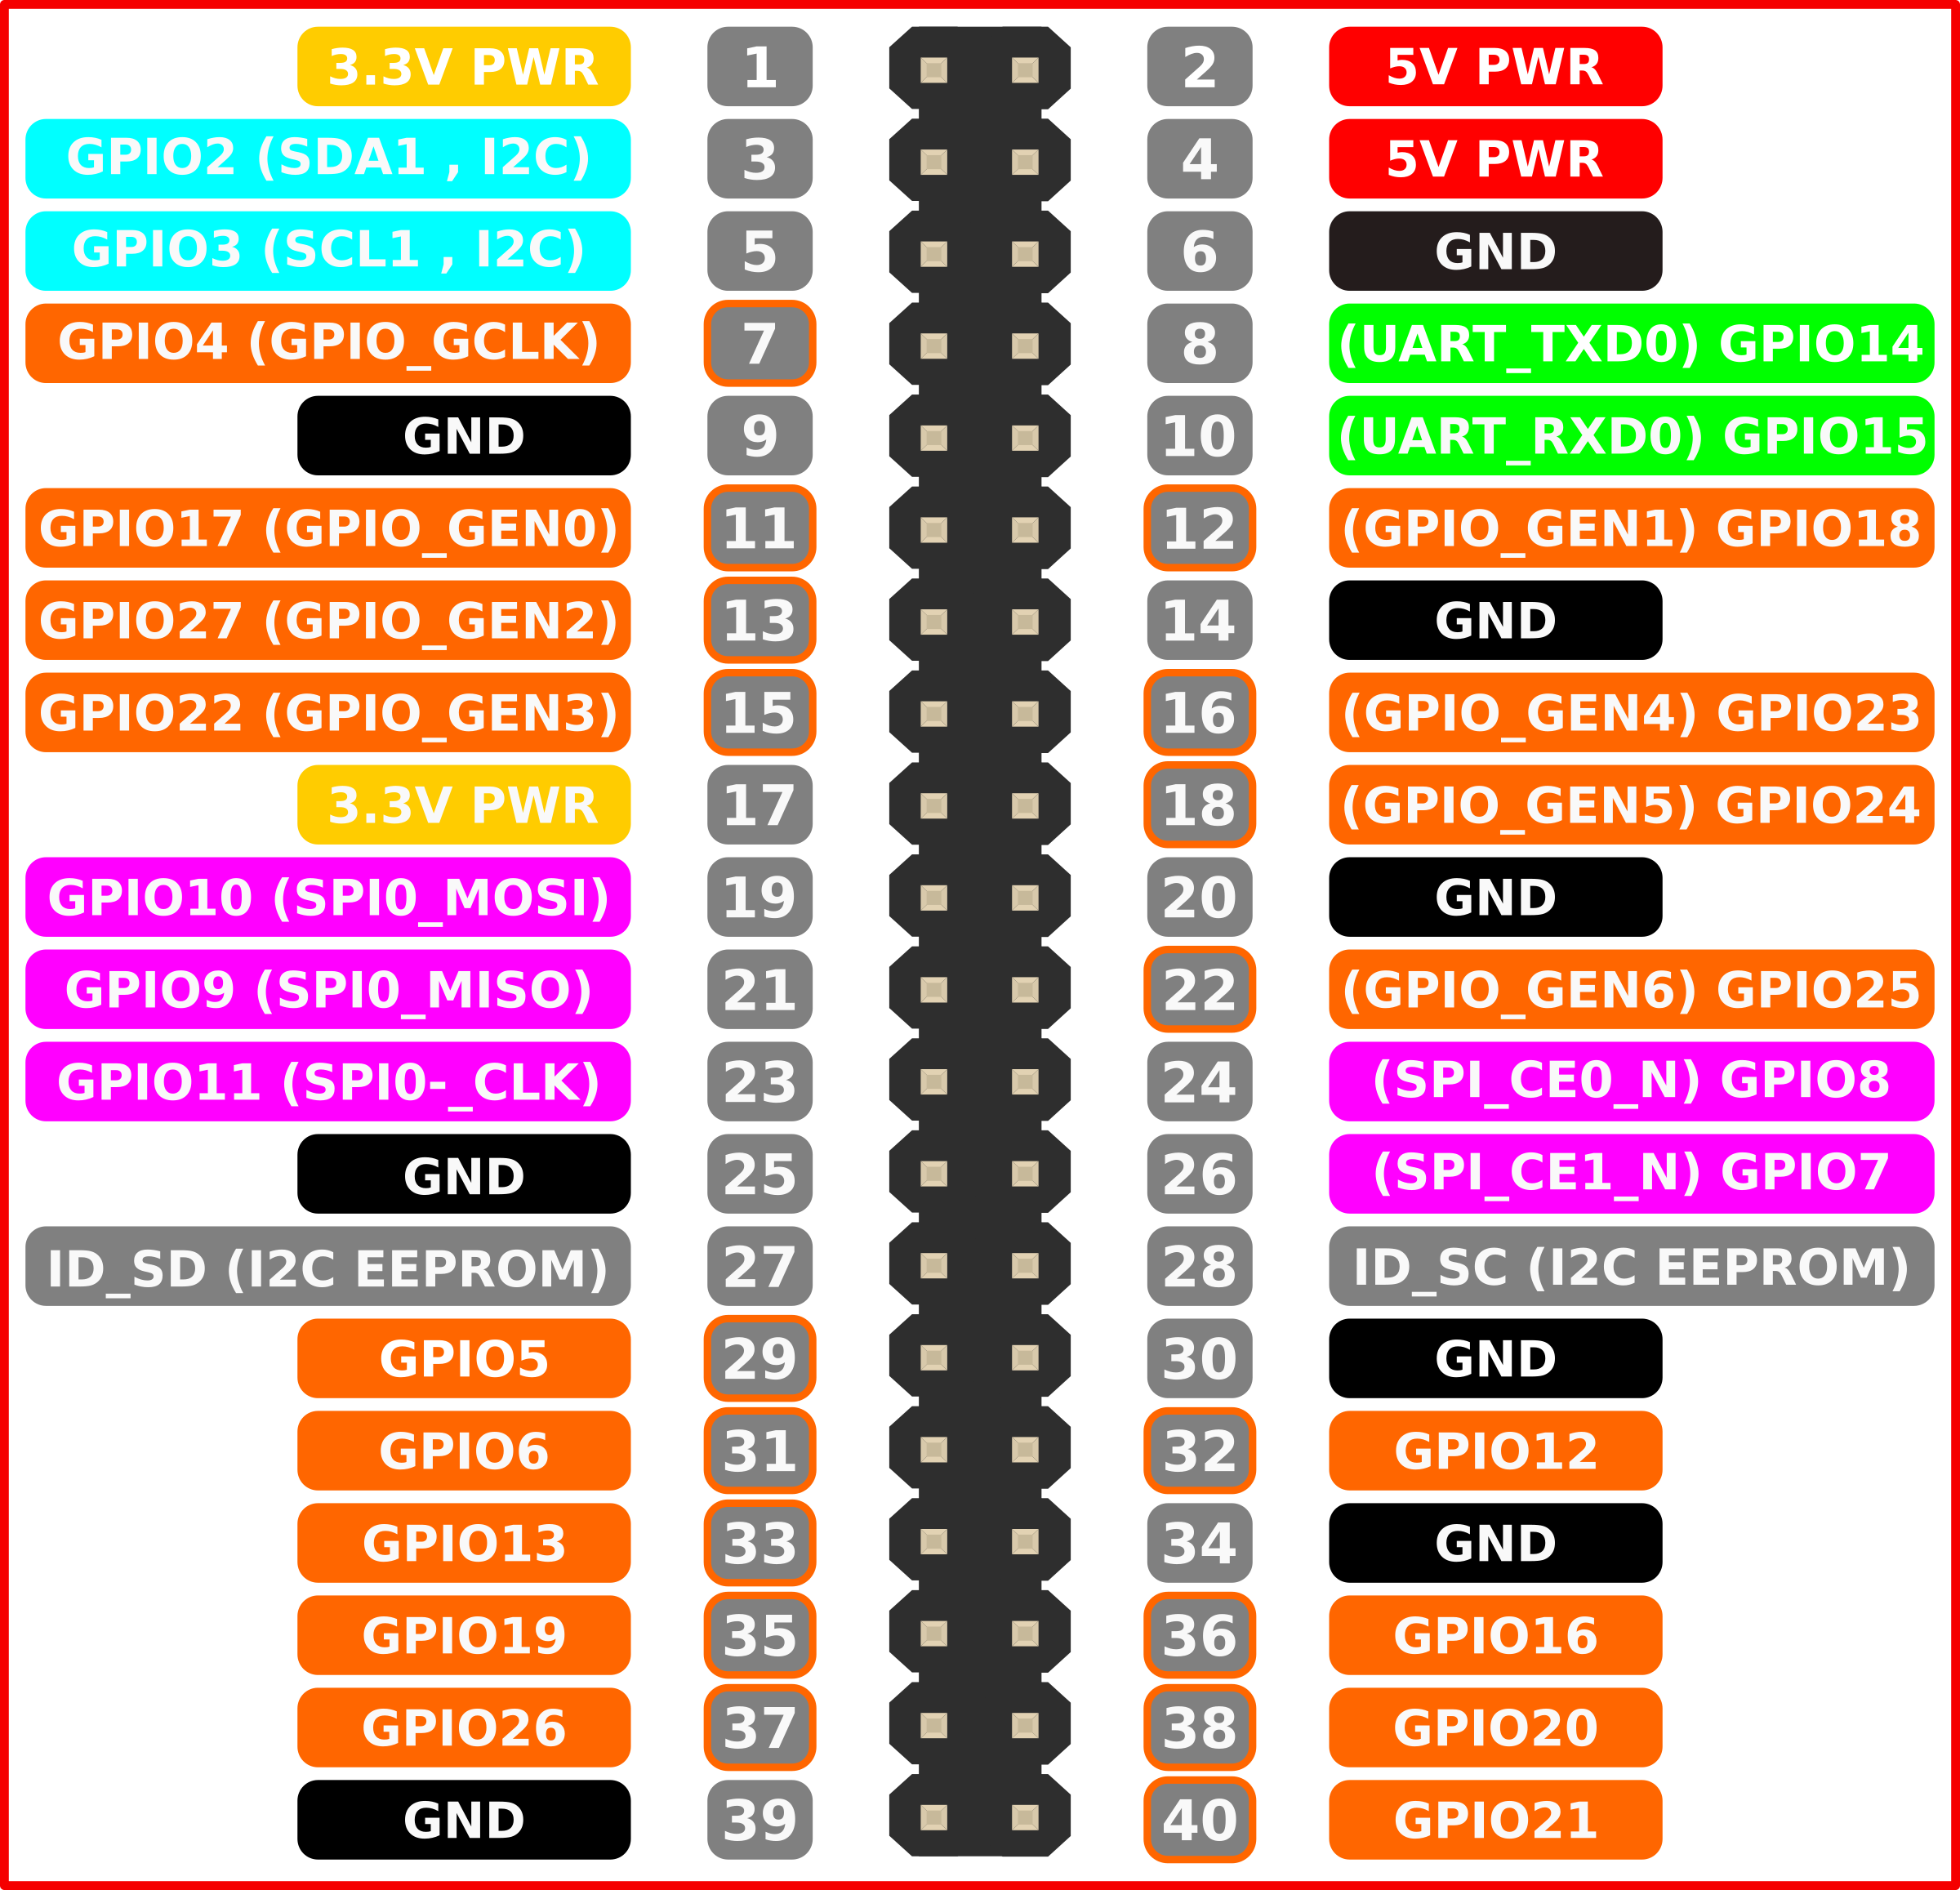
To get started with Raspberry Pi Model 3 (B), You must first understand the Pin Layout of it. Check this out:
- Do not give Power Supply before connecting Peripherals directly
- Please make sure to connect Display and Ethernet First (not mandatory), then Give the Power
- If you don't have HDMI Supported Display, you must use Ethernet to Access Raspberry Pi Model 3B
The steps for Connecting & Accessing via Ethernet is Applicable only if you are using Raspbian Disk Image customized by us
- Download and Install PuTTY
- Go to Network Settings and From Properties change the IP Address to
192.168.1.2and save it. - Now start PuTTY and put RPi's IP address as
192.168.1.3let the port be default (22) and then press Open button - The Console will start and ask for Credentials:
- Login:
pi - Password:
raspberry - In Network Connections, connect to the saved network
You'll now be connected to RPi
- Login:
- From Connection Settings, create a new Connection Named as Raspberry Pi
- In IP V4 tab, change the IP to static as
192.168.1.2and Netmask as24and save it - To access using SSH, start Terminal and Fire foll. commands:
- $
ssh pi@192.168.1.3 - Enter Password:
raspberry
- $
- To access DISPLAY of Raspberry Pi
- Press Super/Windows Key and search for Remmina and click to open it
- Press
Ctrl + Nto create new connection and follow the below Image - Follow the Below screenshot for more clear Idea:
- first save and then connect

