The "OpenCV Jupyter UI" project addresses the compatibility issue between OpenCV's user interface components and Jupyter Notebooks. In remote Jupyter environments such as Jupyter Notebook or Google Colab, the traditional method of using cv2.imshow for displaying images is not supported. This project introduces an alternative solution by providing the jcv2.imshow function, which is compatible with Jupyter environments.
By replacing cv2.imshow with jcv2.imshow, users can seamlessly display images within Jupyter Notebooks without encountering compatibility errors. The jcv2.imshow function leverages Jupyter's capabilities to render images and ensures a smooth integration between OpenCV and Jupyter.
Additionally, the project addresses the need for user interaction and replaces the usage of cv2.waitKey with jcv2.waitKey. For instance, jcv2.waitKey(1000) waits for a button press for one second.
By bridging the gap between OpenCV and Jupyter, the "OpenCV Jupyter UI" project enhances the usability and convenience of using OpenCV's user interface components within Jupyter Notebooks. Users can seamlessly leverage OpenCV functionalities for image processing and visualization, empowering them to work efficiently in Jupyter environments.
As you know it is not possible to use cv2.imshow in the remote jupyter notebook or colab.
This is the replacement of cv2.imshow for jupyter. you need only to replace cv2.imshow to jcv2.imshow. It will works in jupyter or python.
pip install -U opencv_jupyter_ui
Then activate extension
jupyter nbextension install --user --py ipycanvas
jupyter nbextension enable --user --py ipycanvas
or
jupyter nbextension install --py --symlink --sys-prefix ipycanvas
jupyter nbextension enable --py --sys-prefix ipycanvas
For jupyter lab please make sure that you have nodejs or install it by conda install -c conda-forge nodejs Then run
jupyter labextension install @jupyter-widgets/jupyterlab-manager ipycanvas
please upgrade ipycanvas to version 0.12 for higher performance !pip install -q ipycanvas>=0.12
For google colab please add the following codes and restart all the cells.
!pip install -q ipycanvas==0.11
from google.colab import output
output.enable_custom_widget_manager()
import opencv_jupyter_ui as jcv2
It is exactly like cv2.imshow you just need to change cv2 to jcv2.
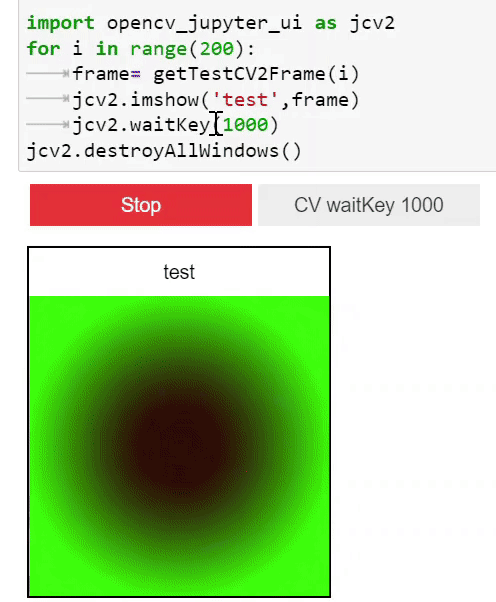
jcv2.imshow('test',frame)
you can specify target width or height:
jcv2.imshow('test',frame,width=100) # scale down/up your image to fit this width
jcv2.imshow('test',frame,100) similar to previous example
jcv2.imshow('test',frame,height=150) # scale down/up your image to fit this height
jcv2.imshow('test',frame,width=100,height=150) # skretch your image to this size
jcv2.imshow('test',frame,color_space='rgb') # color_space=rgb or bgr, default: bgr
Please note that you can also put CSS string instead e.g., width='100%' but it has higher overhead
When you use cv2.waitKey, you need to change it to jcv2.waitKey.
jcv2.waitKey(1000) # to wait for a button press in one second
you can define custom keys with this command
jcv2.setKeys(['q','esc','enter','space'])
Supported special keys are: esc:27,space:32,enter:10,left:2424832,right:2555904,up:2490368,down:2621440,del:3014656
The following line where you clear the output
jcv2.destroyAllWindows()
def getTestCV2Frame(i): # it generate an example image frame
	import numpy as np
	x = np.linspace(-1, 1, 200)
	y = np.linspace(-1, 1, 200)
	x_grid, y_grid = np.meshgrid(x, y)
	blue_channel = np.array(np.sin(x_grid**2 + y_grid**2) * 255, dtype=np.int32)
	red_channel = (np.zeros_like(blue_channel) + 200*i)%222
	green_channel = np.zeros_like(blue_channel) + 50
	return np.stack((red_channel, blue_channel, green_channel), axis=2)


import opencv_jupyter_ui as jcv2
for i in range(200):
	frame= getTestCV2Frame(i)
	jcv2.imshow('test',frame)
	if jcv2.waitKey(1000)=='q':
		break
jcv2.destroyAllWindows() #optinal, only needed if you don't run it in notebook
Output:
if it is not in jupyter it will display an opencv window. please don't forget to call jcv2.destroyAllWindows() and jcv2.waitkey(100) if it is not in jupyter