


In the first step of this guide, we built the Voice User Interface (VUI) for our Alexa skill. On this page, we will be creating an AWS Lambda function using Amazon Web Services. You can read more about what a Lambda function is, but for the purposes of this guide, what you need to know is that AWS Lambda is where our code lives. When a user asks Alexa to use our skill, it is our AWS Lambda function that interprets the appropriate interaction, and provides the conversation back to the user.
-
Go to http://aws.amazon.com and sign in to the console. If you don't already have an account, you will need to create one. If you don't have an AWS account, check out this quick walkthrough for setting it up.
-
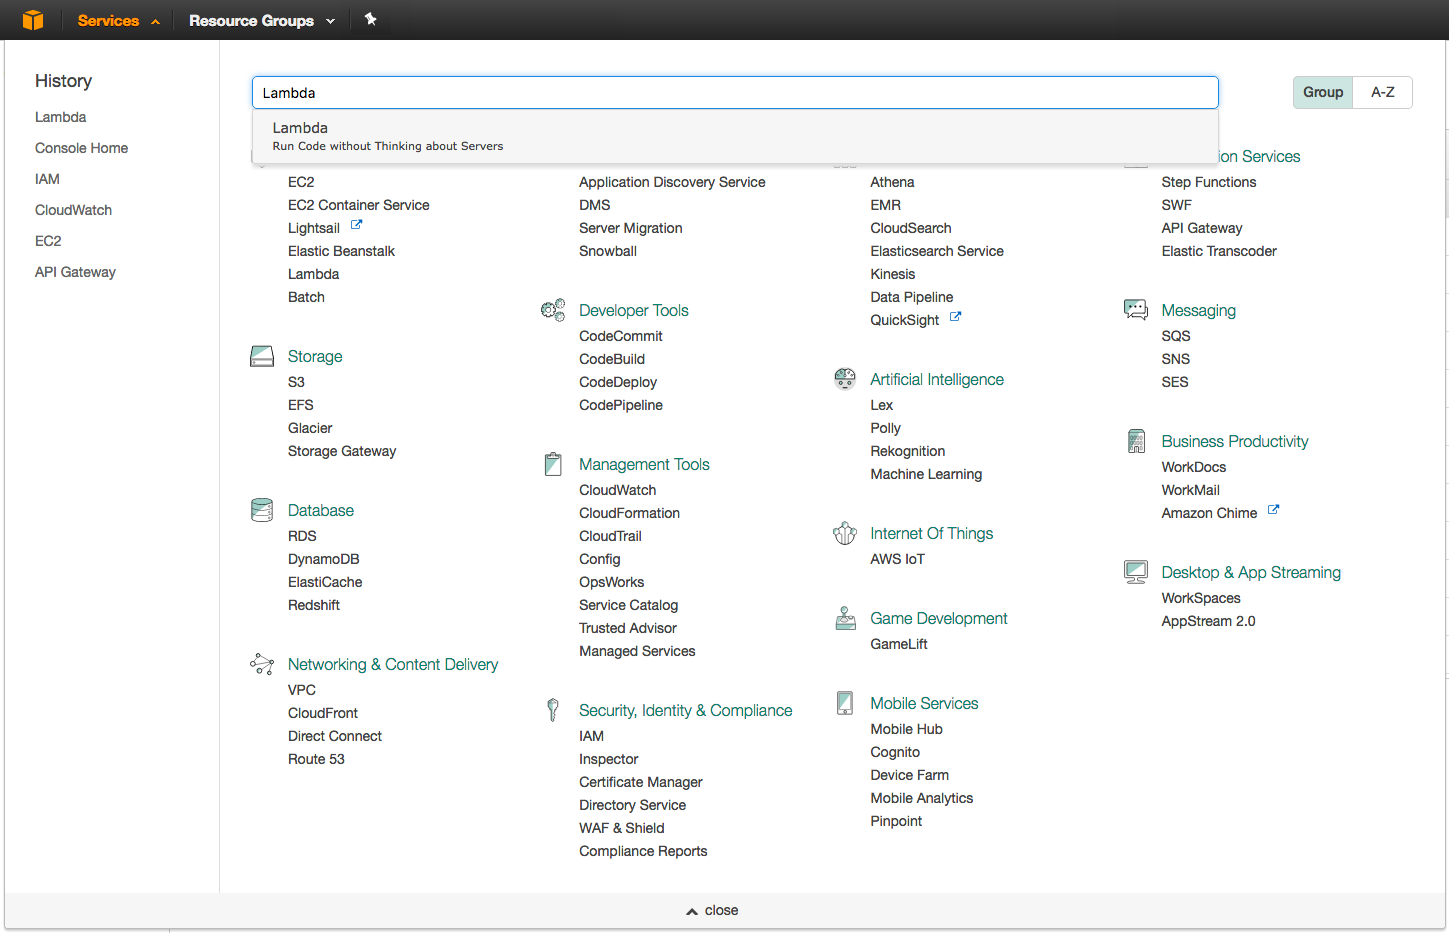
Click "Services" at the top of the screen, and type "Lambda" in the search box. You can also find Lambda in the list of services. It is in the "Compute" section.
-
Check your AWS region. AWS Lambda only works with the Alexa Skills Kit in these regions: US East (N. Virginia), US West (Oregon), Asia Pacific (Tokyo) and EU (Ireland). Make sure you choose the region closest to your customers.
-
Click the orange "Create function" button. It should be near the top of your screen. (If you don't see this button, it is because you haven't created a Lambda function before. Click the blue "Get Started" button near the center of your screen.)
-
There are three boxes labeled "Author from scratch", "Blueprints" and "Serverless Application Repository". Click the radio button in the box titled "Serverless Application Repository" We have created an application in the repository as a shortcut to getting everything set up for your skill.
-
Enter
alexato search for the application repository namedAlexa-Nodejs-Dynamic-Content. Enter the full name into the search box if you need to narrow the search results. -
Click on the application. This template will create the Lambda function, grant the Alexa Skills Kit permission to invoke it, and set up an IAM role for you. It will also add the code from this GitHub repo and include the required dependencies so that you don't have to upload them yourself.
-
Change the application name if so desired and then Click the deploy button at the bottom of the page.
-
Wait for the status of all (three) resources to change to CREATE_COMPLETE. The banner at the top will also change to say Application successfully deployed.
-
Open the function that was just created in the Lambda console by clicking on the link in the list of resources. It is normally the first resource and the only link in the list.
-
(Optional, but recommended) To secure this Lambda function follow the instructions found here
-
Scroll down the page until you see a section called Function code.
-
You are not required to make any changes, however for your knowledge, the code which was pre-loaded into the function comes from here. If you modify the code, be sure to click "Save".
-
You should see the Amazon Resource Name (ARN) for this function in the top right corner of the page. (You may need to scroll back up.) Copy the ARN value for this Lambda function for use in the next section of the guide.


-
Go to http://aws.amazon.com and sign in to the console. If you don't already have an account, you will need to create one. If you don't have an AWS account, check out this quick walkthrough for setting it up.
-
Click "Services" at the top of the screen, and type "DynamoDB" in the search box. You can also find DynamoDB in the list of Databases. It is in the "Database" section.
-
Click "Tables" at the left hand side of the screen to go to tables console.
-
Create Stories table Click on "Create Table" button at the top of the screen. Then add information for the first table. Table name is "StoriesTable" and Primary partition key is "pkStoryID" with type "Number". then click on "create" button at the bottom of the screen
-
Create parts table Click on "Create Table" button at the top of the screen. Then add information for the 2nd table. Table name is "StoryPartsTable". Primary partition key is "pkStoryID" with type "Number". Primary sort key is "skPartID" with type "Number". then click on "create" button at the bottom of the screen
