Read more about 'Applying a Low Pass Filter to Android Sensors' in the blog post on the raw engineering website.
AugmentedRealityView project was created by the mobile development team at raw engineering, and is available on Github. This project can be integrated into any other app, needing AugmentedRealityView.
Augmented reality (AR) is a live, direct or indirect, view of a physical, real-world environment whose elements are augmented by computer-generated sensory input such as sound, video, graphics or GPS data. It is related to a more general concept called mediated reality, in which a view of reality is modified (possibly even diminished rather than augmented) by a computer. As a result, the technology functions by enhancing one’s current perception of reality.
A key measure of AR systems is how realistically they integrate augmentations with the real world. The software must derive real world coordinates, independent of camera images.
Our AugmentedRealityView app uses android phone sensors and certain physics concepts for calculating the Point Of Interest (POIs). The Camera Angle of View and Android's magnetic and accelerometer sensors are considered in calculating the azimuth (yaw), pitch and roll positions.
Android's SurfaceView is used to render the device camera and put markers onto it.
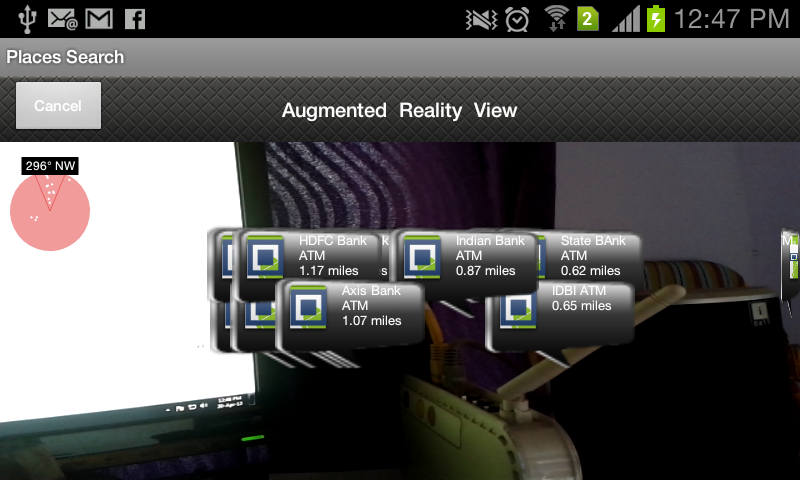
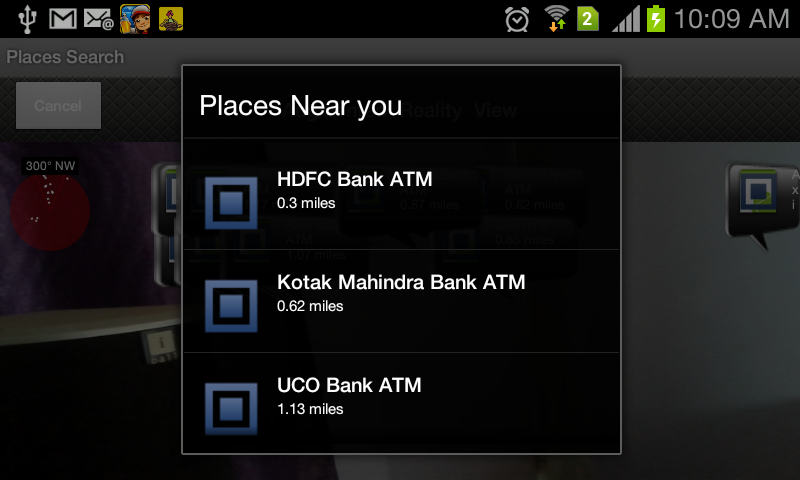
Figure: AugmentedRealityView for Android
Two main classes that comprise this View are:
- RadarView.
- DataView.
RadarView takes care of the Radar shown on the left top corner. It shows the number of points that are in the neighborhood; the points in the "V" notch is the area that is facing the camera.
The points in the "V" notch are in the "Angle of View" of camera.
DataView takes care of all the data and markers that are shown on the phone screen. Just pass the current location coordinates (latitude,longitude) in variables and the ArrayList of locations of places you have to plot.
public void init(int widthInit, int heightInit, android.hardware.Camera camera, DisplayMetrics displayMetrics, RelativeLayout rel) {
	try {
		locationMarkerView = new RelativeLayout[latitudes.length];
		layoutParams = new RelativeLa.......... ... . .
                        .......... . ........... .. ... .
	    }
}
The init () method allows you to initialize the variable sets, which is used for calculating the necessary values for plotting the markers.
ex. onClickListeners of markers, camera view angles, screen dimensions.
public void draw(PaintUtils dw, float yaw, float pitch, float roll) {
	this.yaw = yaw;
	this.pitch = pitch;
	this.roll = roll;
}
The draw () method paints the Radar View on the left top corner.
void radarText(PaintUtils dw, String txt, float x, float y, boolean bg, boolean isLocationBlock, int count)
{
	if(isLocationBlock){
		h = dw.getTextAsc() + dw.getTextDesc() + padh * 2+10;
	}
	else{
		h = dw.getTextAsc() + dw.getTextDesc() + padh * 2;
	}
	if (bg) {
		if(isLocationBlock){
			layoutParams[count].setMargins((int)(x - w / 2 - 10), (int)(y - h / 2 - 10), 0, 0);
			layoutParams[count].height = 90;
			layoutParams[count].width = 90;
			locationMarkerView[count].setLayoutParams(layoutParams[count]);
		......... . ....... . ........ ......... . .
	}
}
The radarText () method is responsible for plotting the markers.
#Applying Low Pass Filter to Android Sensor's Readings
##Overview of Android Sensors The Android sensor framework lets you access many types of sensors. Two very basic types are:
- Hardware Sensors.
- Software Sensors.
Hardware sensors are physical components built into a handset or tablet device. They derive their data by directly measuring specific environmental properties, such as acceleration, geomagnetic field strength, or angular change.
For example: Sensor.TYPE_ACCELEROMETER", Sensor.TYPE_MAGNETIC_FIELD
Software sensors are not physical devices, although they mimic hardware-based sensors. Software-based sensors derive their data from one or more of the hardware-based sensors and are sometimes called virtual sensors or synthetic sensors.
For example: Sensor.TYPE_ORIENTATION, Sensor.TYPE_ROTATION_VECTOR
##Best Practices for Accessing and Using Sensors
- Unregister sensor listeners.
- Don't test your code on the emulator.
- Don't block the onSensorChanged() method.
- Avoid using deprecated methods or sensor types.
- Verify sensors before you use them.
- Choose sensor delays carefully.
- Filter the values received in
onSensorChanged(). Allow only those that are needed.
After we register the Sensors, the sensor readings get notified in SensorEventListener's onSensorChanged() method. However, the rate of change in sensor values is so high that if we map these small changes a.k.a 'Noise' the values jump within a large range of values.
We can also specify the SensorManager's delay properties from one of these:
SENSOR_DELAY_FASTESTSENSOR_DELAY_GAMESENSOR_DELAY_UISENSOR_DELAY_NORMAL
This, however, is only a peek into the system. Events may be received faster or slower than the specified rate, but usually events are received faster.
Moral of the story is:
Allow only those values which are useful and discard the unnecessary noise.
The solution for this is to apply a Low-Pass Filter on these values.
##A Small Glimpse of Low Pass Filter A low-pass filter passes low-frequency signals/values and attenuates (reduces the amplitude of) signals/values with frequencies higher than the cutoff frequency.
Take an example of simple signal with values ranging from 0 to 1. Due to an external source (environmental factors such as jerks or vibrations), a considerable amount of noise is added to these signals. These high frequency signals (noise) cause the readings to hop between considerable high and low values.
##Programmatically Apply Low Pass Filter A device's sensor readings contribute noise data due to high sensitivity of its hardware to various factors. For gaming purposes, these highly sensitive values are a boon, but for application hat need smooth readings, these hopping values are a mess.
Lets look at AugmentedRealityView on GitHub, where we have to point markers on Camera SurfaceView.
The high sensitivity causes the markers to change positions randomly due to noise.
A Low-Pass Filter concept comes to rescue, because we can omit those high frequencies in the input signal, applying a suitable threshold to the filter output reading to plot the markers.
With this implementation the markers won't hop randomly because we have removed the unwanted high reading values.
Here is the algorithm implementation:
for i from 1 to n
y[i] := y[i-1] + α * (x[i] - y[i-1])
Here, α is the cut-off/threshold.
Lets implement it in Android:
lowPass(float[] input, float[] output)
The above method filters the input values and applies LPF and outputs the filtered signals. static final float ALPHA = 0.25f; // if ALPHA = 1 OR 0, no filter applies.
protected float[] lowPass( float[] input, float[] output ) {
    if ( output == null ) return input;

    for ( int i=0; i<input.length; i++ ) {
        output[i] = output[i] + ALPHA * (input[i] - output[i]);
    }
    return output;
}
Low-Pass Filter is finally applied to sensor values in onSensorChanged(SensorEvent event) as follows:
@Override
public void onSensorChanged(SensorEvent evt) {


	if (evt.sensor.getType() == Sensor.TYPE_ACCELEROMETER) {
		gravSensorVals = lowPass(evt.values.clone(), gravSensorVals);

	} else if (evt.sensor.getType() == Sensor.TYPE_MAGNETIC_FIELD) {
		magSensorVals = lowPass(evt.values.clone(), magSensorVals);
	}

	if (gravSensorVals != null && magSensorVals != null) {
		SensorManager.getRotationMatrix(RTmp, I, gravSensorVals, magSensorVals);

		int rotation = Compatibility.getRotation(this);

		if (rotation == 1) {
			SensorManager.remapCoordinateSystem(RTmp, SensorManager.AXIS_X, SensorManager.AXIS_MINUS_Z, Rot);
		} else {
			SensorManager.remapCoordinateSystem(RTmp, SensorManager.AXIS_Y, SensorManager.AXIS_MINUS_Z, Rot);
		}

		SensorManager.getOrientation(Rot, results);

		UIARView.azimuth = (float)(((results[0]*180)/Math.PI)+180);
		UIARView.pitch = (float)(((results[1]*180/Math.PI))+90);
		UIARView.roll = (float)(((results[2]*180/Math.PI)));

		radarMarkerView.postInvalidate();
	}
}
An example of this can be found on GitHub.
Here i have applied low pass filter for Sensor.TYPE_ACCELEROMETER and Sensor.TYPE_MAGNETIC_FIELD.