Getting started with Muca
- Muca breakout
- Arduino ( or other dev boards capable of i2c)
- USB cable
- Wires
Muca interface works with i2c. Any device capable of i2C communication can communicate with the board.
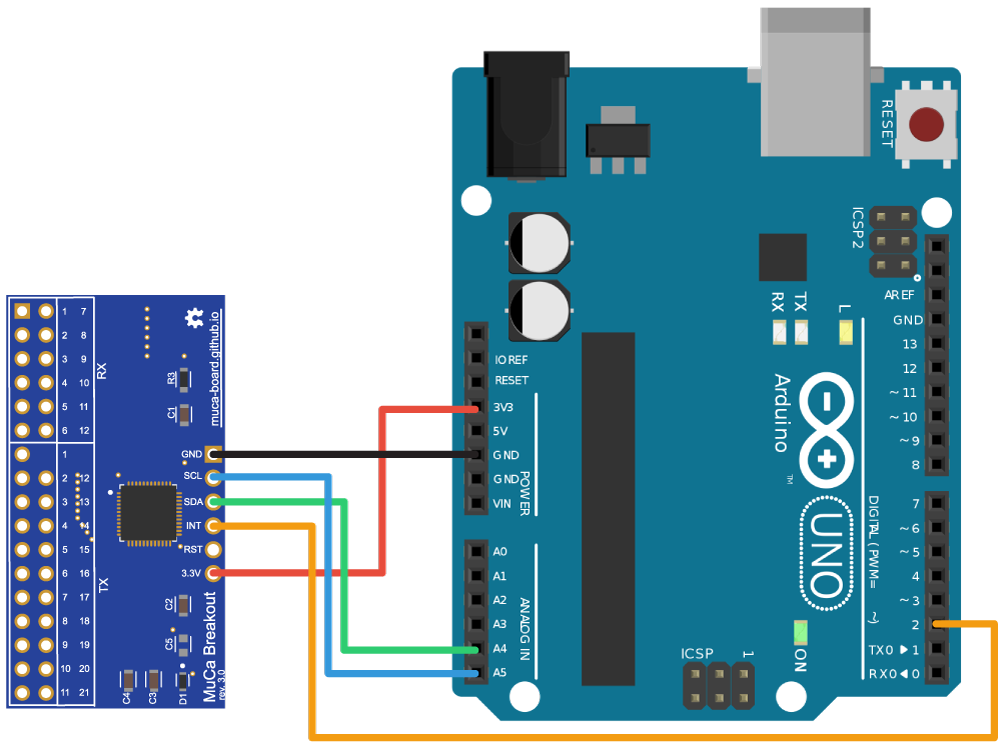
On Arduino, the default SDA pin is A4 and the default SCL pin is A5.
The cable connected to the interrupt pin is only needed if useInterrupt is set to true.
To connect the electrodes, you need to connect all vertical lines to the TX electrodes (1 to 12), in the correct order. You don't have to connect all the electrodes. For instance, if you have only 6 electrodes, connect from 1 to 6. Do the same thing for the horizontal electrodes, that you can connect to the RX electrodes, from 1 to 21.
Tip: You can solder the thread directly to the pins. If you want a robust prototype, lock them in place with some hot glue or epoxy.
If you bought a Muca board, then latest firmware is already flashed on the mcu. If you built it yourself, be sure to flash the firmware beforehand.
Processing is a software used to visualized the values detected by Muca. The basic examples of Muca are working with processing but this software is not a requirement.