This project puts a ReactJS front-end on a smorgasbord of APIs, mostly from a local instance of Hass.io. (Very, very much a work in progress, as of 02/2018.)
This project was bootstrapped with Create React App.
- Demo
- Components
- Setup Dash McDasherdash
- Setup Hassio
- Configure a Pi in Kiosk Mode for Display
- Run A Very Simple Web Server on the Pi and Deploy
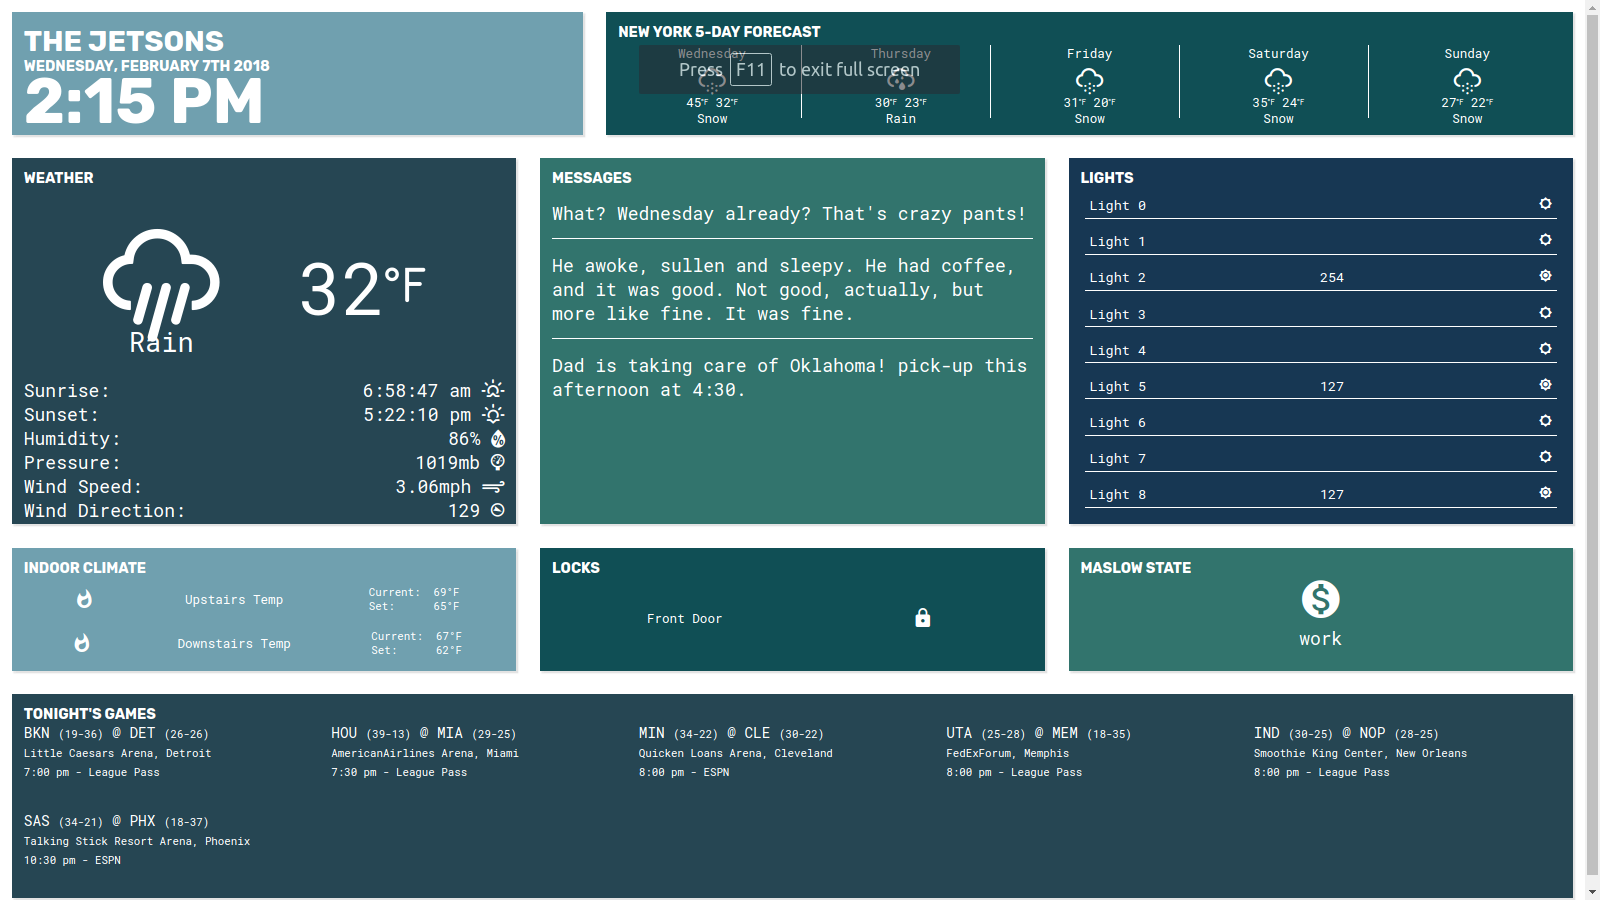
This dashboard is designed to ingest a few different APIs at this time: Todoist, Hass.io, NBA.net, and OpenWeatherMap. The Todoist API supplies the messages panel, information about your home from hassio, last night's scores and tonight's games from NBA.net, and local weather from OpenWeatherMap. Hassio will require some setup if you wish to use it, while Todoist and OpenWeatherMap require keys that are placed in a config file (see below).
To get Dash McDasherdash up and running, clone this project. Then, make a copy of ./src/dashboard_config_sample.js and call it dashboard_config.js.
~$ mv ~/<PATH_TO_PROJECT/src/dashboard_config_sample.js ~/<PATH_TO_PROJECT/src/dashboard_config.js
Open up dashboard_config and fill in the blanks with your information. Then execute these two commands:
~$ npm install
~$ npm start
This will start a development server on localhost:3000.
If you want to consume data feeds from the Hassio API, you will need to allow CORS. Add/edit the http: section of your configuration.yaml:
http:
  # Secrets are defined in the file secrets.yaml
  api_password: !secret http_password
  cors_allowed_origins:
  - 127.0.0.1
  - http://<YOUR_DEV_MACHINE_LOCAL_IP>:3000
  - http://<YOUR_DISPLAY_MACHINE_LOCAL_IP>:5000
  - https://<YOUR_EXTERNAL_URL>.duckdns.org:5000
This section will look different depending on whether you wish the dashboard to be available outside your network, etc.
The original concept for this project was to use an older Raspberry Pi (a Model 2b in my case), in conjunction with an inexpensive wall mount and an old, unused monitor, to create a read-only dashboard view. The wall-mount Pi is running Raspbian Jessie. It works perfectly with launching Chromium fullscreen, disabling the screensaver by installing xscreensaver, and hiding the cursor in LDXE autostart.
Create file called ~/.config/autostart/chromium.desktop
[Desktop Entry]
Encoding=UTF-8
Name=connect
Comment=Checks internet connectivity
Exec=/usr/bin/chromium-browser -incognito --kiosk YOUR_WEB_ADDRESS
Install a screensaver manager on the pi.
~$ sudo apt-get update
~$ sudo apt-get install xscreensaver
Note: If you don't have ssh set up on the display pi, use ctrl+alt+f2 to access the terminal when in kiosk mode, and 'startx' to relaunch the display. Disable Screensaver
Install x11-xserver-utils and unclutter, and add a configuration to hide.
~$ sudo apt-get install x11-xserver-utils unclutter
Open ~/etc/xdg/lxsession/LXDE/autostart
~$ sudo nano ~/etc/xdg/lxsession/LXDE/autostart
Add to the bottom of the file:
@unclutter -idle 0.1 -root
Create a build of the front-end by running this command in your development directory.
~$ npm run build
Then copy the contents of that directory to a directory on your Pi. (Note: I have a different, Pi version 1 running to handle the web server. This could be the same Pi that has the dashboard on it, of course, or anything else. I just have a Pi set up as a minimal server, so I included these steps here.)
From a command line on your dev machine:
~$ scp -r ~/<PATH_TO_PROJECT>/build/. pi@<PI_IP>:~/<PATH_TO_WHEREVER_YOU_WANT_THE_SERVER>/public
Next, navigate to the directory 'above' the /public directory you made via ssh and run:
~$ sudo nano package.json
Then copy this into that file:
{
  "name": "Crazy-Basic-Web-Server",
  "description": "Simple raspberry pi web server.",
  "version": "0.0.1",
  "dependencies": {
    "express": "^4.12.4"
  },
  "engines": {
    "node": "0.12.1"
  }
}
Then
~$ sudo nano server.js
And paste this in:
var express = require('express');
var app = express();

app.set('port', (process.env.PORT || 5000));
app.use(express.static(__dirname + '/public'));

app.get('/', function(req, res) {
        res.send('Hello Raspbian!');
});

app.listen(app.get('port'), function() {
        console.log('Web app running on port', app.get('port'));
});
Next, run
~$ npm install
~$ npm start
And now you should have a webserver running on port 5000.