Device Tree
A devicetree is a data structure that is used to describe and configure hardware. It is extensively used in Zephyr projects.
In order to use the provided devicetree view, it is necessary to have a Zephyr project and the Devicetree Compiler (DTC) installed. For more information, refer to Zephyr and Dependecies Installation.
After compiling the Zephyr Project and refreshing the Devicetree view, it will be populated with a tree-like view of the hardware hierarchy of the project. You can inspect the nodes and their associated values.
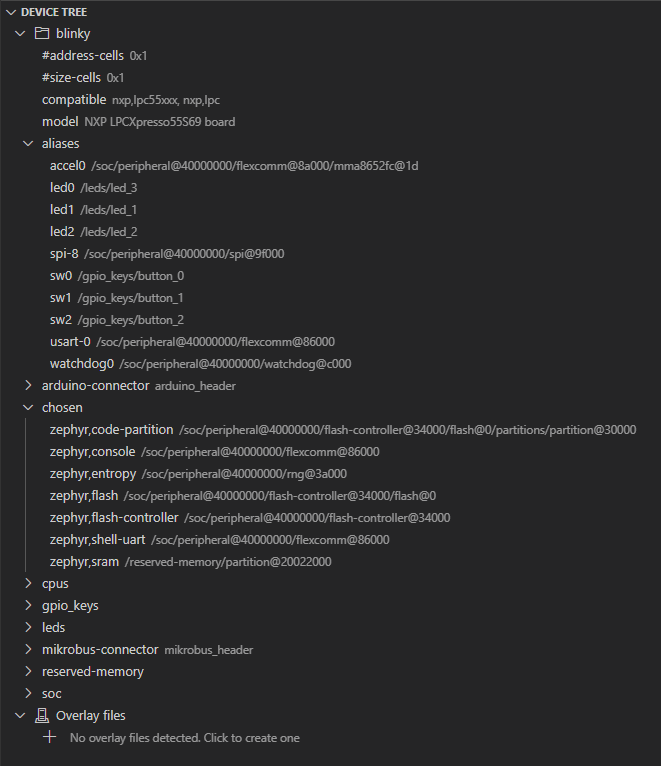
Clicking on a node will redirect the user to the source definition of that node. If the node is the merge result of multiple definitions, the one that sets the final value will be opened.
The node name and value can be copied to the clipboard by opening the context menu (right click on a node), and choosing the Copy Name command.
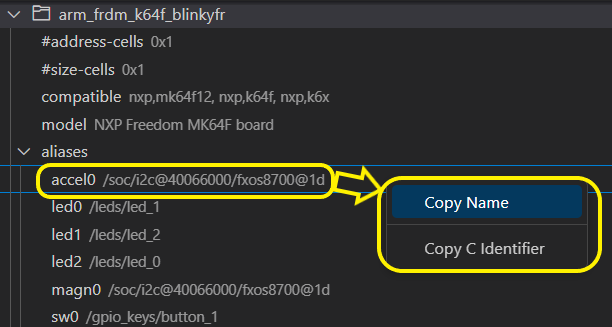
Node values can be referenced programmatically in source code, using specific macros. These can be generated for most of the nodes by opening the context menu and choosing the Copy C Identifier command.
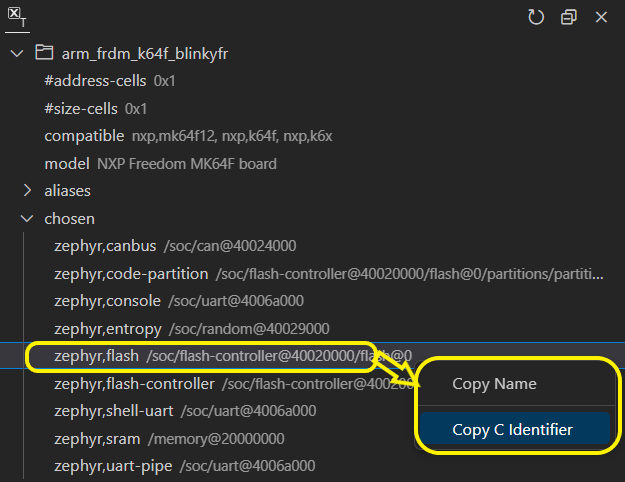
This will copy the associated macro to the clipboard. For more information, refer to Devicetree bindings.
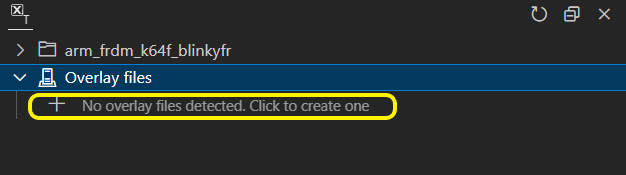
There are multiple ways to override nodes and properties found in the device tree. The most convenient one is to create an overlay file with the required changes. The devicetree view keeps track of the overlay files used during compilation under the Overlay files category.
If there are no overlay files created for the current project, one can easily be added by clicking the prompt under overlay files.
After creating the overlay file, the view will be refreshed and display the currently available overlay files. Clicking on an overlay file will open a new tab in order to edit it.
If there are multiple overlay files, the one used during the build process will have a check next to it.
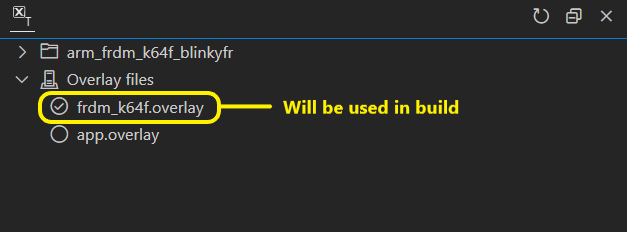
After modifying an overlay file, it is necessary to rebuild the project and refresh the view for it to update.
Additional overlay files can be specified by using CMake variables.
In order to set CMake variables, you need to navigate to the cmake-kits.json file, located under .vscode folder in the root of the project. CMake variables can be specified under the cmakeSettings field of the JSON file.
In the case of overlays, they can be specified under 2 variables: DTC_OVERLAY_FILE and EXTRA_DTC_OVERLAY_FILE. Each entry can contain more than one file, by separating the paths using either a semicolon or a space.

After setting the variables, it is necessary to rebuild the Zephyr project and refresh the device tree view for the changes to take effect.
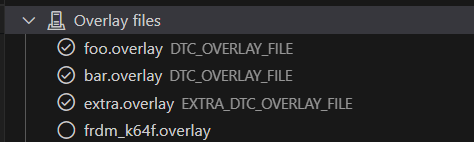
The overlay files specified under CMake variables will take precedence over the project ones defined. Each entry will also specify where it has been declared, either DTC_OVERLAY_FILE or EXTRA_DTC_OVERLAY_FILE.
For more information on how to use overlay files, refer to Devicetree HOWTOs.