Development versions and experimental features
+ + +
This document is outdated.
The new features are described here:
https://github.com/openlilylib/LO-ly/wiki/Whats-new#v-100---whats-new
+ + +
| ANNOUNCEMENT |
|---|
| OOoLilyPond has moved to a new repository: |
| https://github.com/OOoLilyPond |
| All past/present/future development can be found at the new location. The page you are viewing right here contains all development up to V. 1.0.1, but it will no longer be maintained. |
The features described here will be available in the next regular release 1.0.0
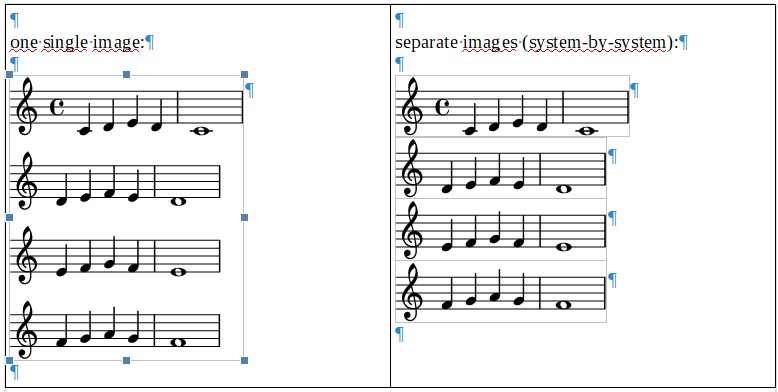
If the snippet contains multiple lines, OLy can insert each of them as a separate image (like the system-by-system insertion mode does in lyLuaTEX). Between these images, OLy then starts new paragraphs.
However, there are some requirements:
- This feature only is available in Writer documents. (It requires a macro iterating through all embedded images which is not possible in Draw or Impress.)
- The snippet must include
lilypond-book-preamble.ly.
The preamble not only removes white borders but also produces separate image files.
Instead of one fileOOoLilyPond.*you get multiple files
OOoLilyPond-1.*,OOoLilyPond-2.*etc.
OLy inserts them and starts new paragraphs between them. - For this to work, the "Anchor" setting must be "as character".
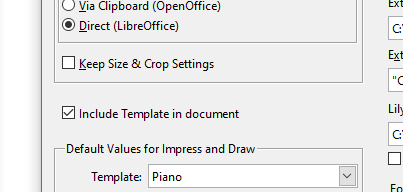
- The "Insert images" method should be set to "Direct (LibreOffice)".
Inserting "via Clipboard" combined with inserting paragraphs sometimes leads to wrong positioning of objects. - File format must be "pdf to svg" (recommended, additional software required for Windows) or "eps" (not usable in LibreOffice).
(lilypond-book-preamble.lyonly produces separateepsandpdffiles.)
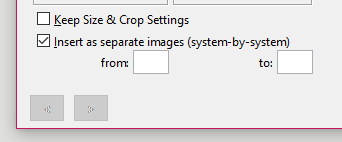
A checkbox in the OLy Editor window lets you choose whether you want your snippet to be inserted as separate images.
In the Config dialogue, you can specify a default setting which will be applied to new snippets.
(Oly will not change this setting for existing snippets by itself. However, you can also change it during batch processing.)
The contents of the Editor fields (code, staff size, line width etc.) are stored in each of the images belonging to the snippet, so you won't lose anything if some of the images are erased.
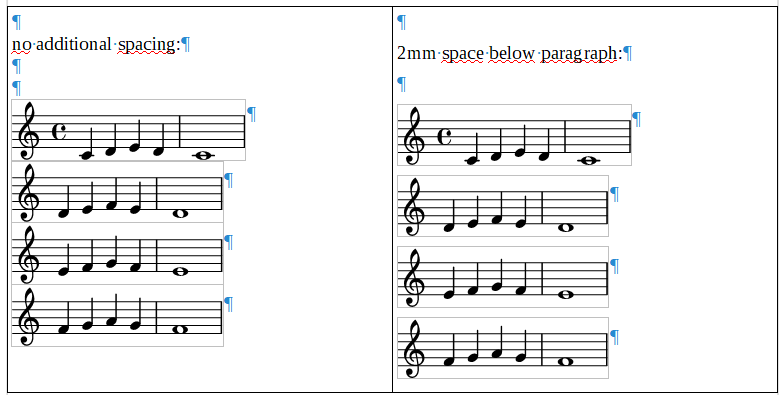
When splitting a score into separate images, LilyPond cannot adjust spacing between them.
For better looking results, it can be helpful to use a paragraph style in LibreOffice that adds a small amount of space below the paragraph.
- To edit such a multi-image snippet, just select one of its images and launch OLy, perform your changes and click the LilyPond button as usual.
- After compiling, OLy will search for all images belonging to the snippet (except for the one you selected) and erase them (as well as the line breaks between them).
- Then the currently selected image (i.e. the last remaining one) is replaced by the newly created images (with new line breaks in between).

In case you only need a subset of the images belonging to your snippet, you can simply erase the ones you don't want to keep.
But once your snippet gets re-compiled, all of the images will be back again.
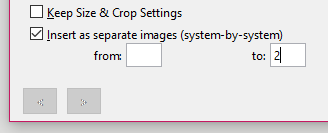
There is a better way to achieve this: Use the "from" and "to" fields to specify a first and a last image number, and OLy will only insert the images belonging to the specified range.
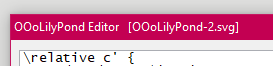
To quickly find out the image number of an existing image, just select it and launch OLy.
If it belongs to a multi-image snippet, you can read its file name in the title bar of the Editor window.
If, for example, the file name "OOoLilyPond-2.svg" is displayed, this is the 2nd image of your snippet.
How can OLy recognize which images belong to the same snippet?
Multi-image objects have a timestamp (date and time) indicating when the Ly file was compiled. Images with the same timestamp are assumed to belong to the same object.
Attention, there is a trap: If you copy an image from a multi-image object, it still has the same timestamp as the "original". When you edit and compile it, only the "original" image that you copied will remain, the other images that belong to the original object will disappear. Don't worry: The "copy" you just compiled has got a new timestamp. You can now re-compile the remaining image from the "original" object to get the missing images back. Now both objects are complete again.
To avoid this problem, you can uncheck the "insert as separate images" checkbox and re-compile your snippet before copying it. Afterwards, you can re-open and re-compile both snippets ("original" and "copy") using the "insert as separate images" option again.
Alternatively, if you want to create a new snippet based on an existing one, you can copy its code from the OLy editor window into the clipboard. Now create a new OLy object and insert the code from the clipboard.
ToDo:
- Provide an option to prevent erasing the "old" images or to instantly set a new timestamp?
OLy now offers an additional way to use the svg graphic file format together with the -dcrop parameter. As with the "normal" svg format, it requires some additional fonts to be installed, but there is automatic cropping due to the -dcrop parameter.
However, the "insert as separate images (system-by-system)" option cannot be used with both svg formats.
It's now possible to include a template inside the OLy object (the config dialogue offers you a checkbox to switch on this feature).
If you send your document to someone else, now you don't have to worry about missing templates.
To save an included template as *.ly file again, click the "Edit" button at the template section of the OLy Editor window. The template editor opens and shows the content of the template. Here you can modify it and save it under the default name or a new name.
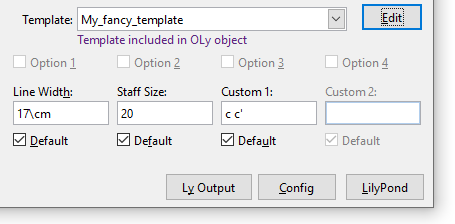
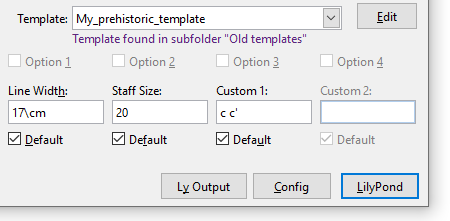
Below the "Template" field, OLy will now indicate if the template is found in a location other than the template folder, i.e. a subfolder or the containing LO document's folder or included in the OLy object.
There is also a hint if no template with the given name is found.
If you have old templates that you don't actively use anymore, but which might still be needed for older documents, you can put them in an subfolder of your regular template folder. They won't be shown in the template list of the editor window, but OLy will still find them if an object needs them.
When an OLy object is opened for editing, OLy will look for a template with a matching name in the following order:
- Templates that are included in the object have highest priority.
They will be used even if a template with the same name can be found inside the template folder. - Next, OLy checks if a matching template file can be found in the folder where the LibreOffice / OpenOffice document file is stored.
Templates that are located there will also have priority over the built-in ones. - Now OLy looks in its regular template folder.
- If the template folder does not contain a matching file, its subfolders will be scanned.
You can now directly type in a template's name. This also works with templates in subfolders or the LO document's folder.
Besides the "OLy" button, there is a new "Batch" button. It opens a new dialogue that lets you specify search-and-replace expressions.
This "Batch" function will not care about which objects are selected in Writer. Once you hit the "Start" button, it will iterate through all OLy objects in the document.
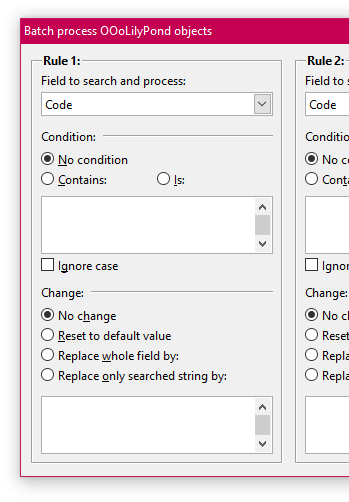
- OLy reads the object and checks if it matches your search criteria (to have all objects processed, choose "no condition"). You can specify in what field (Code, Line Width, Staff Size, ...) you want to search for a certain expression. Hint: In the Code field, it's also possible to search for comments, e.g.
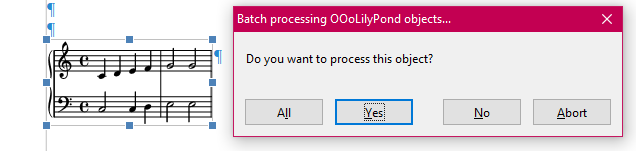
% first movementor% use smaller staff sizeetc. - If your criteria are fulfilled, you will be asked if the object is to be processed (apart from "yes" or "no", you can also abort batch processing or choose to continue without further query).
- The changes you requested are now applied to the content of the search field.
(You can also choose "No change". This can be useful if you only want objects to be re-compiled, e.g. after editing a template or an include file.) - Finally, LilyPond is called to create a new image which will replace the existing one.
(Just like when clicking the "LilyPond" button in the OLy editor window)
During batch compilation, "anchor" and "wrap" settings will not be changed.
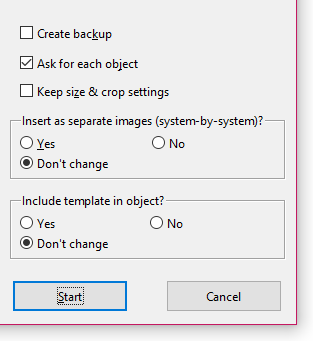
If you activate the "Create backup" option, OLy will save a copy of your text document first. This option only is available if the document has already been saved and thus already has a file name.
You will find this backup in the same folder with a timestamp added to the file name. For example, if your document is named Test.odt and a backup is created on March 7th 2020 at 15:55:02, the latter will be named
Test_2020-03-07_15-55-02.odt.
You can choose to "Keep size & crop settings".
For "Insert as separate images" and "include template in object", apart from yes or no you can choose to keep the object's current settings.
The following settings will be applied as specified in the OLy config dialogue:
- default template (Writer)
- default line width and staff size
- insert images: Via clipboard (OpenOffice) / Direct (LibreOffice)
- Include statement(s)
- template path
- format for image files
- (for png format: resolution (dpi) and settings for transparent background)
Regarding multi-image objects (using the "insert as separate images" option), only one of the corresponding images (the one with the lowest image number) is selected and recompiled.
During this process, all other images belonging to the same object will be erased and the compilation process will produce new images (see above).
The Batch button is only available in Writer documents.
(Batch processing requires access to all graphic objects in the document. Unfortunately, in LibreOffice and OpenOffice only Writer documents have that feature, but it's not available in Draw or Impress.)
ToDo:
- Are two search rules enough or do we need a third rule for the batch window?
- During batch processing, there is no query if the user wants to save an included template. It might be lost when recompiling without including the template. What "intended behavior" would be suitable?
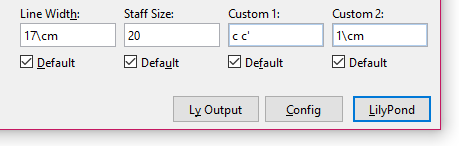
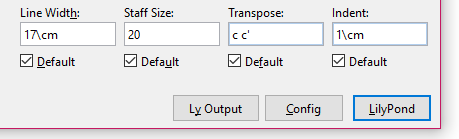
The captions of the four input fields can be customized inside the template using the new OOoLilyPond...Label command.
For example, to change the "Custom 1" caption into "Transpose:", put the following line into the template code:
% %{OOoLilyPondCustom1Label%}Transpose:%{OOoLilyPondEnd%}
- The comment sign
%at the beginning of the line is necessary because otherwise theTranspose:string would be "visible" to LilyPond and certainly cause a compilation error. -
OOoLilyPondtags cannot be nested, so the aboveOOoLilyPond...Labelcommand cannot be used inside another tag pair, e.g. theOOoLilyPondCodesection.
The four input fields Line Width, Staff Size, Custom 1 and Custom 2 will change from text input fields to checkboxes if they are filled with a boolean value (##t or ##f) AND if the current template intends to use a boolean value there. This can be helpful for usages like
ragged-right = %{OOoLilyPondCustom2%}##t%{OOoLilyPondEnd%}
which can now be treated like this:
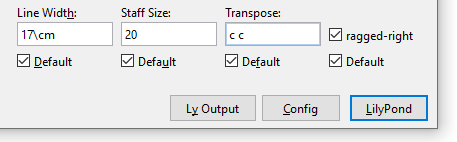
As setting the staff size in LilyPond requires a scheme command, the Staff Size field uses scheme block comments #! and !#. Therefore, when turned into a checkbox, it also produces the scheme versions of boolean values: #t and #f.
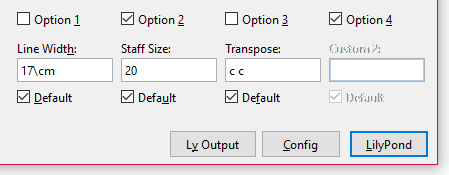
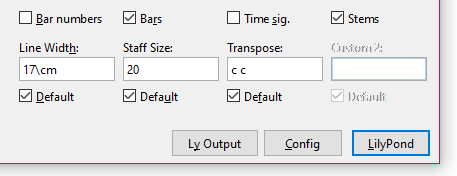
In addition to the input fields, there are four checkboxes that produce the boolean values ##t or ##f.
Those values can "switch" sections of code on or off. For example, any code between the two tags %{OOoLilyPondOption3True%} and %{OOoLilyPondEnd%} will stay visible to LilyPond if Option 3 is ##t. It will be commented out using block comments %{ and %} if Option 3 is ##f. Therefore it must not contain any further block comment signs.
Likewise, code between the tags %{OOoLilyPondOption3False%} and %{OOoLilyPondEnd%} will stay visible to LilyPond if Option 3 is ##f and will be commented out if Option 3 is ##t.
You can use both those pairs of tags in a template, but none of them can be used multiple times.
Here is an example from a demo template. When Option 3 is set to ##t, this is what will be passed to LilyPond:
\layout {
  \context {
    \Staff
    %{OOoLilyPondOption3False%}%{ \remove "Time_signature_engraver" %}%{OOoLilyPondEnd%}
    %{OOoLilyPondOption3True%}\numericTimeSignature%{OOoLilyPondEnd%}
  }
}
With Option 3 set to ##f, you will get
\layout {
  \context {
    \Staff
    %{OOoLilyPondOption3False%}\remove "Time_signature_engraver"%{OOoLilyPondEnd%}
    %{OOoLilyPondOption3True%}%{ \numericTimeSignature %}%{OOoLilyPondEnd%}
  }
}
The captions for option checkboxes can be customized as described above:
% %{OOoLilyPondOption3Label%}Time sig.%{OOoLilyPondEnd%}
Again, don't forget the comment sign % at the beginning of the line.
A similar mechanism is used for providing a default value in the template:
% %{OOoLilyPondOption3Value%}##t%{OOoLilyPondEnd%}
A word on backwards compatibility: Can templates that contain those new tags be used with older OLy versions? Short answer: It depends.
Versions up to 0.5.12 don't know those new "Option" tags. They will ignore the tag pairs as well as the code enclosed by them. This will only be a problem if both tag pairs (...True and ...False) for a checkbox are in use and must not both be omitted at the same time.