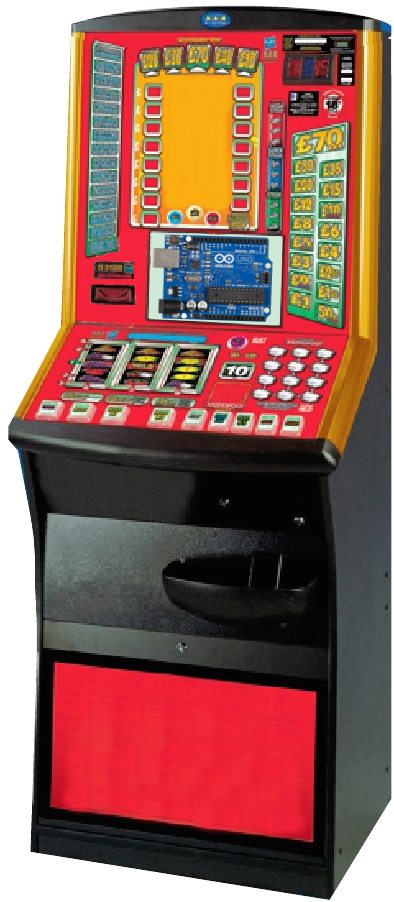
This repository contains code listings, wiring diagrams, notes, and other reference information relating to my experiences of disassembling old (generally broken, sold as "for spares for repairs") fruit machines (or, "slot machines", for U.S. friends) into their various constituent components, and then rebuilding their functionality using an Arduino microprocessor as a controller. Accompanying videos can be found at https://www.youtube.com/playlist?list=PLogiUurtMYtRenE8BooiE4FDIyxuIyZQj
As of July 2021, I have now followed this process with five different machines of different eras and manufacturers (Bell Fruit "Snakes and Ladders", Electrocoin "Magic 100", "Max-a-Million", Global "Tuppenny Nudger" and Global "Phoenix Knights"). Each machine has had different components, features, and designs, and I've tried to update the notes below to cover the different variations I've found.
The feature reel is a single standalone reel, which makes it slightly easier to reverse-engineer than the main reels, which typically occur in a connected bank of three or four. It consists of a stepper motor, lamps, and an opto-sensor. Stepper motors may be 12V (in which they can be driven by a4988, DRV8825 stepper motor drivers of a CNC shield) or 24V (in which case they might need an L293D motor driver shield, as shown below)

The reels work the same way as the feature reel, except that each has 16 positions, three lamps, and an opto-sensor. Rather than directly wire to a motor driver, I used a RAMPS shield, which provides a convenient way to interface with stepper motor drivers (A4988, DRV8825, TMC2209 or similar)

These are the little devices that are used to detect the position of the reels - they consist of a IR transmitter pointing at an IR receiver, with a small gap between them (~1cm). The reels have a small tab protuding from them at one point, which blocks the IR beam as it passes the gap in the sensor, making it possible to know the rotation of the reel at that point. I have encountered several variations of adaptor board which attach the opto-sensors to the reel assmebly, as follows:

There are two commonly-used interfaces for coin hoppers - serial and parallel.
The parallel interface is easy to understand - the hopper simply dispenses coins as soon as, and far as long as, 24V power is connected. A coin counter output pin is connected to ground every time a coin exits the hopper, which can be used to cut power once sufficient coins have been dispensed.
A serial interface called CCTalk was introduced to make universal communication standard with various monetary devices in machines - note validators, coin mechs, and hoppers. The CCTalk standard defines a set of messages that are sent over a serial connection (you can view the documentation here: http://www.coinoperatorshop.com/media/products/manual/cctalk/cctalk44-2.pdf).

The primary LED display is formed from five interlocking 1.8" common cathode 7-segment LED displays - datasheet can be found at http://www.farnell.com/datasheets/99300.pdf To use the displays, I'm sourcing current into the anodes of each segment using a UDN2981 high-side darlington transistor array (the channels of the UDN2981, corresponding to the segments to be lit, are set by a 74HC595 shift register). The segments of all the displays are wired together, and the particular digit to be lit is selected by grounding the common cathode of that digit through a ULN2803 low-side darlington transistor array. The ULN2803 too is set by a 74HC595 which is daisy-chained to the first, meaning all 5 digit displays can be set using just three pins on the Arduino.
Update:
- the 74HC595+UDN2981 on the high side can be replaced with a single MIC5891 8-channel source driver
- the 74HC595+ULN2803 on the low side can be replaced with a single TPIC6595 8-channel sink driver

https://picaxeforum.co.uk/threads/using-spi-serial-vfds-from-fruit-machines-with-picaxe-comprehensive-code-examples.22552/ https://www.fruitemu.co.uk/ib/index.php?app=forums&module=forums&controller=topic&id=17419
The incandescent lamps were arranged into groups around the machine, attached to long harnesses consisting of cable-tied wires, rather resembling a spinal column.

Although the lamps themselves do not have polarity, the bulb holders typically have had a small inline diode inserted the housing, meaning they have a distinct "positive" and "negative" side. As such, wiring them is much the same as wiring 12V LEDs. Note that the colouring of the wires does not necessarily follow any standard convention: in the following photograph, note the line signifying the cathode of the diode shows the red wire is GND, while the grey wire is +12V.

In some machines, the lamps in a group all shared a common ground but each lamp has their own individual 12V wire ("high-side" switching).
In other machines, the lamps share a common 12V supply, but each lamp has their own unique ground connection ("low-side" switching), as in the photograph below.

The following circuits demonstrate how to wire a group of eight 12V lamps to be individually-switched using a power shift register - using a TPIC6B595 for low-side switching, or MIC5891 for high-side switching.

The original buttons, like the lamps, were illuminated with individual 12V incandescent bulbs, sharing a common ground and individually switched 12V supply wires. To facilitate easier wiring and greater functionality, I decided to replace these with PL9823 LEDs. PL9823s are similar to common "Neopixel" or WS2812 LEDs, in that they are indiviudally-addressable, RGB LEDs, and any number of them can be chained together in a long series controlled by only a single data pin on an Arduino. However, unlike Neopixels which commonly come supplied on a strip, PL9823s are individual LEDs supplied in a 5mm form factor, just like a regular LED (except with 4 pins, not 2).

The counters are the most simple electronic components.
