Torrent based Automated Media Center for Raspberry Pi (RPi)
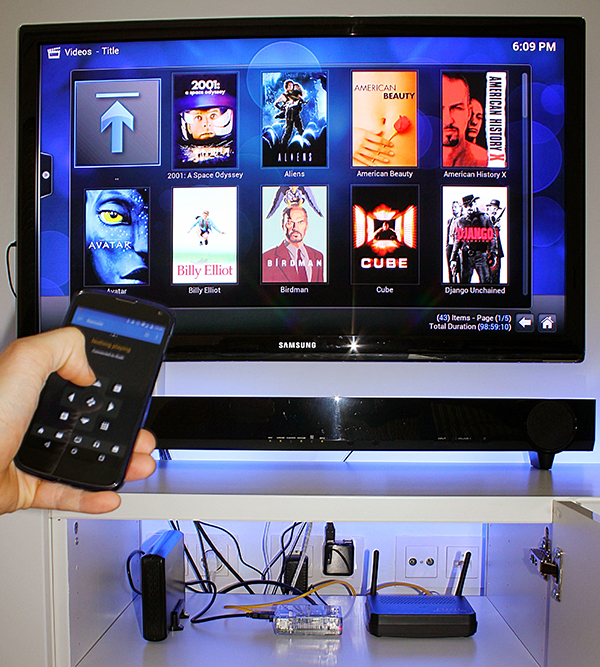
riski is a Torrent based Automated Media Center for the Raspberry Pi (RPi) computer board. By Torrent based, we mean that most of media content is remotely downloaded by using a torrent client (e.g. Transmission) and, by Automated, we mean that once the media file is completely download, it is indexed, stored and elegantly presented on a Media Center environment (e.g. Kodi) in a fully automatically way.
In other words, riski allow us to download any media file (movies, tv shows and music) into our RPi by sending the order remotely through our smartphone wherever we are, and directly playback it on our TV once we arrive at home. It also allow to subscribe in any TV Show RSS stream (e.g. ShowRSS) and automatically receive each new episode of a TV Show that we are following. riski will notify us that a new episode has arrived.
Moreover, riski will look for the subtitles that better fit to our media file according to our language preferences and will display them automatically.
Raspberry Pi (RPi) has been chosen as the hardware where to set up riski because of it low power consumption. Since it is desirable that RPi will be all day turned on waiting us to download something remotely, it is important that the system consumes little power.
An external Hard Drive Drive (HDD) connected via USB will also be needed in order to store all the media content that we will be downloading. It is recommended using an external powered HDD, since, in return, the low RPi consumption has the disadvantage that can not feed big external peripheral devices.
Other hardware components needed are: a SD card (standard or micro depending on the RPi version) where to set up the Operating System (OS), an HDMI cable to connect RPi to TV, Ethernet cable to connect RPi to Router, a 5V micro USB charger to feed RPi (any standard smartphone charger should work) and an external USB keyboard for the installation.
-
Install the Raspbian OS image into a SD card by following https://www.raspberrypi.org/documentation/installation/installing-images/README.md
-
Create a personal DNS (e.g. mydns.duckdns.org) throughout http://duckdns.org/
Keep save the provided URL in section install>pi (e.g https://www.duckdns.org/update?domains=yourdomain&token=XXXdbXXe-cXcX-XXXX-bXXc-bXbXXaXfXfbX&ip=). You will need it in step 4.
-
Register in http://www.opensubtitles.org/
-
Plug the flashed SD card in step 1 into the RPi card slot. Connect an external USB self-powered HDD to your Raspberry Pi (Important!!! Data inside will be erased). Additionally, plug the Ethernet wire, connect an external USB keyboard to the RPi and plug the RPi into a 5V micro USB power source, your RPi will boot for the first time and a configuration menu will pop-up.
By navigating throughout the Raspi-config menu with your keyboard,
- expand the File system
- change Time Zone
- change Keyboard Layout
- change Locale
By pressing Finish>Yes, the RPi will reboot.
-
A login prompt will appear. Type:
- raspberry login: pi
- Password: raspberry
Once the command line prompt $ appears, type:
$ git clone https://github.com/polstein/riski
$ sh riski/riski.sh
Alternatively, step 5 can be done remotely using a shh client such as putty in Windows or Terminal in Mac Os or Linux. For example, in Terminal, just type ssh pi@RPi_private_ip (RPi_private_ip is shown in the address field when typing ifconfig on the RPi prompt) and then, introduce the same password and commands on the code-box above. The advantage of this procedure is that you can copy paste some long input parameters using cursor.
The Riski installation will start and some input parameters must be provided during the installation:
- Type a private IP address for your RPi. The three first numbers separated by dots must be exactly the same as the ones displayed in the eth>inet addr field, the last one can be substituted by convenience for an unused IP, as for example 12 (e.g. 192.168.1.12)
- Copy the Mask, Destination, Bcast and Gateway values as they are displayed (e.g. Mask:255.255.255.0 Destination:192.168.1.0 Bcast:192.168.1.255 Gateway:192.168.1.1)
- Enter OpenSubtitles username and password of step 3
- Type your Duckdns domain URL of step 2 (make sure that you didn't mistype anything)
- At this point you can chose to set the connected HDD or not. If the HDD is already set from a previous instalation just skip this step by writting no, otherwise type yes.
- Type the name of the USB HDD device that you want to setup as it appears (/dev/device) below the second Device Boot line (e.g. sda1)
RPi will reboot, but now it will do on the Kodi (http://kodi.tv/) media center.
- With the keyboard, navigate to VIDEOS>Files. Then also navigate to Files>MEDIABOX>media>Movies and press c. Navigate to Set content and press Intro. Set that this directory contains Movies and press OK>Yes. Do the same with TV Shows.
- Navigate to SYSTEM>Settings>Services>Webserver and mark "Allow control of Kodi via HTTP". Then navigate to Remote control in the left-side menu and mark "Allow programs on other systems to control Kodi". Esc to the Main menu.
- Unplug and plug the RPi to reboot the system. Congratulations!!! Your Riski is already set up! Enjoy it and may torrents be with you ;)
- Open port 9091 for your RPi private IP throghout your Router NAT configuration in order to control Transmission (http://www.transmissionbt.com/) remotely out of your private network.
- Add torrents for download by typing http://RPi.private.IP.XX:9091/transmission/web/ on any browser connected into your private network (User Name: transmission Password: transmission). If you want to do the same out of your network you just need to type your Duckdns DNS instead of RPi.private.IP.XX on the same URL (not that this will not work if you are in your private network)
- You can also search and add torrents remotely with your Android Smartphone by using the Trandroid. Download and configure it by following http://www.transdroid.org/download/.
- You can remotely control Kodi with your smartphone with the oficial Kodi remote control called Kore. Download it for Android here https://play.google.com/store/apps/details?id=org.xbmc.kore