This repository contains guidelines and files to help you build a collaborative course repository using Power Automate flows. Each flow will link to a SharePoint list corresponding to individual courses that will sync on a scheduled basis with Excel sheets you can update as needed. You can share these lists with anyone you like within the same group or organization. A professional or organizational SharePoint account is required to upload the zip file to Power Automate.
We suggest watching the accompanying instructional videos for guidance in setting up your course repositories.
- An Excel sheet course template
- A zip file containing the Power Automate flow to sync the Excel sheet to a SharePoint list
To begin building a repository, you should first navigate to the homepage for your group's SharePoint. The purpose of this section is to build a SharePoint list in which all of the Excel sheets are stored. Whether you make individual spreadsheets per course or combine all materials in one spreadsheet, perhaps differentiating course using a column, is up to you. The spreadsheets contained within the Course Repository Drop-off are where you can make edit, add, or delete course materials. These changes will be updated automatically to the SharePoint list for each course repository using the Power Automate flow built in this vignette.
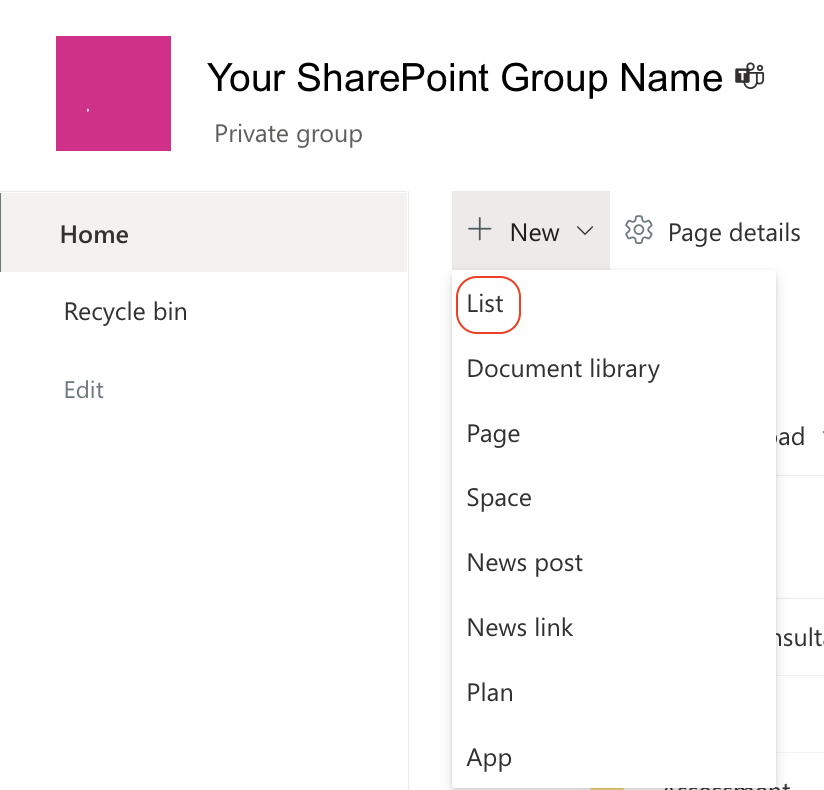
- Directly under the SharePoint group name, select + New and then select Document library.
- Next, select the button in the top left corner labeled Blank list.
- Type Course Repository Drop-off in the Name field. Add a description if helpful.
- Select Create, and now you have a list where you can add Excel sheets that correspond to different courses.

- Download and save the Course Template.xlsx Excel sheet from GitHub.
- Navigate to the Course Repository Drop-off list in SharePoint that you created in Section I.
- Click + New and then + Add template in the drop-down menu.
- Select Course Template.xlsx from your saved documents folder and then click Open.
To determine whether you've uploaded the template successfully, click the + New drop-down menu again. You should see the Course Template Excel document as an option.
Tip: To edit the templates visible in the drop-down list, click + New and select Edit New menu. From here, you can select which templates are visible in the drop-down menu. Select or unselect templates to customize your menu and then click Save at the top of the menu.
If the course spreadsheet already exists in the Course Repository Drop-off SharePoint list, skip to Section IV.
- If an Excel sheet for the course you are looking for does not exist yet, click + New in the top navigation bar.
- Next, click Course Template. An Excel spreadsheet will open.
- Navigate to the top bar, next to Excel, and click Book - Saved to rename the repository spreadsheet. Name the spreadsheet so that it pertains to a certain course. For example, for the fall semester of an Academic Speaking course, you may name the spreadsheet AS Fall Repository.xlsx.

In this section, you will create a SharePoint list that corresponds to the Excel spreadsheet you created in Section III.
- On your organization's SharePoint home page, select + New and then select List, as you did in Section I.
- Next, select the button in the top left corner labeled Blank list.
Tip: If you have created a course SharePoint list in the past, you can select From existing list to create columns in your new SharePoint list.
- Type the name of your course repository in the Name field. Add a description if helpful.
- Select Create.
- To add columns, in the SharePoint list, click + Add column.
- Select the column type. For the purposes of these course repositories, you can select Text for column type. The only caveat is you must choose Hyperlink for the Link and Connected Files columns so that the links are clickable.
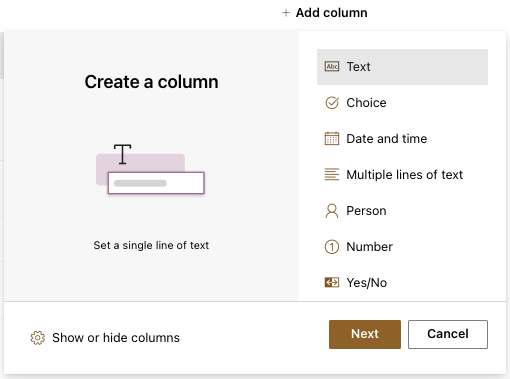
- Submit the column name, being sure to use the same columns names as those that exist in the corresponding Excel spreadsheet.
Note: Even though you could create a list from an Excel spreadsheet, you will likely not be able to amend the column type. What that means is that the Hyperlink columns will not be clickable, which may create issues for the Power Automate flow and for navigating the SharePoint contents.
Now that you have set everything up in SharePoint, it's time to move over to Power Automate. You may ask why there is a need to create a Power Automate flow if you are able to create a SharePoint list directly from an Excel spreadsheet. The limitation with this method is that the SharePoint list will not update based on changes made in the source Excel spreadsheet. The Power Automate flow created with this vignette updates the contents of the SharePoint list based on any changes that are made to the source Excel spreadsheet automatically.
Power Automate is a SharePoint app that allows you to create a workflow that automates processes within SharePoint. For example, Power Automate can be used to create a workflow that updates a List item automatically from an Excel spreadsheet.
You can access Power Automate from the grid icon on the top-left-hand side of SharePoint. If you cannot find it in the first 10 apps, click All apps → to view the entire list of apps.
To successfully import the zip file containing the Power Automate flow, you must establish connections between Power Automate and both (a) Excel Online (Business) and (b) SharePoint. To do this, follow the steps below.
- On the Power Automate home screen, click Data and then Connections in the lefthand bar.
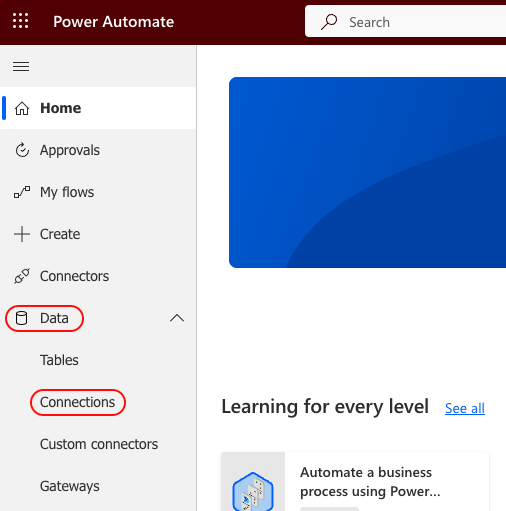
- Next, click + New connection at the top of the window.
- From this screen, you can browse the list for both Excel Online (Business) and SharePoint, or you can use the search function at the top righthand side of the window.
- After clicking Excel Online (Business), click Create and you will be prompted to connect your Excel Online account to Power Automate. Make sure that you are connecting the account associated with your organization.
- Follow the same steps to connect to the SharePoint account associated with your organization.
If you are amending, deleting, or adding new data to a course repository, you can skip to Section V.
- Download the latest version of the CourseRepository WorkflowTemplate.zip in GitHub.
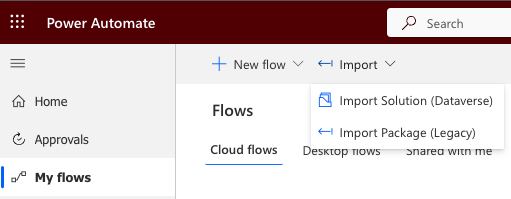
- In Power Automate, navigate to My flows on the left-hand side of the screen. Once there, click ← Import in the top navigation bar and then ← Import Package (Legacy).
- Click the blue button labeled Upload and find the zip file in your folder. It will take a few moments for the zip file to upload in Power Automate.
- Once uploaded, you will have to select import settings. In the Import Setup column for the Course Repository Template, click Update, navigate to the drop-down menu and select Create as new. Here you can name the flow whatever you would like. Click Save to update the name.
- In the Related resources section, click Select during import for any items listed and select your account email.

- Once all fields are filled, you may click the Import button. The flow will take a few moments to import.
- To find the imported flow, click My flows in the left-hand bar.
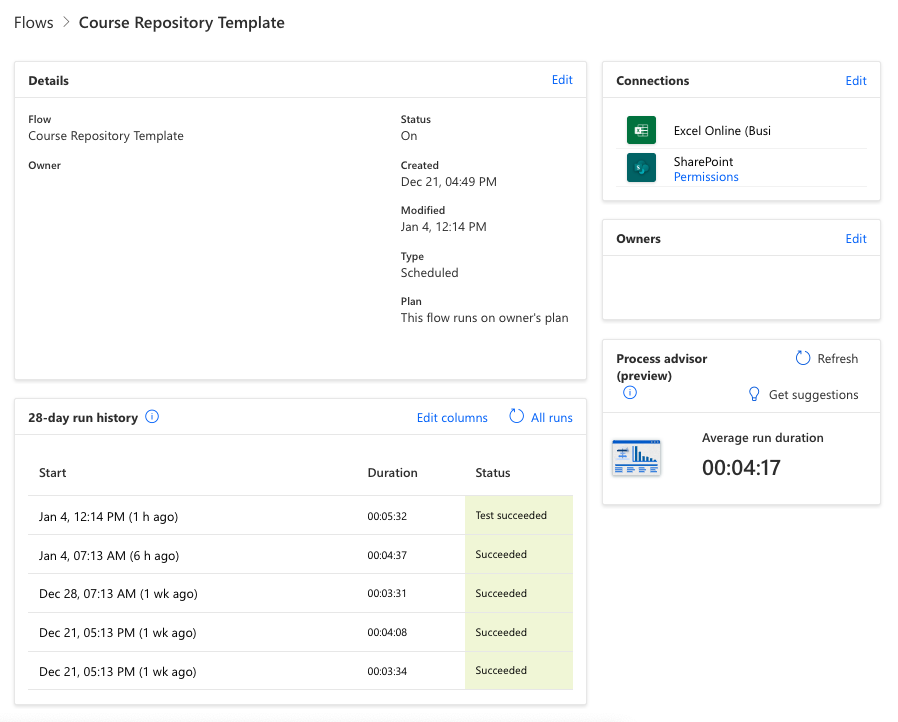
- Click on the imported flow. The page you see is the landing page for the flow, which will show the status (on/off), creation date, the last time it was modified, and any successful or failed runs.
- Click on Edit in the top bar. Here is a preview of the complete workflow in Power Automate. Each bar (e.g., Recurrence, List rows present in a table, etc.) is subsequently referred to as a node.
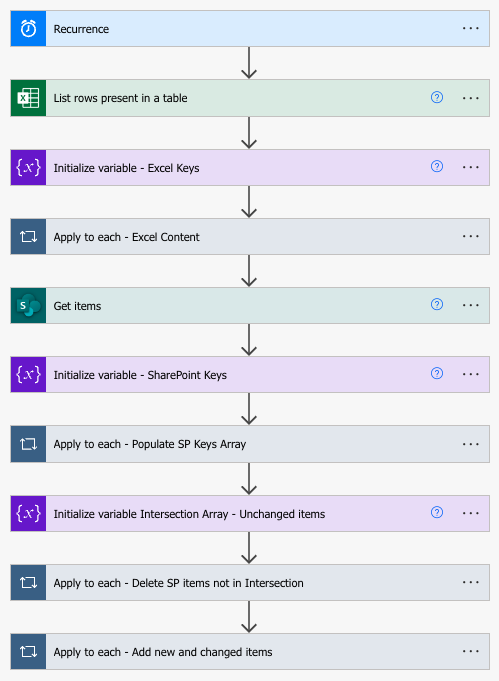
- You will have to open each node to link your Excel spreadsheet and SharePoint list to the Power Automate flow. This can be done by clicking on each node to expand the contents within.
- Directly underneath the title, you will find a word bubble icon next to a comment. The comment within each node will explicitly state whether there is any content in the node that needs to be updated to reference either your Excel spreadsheet or SharePoint list.
- The following table provides an explanation for each of the nodes.
| Node | Purpose |
|---|---|
| Recurrence | Allows you to set a date and time for the flow to run so you do not have to manually run the flow once the Excel spreadsheet has been updated. |
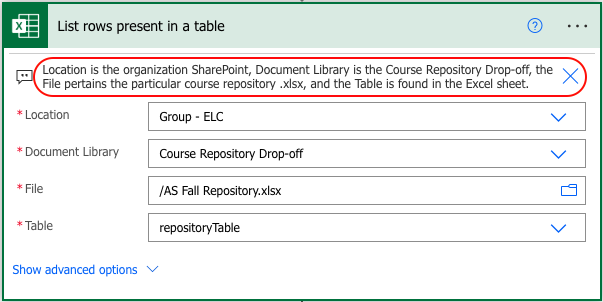
| List rows present in table | Connects the flow to the Excel spreadsheet created where information about course materials can be added, deleted, or changed. |
| Initalize variable - Excel Keys | Creates an empty array called MyExcelKeys. |
| Apply to each - Excel Content | Populates the array called MyExcelKeys with information from the reference Excel spreadsheet. |
| Get items | Connects the flow to the SharePoint list created that will serve as the course repository. |
| Initialize variable - SharePoint Keys | Creates an empty array called MySharePointKeys. |
| Apply to each - Poppulate SP Array | Populates the array called MySharePointKeys with information from the reference SharePoint list. |
| Initialize variable Intersection Array - Unchanged Items | Creates an array called IntersectionArray of the overlapping items in MyExcelKeys and MySharePointKeys to identify items that have been unchanged since the last flow run. |
| Apply to each - Delete SP items not in Intersection | Populates the IntersectionArray to identify and remove items that appear in the SharePoint list but not in the Excel spreadsheet. This means that the Excel spreadsheet has been updated to remove unnecessary or irrelevant materials in the repository, that should now also be removed from the SharePoint list. |
| Apply to each - Add new and changed items | Checks MyExcelKeys for any items that have been added or changed in the Excel spreadsheet and updates them in the SharePoint list. |
- The final node (Apply to Each - Add new and changed items) requires a few extra steps. Click the node, and then click Condition 2. Next, click Create item under the If no condition.
- Make sure that the Site Address and List Name are linked to the correct place.
- For each column name, click the empty field, click the Expression tab, and copy and paste the following code into the blank field, making sure to use the appropriate column name per field.
items('Apply_to_each_-_Add_new_and_changed_items')?['COLUMN NAME HERE']

- For Connected Files, use the following expression:
if(equals(item()?['Connected Files'],''),null,item()?['Connected Files'])
You should end up with fields that look like this when filled in. Note that there is no Apply to each node between If no and Create item.

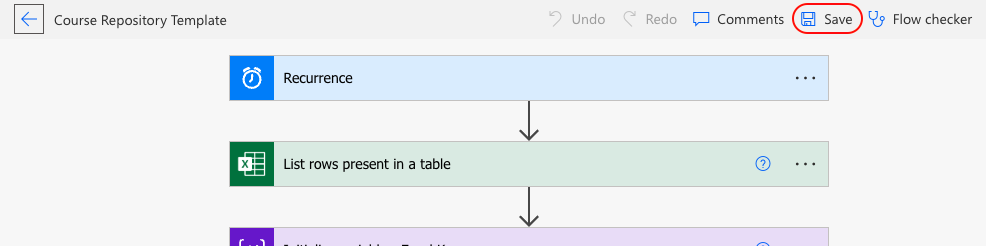
- After you have checked every node and customized each one accordingly, save the flow by clicking the Save icon at the top left of the browser or at the bottom of the flow.
- Before you test out the flow, you must turn it on. To do so, click the left arrow next to your flow name to return to the landing page for that flow.
- Navigate to the top bar and click on Turn on.

- After ensuring the flow is on, click Run in the same bar to test the flow.
Add more info about running flow here (2/14/2023)
-
To share the flow with others in your organization, go to My flows. Find the repository flow you would like to share, hover over it, and you will see a circle outline containing three smaller circles. Click this symbol and search for other users in your organization.
-
If you have shared a flow with someone or someone has shared one with you, your flow has now moved over to My flows → Shared with me.
This is the section that you are most likely to reference when updating course materials.
- First, navigate to the Course Repository Drop-off SharePoint list.
- Find the repository Excel sheet for the course you are interested in adding resources to.
- Make a new line in the Excel sheet with new materials.
Tip: You may also make changes to any of the cells with updated information or delete a row if a material is no longer associated or necessary for a course.
The course repository list can be found in the same navigation list as the Course Repository Drop-off. There will be a separate list for every course. Once there, you can browse the entire list, use the search bar to find specific items, or filter items by column.