Setup in Eclipse PDE
This page describes how to setup Protege in Eclipse using the Plug-in Development Environment (PDE). This method is slightly more complicated than the setup without PDE, however, it has an advantage that one does not generally need to run maven once the project has been imported. In particular, incremental compilation and hot code replace in the debugger should work like for ordinary java projects in Eclipse. This setup is particularly useful for those who develop and debug the main Protege components, but can also be used for developing Protege plugins.
These following screenshots were taken with Eclipse Neon on Mac OS X (El Capitan). These instructions were also tested on Linux Mint Cinnamon and Windows 10.
Specifically these components are necessary: Java IDE, Git client, Maven integration for Eclipse
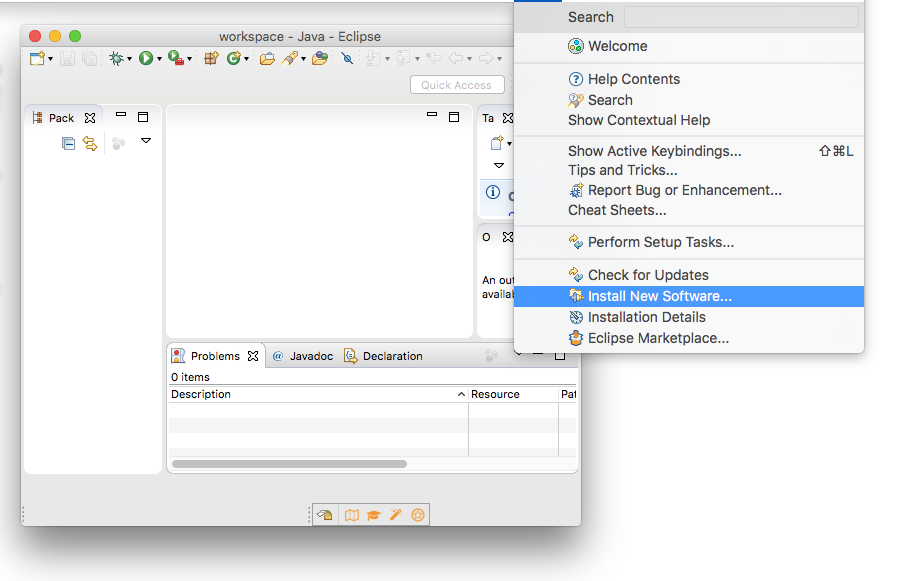
To obtain PDE, in the top menu, select "Help" > "Install New Software".
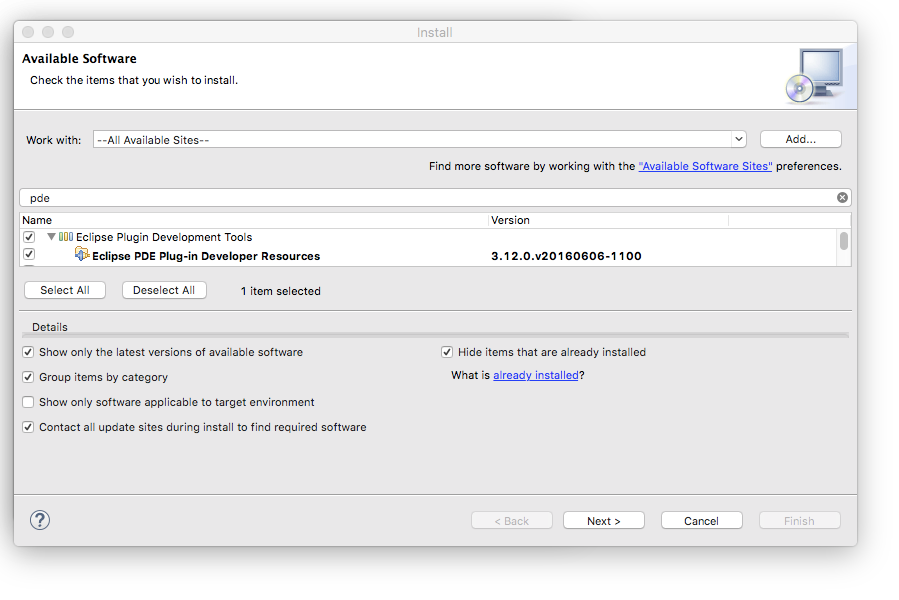
Search for PDE, select it and click "Next". In the next window "Install Details", click "Next". Accept the license agreement and select "Finish". You will need to restart Eclipse.
This plugin can be used to display the coloured Protege log messages in Eclipse console, which are shown using ANSI encoding
To install go to "Help" > "Eclipse Marketplace".
Search for "ANSI Escape in Console". When found, click "Install".
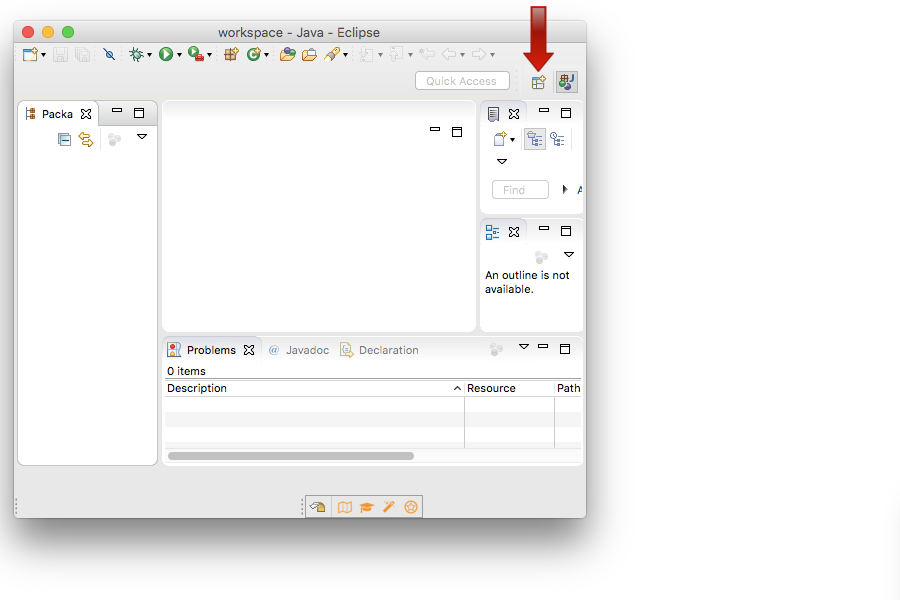
Click on the "open perspective" icon in the upper right.
Select the "Git" perspective. Choose "clone a git repository" and enter as URI
https://github.com/protegeproject/protege.git
Click "Next", and "Next" again in the "Branch Selection" dialog. In the "Local Destination" dialog, select a suitable destination directory and select "Finish". Finally, switch back to the "Java" perspective (the icon with the "J" on the top right).
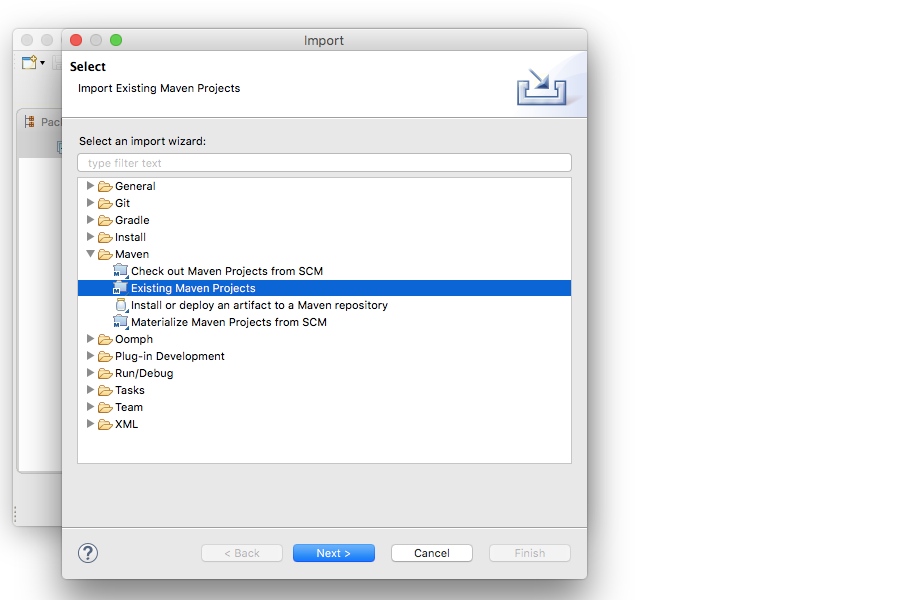
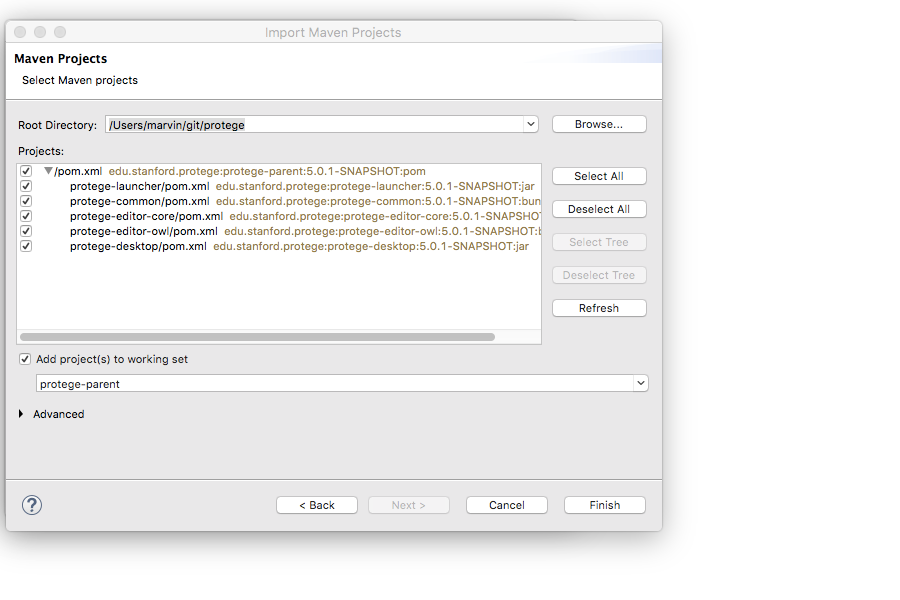
In the top menu of Eclipse, select File > Import > Maven > Existing Maven Projects, click "Next".
In the "Maven Projects" dialog, indicate as "Root Directory" the directory where Protégé was cloned in the previous step, then click "Finish".
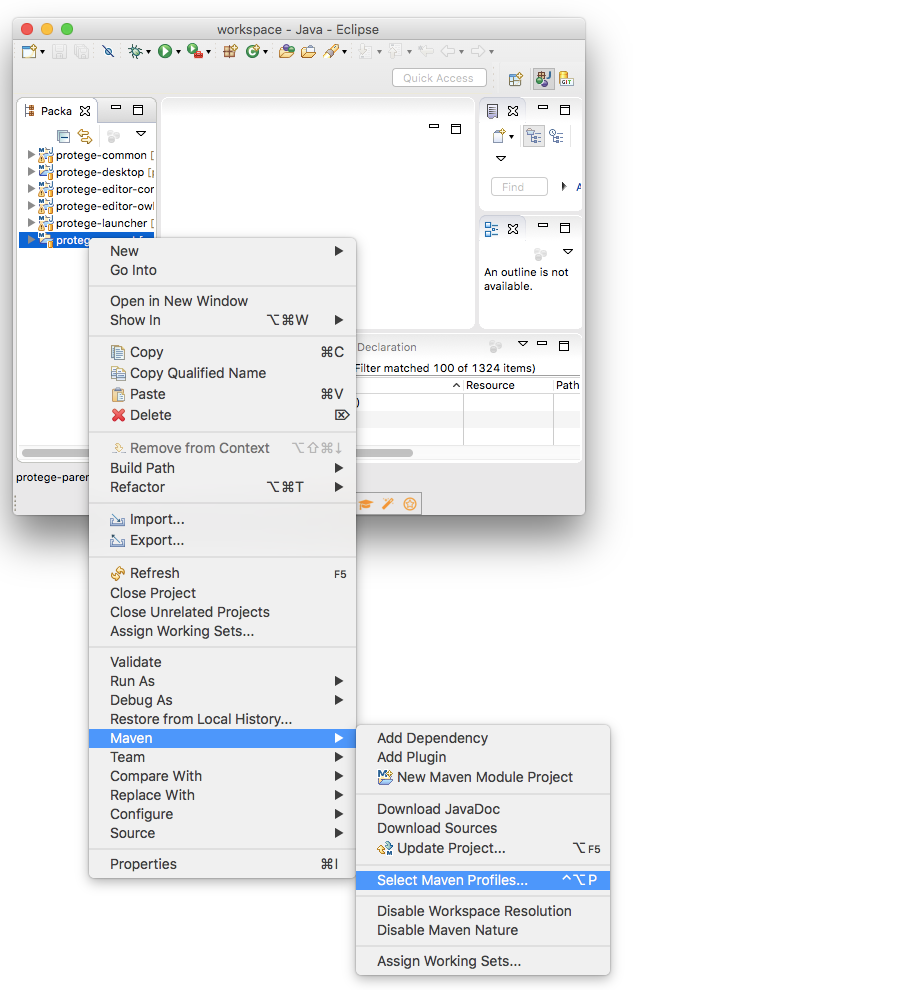
Rightclick on protege-parent in the package explorer, select "Maven" > "Select Maven Profiles".
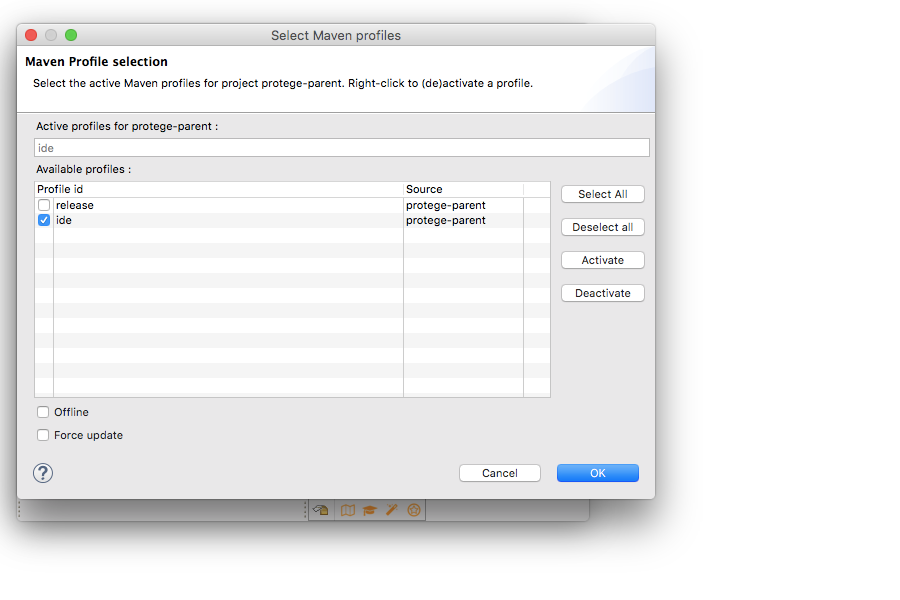
Tick "ide" and click "Ok".
Now right-click on protege-parent again, select "Run as" and choose "Maven install".
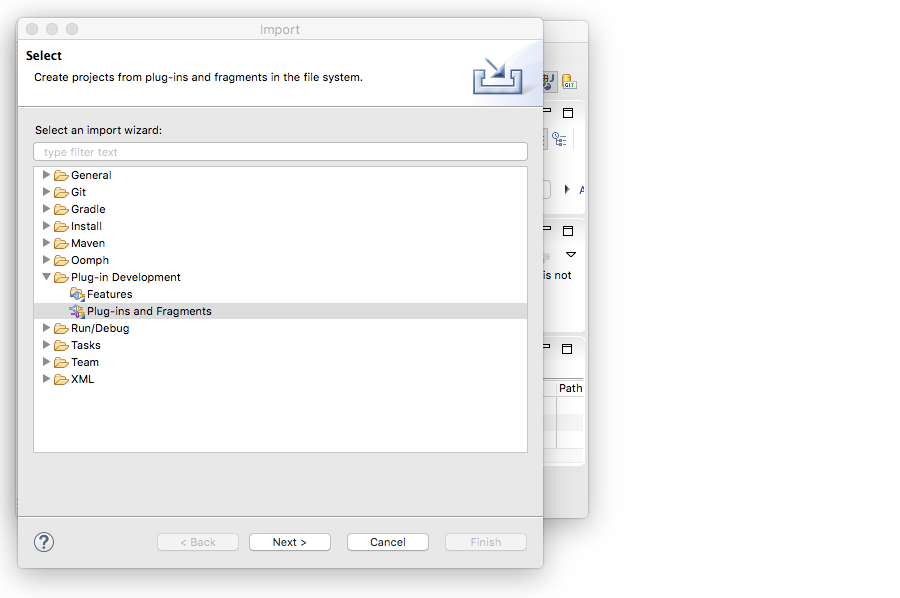
In the top menu, select
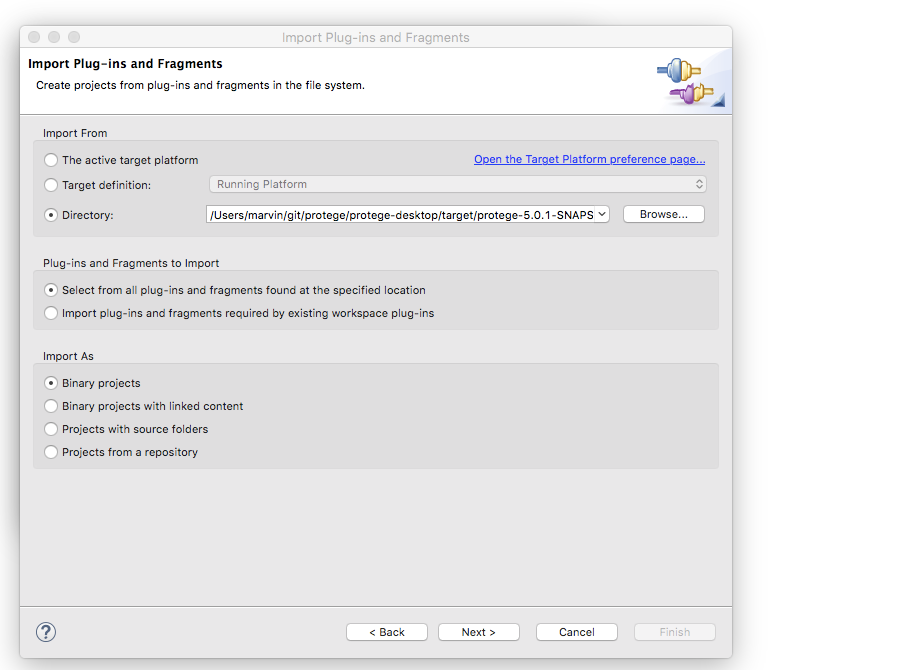
File > Import > Plug-in Development > Plug-ins and Fragments
(if you do not see "Plug-in Development" under File > Import then most likely Eclipse PDE is not installed)
In the field "Import from > Directory", select the following directory in the location where Protégé was cloned:
protege/protege-desktop/target/protege-${version}-platform-independent/Protege-${version}/bundles
Under "Plug-ins and Fragments to Import" tick the first option:
- "Select from all plug-ins and fragments found at the specified location"
Under "Import As" tick the first option:
- "Binary projects"
Click "Next".
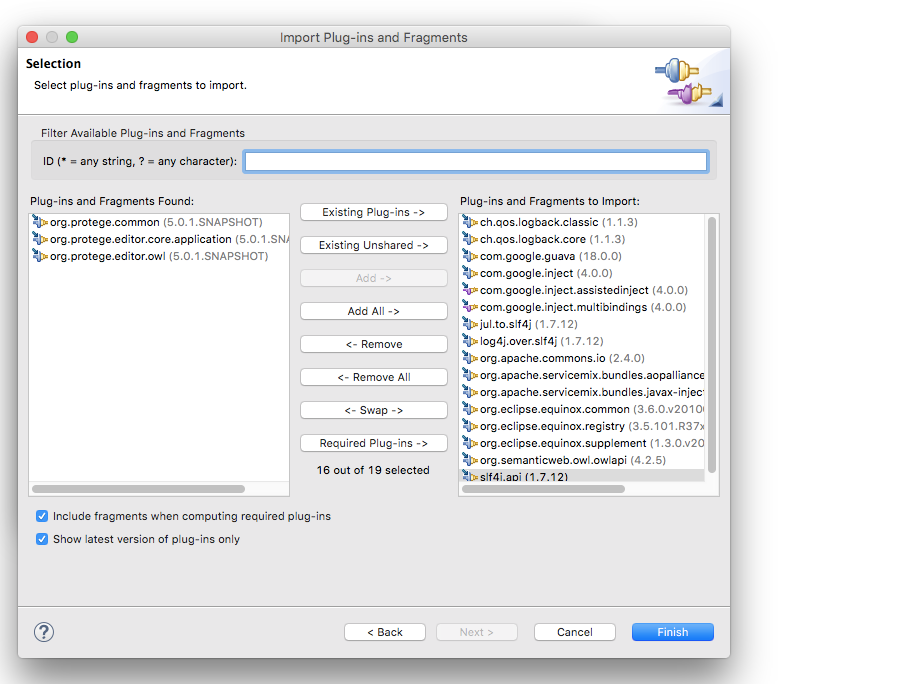
Then move all Plug-ins from the left to the right window except for those that start with
org.protege.
(those will be used from the Eclipse workspace and Eclipse installation)
Press "Finish".
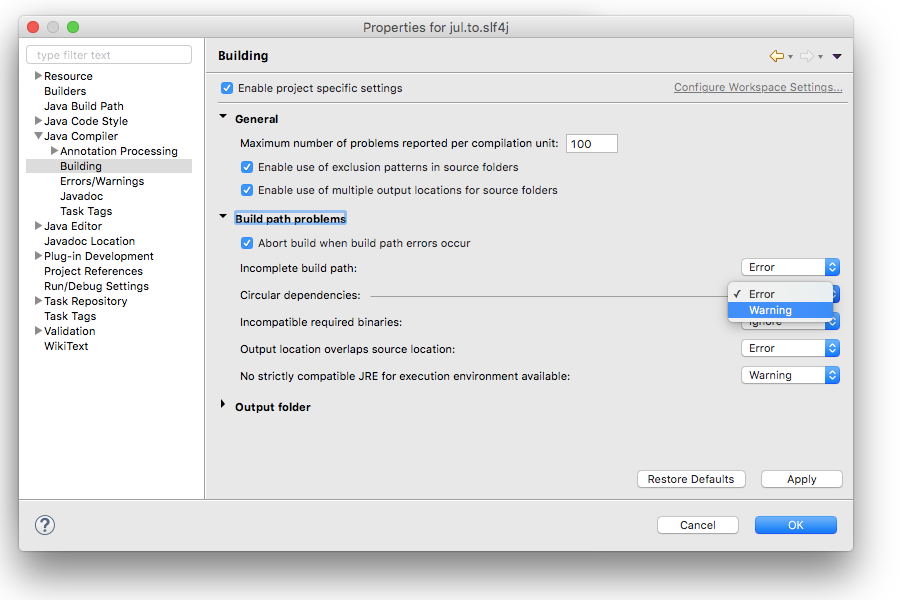
There might be errors (exclamation marks on the new projects in Eclipse) due to cyclic dependencies involving bundle slf4j.api, those can be changed to warnings in Preferences > Java > Compiler > Building > Build path problems > Circular dependencies)
It is recommended to assign all imported binary projects to a separate working set (select projects > right click > Assign Working Sets...) so that they can be hidden in the project explorer (if in "Top Level Elements" it is selected "Working Sets").
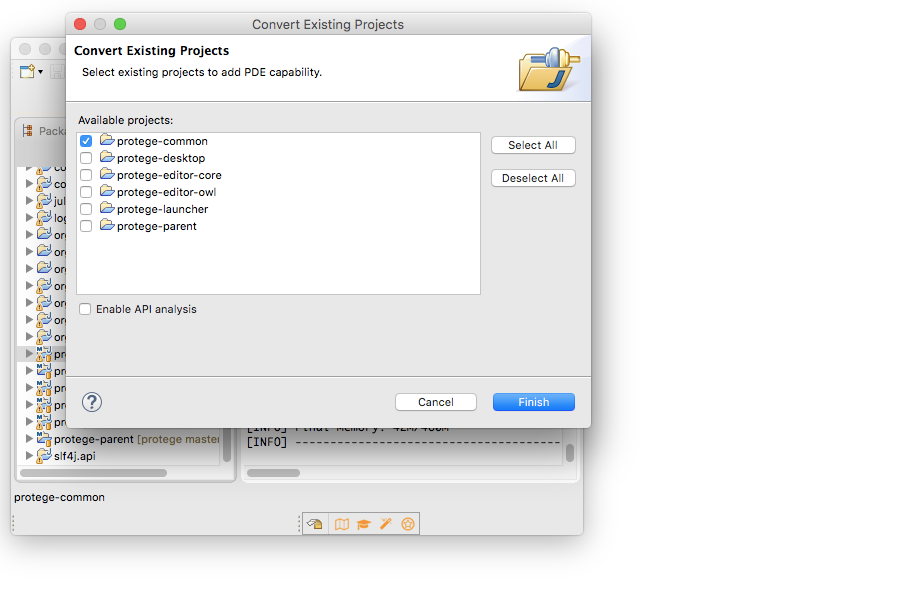
For each of the projects protege-common, protege-editor-core, protege-editor-owl:
- In the left panel, right click on the project: Configure > Convert to Plug-in Projects.
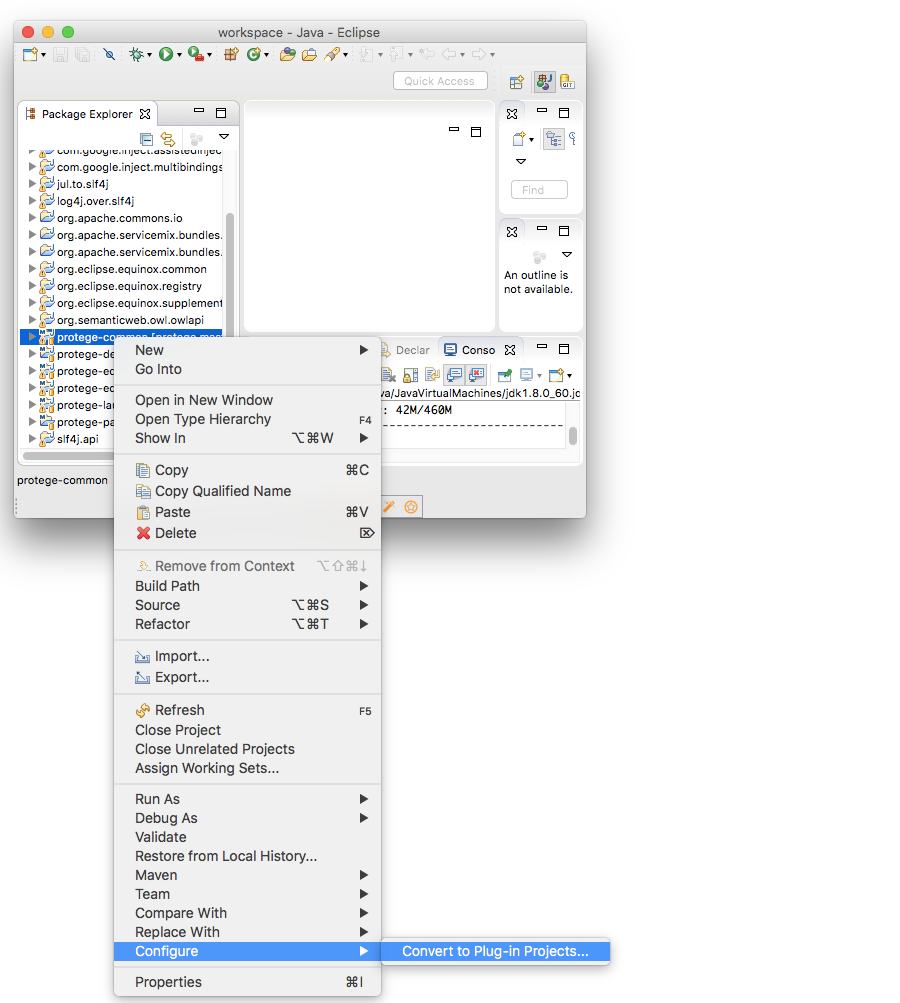
Then click "Finish".
Maven Dependencies on the classpath get deleted when the project is converted to the Plug-in Projects. To restore them, right click on protege-parent: Maven > Update Project... > OK
Now the classpath of each Protege project converted to Plug-in Projects will contain both Plug-in Dependencies and Maven Dependencies. However, all Plug-in Dependencies should be already provided in Maven Dependencies. To avoid unnecessary duplicates on the classpath, we can remove Plug-in Dependencies completely: right click on the project > Properties > Java Build Path > select Plug-in Dependencies > click Remove
In the org.apache.commons.io package, select the "Referenced Libraries" folder and click on commons-io.jar -> META-INF -> MANIFEST.MF. Select the part that starts with "Export-Package:" and copy it to the (other) META-INF/MANIFEST.MF file that is located at the root of the org.apache.commons.io package (replace the whole content of the "Export-Package:" section). (Apparently, when importing the bundle, the newly created manifest is generated with different version numbers than those that are included in the original manifest.)
After this step there should be no errors in eclipse workspace (no red marks).
Go to the META-INF/MANIFEST.MF file in the bundle ch.qos.logback.classic and delete the line: Bundle-ClassPath: logback-classic.jar
If this is not done later there can be warning messages on the console: SLF4J: Class path contains multiple SLF4J bindings. It appears that Eclipse finds logback-classic.jar two times: once on the classpath Plug-in Dependencies and second time in the MANIFEST.MF file.
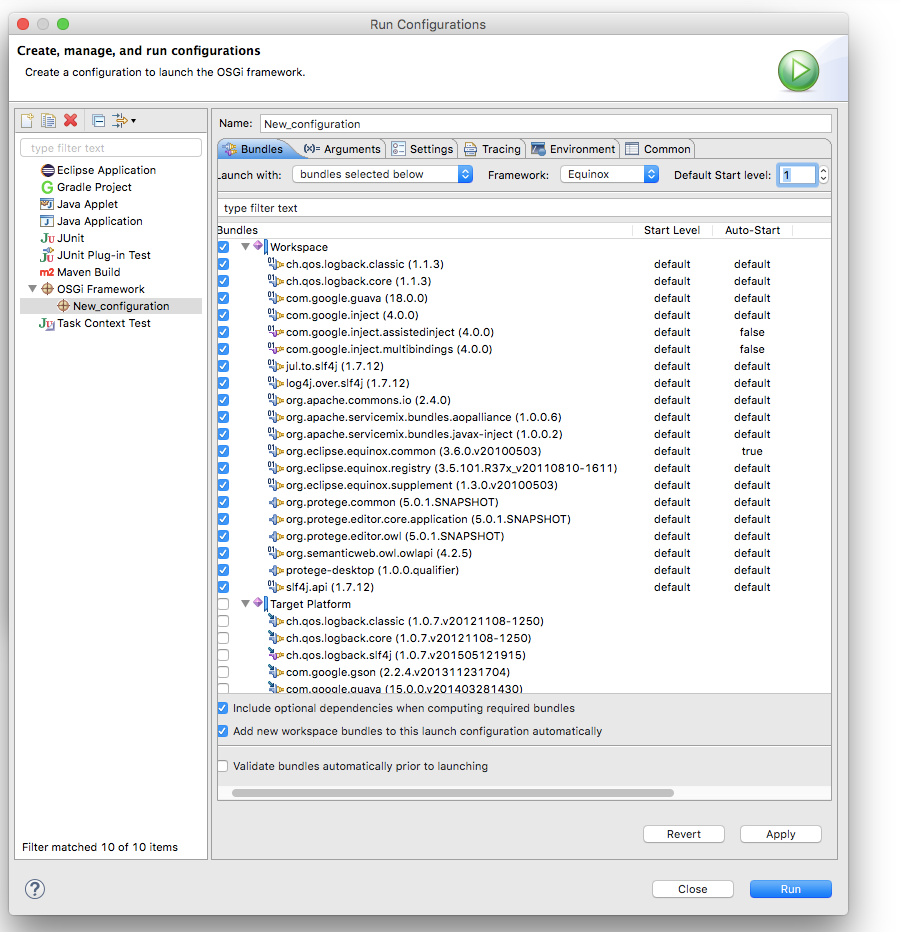
In the top menu, select
Run > Run Configurations... > OSGi Framework > (right click) > New
Now deselect all Target Platform bundles. Select all workspace bundles that were added in the previous steps. Set all their start levels to default, set the default start level to 1 and the default auto-start to true (upper right corner in the screenshot below). Remove the checkbox "Validate Bundles automatically prior to launching" at the bottom.
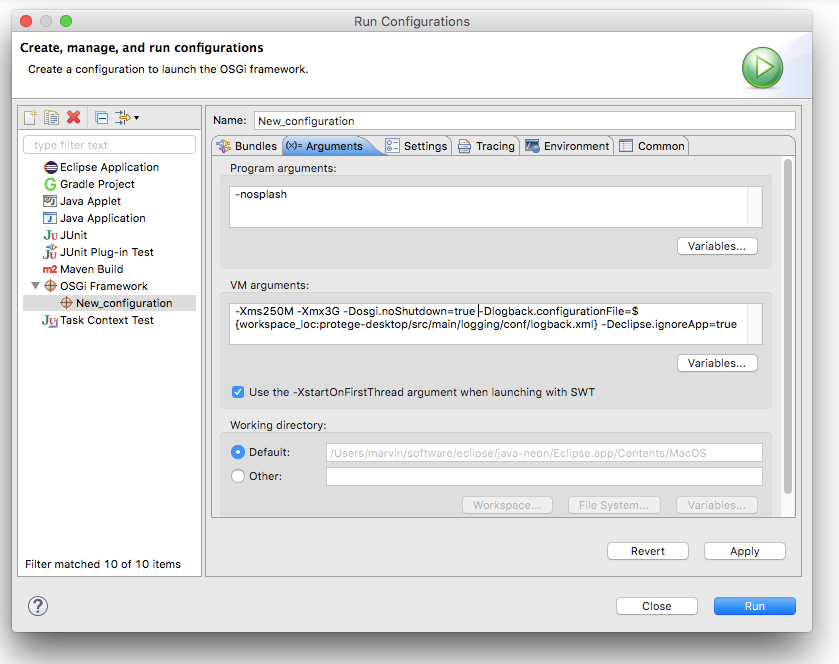
In the arguments tab, remove all existing entries and supply as program arguments
-nosplash -consoleLog
and as VM arguments
-Xms250M -Xmx1G -Dosgi.noShutdown=true -Dlogback.configurationFile=${workspace_loc:protege-desktop/src/main/logging/conf/logback.xml} -Declipse.ignoreApp=true
Now start Protégé using Run.
If there are no errors but Protege does not start, double check that the default start level is set to 1 and the default auto-start set to true (see above). If all settings are fine, try the fix described in Runtime problems.
You can also provide a better name for the configuration, e.g., Protege 5. Once the configuration has been created and used, it is accessible from the Run menu as well as the Run and Debug history.
If after changes Protege does not start when running the configuration or you see some ClassNotFoundException on the console for the classes that should be on the classpath, or some Protege plugins are not working, try the following:
- Duplicate the run configuration: Run > Run Configurations > right click on the Protege configuration created on the last step > Duplicate.
- Delete the previous configuration: right click on the previous configuration > Delete.
- [optional] Select the new configuration and at the top of the window change the field "Name" to the previous value, e.g.,
Protege 5. - With the new configuration selected, press Run at the bottom right corner.
It seems like the PDE configuration occasionally gets corrupted and copying the configuration can fix the problems.
If after changes you have compilation errors or missing required dependencies, try the following steps:
- Refresh projects in the workspace: File > Refresh or F5
- Update maven configuration: Right click on a project > Maven > Update Project... > Add out-of-date > OK