How to submit your iOS app to App Store on Windows system
We know that in the process of Apple applications, the application for the issuance of the certificate need to use the key string, upload IPA need to use Xcode or Application loader submit the build version, which requires Mac apple computer.
Now a lot of partners cross platform development and application, some children do not have an apple machine, do not Mac, Windows is still easy to pack the shelves iOS APP.
Will use a tool Appuploader, you can Windows, Linux and Mac systems to support our apple applications.
The following describes how to apply for a certificate in the Windows environment and upload IPA process.
From the seven steps are described in detail!
1, create a unique identifier App IDs
2, apply for a certificate issued
3, apply for the release of the description file
4, iTunes Connect create App and fill in the information
5, Windows select the certificate compilation and packaging
6, Windows upload IPA to App Store
7, upload good IPA back to iTunes Connect submit audit
Only need to build a developer account, an auxiliary tool Appuploader, a PC computer, where the Mac can not use the computer.
APP IDs in the back of the creation of the release file, create APP to use. First open the developer center https://developer.apple.com/cn/, enter the certificate page.
1.1 click on the certificate, ID and accessories files, enter the settings.
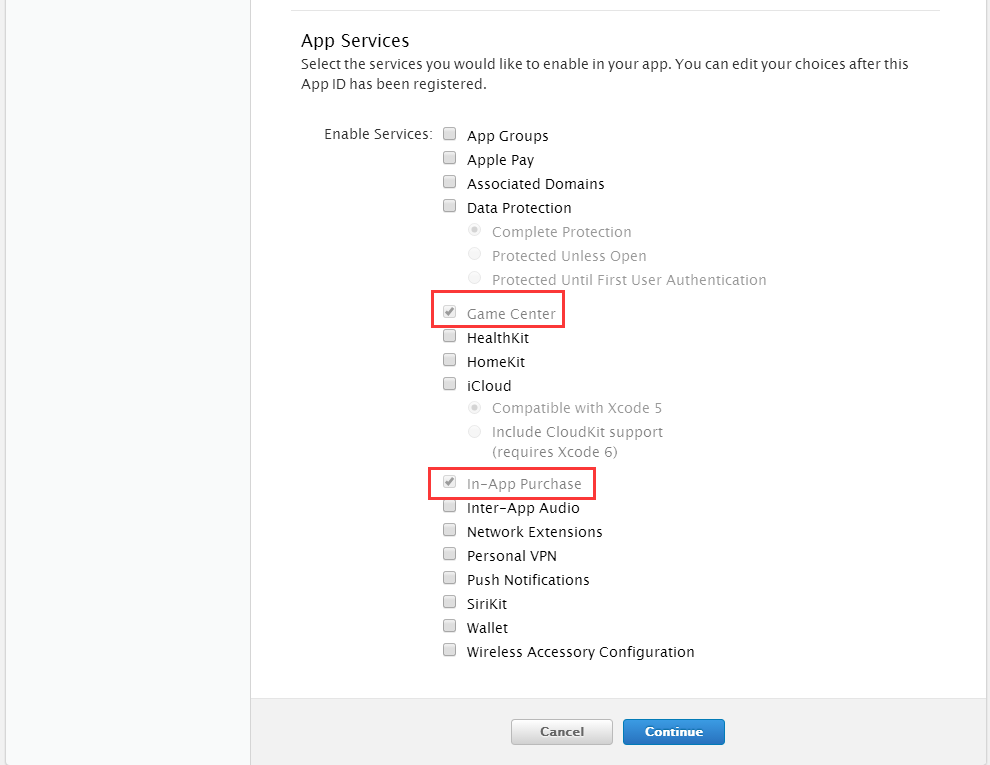
1.2 App IDs -- > + Click to create a new App ID
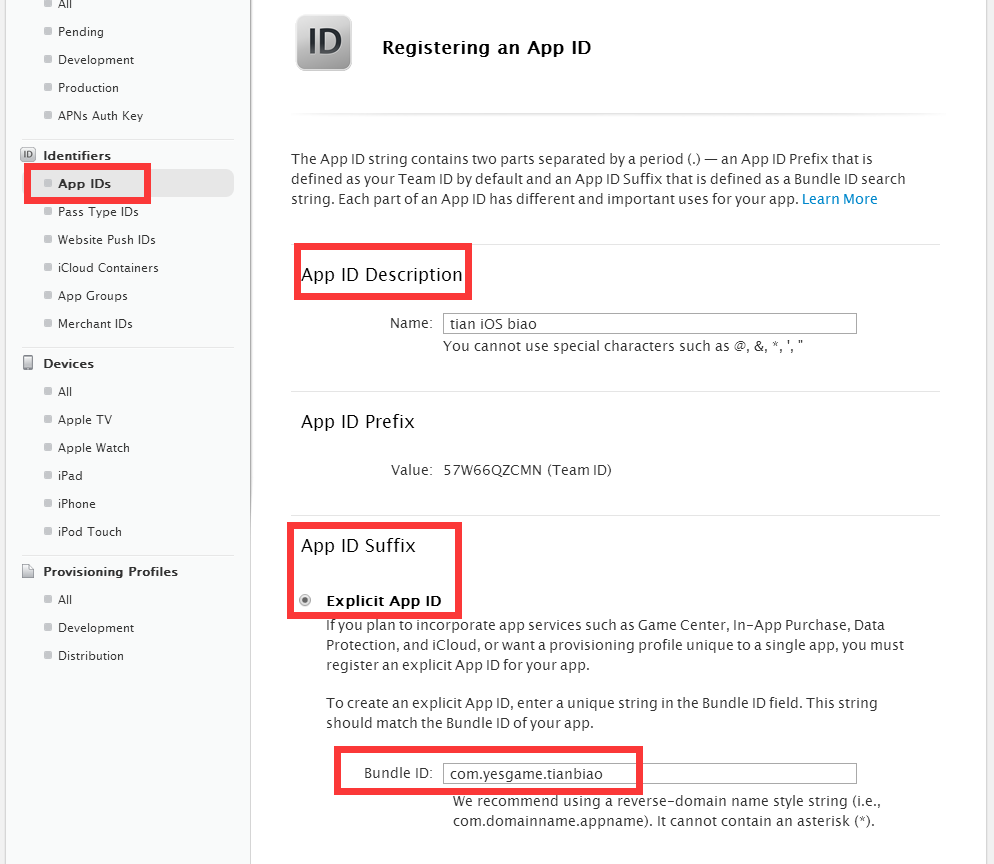
There are two things you need to fill in:
The first item Name, used to describe your App ID, this casual fill, there is no limit, it is best to project name, so easy to identify their own (not allowed in Chinese)
Second Bundle ID (App ID Suffix), which is your App ID suffix, need to carefully fill out. Used to mark our app so that it has a fixed identity that is directly related to your program. Fill in the form of Explicit App ID: com.company.appName, according to the format to write, write a convenient to remember, to use a lot of back.
Third App Services, the default will select the 2 item, can not be modified, the other according to their own needs to choose the service, and then click Continue to confirm that the next step.
Check the ID is not wrong, then click on the Register and then click on the Done to complete the creation of App.
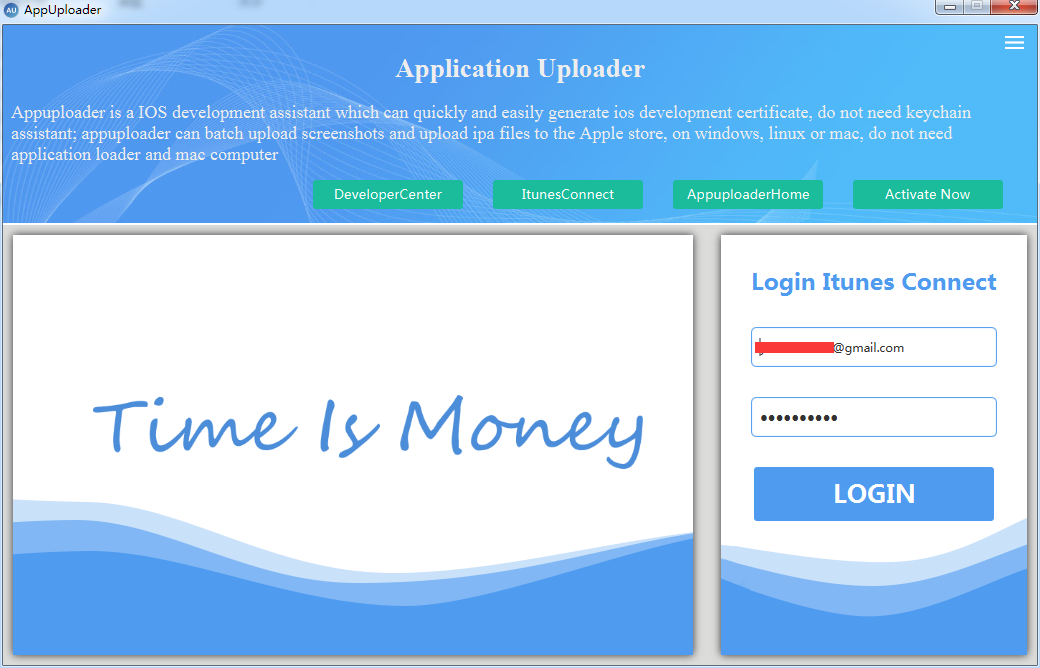
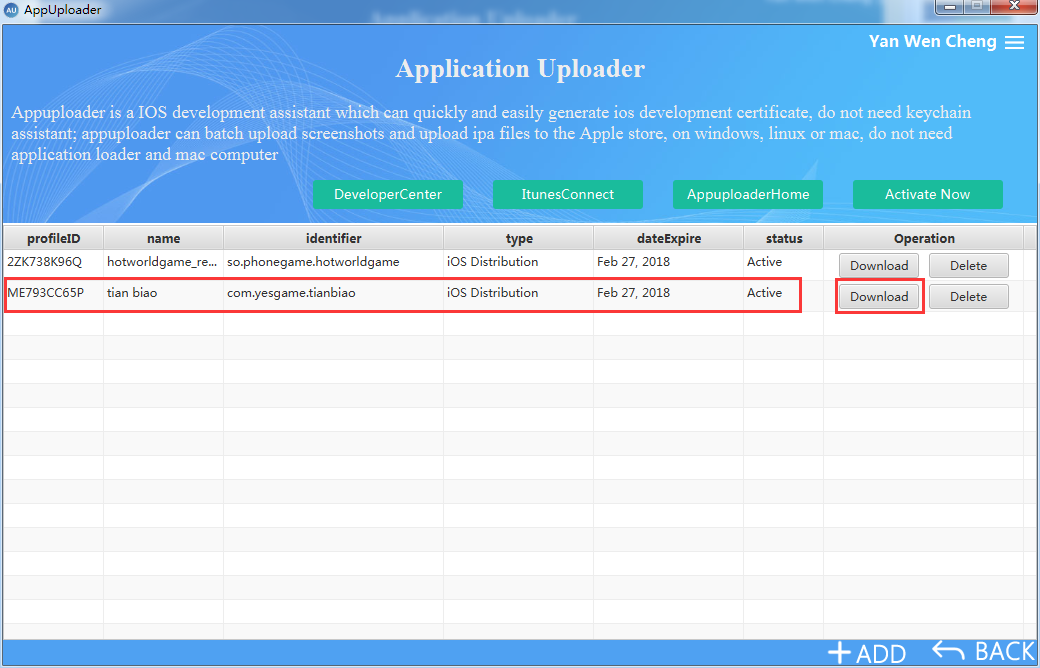
Here we need to use the Appuploader. does not need to create a certificate in the Windows Download and install http://www.appuploader.net/appuploader/download.php
2.1 open the program, enter the Apple Developer Center account, login.
2.2 select Certification
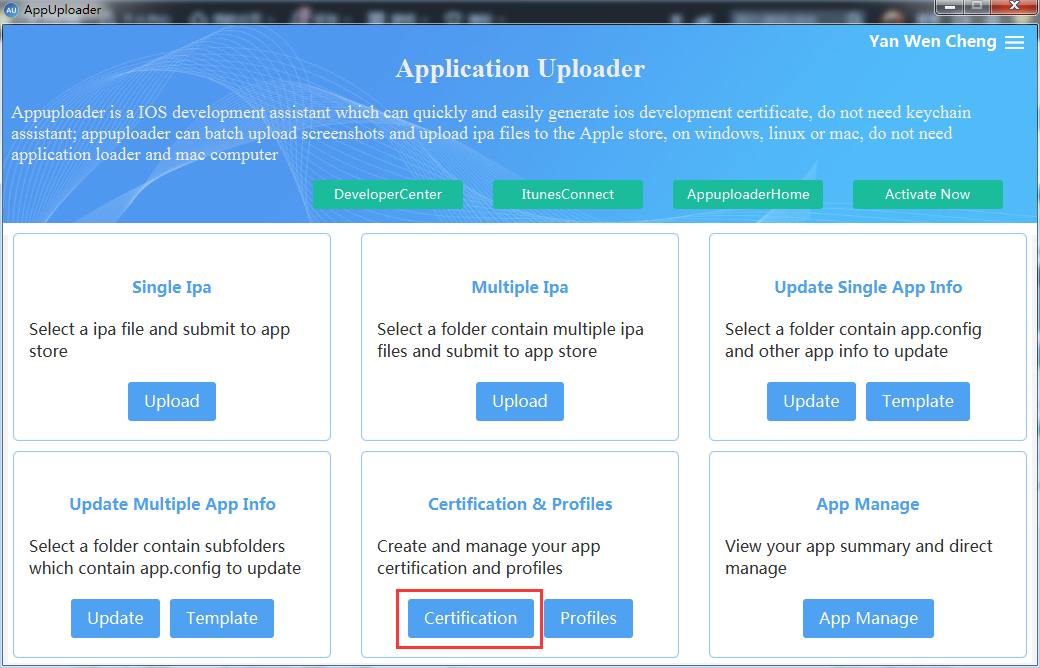
2.3 click +ADD, here are the development certificate and so on to create options, here to choose the third release certificate.
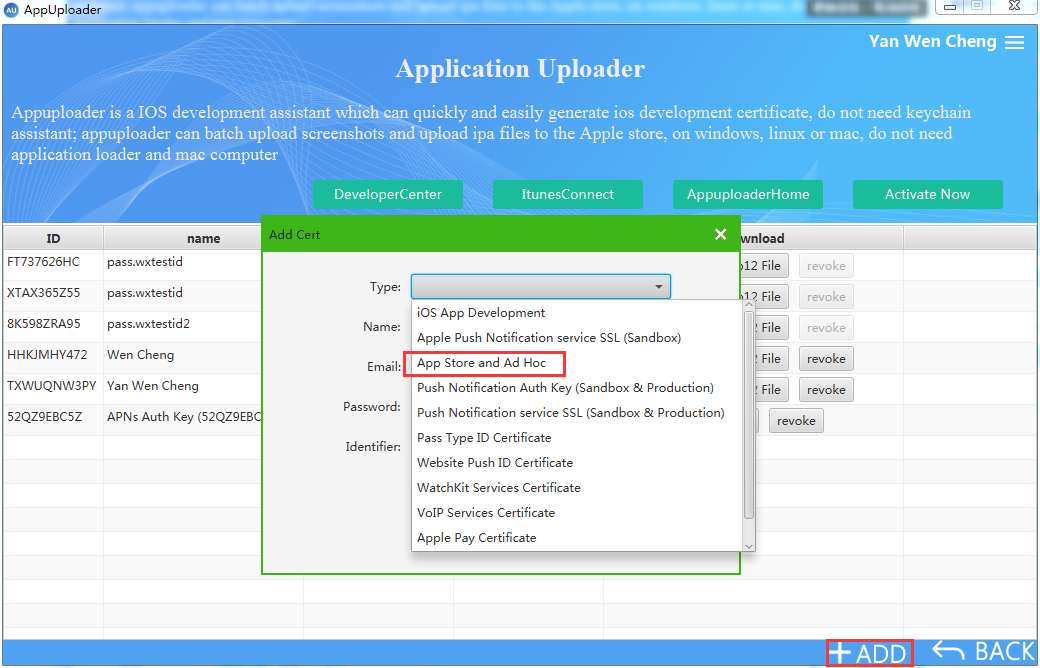
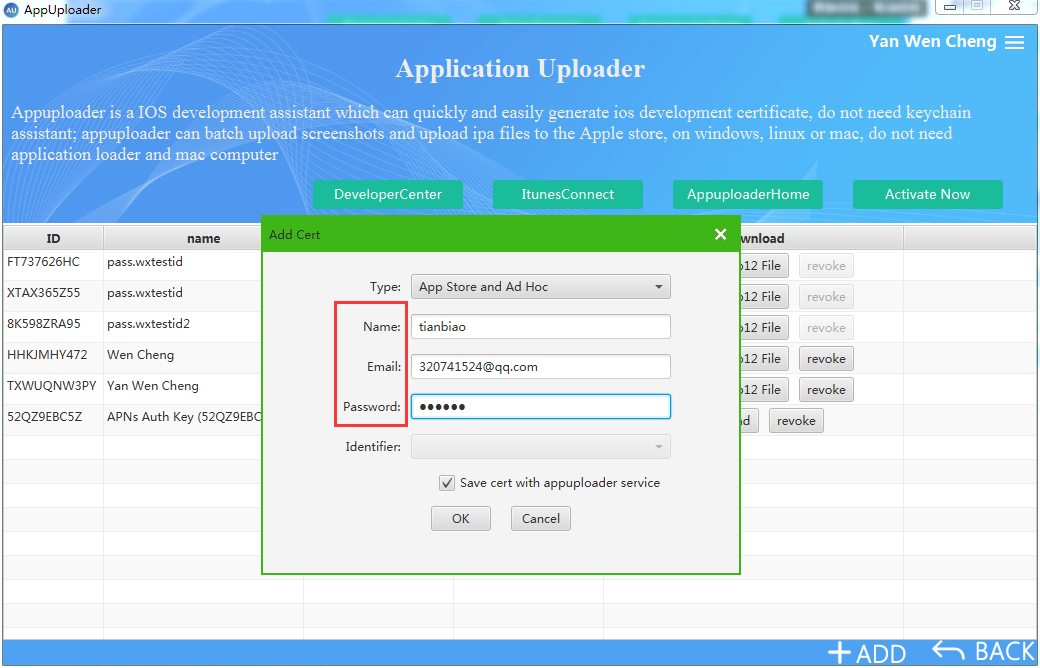
2.4 input, the name of the certificate (optional) mailbox (any mailbox will do) password (later compiled when used) and then click OK
2.5 at this time to produce a good release certificate, click p12 File, download the certificate file, save to the computer.
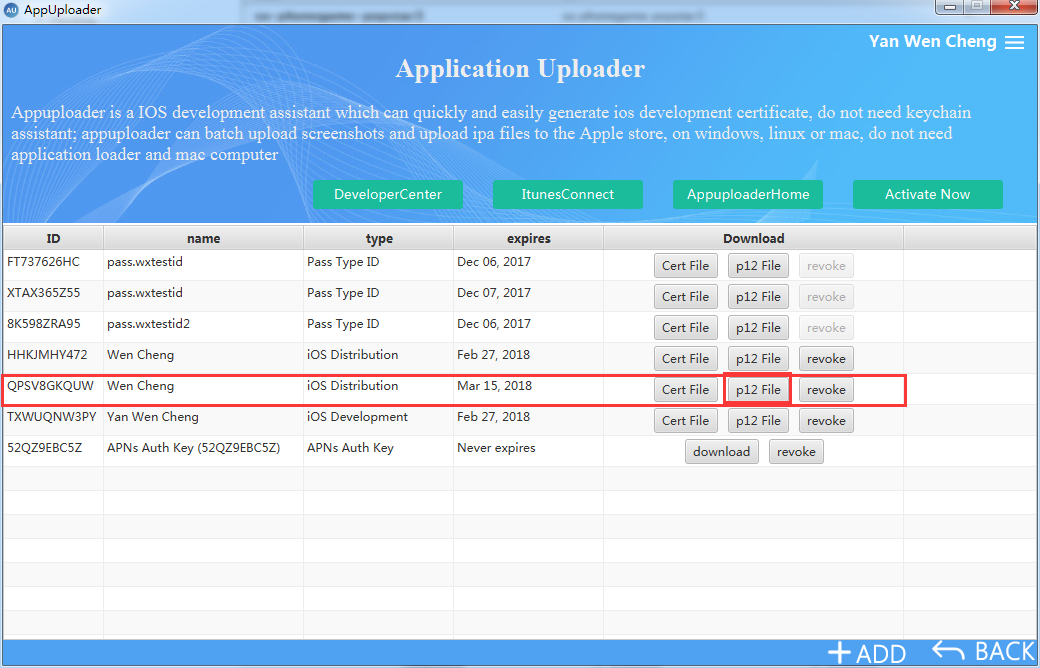
This certificate is issued to create a good, very simple.
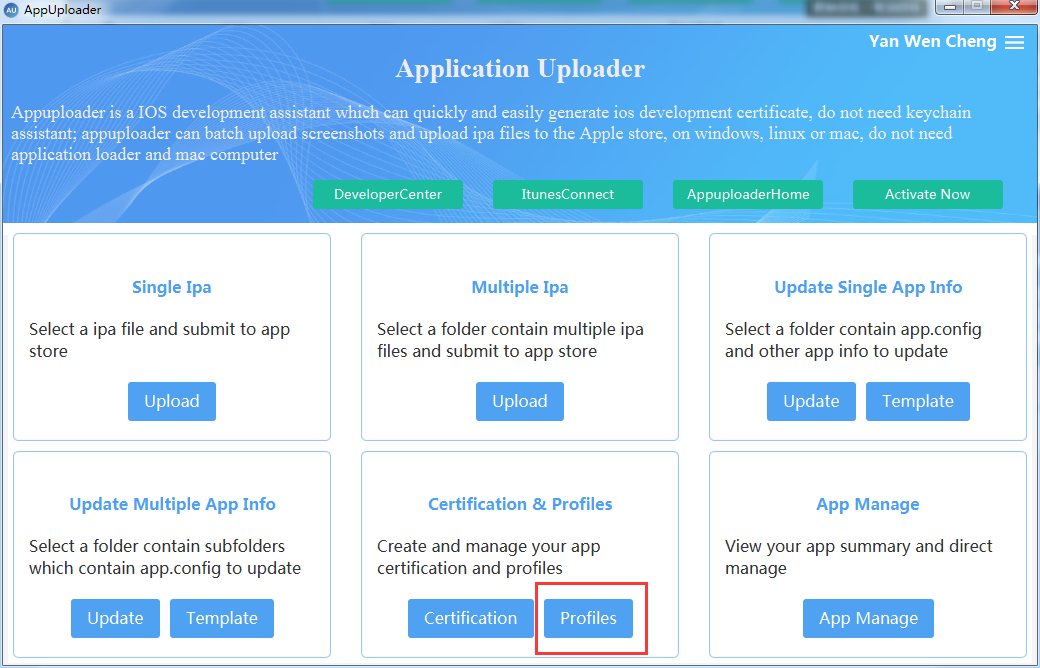
3.1 back to the software click Profiles
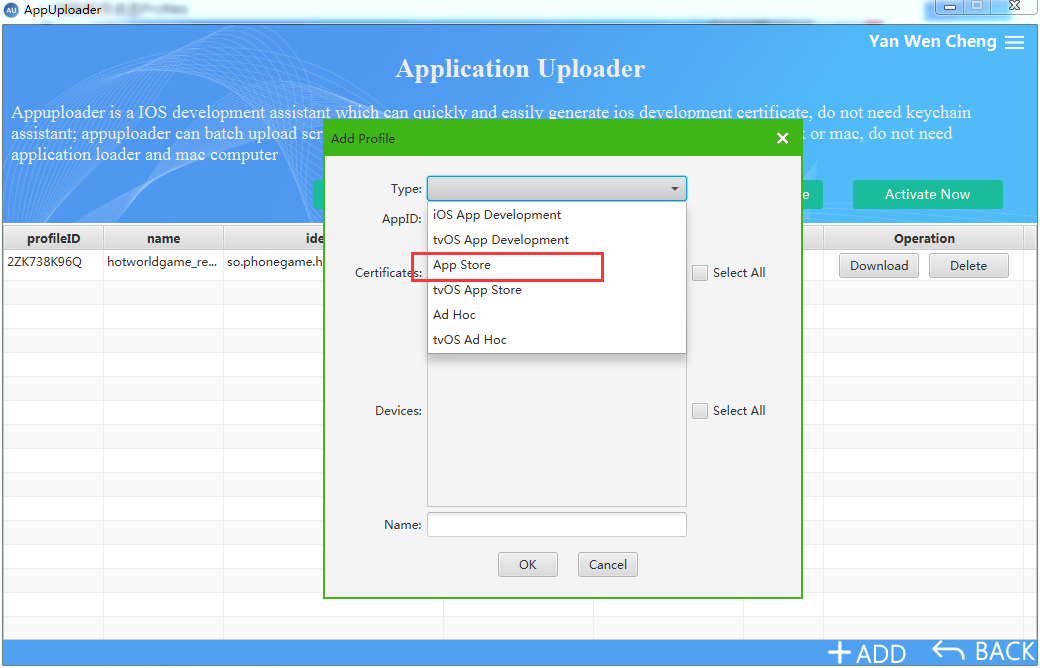
3.2 click +ADD, here are the development of the description file and so on options, select the release of this description file.
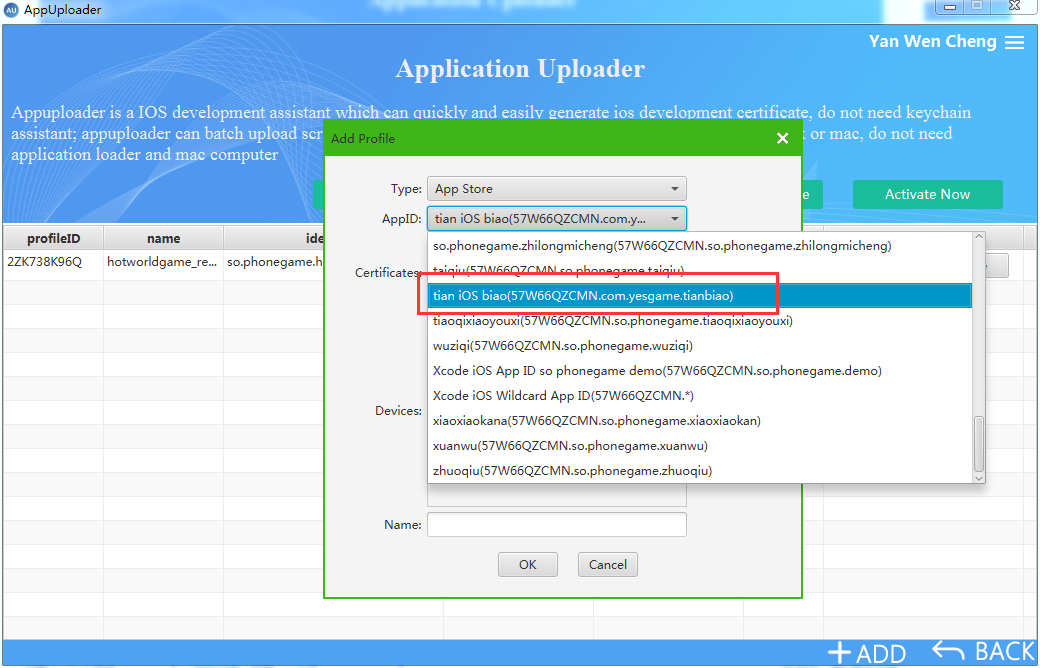
3.3 select APP IDs, previously created in the developer center, it will automatically appear.
3.4 check the newly created issued a good correlation, enter name, click OK
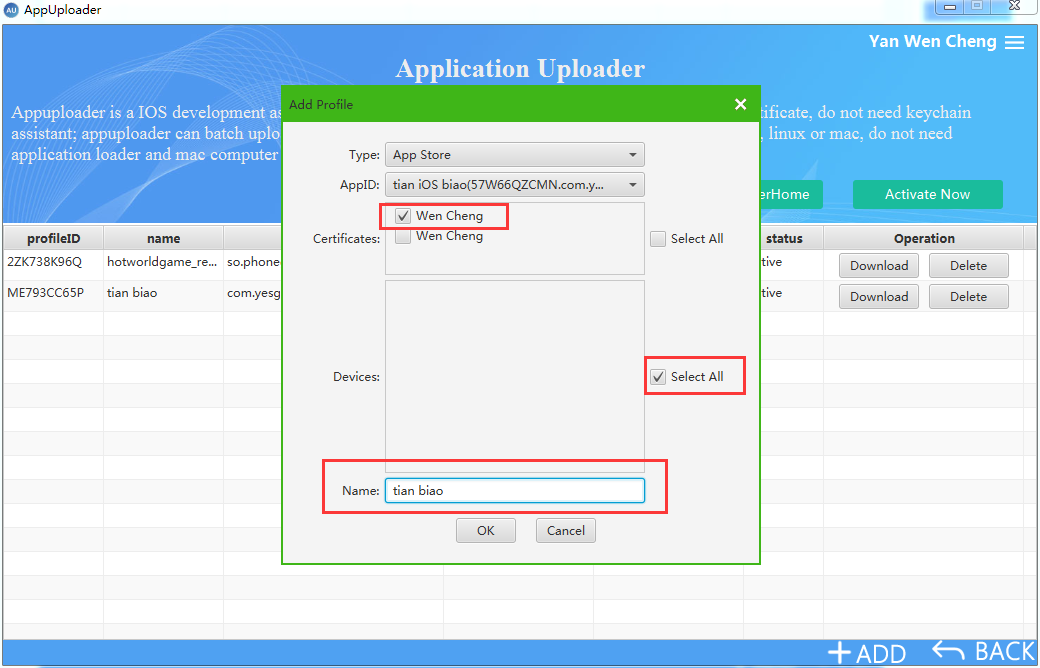
3.5 at this time generated a release description file, click Download to download to save the computer
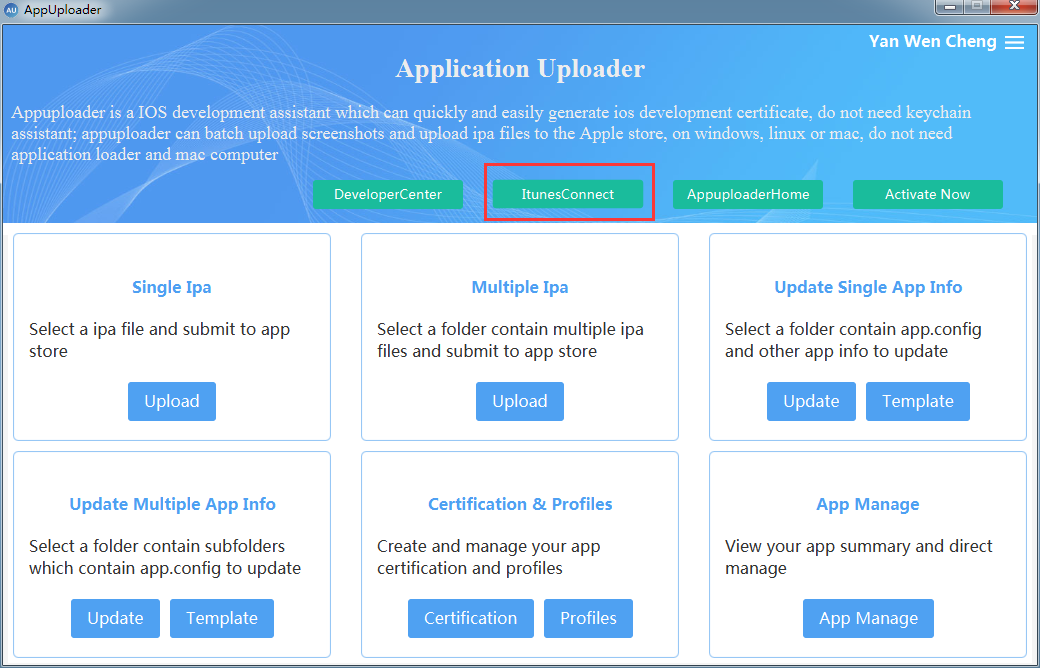
4.1 back to the software, click ItunerConnect, enter iTunes Connect to create APP.
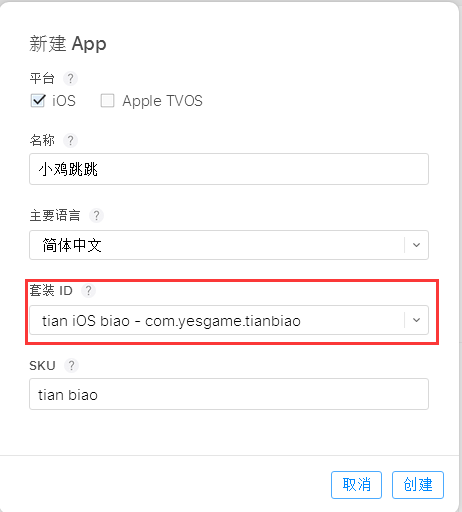
4.2 Click to enter the new APP, enter your application name, language, suit ID, before the developer center to create the corresponding APP IDs, SKU can not write Chinese, click create.
4.3 set up the relevant information, category, price and sales service.
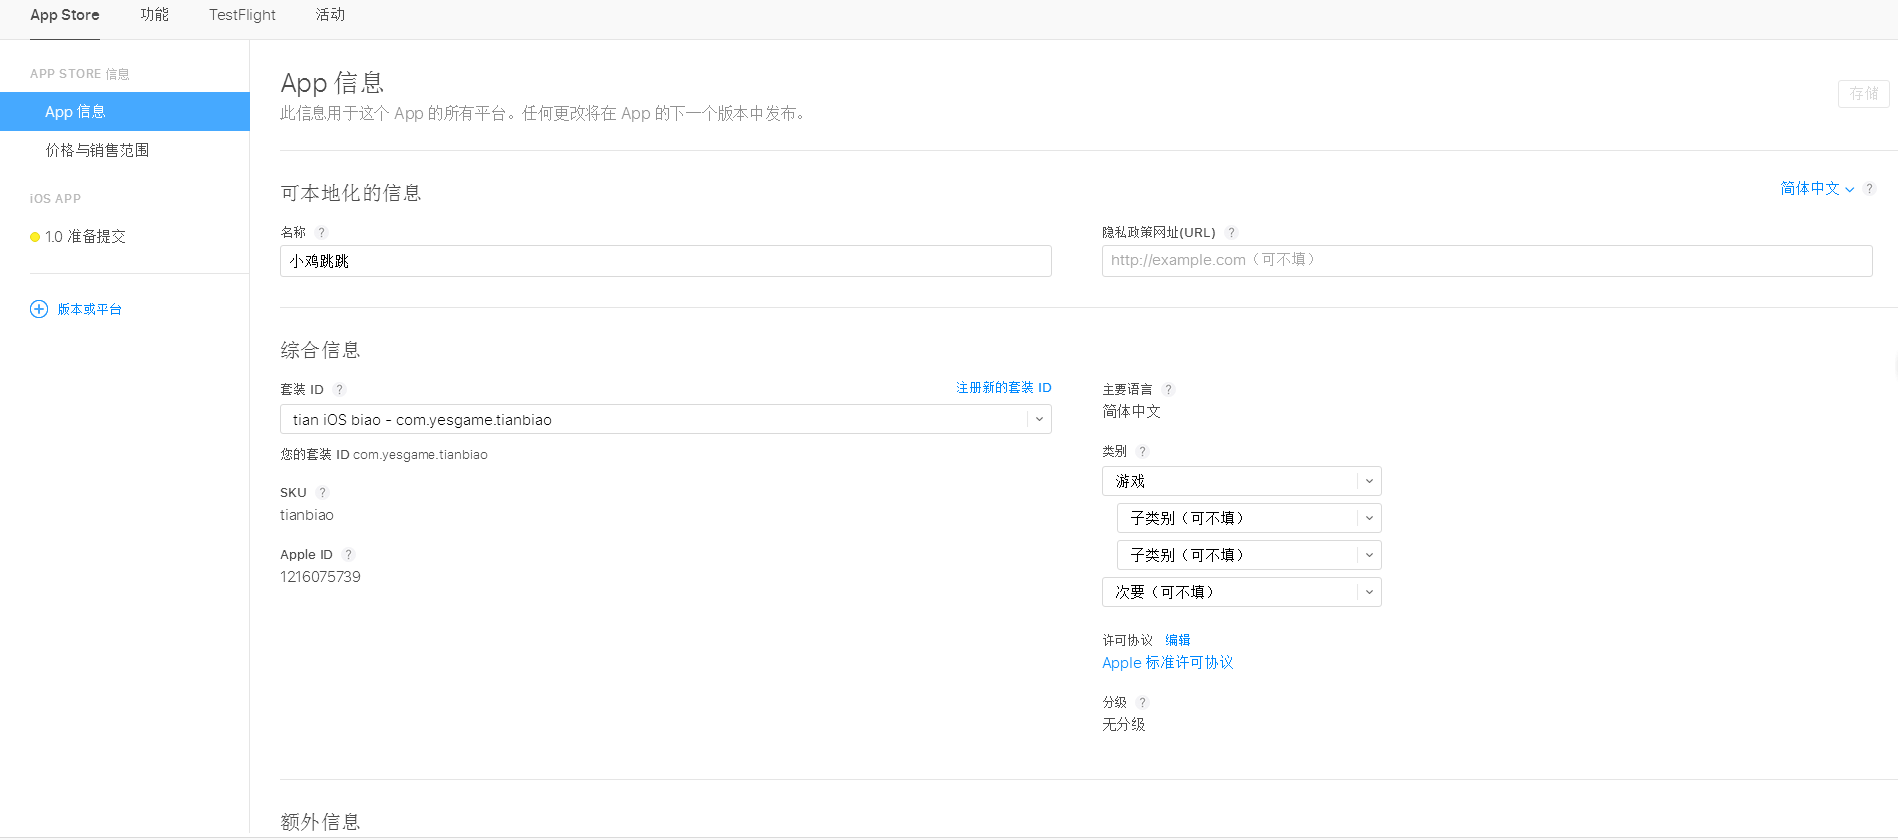
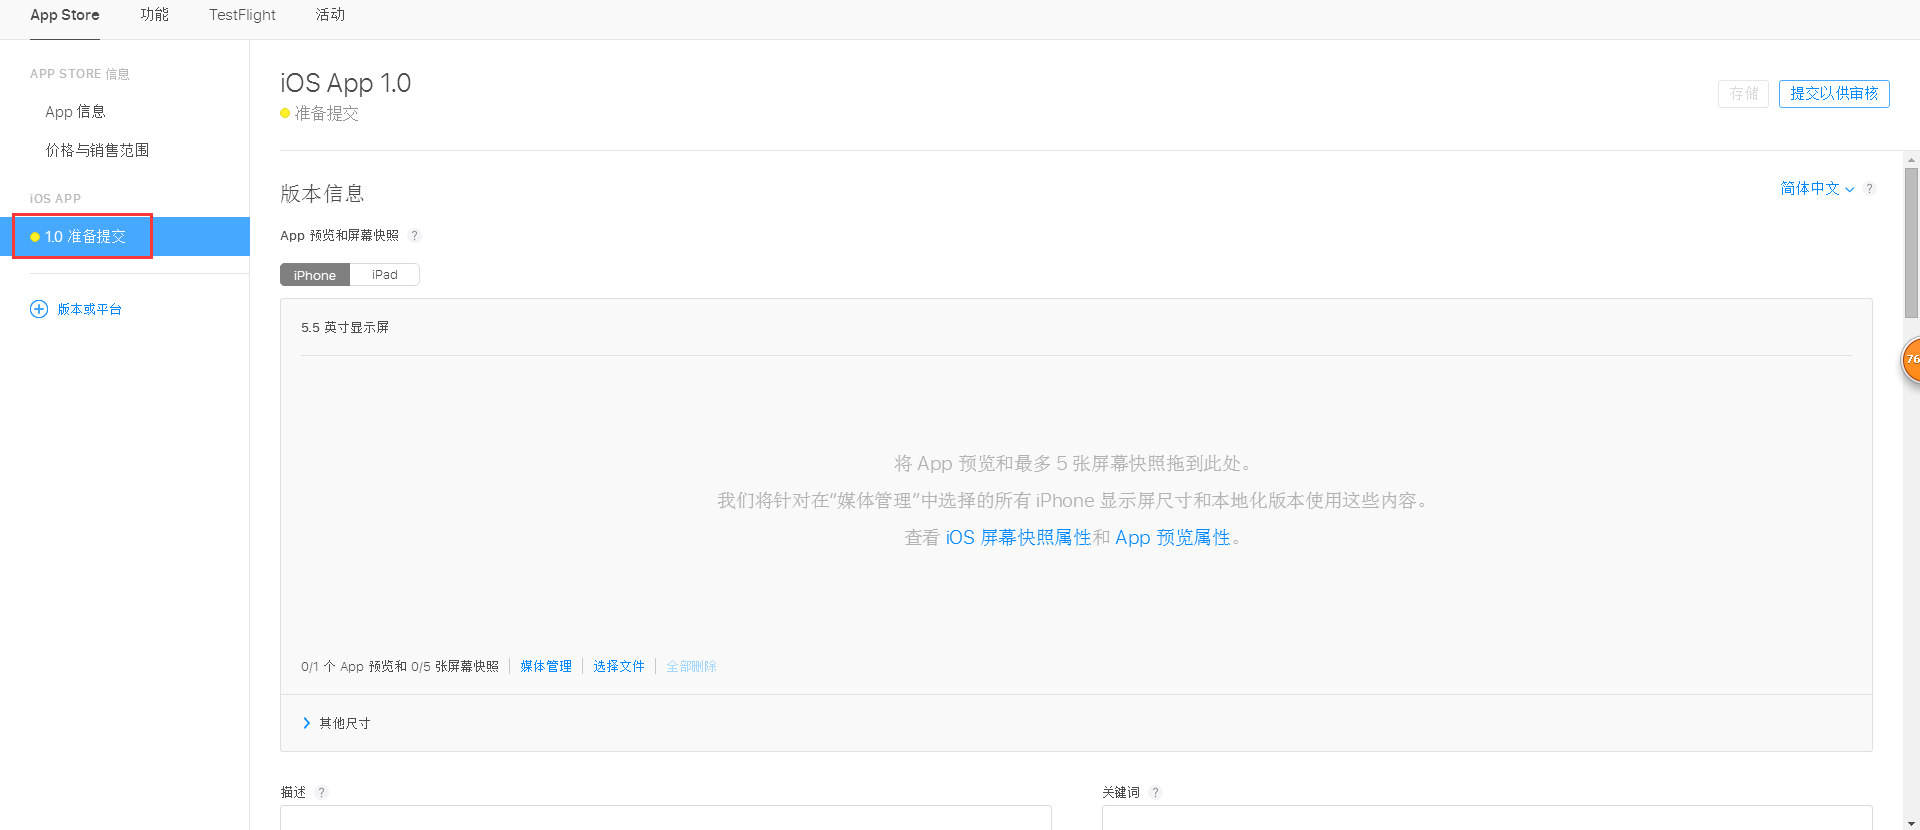
4.4 choose to submit, upload screenshots, fill in APP integrated information, etc..
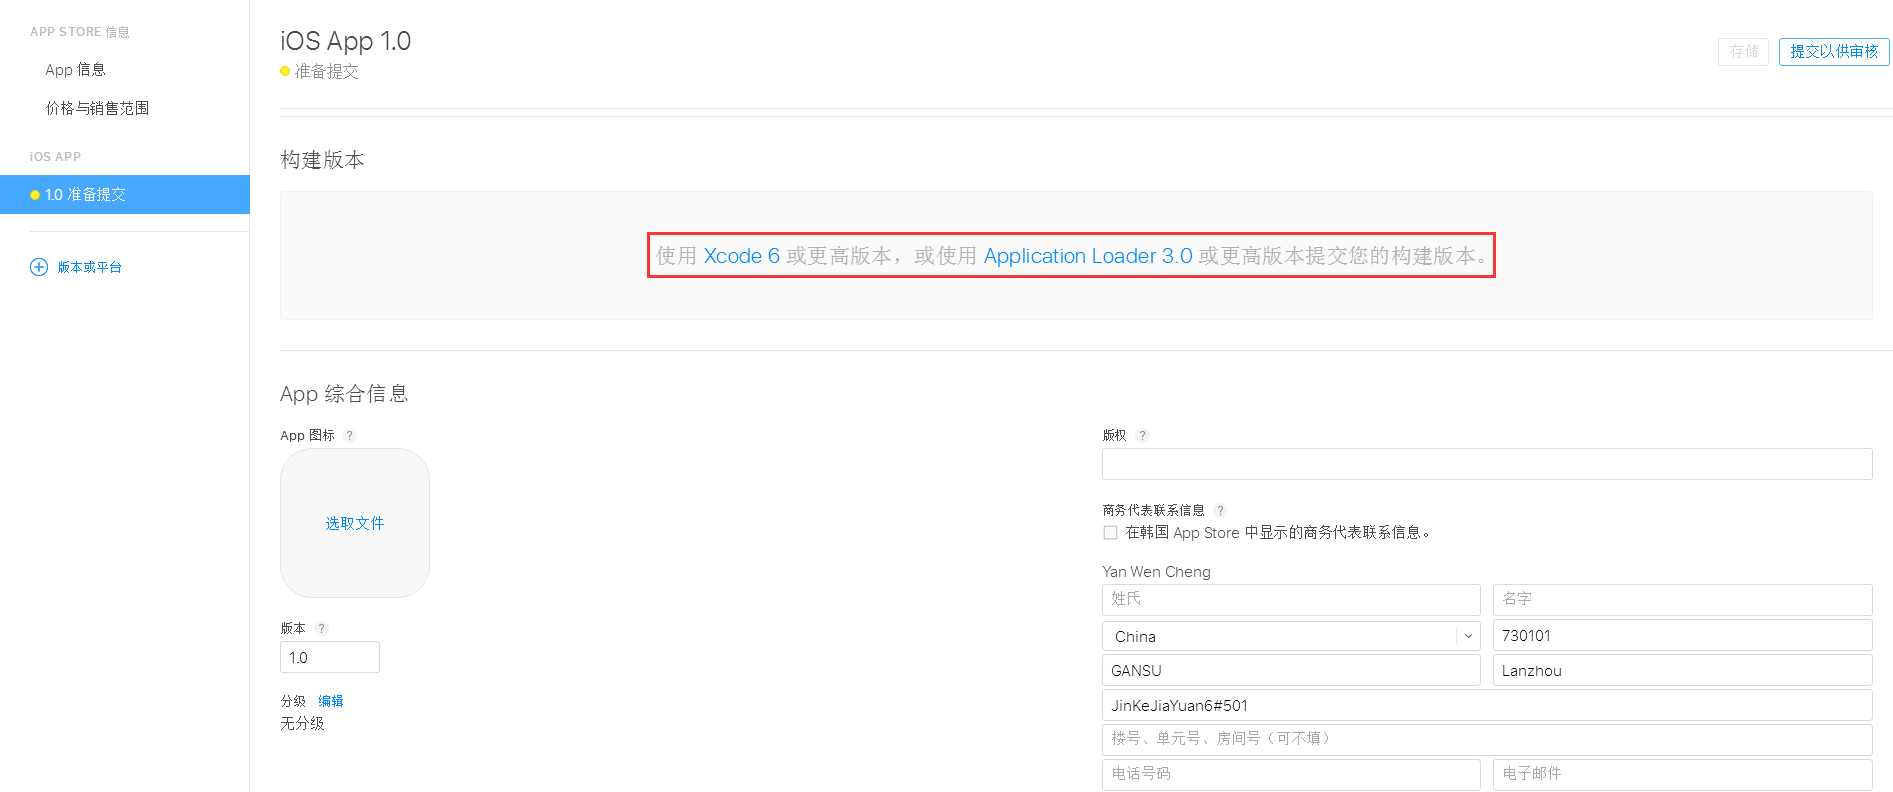
4.5 tips here to use Xcode6 or Application loader3.0 submitted to the IPA, which requires Mac apple machine, we are here to achieve the submission under the Windows, so the following will use the tool Appuploader upload ipa.
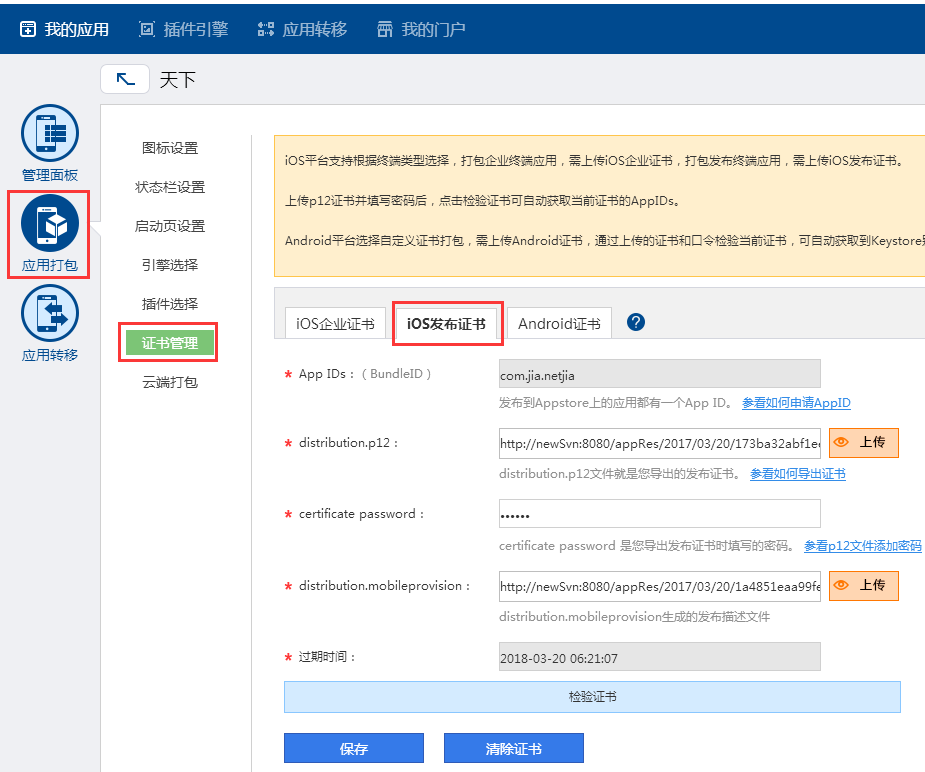
5.1, choose the completion of the APP, click application package, select the certificate management, iOS certificate, certificate issued and set the password for upload and release before the application description file, click test, APP IDS will automatically appear, then save.
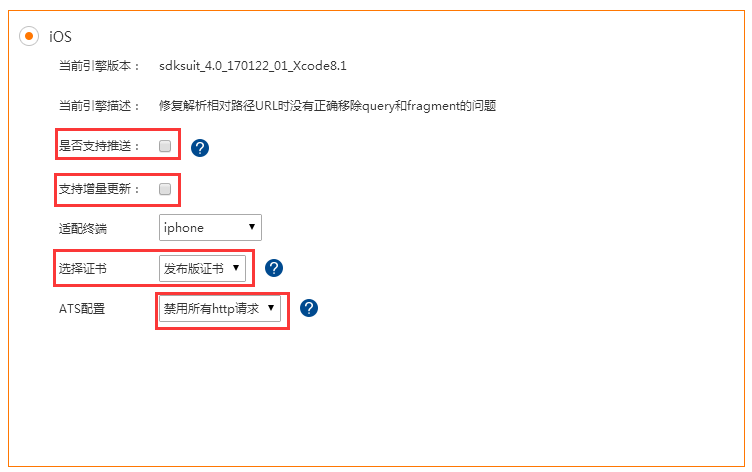
5.2 select the cloud package, iOS package, there is no push the certificate does not check the support push, select the release of the certificate, disable HTTP request is easy to audit.
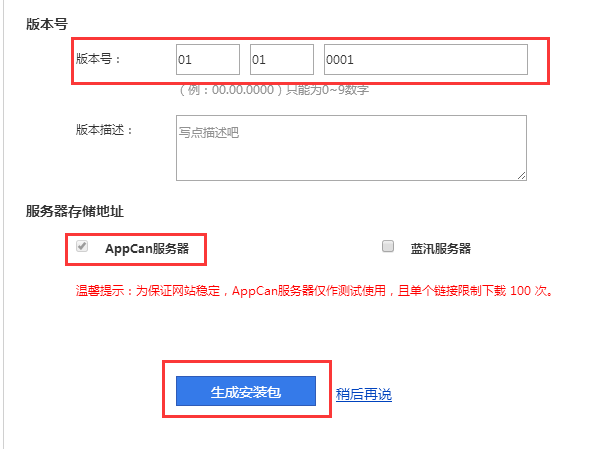
5.3 set the version number, select the appcan server, click to generate the installation package.
5.4 after the installation is successful, download to save to the computer, the IPA package can be uploaded to the App Store

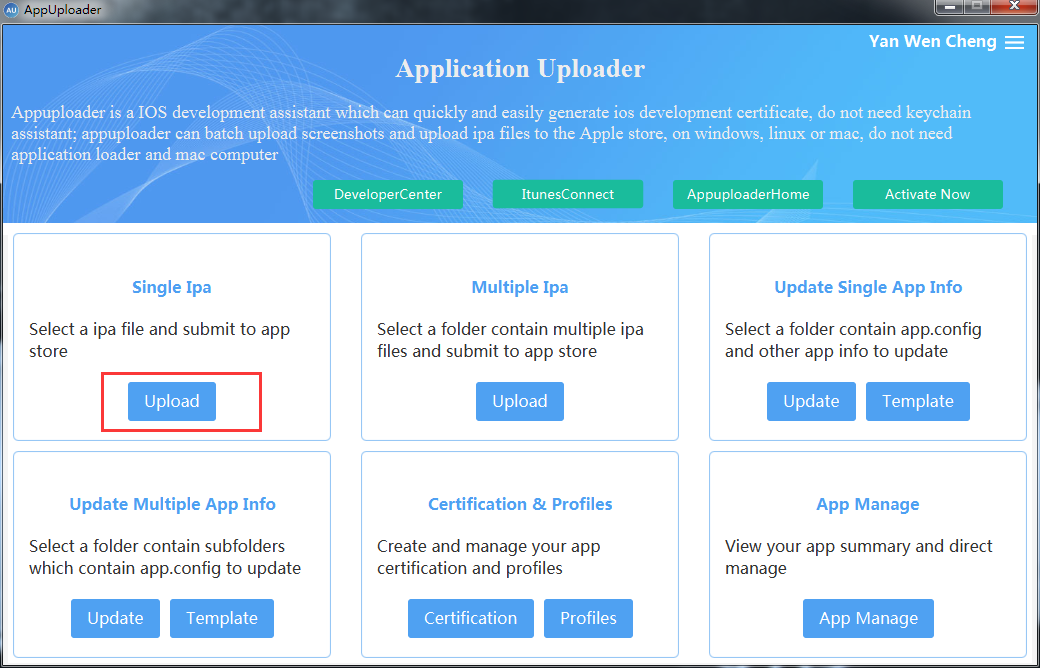
6.1 open the Appuploader program, click Upload.
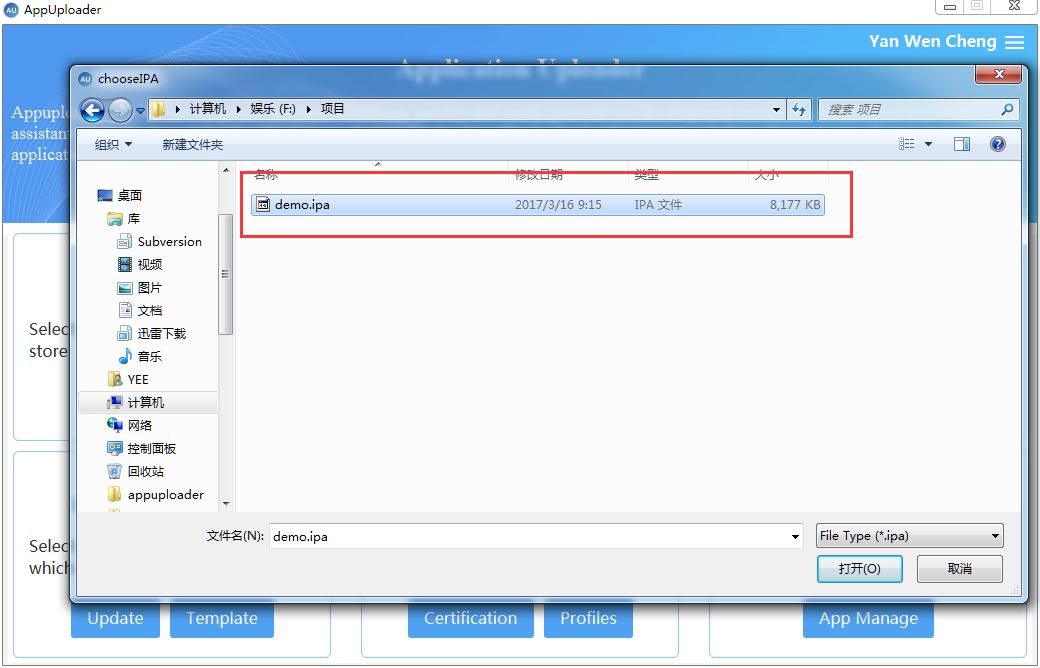
6.2 select the newly generated IAP package
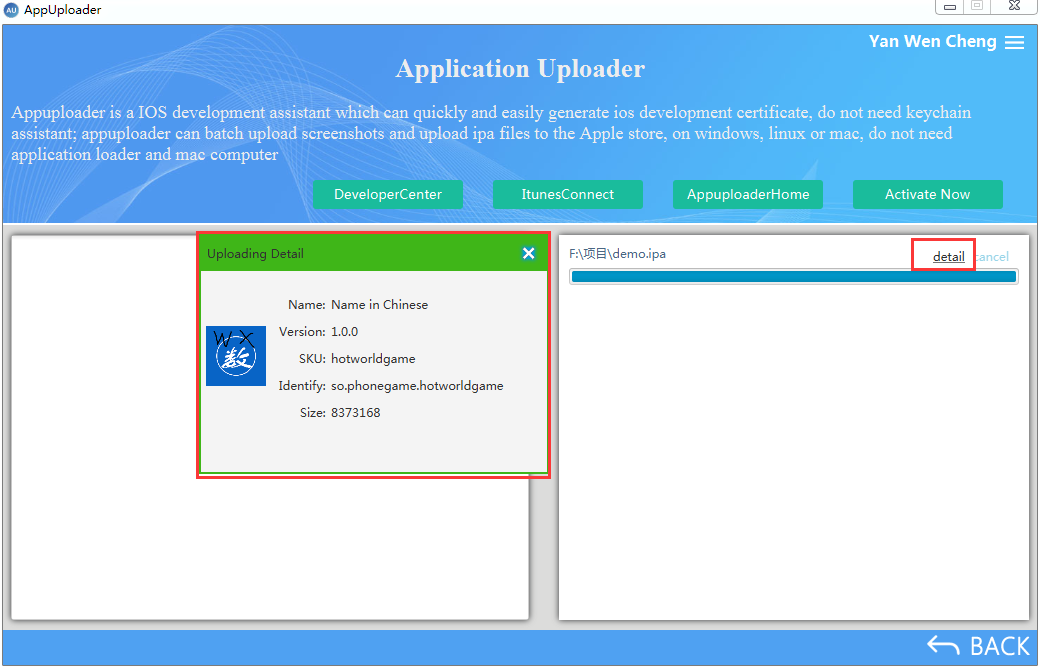
6.3Appuploader will automatically upload your IPA, upload successfully. Click detail, you can view the APP information.
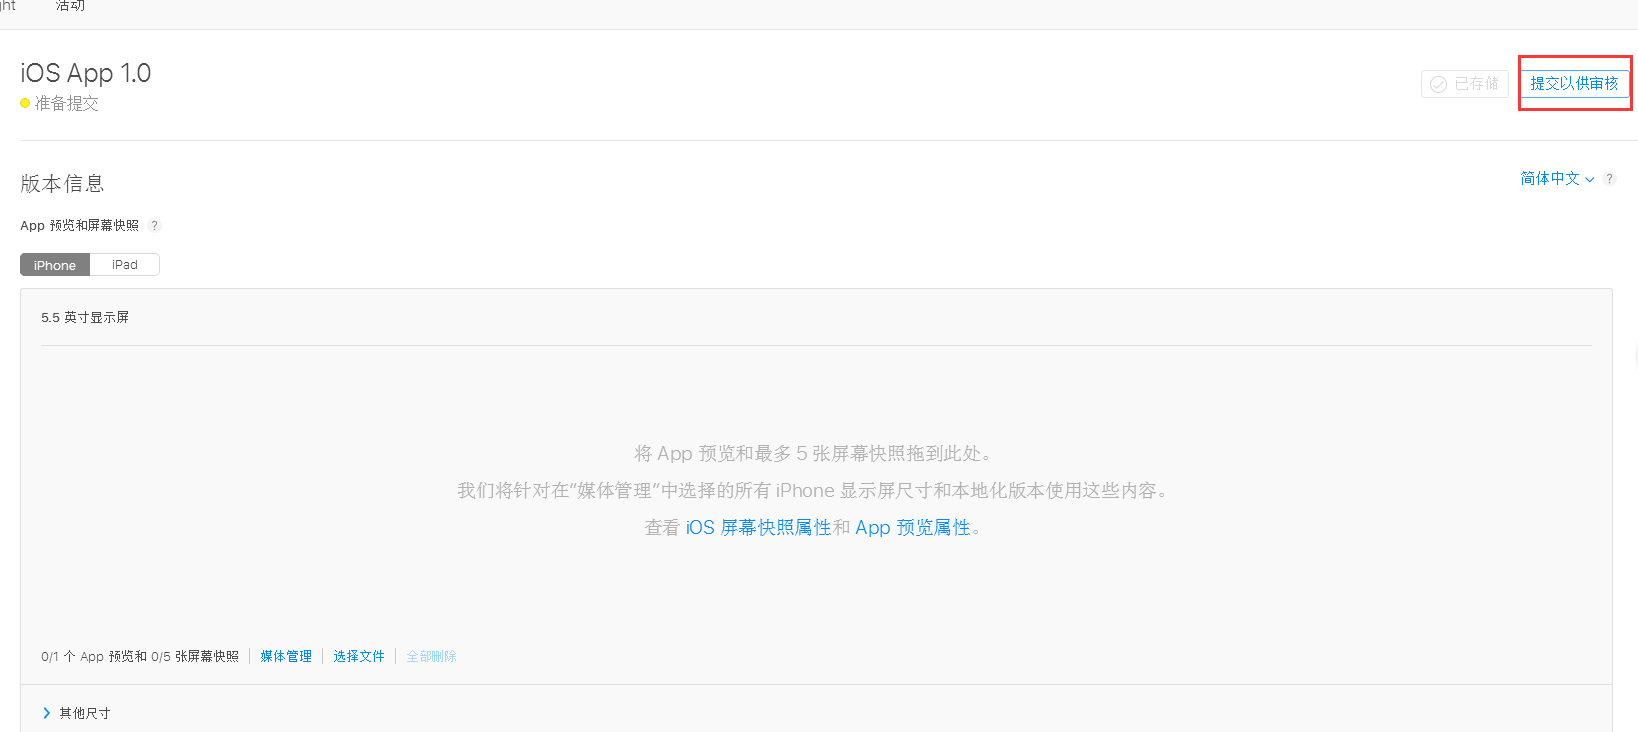
7.1 upload the IPA, then back to iTunes Connect, fill in the information into the page, there is a build option before the next to no +, but this button will appear next to a plus, upload successful, click + then there will you just upload APP, click finish to.

7.2 set the appropriate APP information, click submit for review.
So far it's done, patiently waiting for the audit.