Protect your Data, Protect your Communication, Protect your Business, BounCA!
BounCA as a Service: https://app.bounca.org
Main repo is hosted at Gitlab:
- Source: https://gitlab.com/bounca/bounca
- Packages: https://gitlab.com/bounca/bounca/-/packages
- Issue tracker: https://gitlab.com/bounca/bounca/-/issues
Don't forget to support us: Donate here!
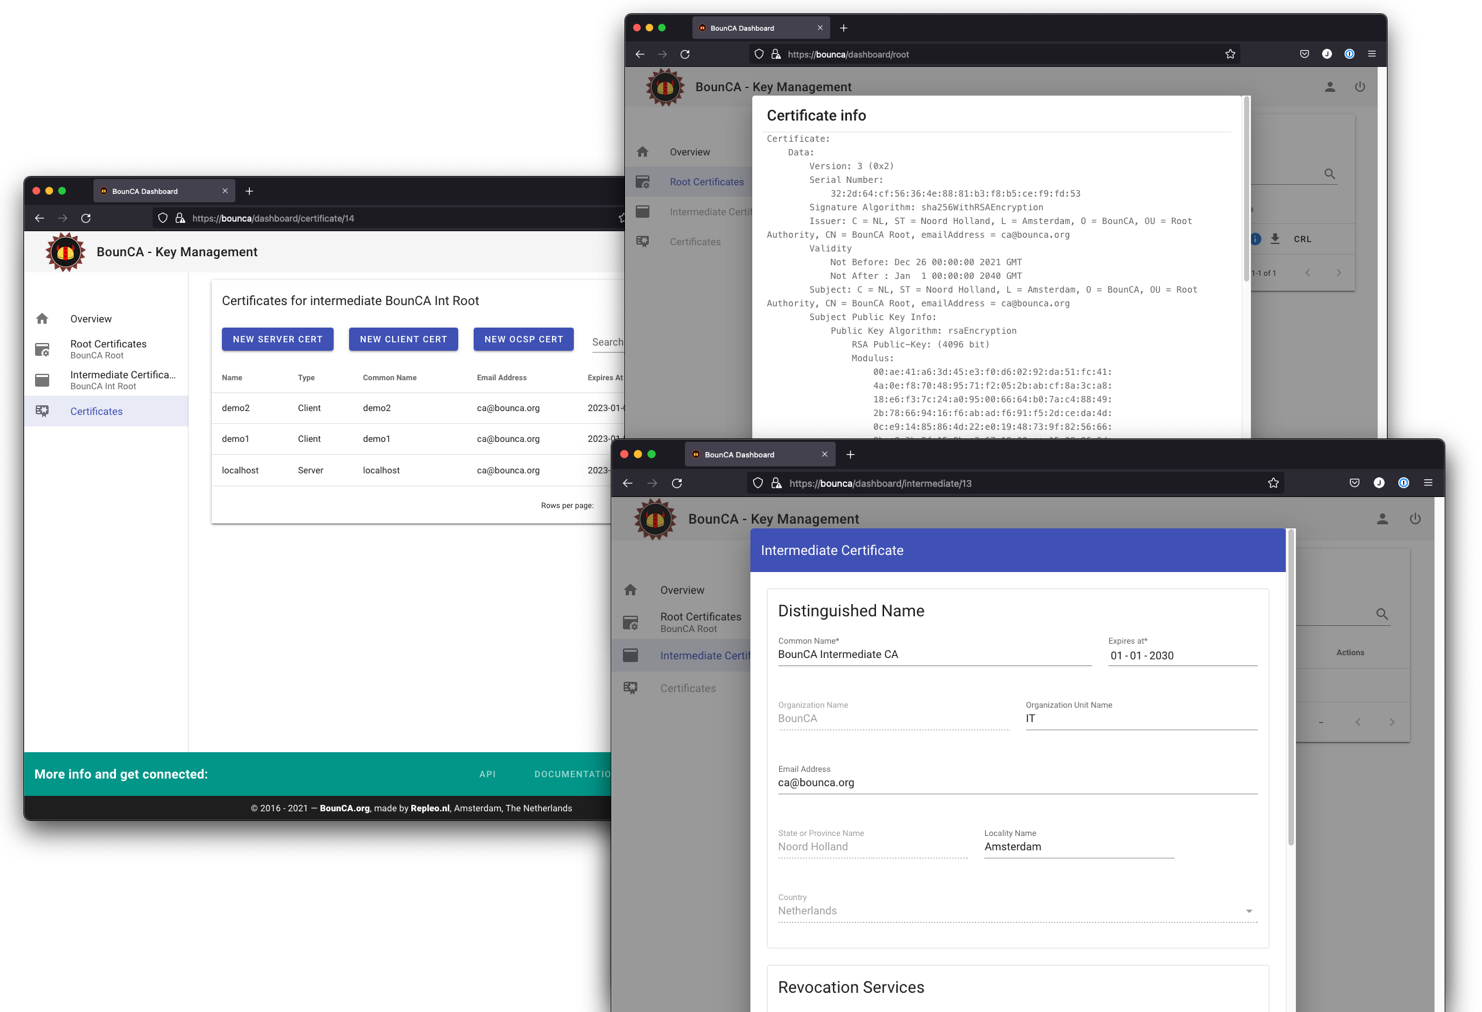
Create a PKI, sign and revoke server and client X.509 v3 SSL certificates. Setting up a trusted encrypted communication network with your peers is a matter of minutes with BounCA. BounCA lets you secure your web applications and OpenVPN connections without passwords, and secure access to your private cloud services with your own HTTPS scheme. Setting up a provisioning service for your Internet of Things devices was never so easy.
Use cases:
- Trusted encrypted communication with your peers (man-in-the-middle attack prevention)
- Secure your internal REST micro-services and internal API's
- Client-certificate based login for web services, web applications and OpenVPN connections
- Secure S/MIME-based encrypted e-mail
- Secure access to your private cloud services with your own HTTPS scheme
- Secure your Internet of Things (IoT) network with your certificates and provision them via the BounCA API
Advantages:
- No single point of failure: Decoupled and decentralized authentication management
- You are in control of your complete trust chain: Spoofing nearly impossible as no third party is involved
- Rocket fast authentication: SSL off-loading can be performed by your webservers
- Create and manage your own root certificates and certificate authorities
- Create intermediate certificates for grouping of certificates
- Create server side certificates for setting up trusted and encrypted connections
- Create client side certificates for authentication and authorization
- Support for advanced v3 certificates containing subject alt names
- Revoke certificates within one mouse click and download Certificate Revoke Lists (CRL)
- Download certificates, keys, and keystore packages for your webserver and installation
- Protect your certificates via passphrases
- Evaluate your certificates via the info button
- Use the API to automate certificate provisioning
- Easy renewal of certificates
BounCA is a Python Django based webapplication, with a Vuetify frontend, and
can be hosted on every platform capable of running python3 applications.
This tutorial describes how to deploy BounCA on a Debian 11 server.
Some commands need the root permission level, prefix them with sudo if necessary.
On a fresh Debian 11 machine, first update your repositories:
sudo apt update
install the following packages via apt:
- gettext
- nginx
- python3
- python3-dev
- python3-setuptools
- python-setuptools
- python-is-python3
- uwsgi
- uwsgi-plugin-python3
- virtualenv
- python3-virtualenv
- python3-pip
- postgresql
- postgresql-contrib
sudo apt install \
    gettext \
    nginx \
    python3 \
    python3-dev \
    python3-setuptools \
    python-setuptools \
    python-is-python3 \
    uwsgi \
    uwsgi-plugin-python3 \
    virtualenv \
    python3-virtualenv \
    python3-pip \
    postgresql \
    postgresql-contrib
Create user and database for Postgres
sudo su - postgres
createuser bounca
createdb --owner=bounca bounca --encoding=UTF8 --template=template0
psql -c "ALTER USER bounca WITH createdb" postgres
Optionally, set a password for the bounca user.
psql -c "ALTER USER bounca PASSWORD '<your password>'"
Don't forget to go back to your normal user, for example by using the command exit.
Create directory for logging:
mkdir /var/log/bounca
chown -R www-data:www-data /var/log/bounca
mkdir -p /srv/www/
Get the newest BounCA release from the packages repo.
Unpack it to a location where your web app will be stored, like /srv/www/.
Make sure the directory is owned by the nginx user:
cd /srv/www/
tar -xvzf bounca-<version>.tar.gz
chown www-data:www-data -R /srv/www/bounca
To run BounCA you need to configure nginx, uwsgi and BounCA. First copy the files:
cp /srv/www/bounca/etc/nginx/bounca /etc/nginx/sites-available/bounca
ln -s /etc/nginx/sites-available/bounca /etc/nginx/sites-enabled/bounca

cp /srv/www/bounca/etc/uwsgi/bounca.ini /etc/uwsgi/apps-available/bounca.ini
ln -s /etc/uwsgi/apps-available/bounca.ini /etc/uwsgi/apps-enabled/bounca.ini

mkdir /etc/bounca
cp /srv/www/bounca/etc/bounca/services.yaml.example /etc/bounca/services.yaml
You need to change the files /etc/bounca/services.yaml and /etc/nginx/sites-available/bounca for your situation.
Create the virtualenv and install python dependencies:
cd /srv/www/bounca
virtualenv env -p python3
source env/bin/activate
pip install -r requirements.txt
The following commands will initialize the database, initialize the folder with static files. Also the fully qualified hostname must be configured, without protocol prefix. Optionally, create a super user for the admin interface.
cd /srv/www/bounca
source env/bin/activate
python3 manage.py migrate
python3 manage.py collectstatic
python3 manage.py site <fully qualified hostname>
In case the commands give you a db connection error, make sure you start the database:
service postgresql start
Check the permissions of /var/log/bounca. The uwsgi user, in case of debian www-data, should have
write permissions.
In case you face the error no python application found, check your startup logs for errors when
starting uwsgi, it is probably related to the permission of the log file, directory.
Finally restart uwsgi and nginx.
service uwsgi restart
service nginx restart
The admin interface can be found at: http://<example.com>/admin.
To access the admin interface you need an super user account. You can also create the super user via a webform, or via the commandline.
You need to have enabled superuser_signup in your config file to enable the webform to create a super user. The signup form can be reached at
this URI: http://<example.com>/accounts/signup/.
python manage.py createsuperuser --username myAdminUser --email myAdminEmail@example.com
(Optionally: Set DJANGO_SUPERUSER_PASSWORD Environment variable to set new passwords for python manage.py createsuperuser command, and execute with python manage.py createsuperuser --noinput --username myAdminUser --email myAdminEmail@example.com)
The admin interface can be found at: http://<example.com>/admin.
BounCA should be up and running. Browse to the hostname of your BounCA machine. Enjoy generating keys.
To update BounCA you need to execute a couple of manual steps.
First, backup your database:
su - postgres -c "pg_dumpall -f /tmp/dbexport.pgsql"Make sure you move the file from the /tmp directory to a safe place.
The database will probably not very large, so zipping the file is not necessary,
You can also decide to backup the code by copying or compressing the bounca installation
folder.
Remove the contents of /srv/www.
cd /srv/www
rm -rf ./bounca
Get the newest BounCA release from the packages repo.
Unpack it to a location where your web app will be stored, like /srv/www/.
Make sure the directory is owned by the nginx user:
cd /srv/www/
tar -xvzf bounca-<version>.tar.gz
chown www-data:www-data -R /srv/www/bouncaCreate the virtualenv and install python dependencies:
cd /srv/www/bounca
virtualenv env -p python3
source env/bin/activate
pip install -r requirements.txtAfter installing the new BounCA version, you need to update the database, and setup the static files. Execute the following commands:
cd /srv/www/bounca
source env/bin/activate
python3 manage.py migrate
python3 manage.py collectstaticFinally restart uwsgi and nginx.
service uwsgi restart
service nginx restartApache License v2 - (c) 2016-2023, Repleo, Amsterdam
Jeroen Arnoldus (jeroen@repleo.nl)
Repleo, Amsterdam, Holland -- www.repleo.nl