Storing Passwords in the Retrospect Vault
Many Kodi add-ons store user name and passwords in their add-on settings. However, almost nobody seems to care about the fact that these are stored in plain text in the settings.xml in the user_data folder. Many users do not secure their Kodi boxes as well as their own PC or laptops, hence there is a higher risk of somebody obtaining that specific information.
With Retrospect 4.1.2 a new feature called 'The Vault' was added. This feature enables storing sensitive data in a more secure way. How does this work:
- The users selects a Vault PIN that is used as the main code for accessing the Vault data. This PIN can be rather simple and short and easy to remember.
- That PIN is then used to generate a much more complex password (let’s call it a PINWord) using Scrypt. The short explanation of Scrypt is that it can be used to convert a rather simple password into a much more complex one. That conversion is slow by design to prevent brute force attacks (for more details see https://en.wikipedia.org/wiki/Scrypt).
- That new PINWord is used to Encrypt/Decrypt the actual strong 32 char (256 bits) Vault Key. This Vault Key is randomly generated once for each Retrospect instance.
- The Vault Key is the actual key that is used to encrypt the data in the Vault. This is done using 256 bits AES (See https://en.wikipedia.org/wiki/Advanced_Encryption_Standard)
- Now I am not claiming that this is perfect, but it is a lot safer than just storing it plain text in the settings.xml.
Before a Vault can be used, the user is asked to set a PIN and confirm that PIN. A PIN can be numerical, but can also include alpha characters. With that PIN, a new PINWord is generated and that is used to encrypt a newly generated Vault Key.
In order to access (either store or retrieve) data from the Vault, the user is prompted for his/her PIN. Retrospect uses that PIN and the Scrypt algorithm to generate the PINWord and decrypts the Vault Key. That Vault Key is then used to either encrypt or decrypt the data using AES.
If a user has forgotten the PIN, there is no way of recovering the data. The only solution is to reset the Vault and pick a new PIN and generate a new Vault Key.
Some channels (such as TV4 Play) require you to configure a refresh token. This token can be used to obtain a new authentication token without the interaction of the user (More info on refresh tokens and OAuth).
To set a refresh token in Retrospect we need two devices: a device running Kodi (let's call it kodi device) and a device with a browers (let's call it browser-device). This could be the same device (e.g.: Kodi runs on Windows and your browser is on the same device), but it could also be two different devices, such as a LibreElec instance running on a Raspberry Pi and a MacBook with a browser.
The process that you need to walk through transfers a refersh token from the browser-device to the Kodi-device. Attention: This walkthrough is based on Google Chrome, on other browsers things might work slightly different.
- The
browser-deviceand theKodi-deviceneed to be on the same network. - On the
browser-device.- Browse to TV4play.se with the local browser.
- Log in to TV4Play.se if you are not already logged in.
- Open de Developer Console: F12 or CTRL+SHIFT+i.
- Go to the tab:
Application. - Select
Cookieson the right hand side. - Select https://www.tv4play.se/ from the list of cookies.
- Find the cookie
called tv4-refresh-token: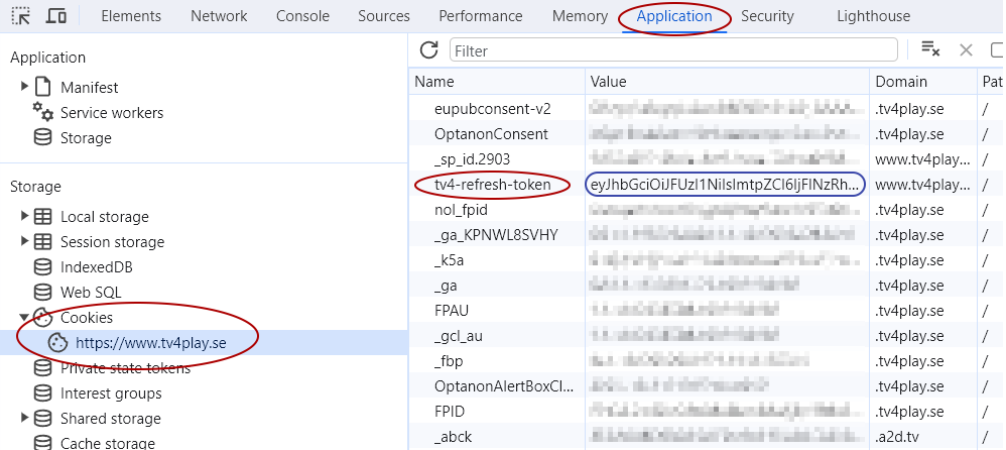
- The value of that cookie (starting with ey) is the one we need. Copy it to your clip board.
- On the
Kodi-device- Start Retrospect.
- Go to the
Channel Settingsfor the channel that needs the refresh token. - Star the
Set refresh tokenaction by pressing the button: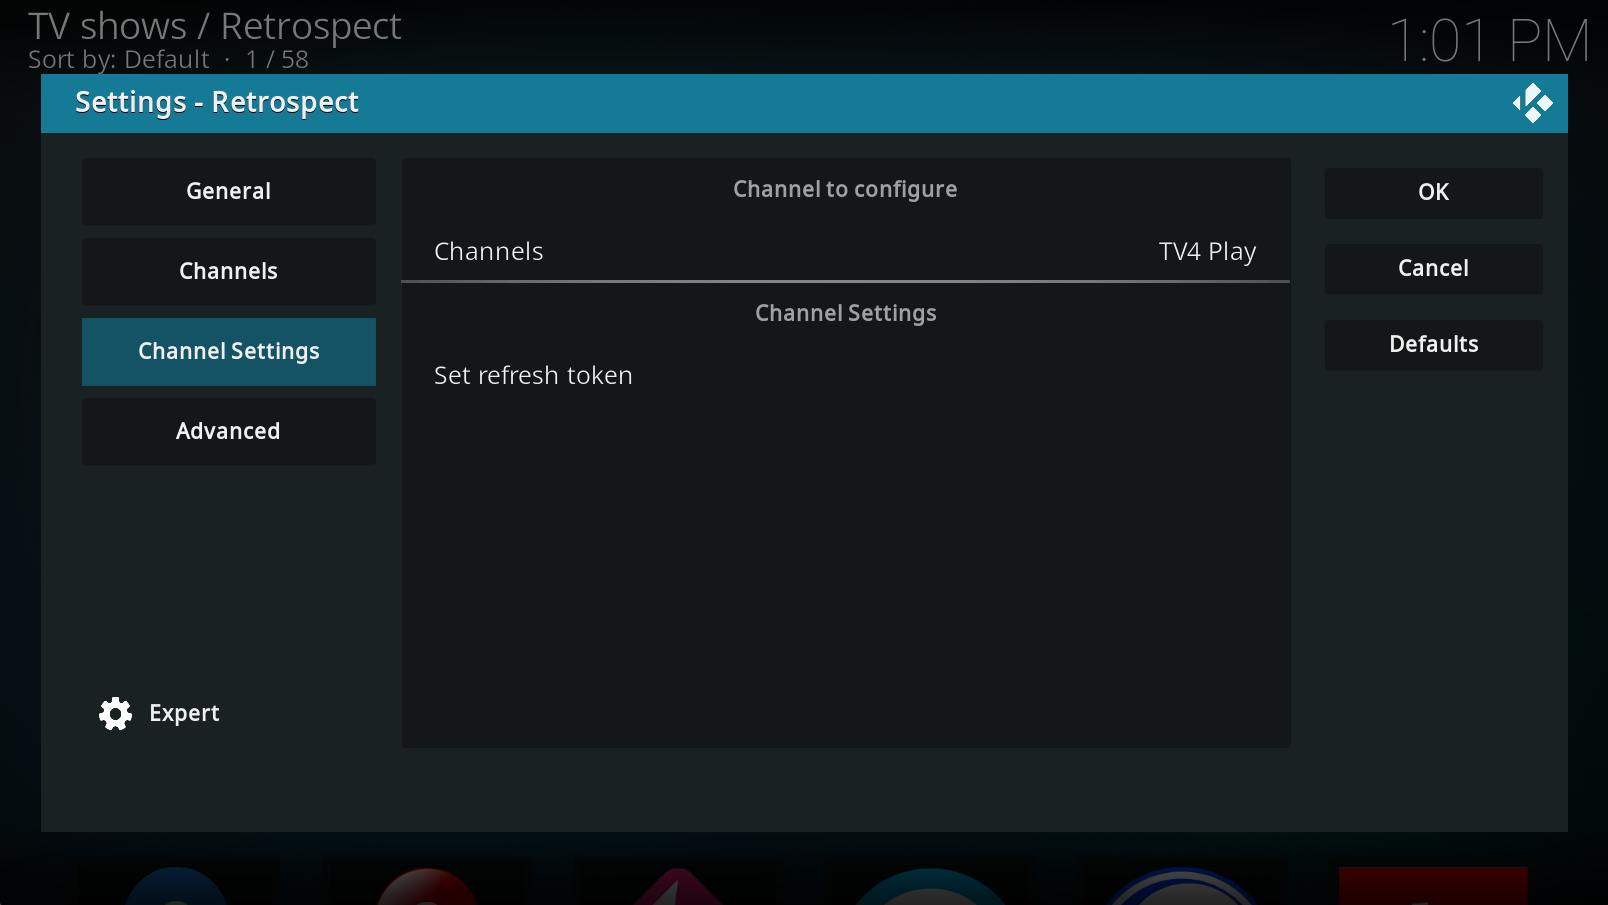
- A dialogue will pop up:
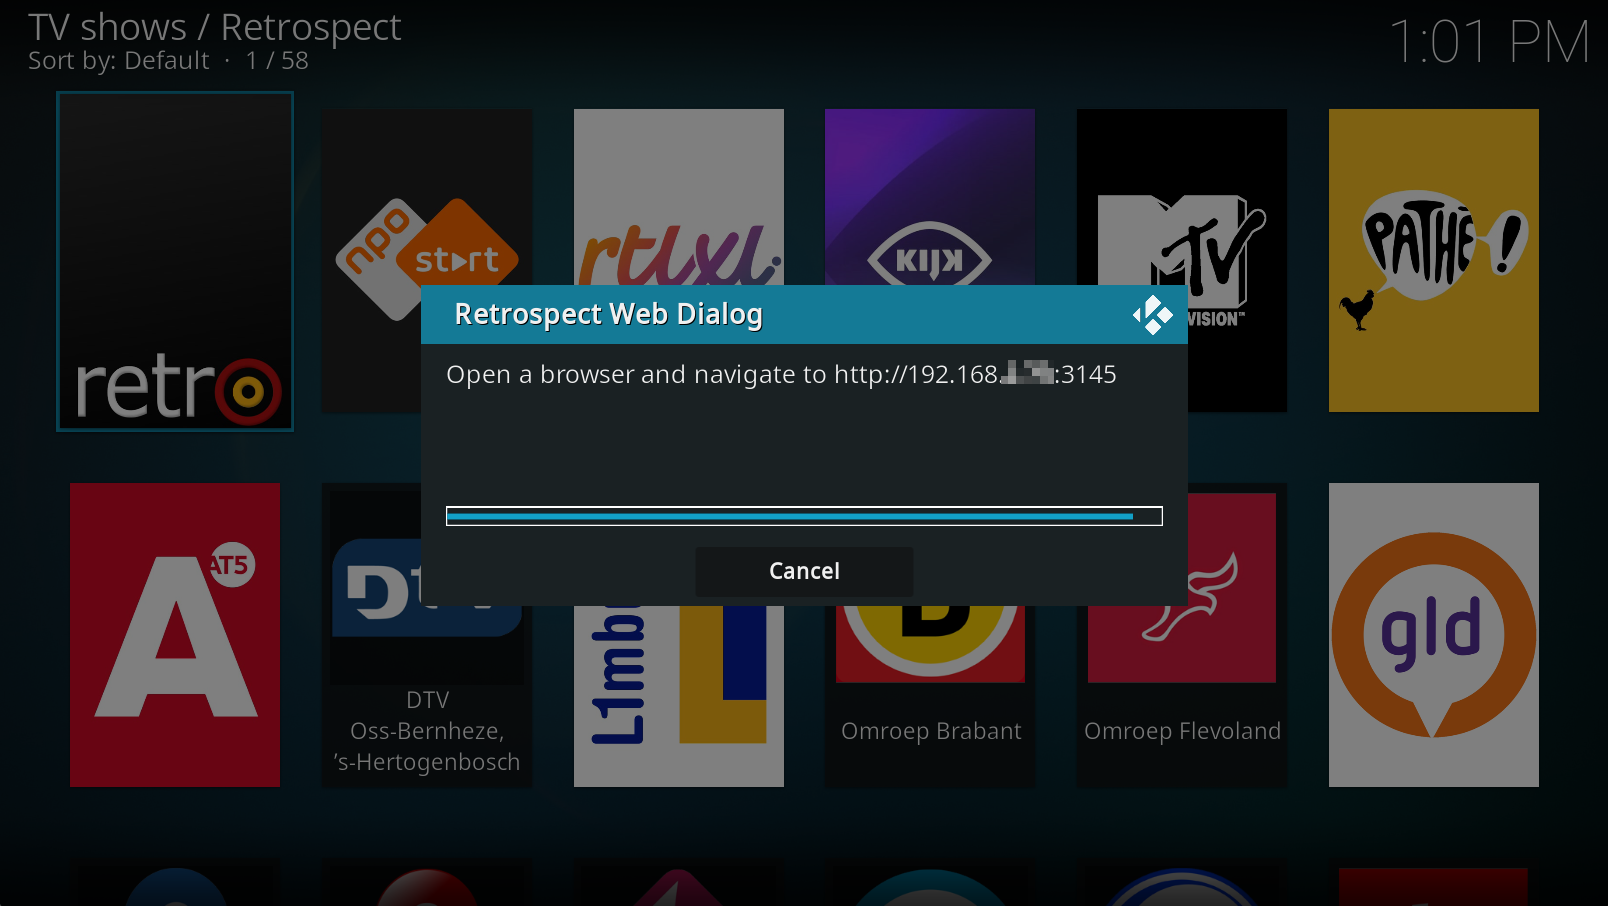
- On the
Browser-device:- Navigate to the URL displayed by the Retrospect webdialogue. In this example that is http://192.168.x.x:3145 but that will be different in for each network!
- The Retrospect webdialog will be shown:
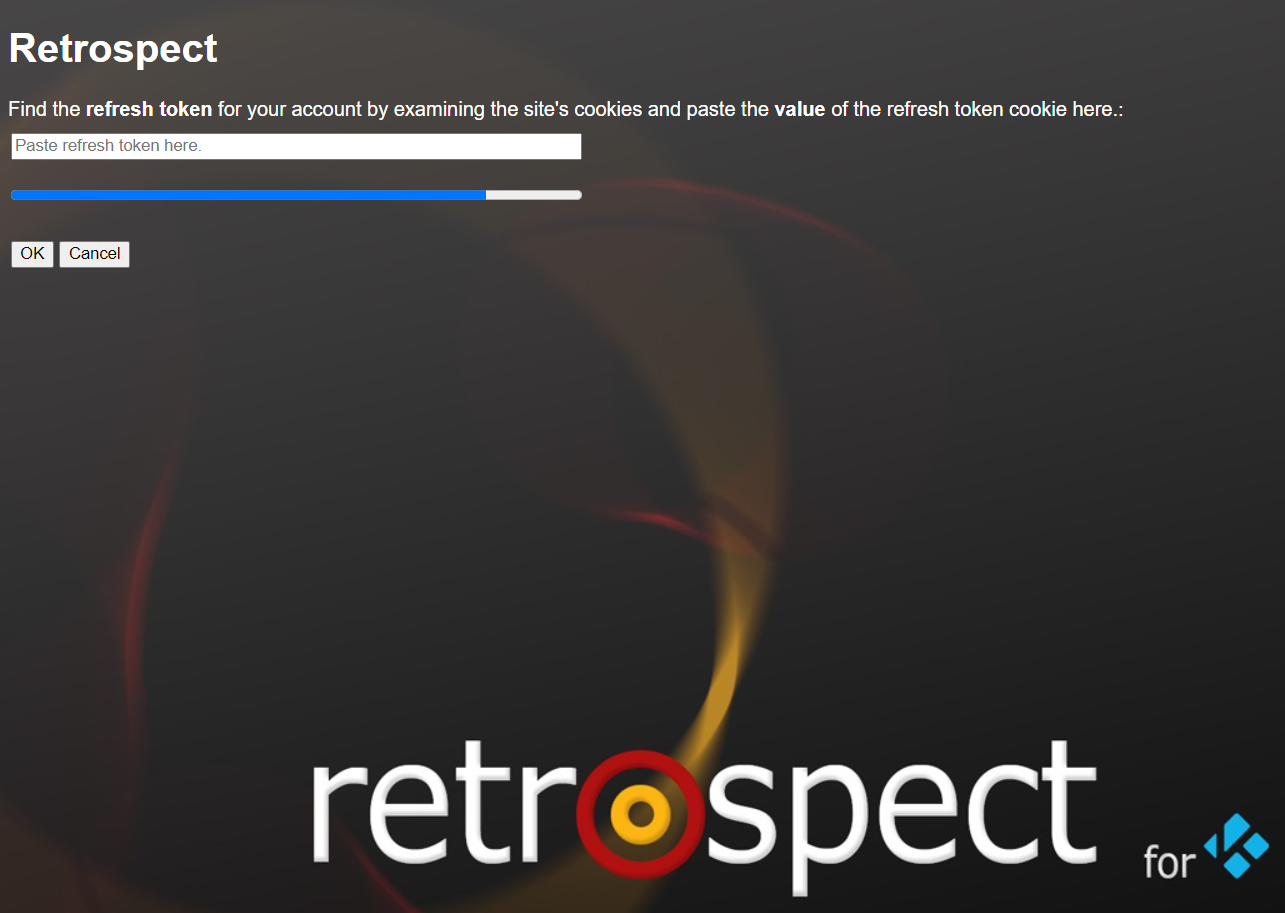
- Paste the cookie value in the Retrospect webdialogue (without quotes).
- Select
OK.
- This completes the process, on the
Kodi-devicethe dialogue should be closed and on thebrowser-devicea blank page is shown.


