The goal of thos project is to enable a user to easily preprocess data, train and test an ML model via a web interface.
The data is provisioned in real-time via REST API and by means of deploying the FIWARE Context Broker.
The use case of this project is water potability classification based on water metrics.
This is a simple web interface which showcases the prediction phase:
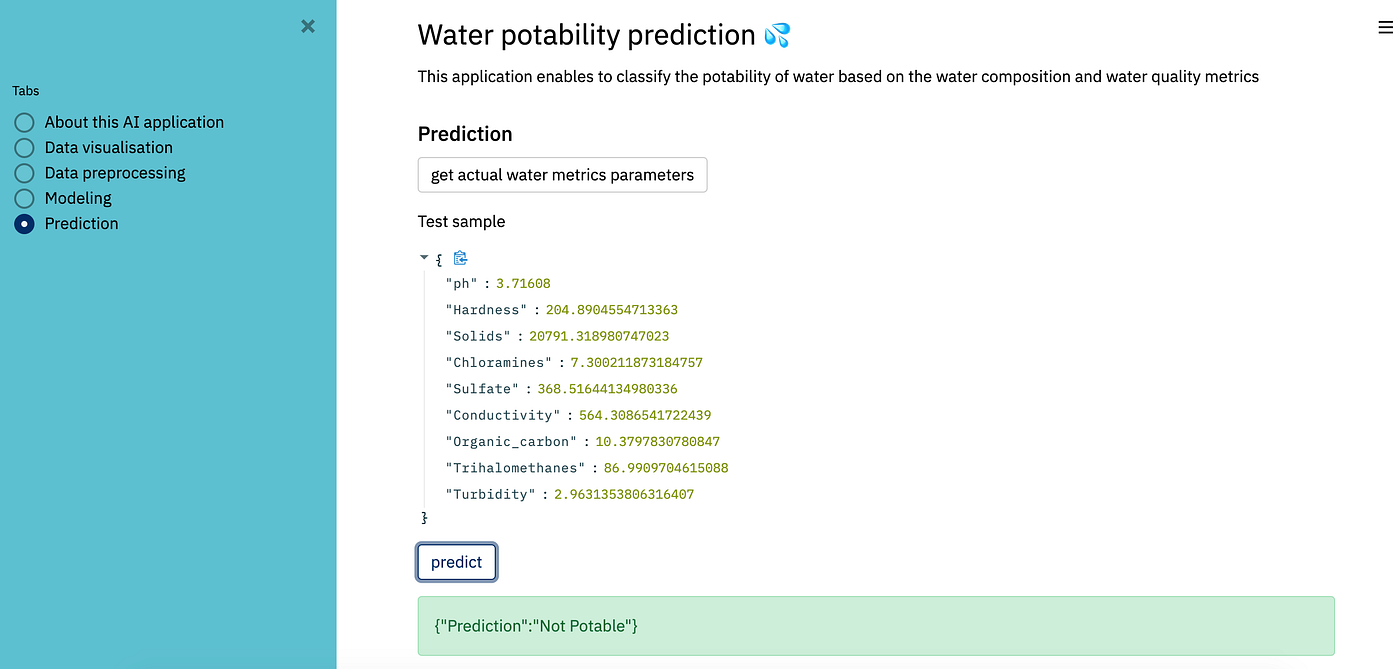
The web app is composed of multiple tabs/interfaces that achieve the different Machine Learning steps manually by the user, relying on the pre-built UI components (e.g for data pre-processing, for configuring the ML model parameters, training,...)
You can see the app in the browser using this URL: http://localhost:8501/
FastAPI is a python web framework which I used to implement the APIs for this web application.
You could check the documentation of the APIs by visiting this link: http://localhost:8000/docs
To package the whole solution which uses multiple images/containers, I used Docker Compose.
Since we have multiple containers communcating with each other, I created a bridge network called AIservice.
First create the network AIService by running this command:
"docker network create AIservice"
Run the whole application by executing this command:
"docker-compose up -d --build"
To test this application, the dataset which should be uploaded should follow the same column names as this sample dataset under streamlit-app/storage/data.csv
When you navigate to the prediction tab, you have to first create an entity at the Context Broker by sending a POST request at the "/ngsi-ld/v1/entities" endpoint.
The ID here is what we need to do the prediction through the UI, which is in this example urn:ngsi-ld:WaterPotabilityMetrics:001.
curl -v --location --request POST 'http://localhost:1027/ngsi-ld/v1/entities' \
--header 'Content-Type: application/json' \
--data-raw '{
    "id": "urn:ngsi-ld:WaterPotabilityMetrics:001",
    "type": "WaterPotabilityMetrics",
    "Ph":{
    "type":"Property",
    "value":12.716080
},
"Hardness":{
    "type":"Property",
    "value":64.8904554713363
},
"Solids":{
    "type":"Property",
    "value":10791.318980747023
},
"Chloramines":{
    "type":"Property",
    "value":1191.318980747023
},
"Sulfate":{
    "type":"Property",
    "value":248.51644134980336
},
"Conductivity":{
    "type":"Property",
    "value":564.3086541722439
},
"Organic_carbon":{
    "type":"Property",
    "value":10.3797830780847
},
"Trihalomethanes":{
    "type":"Property",
    "value":9.3797830780847
},
"Turbidity":{
    "type":"Property",
    "value":2.8631353806316407
},
"Potability":{
    "type":"Property",
    "value":"False"
}
}'
To Querry the Context Broker and verify that the entity is created, run this command in the terminal:
curl --location --request GET 'localhost:1027/ngsi-ld/v1/entities/urn:ngsi-ld:WaterPotabilityMetrics:001'