Engage Digital provides a mobile messaging component that allows users of your app to easily communicate with your customer support agents. You can send text messages and receive push notifications and automatic server-provided replies.
The component integrates nicely in any Android phone or tablet, allows presenting Engage Digital Messaging through Fragment or Activity and has rich customization options to fit perfectly in your application.
For more information about Engage Digital Messaging, please see Engage Digital Messaging reference
Please refer to Engage Digital Messaging SDK Android API Reference for advanced use.
The Engage Digital Messaging SDK Android is currently supporting Android 4.4 (API 19) and above.
Follow these three mandatory steps to integrate the Engage Digital Messaging in your application:
- Install the Engage Digital Messaging library using Gradle.
- Choose your authentication method and initialize the SDK.
- Display Engage Digital Messaging in your application.
Note: Specify requirement for Apache HTTP Legacy library for Engage Digital Messaging version < 1.7.1
If your app is targeting API level 28 (Android 9.0) or above, you must include the following declaration within the <application> element of AndroidManifest.xml.
<uses-library
      android:name="org.apache.http.legacy"
      android:required="false" />
These are minimal steps to make Engage Digital Messaging work in your app.
Read on how to customize the appearance and the behavior of Engage Digital Messaging to perfectly fit in your app:
- Add the right permissions to your application
- Customize Engage Digital Messaging appearance
- Add push notifications support
- Enable location messages using the Google APIs
- Enable static maps display for location messages
- Add a listener to react to SDK triggered events
You can see an example of Engage Digital Messaging implementation by downloading the Sample App.
Add these to your Grade file:
repositories {
    maven {
        url "https://raw.github.com/ringcentral/engage-digital-messaging-android/master"
    }
}dependencies {
compile 'com.dimelo.dimelosdk:dimelosdk:2.1.0'
}Engage Digital Messaging 1.7.0 uses a new mandatory domain name setting (first part of your RingCentral Engage Digital URL: domain-name.engagement.dimelo.com), so these changes must be taken into consideration:
setApiSecret(String apiSecret)is now deprecated in favor ofinitWithApiSecret(String secret, String domainName, DimeloListener dimeloListener).setApiKey(String apiKey)is now deprecated in favor ofinitWithApiKey(String apiKey, String domainName, DimeloListener dimeloListener).setHostname(String hostname)is not available anymore.
To support multi threads in Engage Digital Messaging 2.1.0, these changes must be taken into consideration:
- When integrating the SDK as a fragment:
newChatFragment()method has been removed in favor of the newnewRcFragment()method.Chattype has been removed in favor of the newRcFragmenttype.newRcFragment()method will either instantiate the chat or the conversations list based on the threading activation/deactivation.- To customize the conversations list or the chat, use
RcFragment.Customization(Chat.Customizationwill no longer be available).
- When integrating the SDK as an activity:
setOnActivitySetupAppearenceListener.onSetupAppearancenow expects aRcFragment.Customizationto be passed as argument (it was previously expecting aChat.Customization).
With each HTTP request, Engage Digital Messaging sends a JWT (JSON Web Token).
This token contains user-specific info that you specify (userIdentifier, userName etc.) and a HMAC signature. User identifier allows Engage Digital to identify author of messages from different in the agent's backend.
If user identifier is missing (null), then an autogenerated unique installation identifier is used to identify the user (created automatically).
If your app rely on a uniq imutable technical identifier to identify user use userIdentifier to also identify them at the Agent interface level.
Use userName to provide to agent a human name for the user.
We support two kinds of authentication modes: with adhoc JWT signing (less security) and with a remote JWT signing (recommended).
Using an API secret (deprecated in version 3.2.0)
This is a convenient mode for testing and secure enough when user identifiers are unpredictable.
Here's how to create the Dimelo instance and initialize it using a built-in secret:
Dimelo dimelo = Dimelo.setup(Context);
dimelo.initWithApiSecret(SOURCE_API_SECRET, DIMELO_DOMAIN_NAME, DIMELO_LISTENER);
/*
SOURCE_API_SECRET can be found in your source configuration
DIMELO_DOMAIN_NAME is your Dimelo Digital domain name (e.g. if your Dimelo Digital url is "DIMELO_DOMAIN_NAME.engagement.dimelo.com", then your domainName will be "DIMELO_DOMAIN_NAME")
DIMELO_LISTENER is an optionnal parameter that we will cover later in this document
*/
Note: To support hostname configuration, here's how to create the Dimelo instance and initialize it using a built-in secret:
Here's how to create the Dimelo instance and initialize it using a built-in secret:
Dimelo dimelo = Dimelo.setup(Context);
dimelo.initializeWithApiSecretAndHostName(SOURCE_API_SECRET, DIMELO_HOST_NAME, DIMELO_LISTENER);
/*
SOURCE_API_SECRET can be found in your source configuration
DIMELO_HOST_NAME is your hostname (e.g. if your Dimelo Digital url is "DIMELO_DOMAIN_NAME.engagement.dimelo.com", then your hostName will be "DIMELO_DOMAIN_NAME.messaging.dimelo.com")
DIMELO_LISTENER is an optionnal parameter that we will cover later in this document
*/
Then it will create and sign JWT automatically when needed (as if it was provided by the server).
You simply set necessary user-identifying information and JWT will be computed on the fly. You do not need any cooperation with your server in this setup.
The security issue here is that built-in secret is rather easy to extract from the app's binary build. Anyone could then sign JWTs with arbitrary user identifying info to access other users' chats and impersonate them. To mitigate that risk make sure to use this mode only during development, or ensure that user identifiers are not predictable (e.g. random UUIDs).
Using a token (added in version 3.2.0)
Here's how to create the Dimelo instance and initialize it with a token, a JWT key ID and a JWT secret:
Dimelo dimelo = Dimelo.setup(Context);
dimelo.initializeWithToken(token, hostname, jwtKeyId, jwtSecret, dimeloListener);| Parameter | Description |
|---|---|
token |
can be found in your Engage Messaging channel administration page |
hostname |
can be found in your Engage Messaging channel administration page |
jwtKeyId |
can be found in your Engage Messaging community administration page |
jwtSecret |
can be found in your Engage Messaging community administration page |
delegate |
optional parameter that will be covered later in this document |
Then it will create and sign JWT automatically when needed (as if it was provided by the server).
You simply set necessary user-identifying information and JWT will be computed on the fly. You do not need any cooperation with your server in this setup.
[!WARNING] The security issue here is that built-in secret is rather easy to extract from the app's binary build. Anyone could then sign JWTs with arbitrary user identifying info to access other users' chats and impersonate them. To mitigate that risk make sure to use this mode only during development, or ensure that user identifiers are not predictable (e.g. random UUIDs).
Using the public API key (deprecated in version 3.2.0)
This is a more secure mode. Dimelo will provide you with two keys: a public API key and a secret key.
The public one will be used to configure Dimelo instance and identify your app.
The secret key will be stored on your server and used to sign JWT token on your server.
Here's how create the Dimelo instance and initialize it using a server-side secret:
Dimelo dimelo = Dimelo.setup(Context);
dimelo.initWithApiKey(SOURCE_API_KEY, DIMELO_DOMAIN_NAME, DIMELO_LISTENER);
/*
  SOURCE_API_KEY can be found in your source configuration
  DIMELO_DOMAIN_NAME is your Dimelo Digital domain name (e.g. if your Dimelo Digital url is "DIMELO_DOMAIN_NAME.engagement.dimelo.com", then your domainName will be "DIMELO_DOMAIN_NAME")
  DIMELO_LISTENER is an optionnal parameter that we will cover later in this document
*/
Note: To support hostname configuration, here's how to create the Dimelo instance and initialize it using a server-side secret:
Dimelo dimelo = Dimelo.setup(Context);
dimelo.initializeWithApiKeyAndHostName(SOURCE_API_KEY, DIMELO_HOST_NAME, DIMELO_LISTENER);
/*
  SOURCE_API_KEY can be found in your source configuration
  DIMELO_HOST_NAME is your hostname (e.g. if your Dimelo Digital url is "DIMELO_DOMAIN_NAME.engagement.dimelo.com", then your hostName will be "DIMELO_DOMAIN_NAME.messaging.dimelo.com")
  DIMELO_LISTENER is an optionnal parameter that we will cover later in this document
*/
Once this is done you will have to set jwt property manually with a value received from your server.
This way your server will prevent one user from impersonating another.
- Set authentication-related properties (
userIdentifier,userName,authenticationInfo). - Get a dictionary for JWT using
Dimelo.getJwtDictionary(). This will also contain public API key,installationIdentifieretc. - Send this dictionary to your server.
- Check the authenticity of the JWT dictionary on the server and compute a valid signed JWT token. Use a corresponding secret API key to make a HMAC-SHA256 signature. Note: use raw binary value of the secret key (decoded from hex) to make a signature. Using hex string as-is will yield incorrect signature.
- Send the signed JWT string back to your app.
- In the app, set the
Dimelo.jwtproperty with a received string.
/!\ Dimelo.setUserIdentifier();, Dimelo.setAuthenticationInfo(); and Dimelo.setUserName(); must only be called BEFORE Dimelo.setJwt(); otherwise your JWT will be emptied and your request will end up in a 404 error.
You have to do this authentication only once per user identifier, but before you try to use Engage Digital Messaging. Your application should prevent user from opening Engage Digital Messaging until you receive a JWT token.
Using a token (added in version 3.2.0)
This is a more secure mode.
Here's how create the Dimelo instance and initialize it using a server-side signed JWT:
Dimelo dimelo = Dimelo.setup(Context);
dimelo.initializeWithToken(token, hostname, dimeloListener);| Parameter | Description |
|---|---|
token |
can be found in your Engage Messaging channel admin page |
hostname |
can be found in your Engage Messaging channel admin page |
delegate |
optional parameter that will be covered later in this document |
Once this is done you will have to set jwt property manually with a value received from your server.
This way your server will prevent one user from impersonating another.
-
Set user-related properties (
userIdentifier,userName,authenticationInfo). -
Get the JWT payload by calling
Dimelo.getJwtDictionary(). It will return aJSONObjectthat contains the user-related properties set in the previous step as well as thetokenand aninstallationId(both of these are really important and should not be omitted). -
Send this dictionary to your server.
-
Check the authenticity of the JWT payload on the server and compute a signed JWT. You will find your JWT secret and JWT key ID (required for the JWT signature) in:
- Your Engage Messaging channel admin page (for RingCX users).
- Your Engage Messaging commnity profile admin page (for Engage Digital users).
⚠️ The JWT must be signed using the JWT secret and must include the JWT key ID as thekidin the JWT header.ℹ️ Please note that we currently only support HS256 and RS256 algorithms.
-
Send the signed JWT string back to your app.
-
In the app, set the
Dimelo.jwtproperty with a received string.
Dimelo.setUserIdentifier();, Dimelo.setAuthenticationInfo(); and Dimelo.setUserName(); must only be called BEFORE Dimelo.setJwt(); otherwise your JWT will be emptied and your request will end up in a 404 error.
You have to do this authentication only once per user identifier, but before you try to use Engage Digital Messaging. Your application should prevent user from opening a Mobile Messaging until you receive a JWT token.
Use enableThreads flag to enable/disable multi threads.
Must be a boolean, default is NO.
Programmatically: set Dimelo.enableThreads property
Dimelo provides different ways to display Engage Digital Messaging.
Achieved by calling Dimelo.openRcActivity() (wich will internally call Context.startActivity).
This method will display a full screen Engage Digital Messaging with a Toolbar containing a title.
The title and the background (drawable or color) of the Toolbar are customizable.
The Navigation Icon can be displayed and customized.
The user can close Engage Digital Messaging (the Activity) by pressing the Navigation Icon or the back button of his device.
By default, the app name is used for the title and the primaryColor (appCompat) is used as the background color of the toolbar.
To make it work, you must declare the Activity in your AndroidManifest.xml with a name equals to com.dimelo.dimelosdk.main.ChatActivity and another one with a name equals to com.dimelo.dimelosdk.main.ThreadsListActivity when multi threads are enabled.
This is the easiest way to display Engage Digital Messaging.
If your application doesn't inherit from AppCompat, the toolbar and status bar of Dimelo will be black.
In order to fix this, your application needs to set the ChatActivity and ThreadsListActivity (when multi threads are enabled) theme to @style/DimeloTheme (AndroidManifest.xml).
By default, DimeloTheme will set the Toolbar and status bar to blue.
You can change those by overriding dimelo_color_primary and dimelo_color_primary_dark in color file resources (dimelo_color_primary for toolbar and dimelo_color_primary_dark for status bar).
Note: This is an example on how to declare Engage Digital Messaging activities in AndroidManifest.xml:
- When threading is enabled:
<activity android:name="com.dimelo.dimelosdk.main.ChatActivity" />

<activity android:name="com.dimelo.dimelosdk.main.ThreadsListActivity">
  <meta-data
    android:name="android.support.PARENT_ACTIVITY"
    android:value="com.dimelo.sampleapp.MainActivity" />
</activity>

...- When threading is disabled:
<activity android:name="com.dimelo.dimelosdk.main.ChatActivity">
  <meta-data
    android:name="android.support.PARENT_ACTIVITY"
    android:value="com.dimelo.sampleapp.MainActivity" />
</activity>

...Your app must use an AppCompat theme to be able to use Dimelo as a Fragment.
Achieved by calling Dimelo.newRcFragment() and using the Android FragmentManager and FragmentTransaction.
This is the most flexible way to display Engage Digital Messaging as you can manually place, open and close it like any Fragment.
No Toolbar is displayed.
Note: The dimelo Fragment is renamed to RcFragment and it will instantiate the Chat or the ThreadsListFragment according to the activation/deactivation of threads.
Note: forwarding onBackPressed() events using "RcFragment.onBackPressed()" is necessary to display the best user experience; "true" will be returned if the event has been consumed
Engage Digital Messaging support fragment nesting (i.e: Engage Digital Messaging fragment can be displayed inside a fragment parent). However, in this specific case, the host application needs to care about the following steps.
-
Using Fragment.setUserVisibleHint in order to notify Engage Digital Messaging about its visibility state. This will prevent Engage Digital Messaging to do background work when unnecessary
-
Engage Digital Messaging uses intents for displaying attachments. Forwarding "onActivityResult" will allow Engage Digital Messaging to correctly receive the results.
-
Engage Digital Messaging is compiled against Android sdk 23 and handle dynamic permissions. To allow optimal behaviors, forwarding "onRequestPermissionsResult" is necessary.
Note: forwarding onBackPressed() events using "RcFragment.onBackPressed()" is necessary to display the best user experience; "true" will be returned if the event has been consumed
Examples are provided within the SampleApp
Please refer to Localization.md for guidance on strings customization
In order to add access to images in the gallery you need to add the READ_MEDIA_IMAGES permission to your AndroidManifest.xml:
<uses-permission android:name="android.permission.READ_MEDIA_IMAGES" />If you also want to add access to videos in the gallery you need to add the READ_MEDIA_VIDEO permission to your AndroidManifest.xml:
<uses-permission android:name="android.permission.READ_MEDIA_VIDEO" />To add access to images and videos in the gallery you need to add the READ_EXTERNAL_STORAGE permission to your AndroidManifest.xml:
<uses-permission android:name="android.permission.READ_EXTERNAL_STORAGE" />In order for the camera to be enabled you'll need to add the CAMERA permission to your AndroidManifest.xml:
<uses-permission android:name="android.permission.CAMERA" />Just like in Android 11+ you'll need to add the CAMERA permission to your AndroidManifest.xml but you'll also need to add the WRITE_EXTERNAL_STORAGE permission:
<uses-permission android:name="android.permission.CAMERA" />
<uses-permission android:name="android.permission.WRITE_EXTENAL_STORAGE" />See how to customize Engage Digital Messaging using the Android Resource folders.
You can also customize it programmatically:
- Implementing
Dimelo.OnActivitySetupAppearanceListener(RcFragment.Customization customization)and modifyingcustomizationattributes.
The ThreadsListActivity/ChatActivity will call the listener back when creating its layout.
You do not need to call customization.apply() as it will be called for you.
- Calling
RcFragment.getCustomization()and receiving an instance ofRcFragment.Customization - Modifiying its attributes.
- Calling customization.apply() to register the changes and update Engage Digital Messaging.
We provide a lot of properties for you to make Engage Digital Messaging look native to your application.
For your convenience, properties are organized in two groups: Basic and Advanced. In many cases it would be enough to adjust the Basic properties only.
You can customize the inputbar color, the font and the color of any text in Engage Digital Messaging view. If you are displaying Engage Digital Messaging as an activity you can also cutomize the ActionBar colors and title
Advanced options include background and padding for text bubbles. We use 3 kinds of messages. Each kind can be customized independently.
- User's text message.
- Agent's text message.
- System text notification (automatic reply from the server).
All bubble images must be 9-part sliced resizable images or a (Drawable xml) to fit arbitrary content.
Text bubbles can be colored using properties userMessageBackgroundColor, agentMessageBackgroundColor etc.
If you provide a custom bubble image for text, you should also update message bubble padding properties to arrange your text correctly within a bubble.
Check the Engage Digital Messaging SDK Android API Reference to learn about all customization options.
Engage Digital Messaging can receive push notifications from Engage Digital Messaging server. To make them work, a couple of steps must be done on your part:
- Register to Google GCM service by using for example
GoogleCloudMessaging.register(senderId) - Set
Dimelo.deviceTokenproperty with the value returned by theGoogleCloudMessaging.register(senderId) - Your app must register for remote notifications for example by declaring and implementing a
Receiverand aService(Android APIs). - Optionally implement
Dimelo.BasicNotificationDisplayerabstract class. It allows you to specify a title, an icone and how to display Engage Digital Messaging when the user click the notification. If you want to handle the entire process of displaying notifications you can directly implementDimelo.NotificationDisplayerinterface. - Let Dimelo consume the notification using
Dimelo.consumeReceivedRemoteNotification(). If this method returnstrue, it means that Dimelo recognized the notification as its own and you should not process the notification yourself. Engage Digital Messaging will be updated automatically with a new message. - If your Android version is at least Android N, you'll receive an interactive push notification with direct reply. To disable this, use
Dimelo.interactiveNotification = false;.
If the notification is received while the app is running, the sdk will display the notification only if Engage Digital Messaging is not visible by the user
You can override the behavior by implementing dimeloShouldDisplayNotificationWithText from the listener DimeloListener
Prior to Android 5, the notification will be displayed as a Ticker (one line scrolling notification) and is not clickable.
Starting from Android 5, the notification will be displayed as a (Heads-up). Clicking of the Heads-up will, by default, open the application. If you specify the (parent activity using the support meta-data tag), clicking the Heads-up will open Engage Digital Messaging and provide the up-navigation.
If Engage Digital Messaging is opened directly upon clicking the notification, then the IntentService managing the notification must ensure to properly configure the Dimelo instance (at the minimum, calling Dimelo.setup and dimelo.setApiSecret).
If you'd like to have the full control on the notification (appearance and behavior on click) you can implement the Dimelo.NotificationDisplayer interface.
Using Firebase Cloud Messaging (FCM):
Note: This is an example on how to initialize the Dimelo instance:
public class MainActivity extends AppCompatActivity {
    public static Dimelo setupDimelo(Context context) {
        Dimelo.setup(context);
        Dimelo dimelo = Dimelo.getInstance();

        dimelo.initWithApiSecret(CHANNEL_API_SECRET, ENGAGE_DIGITAL_DOMAIN_NAME, DIMELO_LISTENER);
        dimelo.setPushNotificationService("fcm");
        return dimelo;
    }

    @Override
    public void onCreate(Bundle savedInstanceState) {
        super.onCreate(savedInstanceState);
        setContentView(R.layout.your_layout);
        // Setup Dimelo
        Dimelo dimelo = setupDimelo(this);
    }

    ...
}- Download the
google-services.jsonfile from your firebase console and copy it in your project's/appfolder - Declare a
FirebaseMessagingServiceservice in your project'sAndroidManifest.xml:
<service
    android:name=".MyFirebaseMessagingService">
    <intent-filter>
        <action android:name="com.google.firebase.MESSAGING_EVENT"/>
    </intent-filter>
</service>- Create a class that extends FirebaseMessagingService:
public class MyFirebaseMessagingService extends FirebaseMessagingService- Retrieve the device token and pass it to your Dimelo instance by overriding the
onNewTokenmethod:
@Override
public void onNewToken(String token) {
    if (Dimelo.isInstantiated())
        Dimelo.getInstance().setDeviceToken(token);
}- Finally intercept the notification and pass it to your Dimelo instance by overring the
onMessageReceivedmethod:
@Override
public void onMessageReceived(RemoteMessage remoteMessage) {
    // You have to configure the Dimelo instance before calling the Dimelo.consumeReceivedRemoteNotification() method.
    MainActivity.setupDimelo(MyFirebaseMessagingService.this);
    if (Dimelo.consumeReceivedRemoteNotification(MyFirebaseMessagingService.this, remoteMessage.getData(), null)){
        // The notification will be handled by the Dimelo instance
    }
    else {
        // It is not a Dimelo notification.
    }
}
Note: You can also retrieve the current device token by calling FirebaseInstanceId.getInstance().getInstanceId(). Here is an example on how to retrieve the device token and pass it to the Dimelo instance (as described here):
FirebaseInstanceId.getInstance().getInstanceId()
        .addOnCompleteListener(new OnCompleteListener<InstanceIdResult>() {
            @Override
            public void onComplete(@NonNull Task<InstanceIdResult> task) {
                if (!task.isSuccessful()) {
                    Log.w(TAG, "getInstanceId failed", task.getException());
                    return;
                }

                // Get new Instance ID token
                String token = task.getResult().getToken();
                Dimelo.getInstance().setDeviceToken(token);
            }
        });
Using Huawei Push Kit (HMS):
Note: This is an example on how to initialize the Dimelo instance:
public class MainActivity extends AppCompatActivity {
    public static Dimelo setupDimelo(Context context) {
        Dimelo.setup(context);
        Dimelo dimelo = Dimelo.getInstance();
        dimelo.initWithApiSecret(CHANNEL_API_SECRET, ENGAGE_DIGITAL_DOMAIN_NAME, DIMELO_LISTENER);
        dimelo.setPushNotificationService("hms");
        return dimelo;
    }

    @Override
    public void onCreate(Bundle savedInstanceState) {
        super.onCreate(savedInstanceState);
        setContentView(R.layout.your_layout);
        // Setup Dimelo
        Dimelo dimelo = setupDimelo(this);
    }

    ...
}- Add
Dimelo.setPushNotificationService("hms")to your rc configuration to support the Huawei push notifications (Default isfcm) - Configuring App Information in AppGallery Connect
- Sign in to AppGallery Connect and click My projects.
- Find your app project and click the app that needs to integrate the HMS Core SDK.

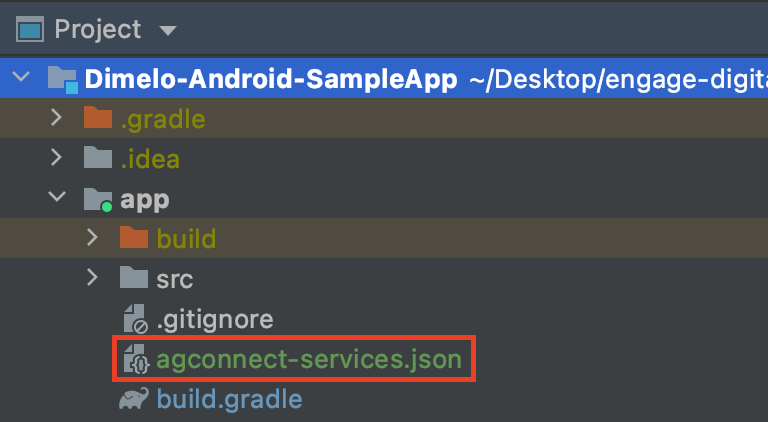
- Download the
agconnect-services.jsonfile from your AppGallery Connect and copy it in your project's/appfolder
- Configuring the Maven Repository Address for the HMS Core SDK
- Add the AppGallery Connect plugin and the Maven repository.
- Go to buildscript > repositories and configure the Maven repository address for the HMS Core SDK.
- Go to allprojects > repositories and configure the Maven repository address for the HMS Core SDK.
- If the agconnect-services.json file has been added to the app, go to buildscript > dependencies and add the AppGallery Connect plugin configuration.
buildscript {
    repositories {
        google()
        jcenter()

        // Configure the Maven repository address for the HMS Core SDK.
        maven { url 'https://developer.huawei.com/repo/' }
    }
    dependencies {
        ...

        // Add the AppGallery Connect plugin configuration.
        classpath 'com.huawei.agconnect:agcp:1.4.2.300'
    }
}

allprojects {
    repositories {
        google()
        jcenter()

        // Configure the Maven repository address for the HMS Core SDK.
        maven { url 'https://developer.huawei.com/repo/' }
    }
}- Add the build dependencies
- Add a build dependency in the dependencies block.
dependencies {
    implementation 'com.huawei.hms:push:{version}'
}- Add the AppGallery Connect plugin configuration:
apply plugin: 'com.huawei.agconnect'- Configure the signing information in the build.gradle File https://developer.huawei.com/consumer/en/doc/development/HMSCore-Guides/android-integrating-sdk-0000001050040084
- Copy the keystore file generated in Generating a Signing Certificate Fingerprint to the app directory of your project and configure the signing information in the build.gradle file in the directory.
android {
    signingConfigs {
        config {
            // Set the parameters based on the actual signing information.
            keyAlias 'xxx'
            keyPassword 'xxxx'
            storeFile file('xxx.jks')
            storePassword 'xxxx'
        }
    }
    buildTypes {
        debug {
            signingConfig signingConfigs.config
        }

        release {
            signingConfig signingConfigs.config
            minifyEnabled false
            proguardFiles getDefaultProguardFile('proguard-android-optimize.txt'), 'proguard-rules.pro'
        }
    }
}- set the
minSdkVersionto 17 or above in the build.gradle File - Declare a
HmsMessageServiceservice in your project'sAndroidManifest.xml:
<service
    android:name=".MyHmsMessageService"
    android:exported="false">
    <intent-filter>
        <action android:name="com.huawei.push.action.MESSAGING_EVENT" />
    </intent-filter>
</service>- Declare a
push_kit_auto_init_enabledmeta data (https://developer.huawei.com/consumer/en/doc/development/HMSCore-Guides/android-client-dev-0000001050042041) in your project'sAndroidManifest.xml:
<manifest ...>
...
    <application ...>
        <meta-data
            android:name="push_kit_auto_init_enabled"
            android:value="true"/>
        ...
    </application>
...
</manifest>- Create a class that extends
HmsMessageService:
public class MyHmsMessageService extends HmsMessageService- Retrieve the device token and pass it to your Dimelo instance by overriding the
onNewTokenmethod ifpush_kit_auto_init_enabled=true:
@Override
public void onNewToken(String token) {
    if (Dimelo.isInstantiated())
        Dimelo.getInstance().setDeviceToken(token);
}- Finally intercept the notification and pass it to your Engage Digital Messaging SDK by overriding the
onMessageReceivedmethod:
@Override
public void onMessageReceived(RemoteMessage remoteMessage) {
    // You have to configure the Dimelo instance before calling the Dimelo.consumeReceivedRemoteNotification() method.
    MainActivity.setupDimelo(MyFirebaseMessagingService.this);
    if (Dimelo.consumeReceivedRemoteNotification(MyHmsMessageService.this, remoteMessage.getDataOfMap(), null)){
        // The notification will be handled by the Engage Digital Messaging SDK
    }
    else {
        // It is not a RingCentral Engage Digital Messaging notification.
    }
}
Note: You can also retrieve the current device token by calling HmsInstanceId.getInstance(Context).getToken(appId, tokenScope) if push_kit_auto_init_enabled=false. Here is an example on how to retrieve the device token and pass it to the Dimelo instance (as described here):
private void getToken() {
    new Thread() {
        @Override
        public void run() {
            try {
                String appId = "your_app_gallery_connect_app_id";
                String tokenScope = "HCM";
                String token = HmsInstanceId.getInstance(MainActivity.this).getToken(appId, tokenScope);

                if (!TextUtils.isEmpty(token) && Dimelo.isInstantiated()) {
                    Dimelo.getInstance().setDeviceToken(token);
                }
            } catch (ApiException e) {}
        }
    }.start();
}
Note: With Android 13: you'll need to add the POST_NOTIFICATIONS permission in your AndroidManifest.xml file then accept the alert dialog to continue receiving push notifications:
<uses-permission android:name="android.permission.POST_NOTIFICATIONS" />Please refer to the Engage Digital Messaging Maps SDK for Android documentation for guidance on how to allow your users to send location messages (only compatible with version 2.3.0 and above).
Along with allowing your users to send location messages through the Engage Digital Messaging SDK you can also allow your users to see the location they sent as a static map generated using Google's APIs
Here are the step you need to follow in order to enable this feature:
- Generate a Google API key with the Maps Static API enabled
- Provide the API key to your
Dimeloinstance:
Dimelo dimelo = Dimelo.getInstance();
dimelo.setStaticMapsApiKey("YOUR_API_KEY");
Please note that if the API key is not present or if it doesn't have the correct permission to display a static map we'll only display a link to Google Maps containing the address that was sent by the user.
You can react to various events in Engage Digital Messaging by implementing a DimeloListener.
Two particular events that might be interesting to you are dimeloDidBeginNetworkActivity() and dimeloDidEndNetworkActivity().
Use onOpen(Dimelo dimelo) and onClose(Dimelo dimelo) events to get informations using dimelo parameter when Engage Digital Messaging view is just opened or closed.
You can use the rcShouldDelegateUrlOpening(URI uri) event that will be fired by DimeloListener when a URL is going to be opened by the Engage Digital Messaging Android SDK:
- return
falseto let the Engage Digital Messaging Android SDK open the URL. - return
trueto prevent the Engage Digital Messaging Android SDK from opening the URL so that you can apply your own logic.
Please refer to Engage Digital Messaging SDK Android API Reference documentation for more information.
Starting in Android 11, you must add the to your manifest application for the camera to work.
<queries>
   <intent>
     <action android:name="android.media.action.IMAGE_CAPTURE" />
   </intent>
</queries>The Engage Digital Messaging Android SDK exposes the openWebView(URL url, RC_WEB_VIEW_SIZE height) method to allow you to manually open a WebView.
This method takes 2 parameters:
- The
urlparameter is aURLthat represents the URL you want to open in the WebView. - The
heightparameter is aRC_WEB_VIEW_SIZEthat represents the height of the WebView (based on the WebView's container size), its value can be:
| Value | Container's height |
|---|---|
FULL_MODE |
100% |
TALL_MODE |
75% |
COMPACT_MODE |
50% |