Objective of this project is to develop a deep neural network pipeline for a self driving car in a simulated track to be able to learn and mimic driving behaviour of a human (myself). I collected training data by driving around track 1 in the simulator using a PlayStation 3 controller. The focus was to generate good driving behaviour and recovery movements. I then used a number of artifical augmentation techniques to generate training samples on-the-fly, that simulated various driving conditions such as: different lighting conditions, effect of car wandering of to the side and recovering, car driving at different positions of the road shifted from the centre of the lane, etc. This helped generate unlimited amount of data, programmatically instead of having to manually produce the data. Although no data from Track 2 was available during training, the trained five-layer convolutional neural network was able to generalise to a more challenging new environment consisting of darker lighting, more turns and bumpy roads.


- Use the simulator to collect data of good driving behavior
- Build, a convolution neural network in Keras that predicts steering angles from images
- Train and validate the model with a training and validation set
- Test that the model successfully drives around track one without leaving the road
- Summarize the results with a written report
My project includes the following files:
model.pycontaining the script to create and train the modeldrive.pyfor driving the car in autonomous modemodel.json+model.h5containing a trained convolution neural networkREADME.mddocumentation of the project and summary of my results
BehaviourCloning.ipynb- Jupyter notebook for generating various stages of the project to assist during this writeup. Images produced from this notebook can also be found at output_images/*.pngcustom-data.zip- Custom training data produced by driving in training mode of the Udacity simulator. Consists ofIMG/directory containing frame-by-frame.jpgimages from left, centre and right cameras of the vehicle.driving_log.csvcontains information that links the centre, left, right camera images for each frame with steering angle, throttle, brake, and speed information. This csv file is read with the help of pandas library during the training process. SeeBehaviourCloning.ipynbfor details. Please refer to the instructions in the next section about how to extract the split zip archivescustom-data.z01andcustom-data.z02.carnd-simulator-macos.zip*- Compressed CarND simulator app used to train and test the convolutional neural network for this project. Please refer to the instructions in the next section about how to extract the split zip archivescarnd-simulator-macos.zip.aaandcarnd-simulator-macos.zip.ab.
git clone https://github.com/sagunms/CarND-Behavioral-Cloning-P3
cd CarND-Behavioral-Cloning-P3To play ball with GitHub's 100 MB per commit limit, I have committed the split archives carnd-simulator-macos.zip.aa and carnd-simulator-macos.zip.ab as separate commits. The following script combines the split files into a single archive carnd-simulator-macos.zip, extracts it to carnd-simulator-macos.app and runs the simulator. Please read comments inside extract-carnd-simulator-macos.sh file for more details.
chmod +x extract-carnd-simulator-macos.sh
./extract-carnd-simulator-macos.shAgain, due to GitHub's 100 MB per commit limit, I have committed custom-data.zip along with split zip archive files custom-data.z01 and custom-data.z02 into individual commits. The following script combines the split files into a single archive and extracts it to custom-data/.
chmod +x extract-custom-data.sh
./extract-custom-data.shFollow instructions from CarND-Term1-Starter-Kit page to setup the Anaconda environment from scratch. GPU is strongly recommended to train the model from scratch. I used Amazon AWS udacity-carnd AMI running on g2.2xlarge instance for this.
source activate carnd-term1Dependecies used are listed here.
The model.py file contains the code for training and saving the convolution neural network. The file shows the pipeline I used for training and validating the model, and it contains comments to explain how the code works.
Also, I added argument parser for my own convenience in training my model between different training data, different architectures and epochs. Example usage (see model.py lines 210-236):
python model.py -i 'udacity-data' -o 'trained-models' -e 5 -w 'sagun' -m 'model_sagun'
python model.py -i 'custom-data' -o 'trained-models' -e 3 -w 'commaai' -m 'model_commaai'Using the Udacity provided simulator and my drive.py file, the car can be driven autonomously around the track by executing
python drive.py trained_models/model_sagun.jsonMy final model architecture (model.py lines 136-174) consisted of a convolution neural network with the following layers and layer sizes:
| Layer | Layer Type | Layer Size | Activation and/or Dropout | Maxpooling |
|---|---|---|---|---|
| Layer 1 | Convolutional layer | 32 5x5 filters | ELU activation | |
| Layer 2 | Convolutional layer | 16 3x3 filters | ELU activation, Dropout(0.5) | 2x2 maxpooling |
| Layer 3 | Convolutional layer | 16 3x3 filters | ELU activation, Dropout(0.4) | |
| Layer 4 | Fully connected layer | 1024 neurons | Dropout(0.3), ELU activation | |
| Layer 5 | Fully connected layer | 512 neurons | ELU activation | |
| Layer 6 | Fully connected layer | 1 neuron |
My model (model.py lines 136-174) uses 32 5x5 filters and 16 3x3 filters in the next two layers. I used 2x2 max pooling. I used two fully connected layers: first with 1024 neurons and second with 512 neurons. Then a final layer with one output for steering. The model includes Exponential Linear Unit (ELU) layers after each layer to introduce nonlinearity and prevent the problem of vanishing gradients which is one of the major drawbacks of the simpler ReLU. Also, it is used to make transition between angles smoother. The data is normalized in the pre-processing pipeline before sending it to the network instead of using lambda layer. The architecture will be discussed further in the later paragraphs.
I initially started testing Comma-AI's network which trained with very good validation accuracy but with bad results on the actual track. This model is also available in model.py line 176-205.
The model contains three dropout layers of probabilities 0.5, 0.4, 0.3 following convolutional layers 2, 3, 4 respectively in order to reduce overfitting (model.py lines 148, 154, 161).
I experimented with various dropout probabilities where I initially used aggressive dropouts. However, since the car did not perform well on the track, the final parameters seemed to work well.
The model was trained and validated on different data sets to ensure that the model was not overfitting (code lines 10-16). The model was tested by running it through the simulator and ensuring that the vehicle could stay on the track.
The model used an Adam Optimizer available in Tensorflow so the learning rate was not tuned manually (model.py line 203) and used mean squared error (MSE) as the loss function.
Training data was chosen to keep the vehicle driving on the road using a PlayStation 3 controller in Training Mode available in the simulator. I used a combination of center lane driving, recovering from the left and right sides of the road.
For details about how I created the training data, see the next section.
My first step was to use a convolution neural network model similar to the Comma-AI model. I thought this model might be appropriate because of its small size and its popularity in the CarND forums.
In order to gauge how well the model was working, I split my image and steering angle data into a training and validation set. I spent a lot of time training various models ranging from 1 to 10 epochs. Although I found that more epochs resulted low mean squared error on the training set but higher than 8 epochs, I noticed a high mean squared error on the validation set. So this was a sign of overfitting. So number of epochs used during the later stages was 5.
The final step was to run the simulator to see how well the car was driving around track one. There were a few spots where the vehicle fell off the track. My initial guess was that I should not trust my own training data. I used the dataset provided by Udacity, which clearly showed exaggerated amounts of recovery data and the vehicle would oscillate like a drunk driver and always fall off the bridge.
Another approach I tried was merging my own data with udacity data. The behaviour resulting from this merged data was less oscillating, very slow to train because of more data, yet was not successful in completing the track.
I then decided to try my own model, sightly larger but using dropout and ELU layers as in Comma-AI model. After various trials and tribulations my final model architecture as distribed above got the job done.
At the end of the process, the vehicle is able to drive autonomously around the track without leaving the road. Better yet, the model was able to generalise to Track 2 even when no training data was provided for this track. I would say that the second track performed even better than the first one!
20000/20000 [==============================] - 58s - loss: 0.0581 - val_loss: 0.0214
Epoch 2/5
20000/20000 [==============================] - 57s - loss: 0.0454 - val_loss: 0.0041
Epoch 3/5
20000/20000 [==============================] - 57s - loss: 0.0419 - val_loss: 5.4761e-06
Epoch 4/5
20000/20000 [==============================] - 57s - loss: 0.0406 - val_loss: 0.0018
Epoch 5/5
20000/20000 [==============================] - 57s - loss: 0.0409 - val_loss: 0.0020
Saving model weights and config to trained-models/model_sagun file...
To capture good driving behavior, I first recorded two laps on track one using center lane driving. Here is an example image of center lane driving:

I then recorded the vehicle recovering from the left side and right sides of the road back to center so that the vehicle would learn to recover back to the center of the lane when it begins to veer off. These images show what a recovery looks like starting from left and right respectively.
| Recovery from Left | Recover from Right |
|---|---|
 |
 |
For this, I was careful in recording images only when the vehicle is entering the recovery and not veering off so that the network does not begin mimicking unwanted behaviour of veering off. I repeated this process for two laps in Track 1 in order to get more data points. I did not use any training data from Track 2.
After the collection process, I had 5921 number of data points.
I plotted up a histogram distribution of steering angles and found that my training data set was heavily biased towards going straight and turning left. This is mainly because of Track 1 in which the training was done which has a lot more left turns than right.

I also analysed a Steer vs. Time for 500 image frames and found out the steering pattern of my training data.

The simulator provided images from left, center and right camera for each frame recorded as shown below for Frame 30.

As my training dataset was not large enough, I had to augment synthetic data for training the convolutional network.
I used the techniques suggested in the Vivek Yadav's blog and nVidia's paper, for augmenting data.
- Without having to generate tons of data by myself, I would use the left and right camera images to simulate the effect of the car wandering off to the side and recovering. Experimentally, if the left camera is steered by adding a small angle of 0.25 radians (6.25 degrees), it would have similar image as the center camera. Similarly, if 0.25 angle is subtracted from the right camera image, it would be similar to the center camera image. In this way, the camera location was chosen randomly from the dataset and if it was left or right, 0.25 was added or subtracted respectively.
As mentioned previously, there are a lot of images of the car turning left than the right. So to reduce this bias, I flipped the image horizontally (along y=0 axis) randomly. However, when a flip was triggered, the steering angle should be reversed.

To make the convolutional network more robust to changes in brightness (both day and night), and pre-empting the problem of Track 2, which was darker compared to Track 1, I added random brightness to the training images. The easiest way to do this is to convert the RGB image to HSV colour space and darken it by a random factor. However, to prevent completely black images, a lower limit of 25% darkness was added. After this, the image was converted back to RGB colour space.

The lower part of the camera images contained the hood of the car. Also, the horizon and the sky was not necessary for learning to drive the structured track. Therefore, I removed the top 55 pixels and the bottom 25 pixels which resulted in reducing the size of the image in half from 160x320 to 80x320.

Finally, the image is resized to size 64x64 which is sufficiently small size for the network to learn.

A number of random images going through the entire augmentation and pre-processing pipeline is shown below.

I finally randomly shuffled the data set and put Y% of the data into a validation set.
I used this training data for training the model. The validation set helped determine if the model was over or under fitting.
The ideal number of epochs for me was 5 as described earlier. I used an adam optimizer so that manually training the learning rate wasn't necessary.
I used fit_generator which is part of Keras to generate random new augmented/pre-processed data on the fly. Since there is a limit in memory and the amount of training data for deep learning is very large, this on the fly would enable the optimizer to see virtually unlimited new data on every epoch. The fit_generator called my custom python generator which did the following.
- For training set, I generated 20,000 images on the fly per epoch
- For validation set, I generated 3,000 images on the fly per epoch
I did not use any test set as the model was deemed successful if it drove reasonably well on the complete Track 1 without going out of the line or getting stuck even once.
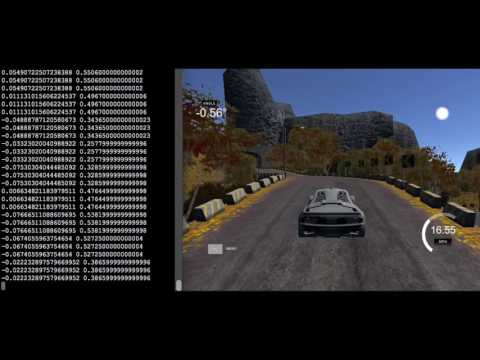
Initially, I used video.py to generate the video but the quality was really poor so I decided to do a screen capture instead. The working implementation driving on both tracks can be summarised with the following animation.

Please excuse my taste for the background music in the video but it was getting really boring staring at the same silent simulation environment for weeks. ʘ‿ʘ ♫
Successful autonomous driving on both Track 1 and Track 2