Bootable Gentoo image for the USB armory, with Linux 4.3.0
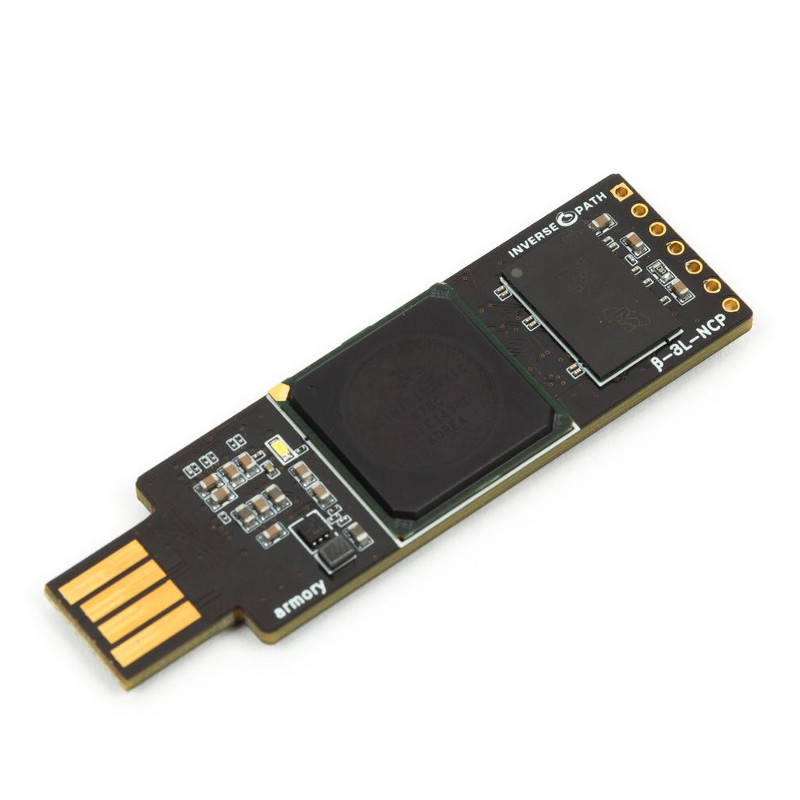
This project contains a bootable, microSD card Gentoo image for the USB armory from Inverse Path (a Cortex-A8 based computer in a USB-stick form factor).
The kernel used in the image is 4.3.0 from gentoo-sources. The .config used for the kernel may be found here in the git archive (I have based it on the kernel config used by the ArchLinux ARM image for armory). The image uses OpenRC as its init system, but you should be able to set up systemd easily enough should you wish, as the necessary kernel settings are present.
The image may be downloaded from the link below (or via wget, per the following instructions).
| Variant | Version | Image | Digital Signature |
|---|---|---|---|
| USB armory | 1.0.0 | genarmimg.xz | genarmimg.xz.asc |
Please read the instructions below before proceeding. Also please note that all images are provided 'as is' and without warranty.
To try this out, you will need:
- A microSD card of at least 8GB capacity (the compressed (.xz) image is 225MiB, the uncompressed image is 14,823,424 (512 byte) sectors = 7,589,592,576 bytes). A list of known-good microSD cards may be viewed here. Depending on the slots available on your PC, you may also need an adaptor to allow the microSD card to be plugged in (to write the image to it initially).
- A USB armory (obviously!). At the moment, only the mk1 (production) release hardware is supported.
- A PC to decompress the image and write it to the microSD card. This is most easily done on a Linux machine of some sort, but tools are also available for Windows (see here and here, for example). In the instructions below I'm going to assume you're using Linux.
On your Linux box, issue:
# wget -c https://github.com/sakaki-/gentoo-on-armory/releases/download/1.0.0/genarmimg.xz
# wget -c https://github.com/sakaki-/gentoo-on-armory/releases/download/1.0.0/genarmimg.xz.asc
to fetch the compressed disk image file (225MiB) and its signature.
Next, if you like, verify the image using gpg (this step is optional):
# gpg --keyserver pool.sks-keyservers.net --recv-key DDE76CEA
# gpg --verify genarmimg.xz.asc genarmimg.xz
Assuming that reports 'Good signature', you can proceed.
Next, insert (into your Linux box) the microSD card on which you want to install the image (you may need to use an adaptor), and determine its device path (this will be something like /dev/sdb, /dev/sdc etc.; the actual path will depend on your system, you can use the lsblk tool to help you). Unmount any existing partitions of the microSD card that may have automounted (using umount). Then issue:
Warning - this will destroy all existing data on the target drive, so please double-check that you have the path correct!
# xzcat genarmimg.xz > /dev/sdX && sync
Substitute the actual microSD card path, for example /dev/sdc, for /dev/sdX in the above command. Make sure to reference the device, not a partition within it (so e.g., /dev/sdc and not /dev/sdc1; /dev/sdd and not /dev/sdd1 etc.)
The above xzcat to the card will take some time, due to the decompression (it takes between 8 and 20 minutes on my machine, depending on the microSD card used). It should exit cleanly when done - if you get a message saying 'No space left on device', then your card is too small for the image, and you should try again with a larger capacity one.
Remove the microSD card from your PC, and insert it into the armory's microSD slot, taking care not to damage the metal hinge as you do so. Once this is done, plug the armory into a free USB slot on your PC. The small LED on the top of the armory should then:
- first, turn a dim white, for about 10 seconds, as the system boots; then,
- start blinking in a brighter white once the kernel boots, and begins initializing Gentoo (the flashing is a heartbeat trigger).
About 15 seconds after the LED starts blinking in step 2, above, you should be able to log in (via either ssh or on the virtual serial-over-USB console), per the following instructions.
Once booted, you can log into the armory in one of the following two ways:
The armory is set up to expose a serial-over-USB console for login, which will appear at /dev/ttyACM0 on your host PC (if running Linux). The baud rate is 115,200 baud. To connect, use a terminal program such as GNU screen. For example, on your PC, issue:
$ screen /dev/ttyACM0 115200
armory login: <type root and press Enter>
Password: <type gentooarmory and press Enter>
armory ~ #
and you're in! As shown above, the root password on the image has been set to be gentooarmory initially. Note also that, depending on your system, you may need to be a member of the dialout group to connect to the serial console via screen in the manner shown.
Note, even if you do log via the serial console rather than via
ssh, it is still highly recommended to set up network forwarding (as detailed below). This will enable you to access the net when logged into your armory (for example, toemergepackages) and will also ensure that the clock is set properly (the armory has no battery-backed real-time clock, and accordingly the image uses thechronypackage to set the system time via NTP).
The armory will also bring up an Ethernet-over-USB connection, with (armory-side) address 10.0.0.1, when booted. To connect to this (and to allow your armory to access the outside internet via your PC's internet connection), first locate the name of the new Ethernet-over-USB interface that will have appeared on your PC (you'll need to be root to do the following):
# ip link show
... additional output suppressed ...
20: enp13s0u2: <BROADCAST,MULTICAST,UP,LOWER_UP> mtu 1500 qdisc pfifo_fast state UP mode DEFAULT group default qlen 1000
    link/ether da:4e:42:46:8c:ed brd ff:ff:ff:ff:ff:ff
... additional output suppressed ...
Your output will most likely differ, but you are looking for an interface whose name starts with 'enp' and which contains a 'u'; here it is enp13s0u2 (note that on some systems, however, the interface may show up as usb0, in which case modify the following instructions accordingly). Now we need to set up our (PC) end of the connection (to have address 10.0.0.2), and allow IPv4 traffic from the armory to be forwarded to and from the PC's external internet interface. To do this (more details here), issue (on your PC):
# ip addr add 10.0.0.2/24 brd + dev enp13s0u2
# iptables -A FORWARD -s 10.0.0.1 -j ACCEPT
# iptables -t nat -A POSTROUTING -s 10.0.0.1 -o enp0s1 -j MASQUERADE
# echo 1 > /proc/sys/net/ipv4/ip_forward
Substitute your Ethernet-over-USB interface for
enp13s0u2, and your PC's external network interface (the one normally used to access the web etc) forenp0s1, in the above commands. Note that you'll need to set this up each time you plug in your armory.
Then, on your PC, issue:
$ ssh root@10.0.0.1
The authenticity of host '10.0.0.1 (10.0.0.1)' can't be established.
ED25519 key fingerprint is SHA256:Hls5xhEEumfLC2LiEfQS3hSumHDw0OTx0t9imZsW6IQ.
Are you sure you want to continue connecting (yes/no)? <type yes and press Enter>
Warning: Permanently added '10.0.0.1' (ED25519) to the list of known hosts.
Password: <type gentooarmory and press Enter>
armory ~ #
and you're in! As shown above, the root password on the image has been set to be gentooarmory initially. You may receive a different fingerprint type, depending on what your ssh client supports. Also, please note that the ssh host keys on the image are generated on first boot (for security), and so the fingerprint you get will be different from that shown above.
If you have previously connected to a different machine with the same IP address (10.0.0.1) from your PC, you may need to delete its host fingerprint (from ~/.ssh/known_hosts on the PC) before ssh will allow you to connect.
The supplied image contains a fully-configured Gentoo system (not simply a minimal install or stage 3), with a complete Portage tree already downloaded, so you can immediately perform emerge operations etc. Be aware that, as shipped, it uses UK locale settings and timezone; however, these are easily changed if desired. See the Gentoo Handbook for details.
The full set of packages in the image may be viewed here (note that the version numbers shown in this list are Gentoo ebuilds, but they generally map 1-to-1 onto upstream package versions). The (sub-)set of packages in the /var/lib/portage/world file (with ebuild versions) may be viewed here.
The system on the image has been built via a minimal install system and stage 3 from Gentoo (armv7a_hardfp), but all binaries (libraries and executables) have been rebuilt to target the armory's processor specifically (the /etc/portage/make.conf file used on the image may be viewed here). The CHOST on the image is armv7a-hardfloat-linux-gnueabi. All packages have been brought up to date against the Gentoo tree as of 6 December 2015. As such, heartbleed, shellshock and Ghost fixes have been applied.
Note: although the
CFLAGSused for the image build includes-march=armv7-a -mtune=cortex-a8 -mfpu=neon -mfloat-abi=hard, the neon FPU will not generally be exploited fully, as-ffastmathhas not been set, and neon is not 100% IEEE 754 compliant. See here and here for a brief discussion. You can of course re-build selective components with more aggressive flags yourself, should you choose.
When you are done using your Gentoo system, you can simply issue:
armory ~ # poweroff
and your armory will shut down. Wait for a few seconds after the armory's LED turns solid white (no blinking) before unplugging it.
Have fun! ^-^
- For simplicity, the image uses a single
ext4root partition. To allow large packages (such asgcc) to be built without running out of memory, a 512 MiB swapfile has been set up at/var/cache/swap/swap1. - Per the instructions on Inverse Path's USB armory wiki, the bootloader on the image is a build of
U-Boot 2015.10with theusbarmory_config, which has beendd-d into the start of the device image (incidentally, theu-boot.imxused in the project may be downloaded here). - If you have a microSD card larger than the minimum 8GB, after writing the image you can easily extend the size of the root partition (using
fdiskandresize2fs), so you have more space to work in. See these instructions, for example. Alternatively, you can set up (e.g.) a/homepartition on the free space, and add this to the/etc/fstab(the image's/etc/fstabmay be viewed here). PermitRootLogin yeshas explicitly been set in/etc/ssh/sshd_config(as not allowed by default fromopensshv7).
If you'd like to compile a kernel on your new system, you can do so easily (the image has sufficient space). Suppose you wish to build the most modern version available using the standard Gentoo-patched sources. Then you would issue:
armory ~ # emerge --ask --verbose gentoo-sources
   (confirm when prompted; this will take some time to complete, depending on your network connection)
armory ~ # eselect kernel list
   (this will show a numbered list of available kernels)
armory ~ # eselect kernel set 1
   (replace '1' in the above command with the number of the desired kernel from the list)
armory ~ # cd /usr/src/linux
If you haven't already installed u-boot-tools, do do now:
armory ~ # emerge --ask --verbose u-boot-tools
   (confirm when prompted)
Next, grab the configuration from the current kernel:
armory linux # zcat /proc/config.gz > .config
then, following the outline of the instructions given here, proceed as follows:
armory linux # wget https://raw.githubusercontent.com/inversepath/usbarmory/master/software/kernel_conf/imx53-usbarmory-common.dtsi -O arch/arm/boot/dts/imx53-usbarmory-common.dtsi
armory linux # wget https://raw.githubusercontent.com/inversepath/usbarmory/master/software/kernel_conf/imx53-usbarmory.dts -O arch/arm/boot/dts/imx53-usbarmory.dts
If you like, modify the kernel configuration to suit your own requirements:
armory linux # make menuconfig
Now build and install the kernel, device tree blob and modules:
armory linux # make uImage LOADADDR=0x70008000 modules imx53-usbarmory.dtb
armory linux # cp arch/arm/boot/uImage /boot/
armory linux # cp arch/arm/boot/dts/imx53-usbarmory.dtb /boot/imx53-usbarmory.dtb
armory linux # make modules_install
armory linux # sync
All done! After you reboot, you'll be using your new kernel.
Of course, you can easily adapt the above process, if you wish to use Gentoo's hardened sources etc.
It is also possible to cross-compile a kernel on your (Gentoo) PC, which is much faster than doing it directly on the armory, by using crossdev.
If you have any problems, questions or comments regarding this project, feel free to drop me a line! (sakaki@deciban.com)