Import from Visual Source Safe
To import Git repositories from Visual Source Safe there are two ways you can follow.
First way: Create local repository with vss2git, subsequently create remote repository and link them.
The .gitignore-file must be copied (added) manually from somewhere else.
All files which are initially included in vss, but should be ignored, will always remain in your git respository (and tracked furthermore). Until you manually delete and/or untrack them.
-
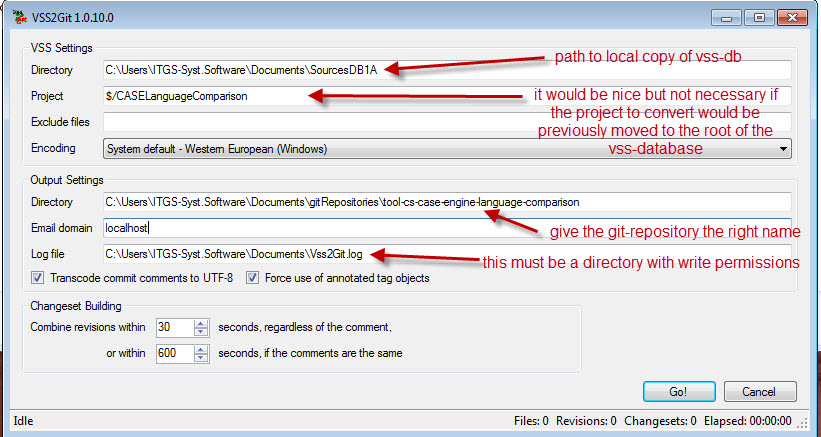
Launch vss2git to import the Visual Source Safe repository to a local Git repositories
- Define the directory to the VSS-database containing the project to import
- Define the Project path (VSS-path) to the project you want to extract in a directory (respect the case-sensitive spelling)
- Define Output Settings > Directory to the path of the the new git repository to create
- You need write-access to the path where the log-file is placed
-
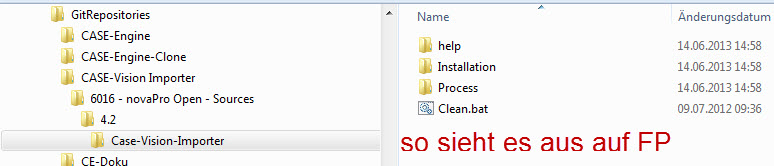
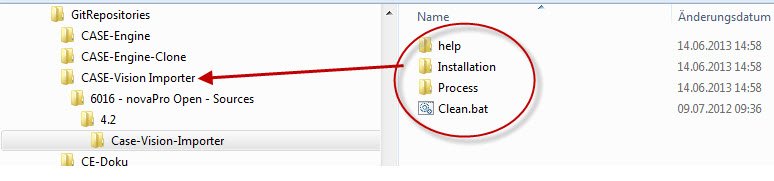
As vss2git generates a repository containing the full-path of the previous Visual Source Safe repository:
-
To do so, as Git recognize perfectly file move, simply adapt the structure of the folders by moving the files to the top level of the repository.
-
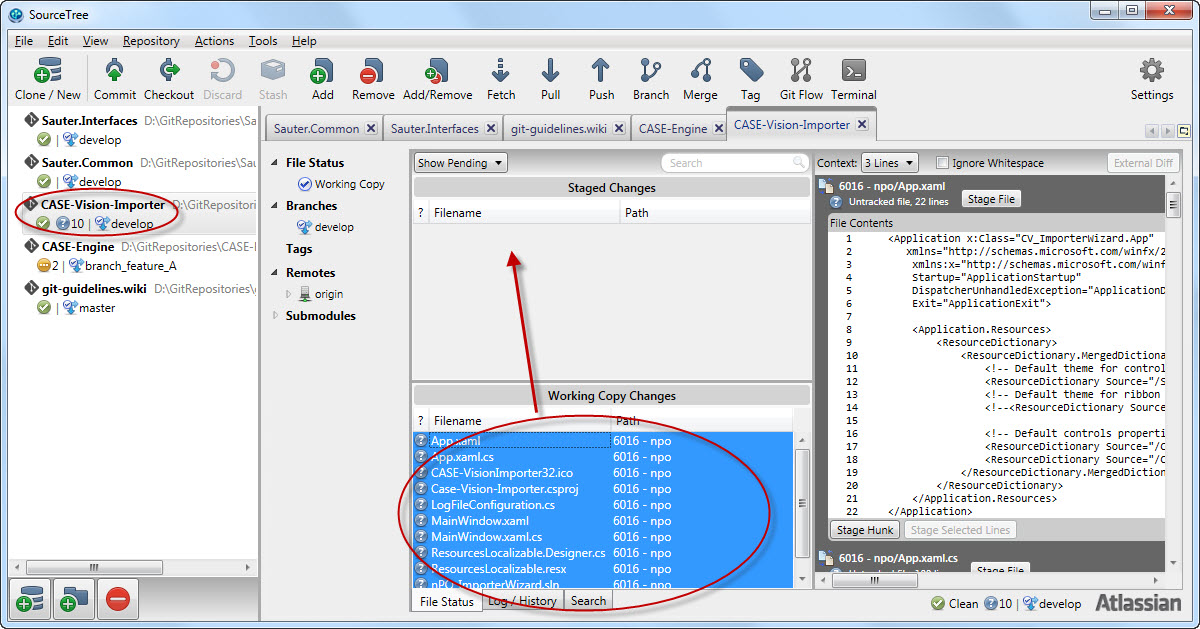
Go to SourceTreeApp, open the Git repository folder (i.e. What was chosen before as Output Settings > Directory) choose the File Status tab and add all working directory changes to the index (i.e. Select all and drop on the Staged Changes file list.
-
Commit the changes by clicking the Commit button.
-
Create a repository on github where initializing it
-
Go into SourceTreeApp and choose menu Repository > Repository Settings... and add the default remote, that is to say origin. Take the https or ssh url given by Github for this remote.


-
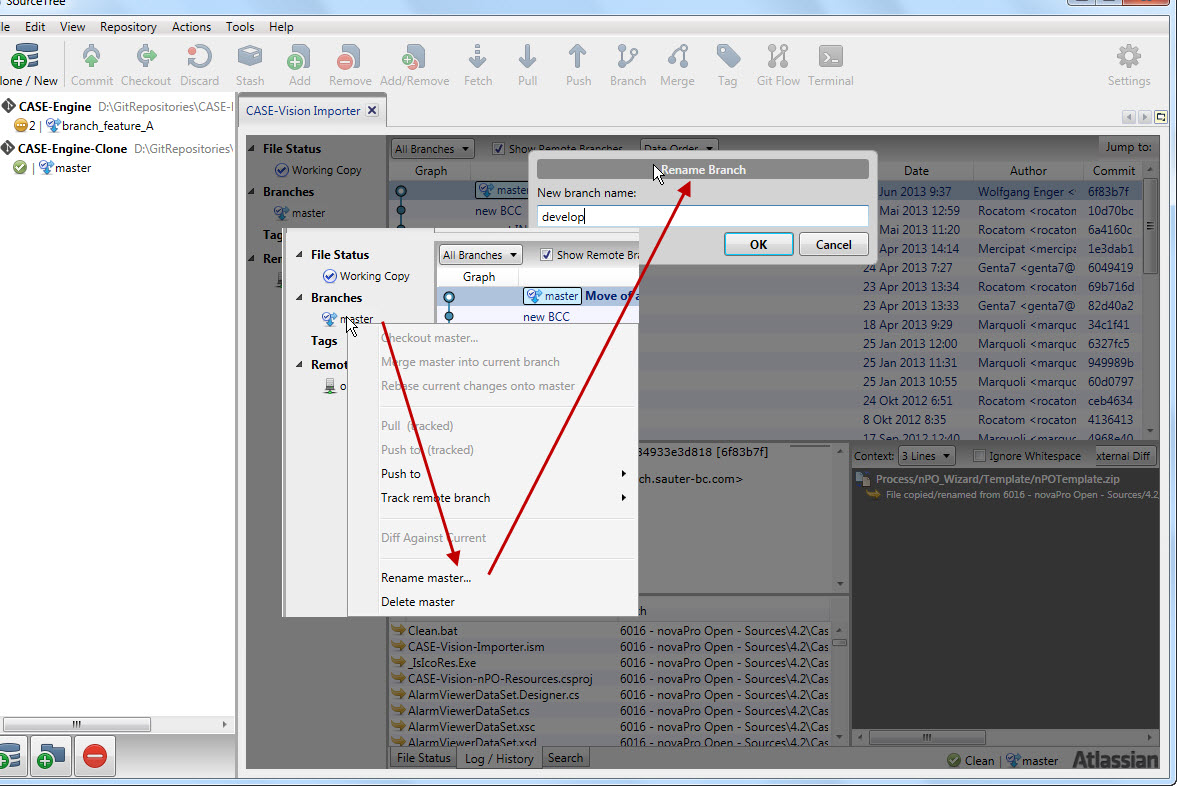
Rename branch master as develop (i.e. Click on branch master and choose menu Rename master...)
-
Create .gitignore from this model : you have to copy it manually from somewhere else (other repository?) and commit this change. CHECK THIS
-
Finish by pushing the different refs by clicking Push and choosing to Select all refs.
If you get some errors when trying to push the initial repository see the comment at the end of this document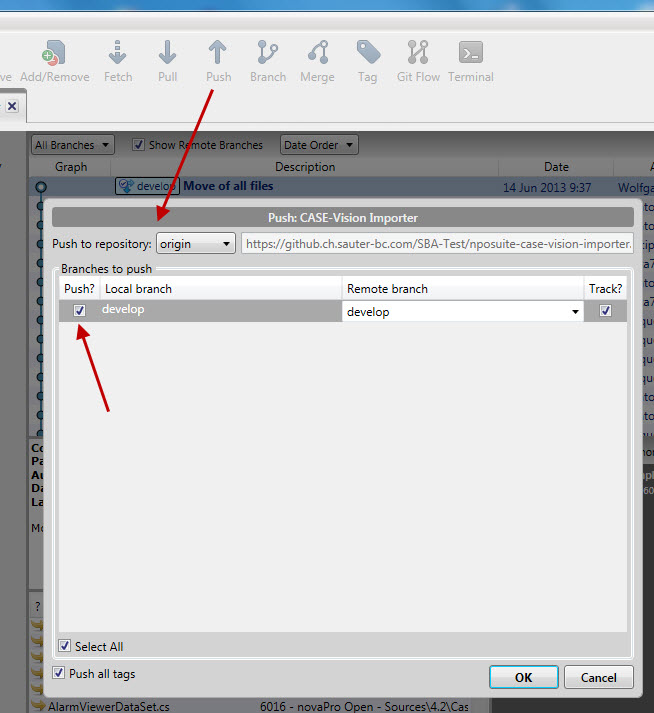
-
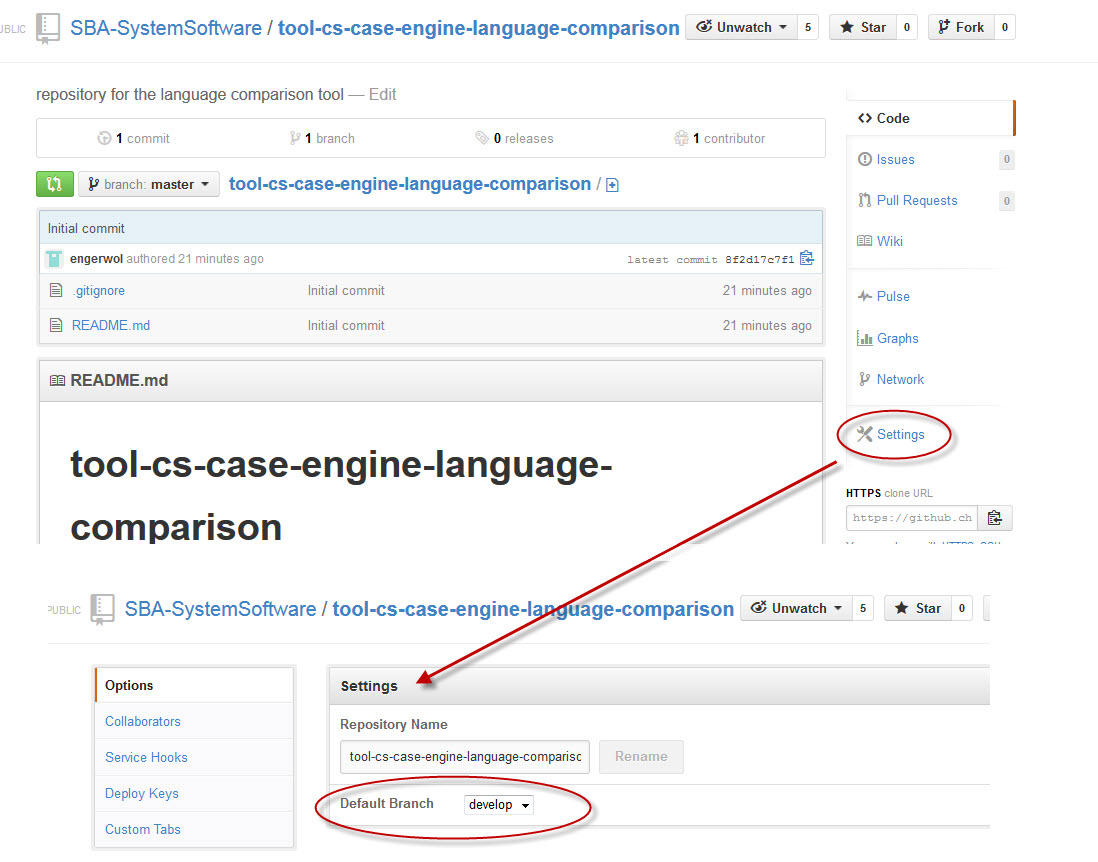
At the end you should set the develop branch as the default branch on the remote repository. This is useful when cloning a repository, because you will then check out the develop branch. This is the same procedure as it is in the case if you create a new repository from scratch.
Do not forget to add/create some teams for your repository.
Some errors may occur during the vss2git-procedure (for each file which is included in vss but should be ignored).
-
Create a repository on github where initializing it (follow the description in Creating the initial repository, step 1).
Do not forget to add a .gitignore file -
Clone this repository (see clone repository).
-
Launch vss2git to import the Visual Source Safe repository to a local Git repositories
- Define the directory to the VSS-database containing the project to import
- Define the Project path (VSS-path) to the project you want to extract in a directory (respect the case-sensitive spelling)
- Define Output Settings > Directory to the path of the cloned git repository to fill
- You need write-access to the path where the log-file is placed
-
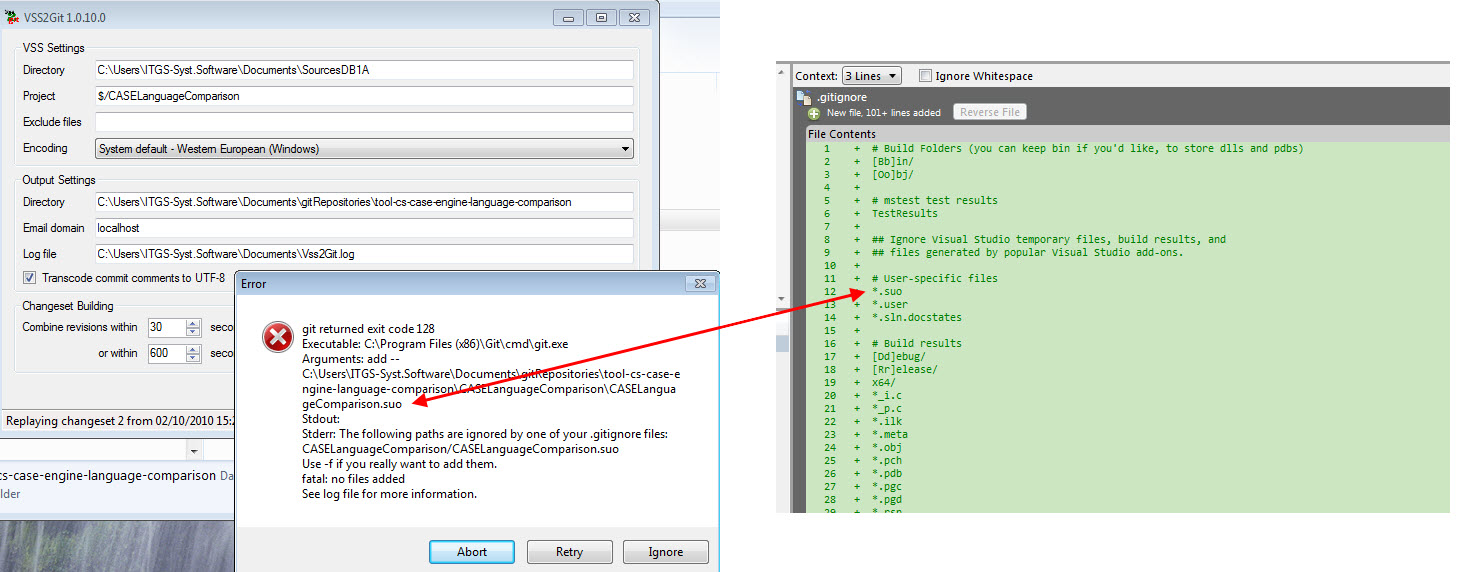
During the conversion some errors may occur. You will get a message for each file, which is included in vss, but should be ignored. In the following picture you will see such a message for the ".suo"-file which is erroneously included in the vss-database:
-
As vss2git generates a repository containing the full-path of the previous Visual Source Safe repository:
-
To do so, as Git recognize perfectly file move, simply adapt the structure of the folders by moving the files to the top level of the repository.
-
Go to SourceTreeApp, open the Git repository folder (i.e. What was chosen before as Output Settings > Directory) choose the File Status tab and add all working directory changes to the index (i.e. Select all and drop on the Staged Changes file list.
-
Commit the changes by clicking the Commit button.
-
Rename branch master as develop (i.e. Click on branch master and choose menu Rename master...)
-
Finish by pushing the different refs by clicking Push and choosing to Select all refs.
If you get some errors when trying to push the initial repository see the comment at the end of this document -
At the end you should set the develop branch as the default branch on the remote repository. This is useful when cloning a repository, because you will then check out the develop branch. This is the same procedure as it is in the case if you create a new repository from scratch.
Do not forget to add/create some teams for your repository.
Comment: If you get some errors when trying to push the initial repository using the https-method, you should use ssh instead of https.
I (WoE) have got the following two errors which could be solved using ssh:
- HTTP ERROR 413 Request Entity Too Large
- git spawn / no such file or directory
These are the steps you should perform when using ssh:
-
Create a new ssh-key using the putty key generator (sourcetree/tools/create or import ssh keys)
Start it by pressing "generate". During the procedure you have to move the mouse. -
Store the private key in a local folder. You can confirm the message if you don't use a passphrase.
Please do not close this dialog, you need some additional information from it. -
Mark the whole content of the public key (in the readonly edit-field) and copy it to the clipboard.
-
Open your personal profile in github and add a new ssh-key. Give it a name and paste the content of the clipboard. After this you can close the generator dialog.
-
Now you can change the method for cloning the repository in github to ssh. Copy the given url to the clipboard.
-
Change the url setting in sourcetree (menu repository/repository settings/remotes/edit) to the new url.
-
Launch the ssh-agent in sourcetree (tools/launch ssh agent) and add a new key. You should use the previously stored private key.
-
Now you can retry to push the repository onto the server.