
This GitHub page offers a interfacing details and getting started guide for Rotary Encoder powered by Pico W.
- Device powered by powerful Pico W which has a Dual-core Arm Cortex M0+ processor, a flexible clock running up to 133 MHz
- Inbuilt Wi-Fi & Bluetooth LE for wireless connectivity
- It has 264kB of SRAM and 2MB of on-board flash memory
- It has a Rotary encoder
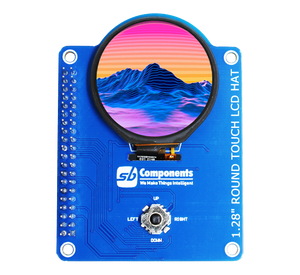
- 1.28" TFT display with a resolution of 240 x 240 pixels for visual interactions
- Round display has capacitive touch
- GPIO having Crocodile clip connector for interfacing additional peripherals
- It has an onboard SD Card
- On board 32 RGB (WS2812B) Led's
-
Pico W and Touch interfacing
Pico W Touch Controller Function GP6 SDA Touch I2C GP7 SCL Touch I2C GP4 RESET Touch Reset GP7 INT Touch Intrrupt -
Pico W and Round Display interfacing
Pico W Display Pin Function GP10 SCLK Clock pin of SPI interface for display GP11 DIN MOSI (Master OUT Slave IN) data pin of SPI interface GP12 DOUT MISO (Master OUT Slave OUT) data pin of SPI interface GP8 DC Data/Command pin of SPI interface GP13 CS Chip Select pin of SPI interface for display GP9 Reset Display Reset Pin GP14 BL Display backlight Pin -
Pico W and micro SD card interfacing
Pico W microSD Card Function GP18 SCLK Clock pin of SPI interface for microSD card GP19 DIN MOSI (Master OUT Slave IN) data pin of SPI interface GP16 DOUT MISO (Master IN Slave OUT) data pin of SPI interface GP17 CS Chip Select pin of SPI interface for SDcard -
RGBLed Interfacing with Pico W
Pico W RGB LED Function GP15 DIN WS2812 Data Pin -
Rotary Encoder Interfacing with Pico W
Pico W Encoder GP2 OUT A GP3 OUT B
- Every Rotary Pico W board will be provided with boot firmware already installed, so you can skip this step and directly go to step 2.
- If in case you want to install firmware for your board, Push and hold the BOOTSEL button and plug your Pico W into the USB port of your computer. Release the BOOTSEL button after your Pico is connected.

- It will mount as a Mass Storage Device called RPI-RP2.
- Drag and drop the MicroPython UF2 - Rotary Pico W_firmware file provided in this github onto the RPI-RP2 volume. Your Pico will reboot. You are now running MicroPython.
-
Download Thonny IDE from Download link as per your OS and install it.
-
Once done start Thonny IDE application, Connect ReadPi to laptop/PC.
-
Select the device at the bottom right with a suitable COM port, as shown in the below figure. You might get a different COM port.


-
Write simple onboard blink Python code or Download Led blink code, then click on the green run button to make your script run on Rotary Pico W.

Now that we've reached this point, you're executing your script through Thonny IDE, so if you unplug Pico, it will stop running. To run your script without using an IDE, simply power up Rotary Pico W and it should run your script, go to step 3. Once you have transferred your code to the Rotary Pico W board, to see your script running, just plug in power either way using micro USB or via Vin, both will work.


-
Click on File -> Save Copy -> select Raspberry Pi Pico W, Then save file as main.py

Similarly, you can add various Python code files to Pico. Also, you can try out sample codes given here in examples folder.
-
But in case you want to move multiple files at one go, for example, suppose you are interested in saving the library files folder into Pico W, the below image demonstrates that

NOTE: Don't rename lib files or other files, only your main code script should be renamed as main.py for standalone execution without Thonny.
Save whatever example code file you want to try as main.py in Pico W as shown above step 3, also add related lib files with the default name. In example folder you will find demo example script code to test onboard components of Rotary Pico W like
- Library: before running the code kindly save this library inside Pico W.
- Display test, RGB test, SD Card test, and touch test, etc.: All demo file
- Image display test: testing image display.
- Schematic
- Hardware Files
- Step File
- MicroPython getting started for RPi Pico/Pico W
- Pico W Getting Started
- RP2040 Datasheet

This is open source product. Kindly check the LICENSE.md file for more information.
Please contact support@sb-components.co.uk for technical support.