| Service | Status |
|---|---|
| GitHub | |
| Code Climate |  |
| Code Climate | |
| Snyk (npm) | |
| Snyk (Gemfile) |
TV Manager is a Progressive Web App (PWA) that keeps track of which episodes of your favourite TV shows you:
- have seen,
- have recorded to your DVR (or downloaded by other means),
- expect to be broadcast in the near future, or
- missed
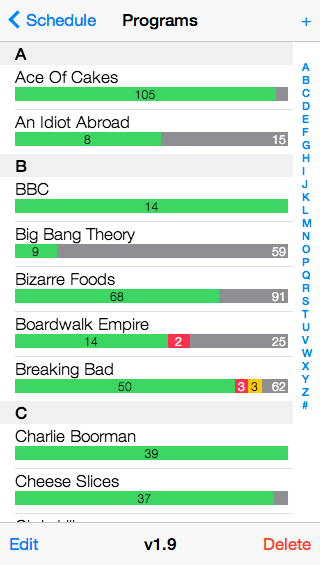
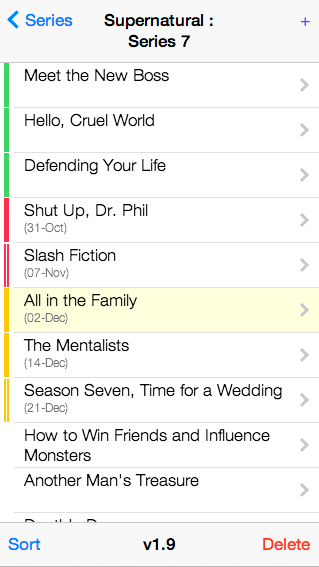
The data model is very simple: Programs consist of zero or more Series, which consist of zero or more Episodes.
Programs simply have a name (eg. "Lost")
Series have a name (eg. "Series 1" or "Season 1") and optionally a broadcast frequency (eg. "Daily" or "Mondays" or "Tuesdays", etc.)
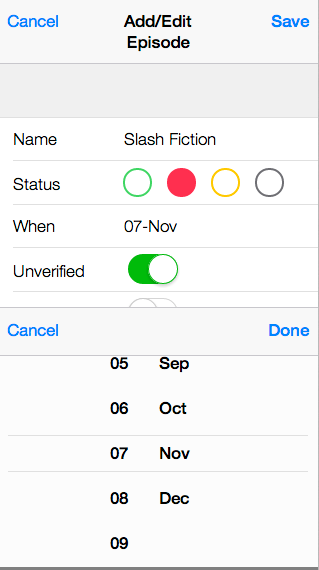
Episodes have a name, a status (eg. Watched/Recorded/Expected/Missed), a date (ie. when the episode was recorded/expected/missed), plus some attributes to indicate whether it is unverified (eg. you think this is the eposide you recorded, but you're not 100% sure) or unscheduled (don't forget to set your DVR!)
The main view is the Schedule, which lists all series that are currently airing (ie. have a frequency other than "Not Showing"), plus any other series that may not be currently airing but have one or more recorded or upcoming episodes expected.
The other main view is Unscheduled, which lists any upcoming episodes that flagged as "unscheduled". This is your TODO list for programming your DVR.
The rest of the app consists of data management views (add/edit/delete programs, series & episodes), basic reports (eg. "All recorded", "All Expected", "All Missed" etc.), and some utility functions such as importing/exporting the database to/from a backend NoSQL database (CouchDB) etc.
The PWA uses a service worker, application manifest and a local IndexedDB database. When installed to the homescreen of a device, it functions like an app including when offline/disconnected or in airplane mode.
The code is developed in an MVC-style architecture, with a custom "view stack" for navigating through the screens (ie. opening a view 'pushes' it onto the top of the stack; closing the view 'pops' it off the stack, revealing the previous view underneath).
On the server side it's a Ruby Sinatra app, however as all of the static resources (HTML, JS, CSS) are cached on the client by the service worker, there isn't much happening on the server. It provides import/export services that allows the client-side IndexedDB database to be backed up/restored (BYO CouchDB database).
Database schema changes are managed via an upgrade routine on startup (similar to Rails-style migrations).
- Browser with support for ECMAScript 2017, Service Workers, App Manifest, Web Workers & IndexedDB
- For development: Node.JS/npm, Ruby/RubyGems/Bundler (recommend asdf)
- For production/staging: somewhere to host the Ruby app and public HTML/JS/CSS files (recommend Fly.io or similar)
- Clone the repository (
git clone git://github.com/scottohara/tvmanager.git) - Install the dependencies (
cd tvmanager && bundle config --local path vendor/bundle && bundle install && npm install) (path vendor/bundleensures that gems are installed locally in the project) - Start the server (
npm start)
(Tip: On the iPhone, use the "Add to Home Screen" option to create a permanent icon that runs the app in fullscreen mode without the Safari chrome)
The app includes a backup/restore facility. A log of all changes made to the local IndexedDB database since the last export is kept, and when an export is initiated, those changes are serialized to a JSON-representation and sent to a CouchDB database configured on the server.
Restoring the database does the reverse, pulling JSON objects from CouchDB (via the server) and loading them into the local database.
Each client must first register itself with the server for the import/export feature to become available. Once registered, the first import is always a full import, clearing any existing data from the local database and reloading it with the JSON objects from CouchDB. After that, any subsequent imports will pull down only changes from the server (although a full import can be requested at any time, by turning off the "Fast Import" option).
Before a client is allowed to export changes to the server (to prevent unauthorised access to your data), the CouchDB admin must first permit the client. This is done by updating the client's "device" document in CouchDB, setting its "readOnly" attribute to false. Once this is done, the client can export any local changes or deletions to the server.
In the event of a conflict (i.e. an object modified/deleted both locally and on the server), the conflict is resolved in the direction that data is flowing. In other words: for exporting, local changes overwrite changes on the server; and for importing, changes on the server overwrite local changes.
An MD5 checksum verifies that the data was imported/exported succesfully.
To enable the Import/Export functionality, you will need to declare the TVMANAGER_COUCHDB_URL environment variable.
In development, the above environment variables can be saved to a .env, eg.
.env
TVMANAGER_COUCHDB_URL='http://user:pass@host:port/database'
For staging/production, if you use Fly.io you can specify these as secrets using the flyctl CLI, eg.
fly secrets set TVMANAGER_COUCHDB_URL=http://user:pass@host:port/database --app <name staging or production app>
(Assumes you have setup two Fly apps, one for staging and one for production)
After creating an empty CouchDB database, you need to load the design documents from /db/design/*.json. You can load these manually using Futon or via a cURL script if you like, or there is rake task (db:migrate) that does this for you. This tasks automatically runs on each deployment, to ensure the latest design documents are being used.
To remind users to backup regularly, a warning prompt appears at startup if the last backup was more than 7 days ago. In development, this prompt is configured to appear after 9999 days so that you are not constantly prompted to backup.
Frontend specs are implemented using mocha+chai+sinon.
Four karma configurations are available to run the frontend test suite:
npm run test:bddwatches for any file changes and runs the full test suite (without code coverage)npm run test:coverageperforms a single full test suite run, including instanbul (via karma-coverage) code coverage reporting. Summary coverage report is written to stdout, and a detailed HTML report is available in/tvmanager/coverage/frontend/index.htmlnpm run test:coverage:chromeis the same asnpm run test:coverage, except only for headless Chromenpm run test:coverage:mobileis the same asnpm run test:coverage, except only for iOS Simulator
By default, the test:bdd suite is run in Chrome, and the test:coverage suite is run in headless Chrome and iOS Simulator.
To run the tests in Mobile Safari on a physical device:
- start the test runner without launching the default browsers (
npm run test:coverage -- --browsers) - the Karma server will pause waiting for a browser connection
- manually launch Mobile Safari and browse to the URL shown in the terminal window (eg.
http://localhost:9876)
Backend specs are implemented using RSpec:
- Ensure the database server is running (e.g.
couchdb) - Run the RSpec rake task (
bundle exec rake spec). To run specific specs, use RSpec filtering (fdescribe,fit,xdescribe,xit)
Integration tests are implemented using Cypress:
- Start the database server and app server in test mode, and launch Cypress (
npm run test:e2e) - Optionally run Cypress in headless mode (
cypress run --browser chrome)
Frontend checks are implemented using eslint:
npm run lint
Backend checks are implemented using rubocop:
bundle exec rubocop
Before deploying, you should first create an annotated tag (e.g. git tag -am "Version 1.00" v1.00).
Then run:
npm run deploy:stagingto deploy to the staging appnpm run deploy:productionto deploy to the production app


