Introducing the perfect companion for your Discord community! 💻🚀 This reward calculation bot is the ultimate tool for those seeking recognition for their contributions. From small code tweaks to large collaborative projects, this bot is equipped to calculate and display the rewards deserved for each contribution. ⚙️💰 With its precision and speed, this bot will make your creators feel valued and motivated to keep working in the community. Don't wait any longer to add it to your Discord server and give your members the gratification they deserve! 💯💪
Before you start, make sure you have the following:
.github
  └─ workflows
        └─ CI with pnpm cache setup
.vscode
  └─ Recommended extensions and settings for VSCode users
apps
  ├─ bot
  |   ├─ Node
  |   ├─ Discord JS
  |   ├─ tRPC Client
  |   └─ TypeScript
  └─ next.js
      ├─ Next.js 13
      ├─ React 18
      ├─ Tailwind CSS
      └─ E2E Typesafe API Server & Client
packages
 ├─ api
 |   └─ tRPC v10 router definition
 ├─ auth
     └─ authentication using next-auth. NOTE: Only with Discord
 └─ db
     └─ typesafe db-calls using Prisma
As the project uses Turborepo, you could run the following commands on the root, and it will run every inner same command.
Note Ensure you have set the enviorimental variables before running the project
- Install the project dependencies by running
pnpm install. - Build the project by running
pnpm build. - Start the project by running
pnpm dev.
Note
pnpm devwill run discord and nextjs project
Example:
To get it running, follow the steps below:
You will find a .env.example file in your project's root directory. Use it as a template for your own .env.
Explanation of Required Environment Variables for Database, Discord OAuth2 and Bot Authentication
These are environment variables that you need to set in order to use Discord's OAuth2 API and to authenticate your bot with Discord.
DATABASE_URL: This is the URL for your database. You need to replace it with the actual URL for your database.

NEXTAUTH_SECRET: This is a secret key used by NextAuth.js for secure session cookies and CSRF protection. You should generate a new secret key and replace it with the placeholder.
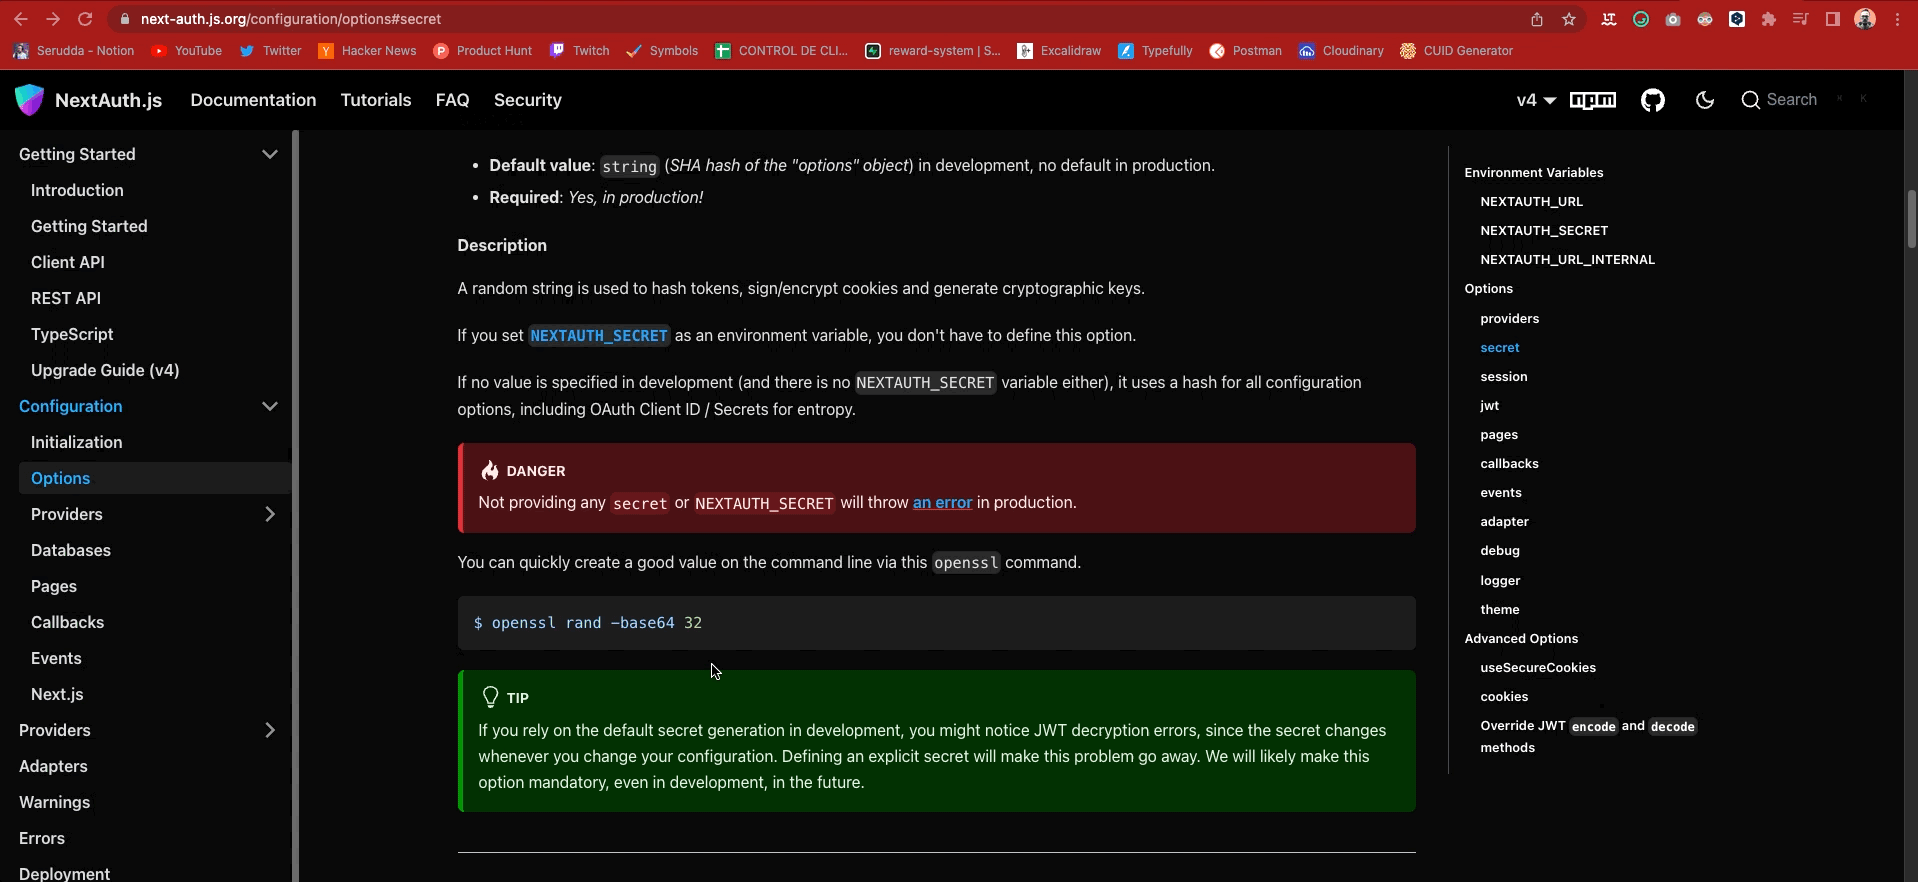
NEXTAUTH_URL: When deploying to production, set the NEXTAUTH_URL environment variable to the canonical URL of your site. if you are working locally, replace with "http://localhost:3000"
DISCORD_CLIENT_ID: This is the client ID of your Discord application. You can get it from the Discord Developer Portal.
DISCORD_CLIENT_SECRET: This is the client secret of your Discord application. You can get it from the Discord Developer Portal.
DISCORD_SERVER_ID: This is the Discord server ID. You can get it from your own Discord server.
DISCORD_BOT_TOKEN: This is the bot token for your Discord bot. You need to create a bot in the Discord Developer Portal and get the token from there.
DISCORD_WEBHOOK_URL: This is the webhook URL for your Discord server. You can create a webhook in your server settings and get the URL from there.
.env example
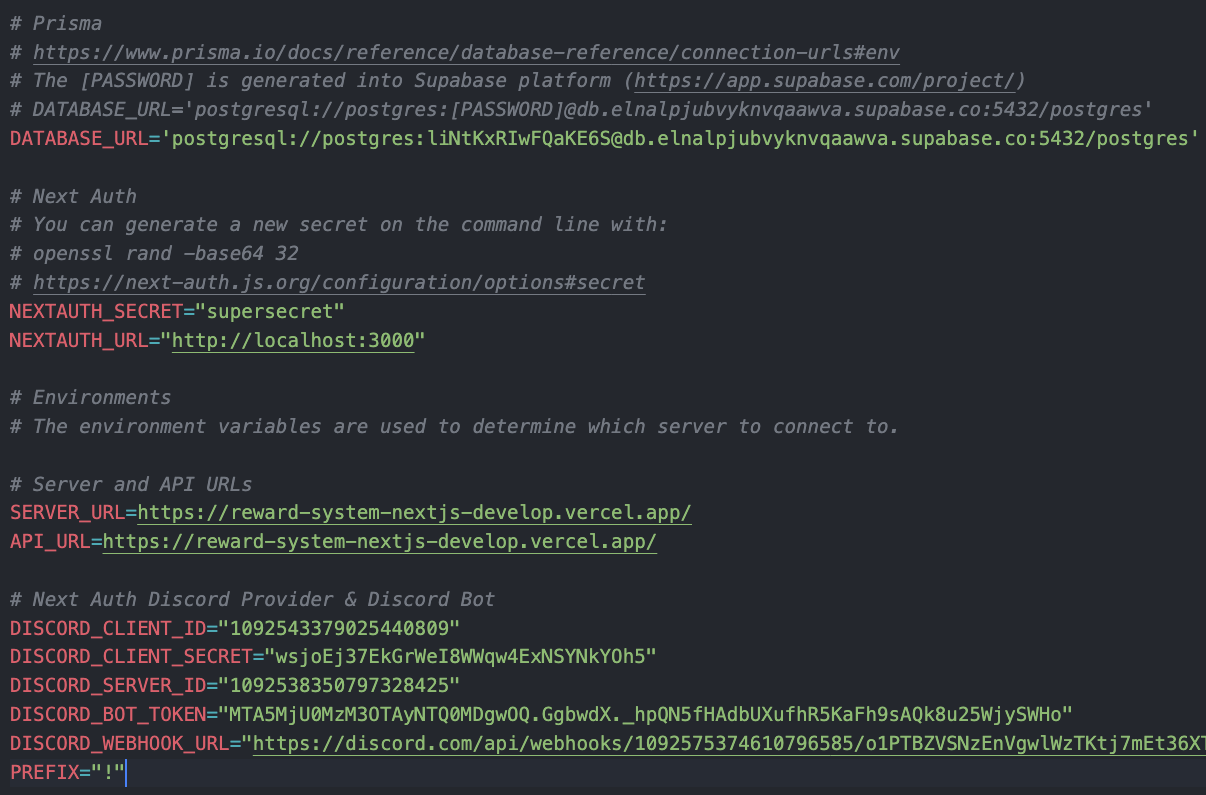
Once you have set these environment variables in your .env file, you are ready to run the project.
To use Supabase as your database provider, you'll need to create a new project in Supabase and obtain your connection string URI. Here's how:
- Create a new project in Supabase.
- In your project, go to Settings -> Database.
- Under the "Connection" tab, copy the Connection string (URI).
- In your project, create a .env.local file at the root of the project folder.
- In the .env.local file, set the DATABASE_URL variable to your Supabase connection string URI.
For more details on setting up your Supabase database, check out the Supabase documentation.
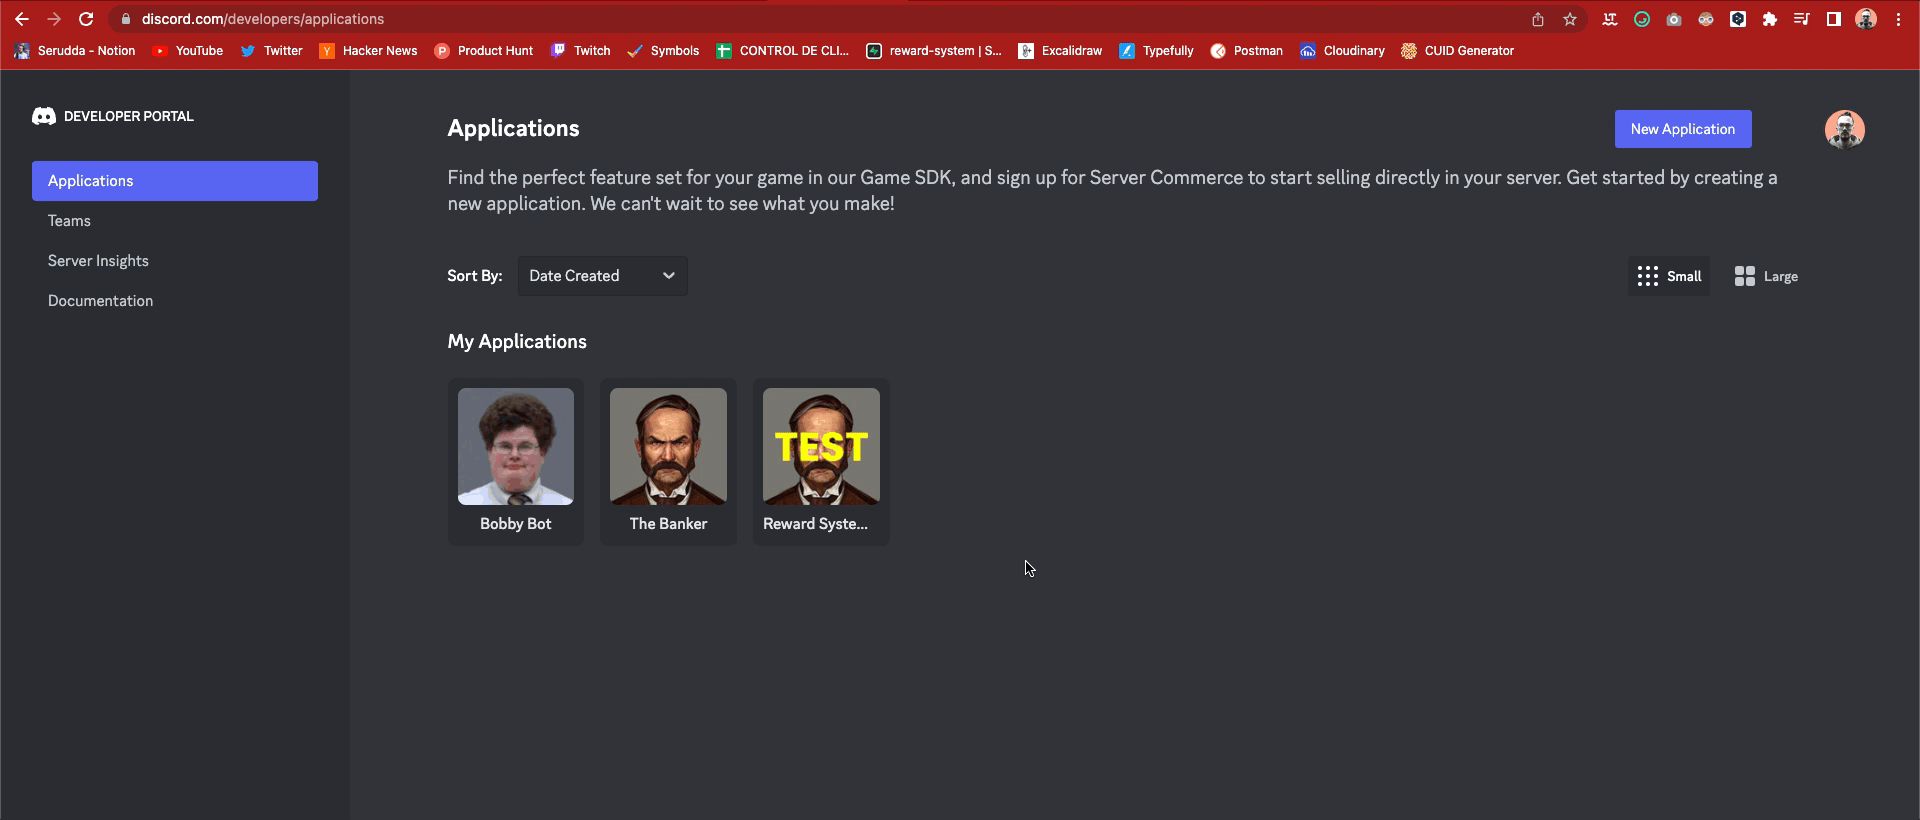
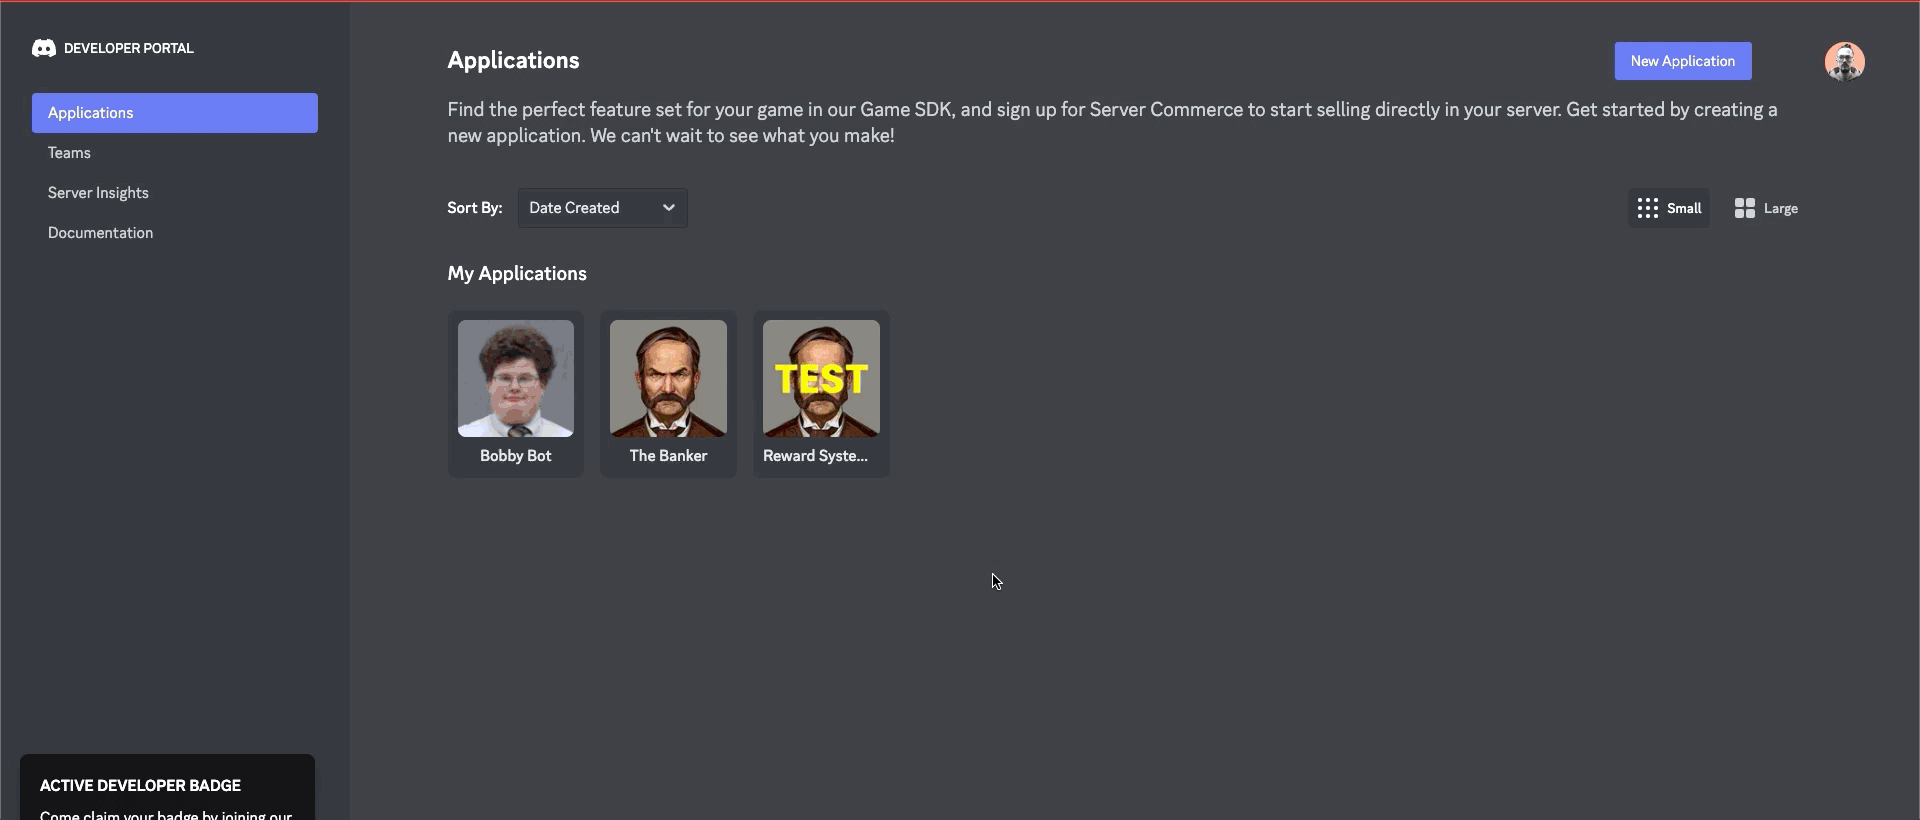
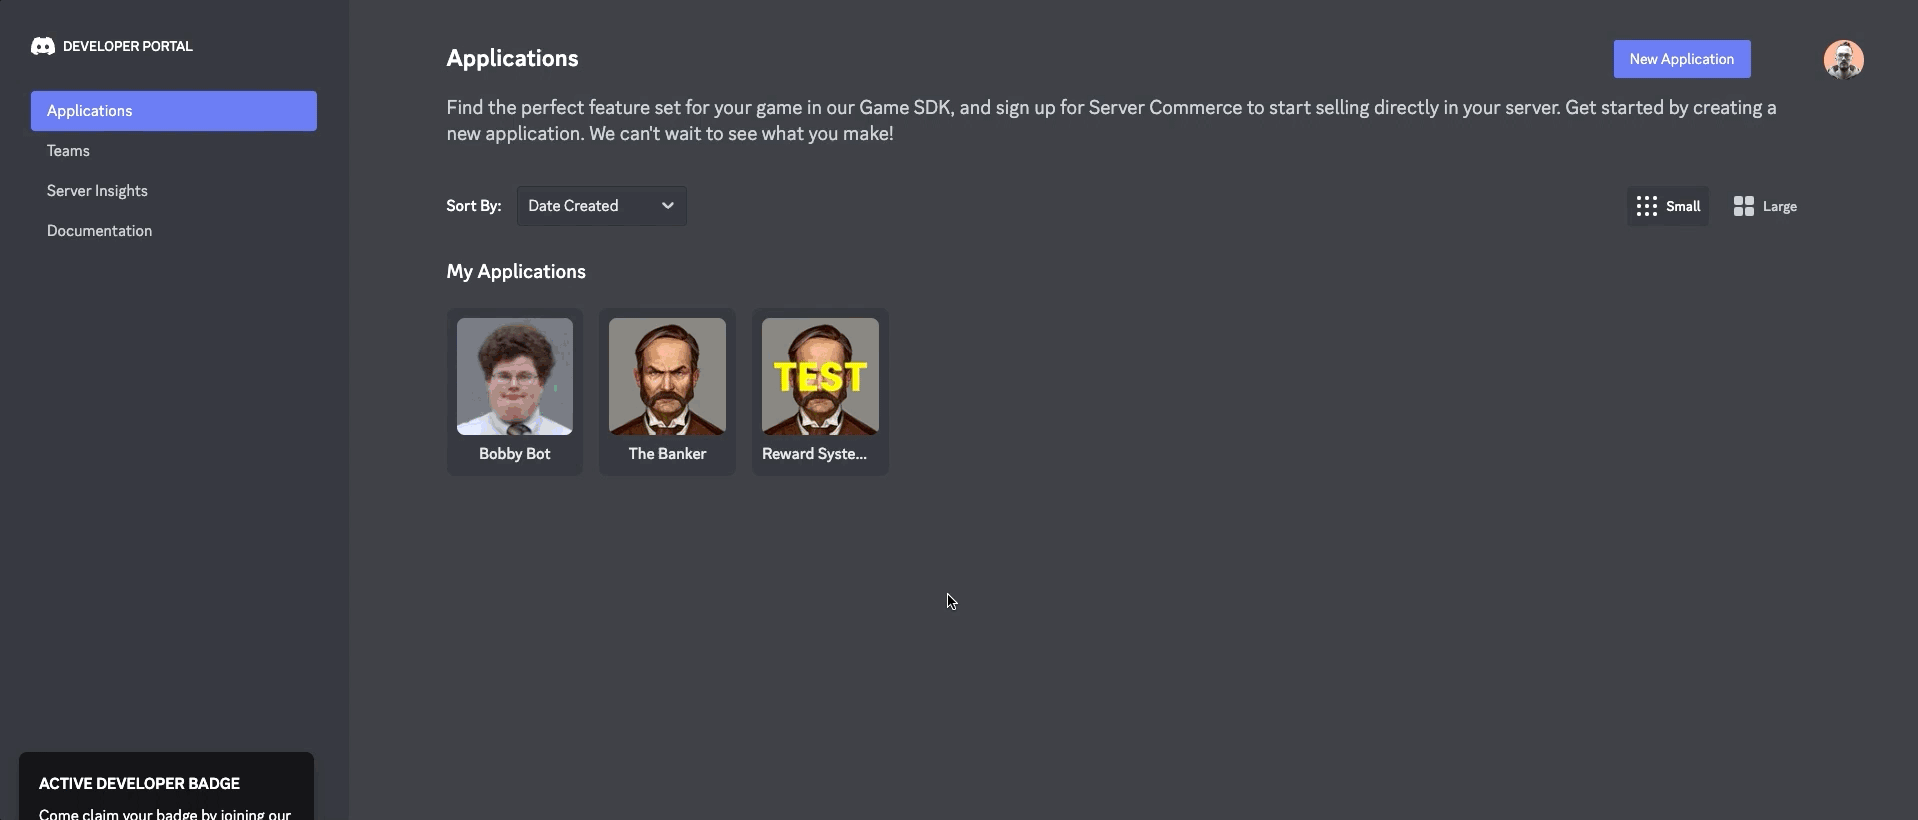
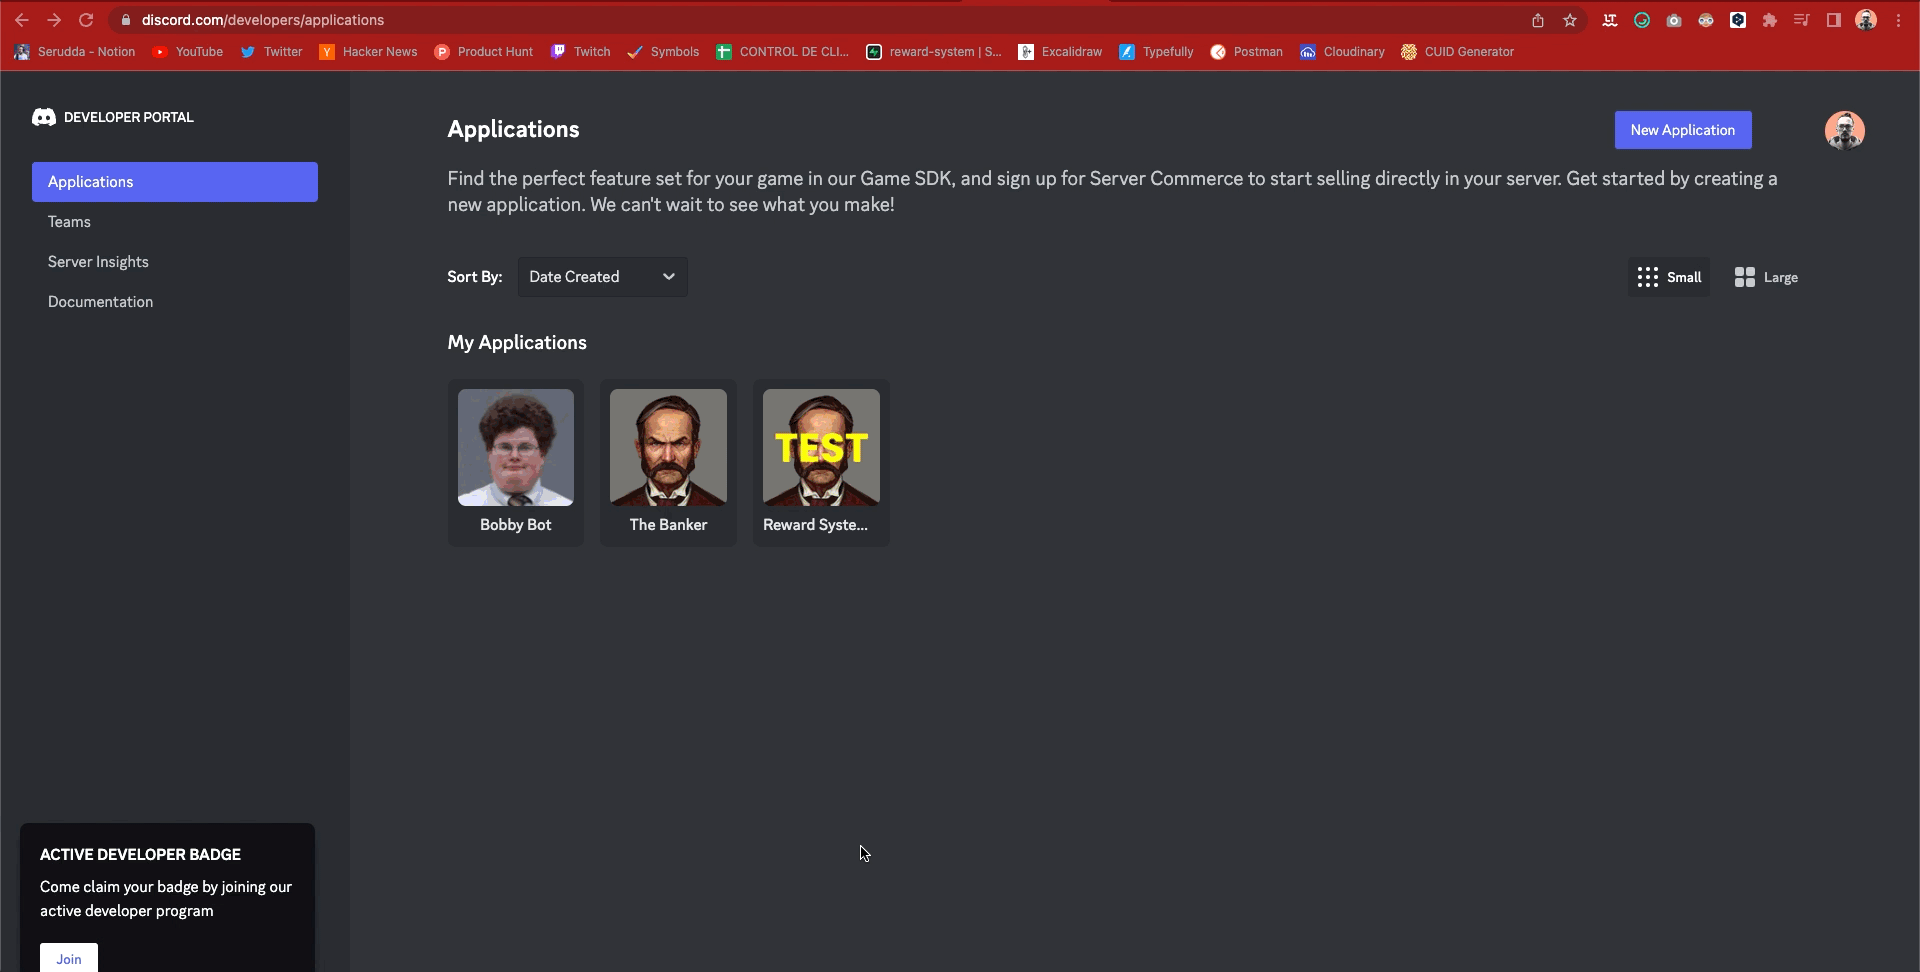
2. Create a New Application.

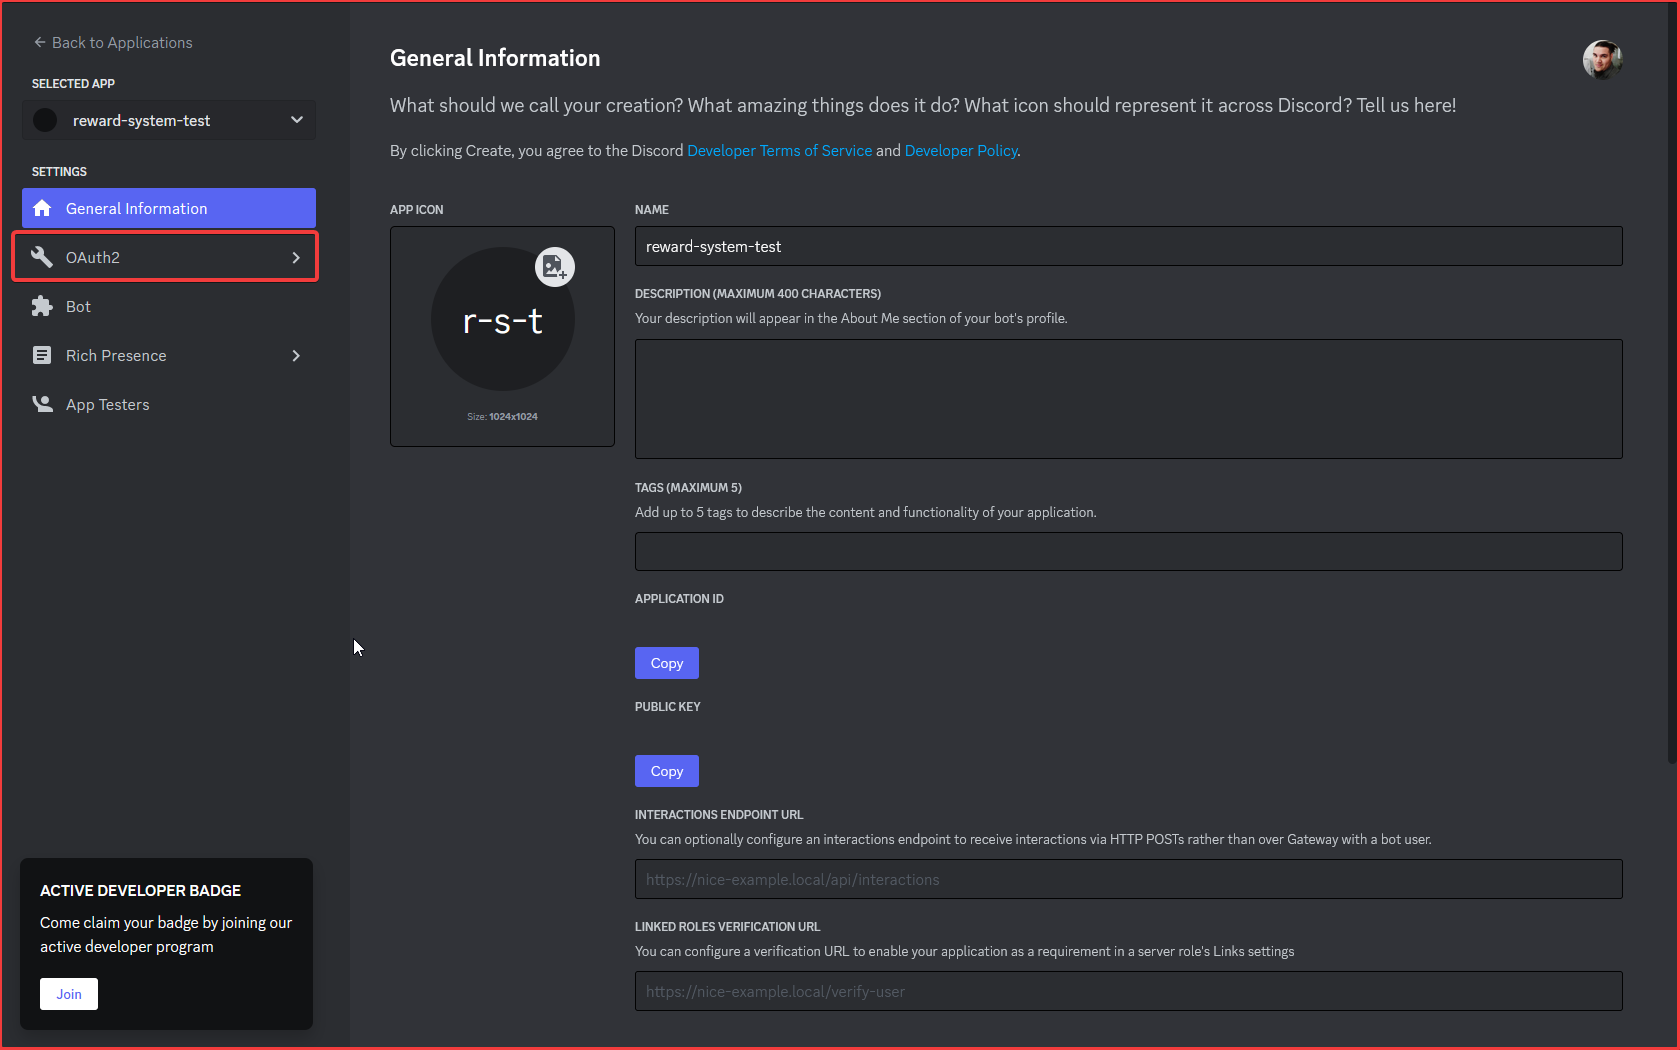
3. Your next step is to go over the menu on the left side of the screen and click “Bot”.

4. Now you want to click the blue “Add Bot” button.

- Click the “Yes, do it!” button…
6. You’ll also see a “Token” and a blue link you can click called “Copy”.

DISCORD_BOT_TOKEN="YOUR_TOKEN"
- Add Your Bot to a Discord Server
8. In order to add your bot to your Discord Server, you’ll need to navigate back to the “OAuth2” "URL GENERATOR" tab.

9. In the “Scopes” section, you’ll want to select the “bot” checkbox.

10. “Bot Permissions” section. This is where you choose what permissions to give your bot, and what it can and can’t do. If this is a Bot to test new features o commmands, you could assign the "Administrator" permission.

11. After you’ve selected your permissions, scroll down to the bottom and look at the URL that was generated.
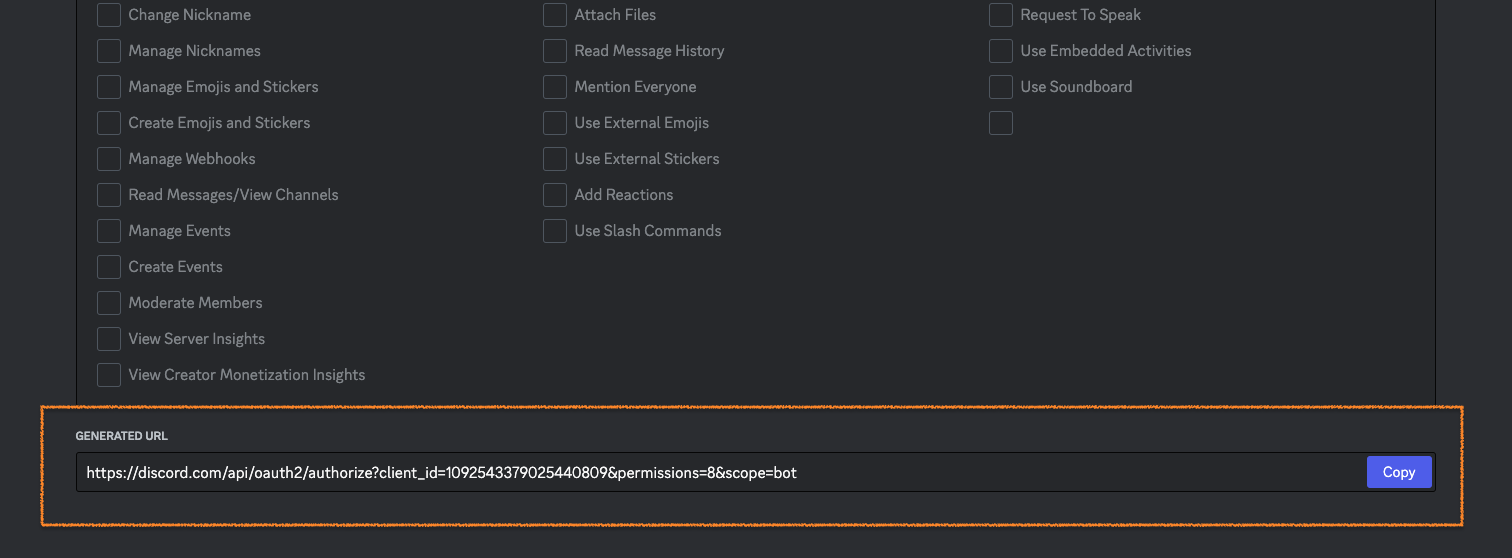
12. Click the blue “Copy” button on the right side. This is the URL you’ll navigate to in order to add your bot to a server.
To configure your Discord keys and enable your application to access the Discord API, follow the steps below:
1. Navigate to the "OAuth2" section in the Discord Developer Portal and select your bot name.
Client ID: DISCORD_CLIENT_ID="your_client_id_here"
2. Under the "CLIENT ID" section, copy the client ID.
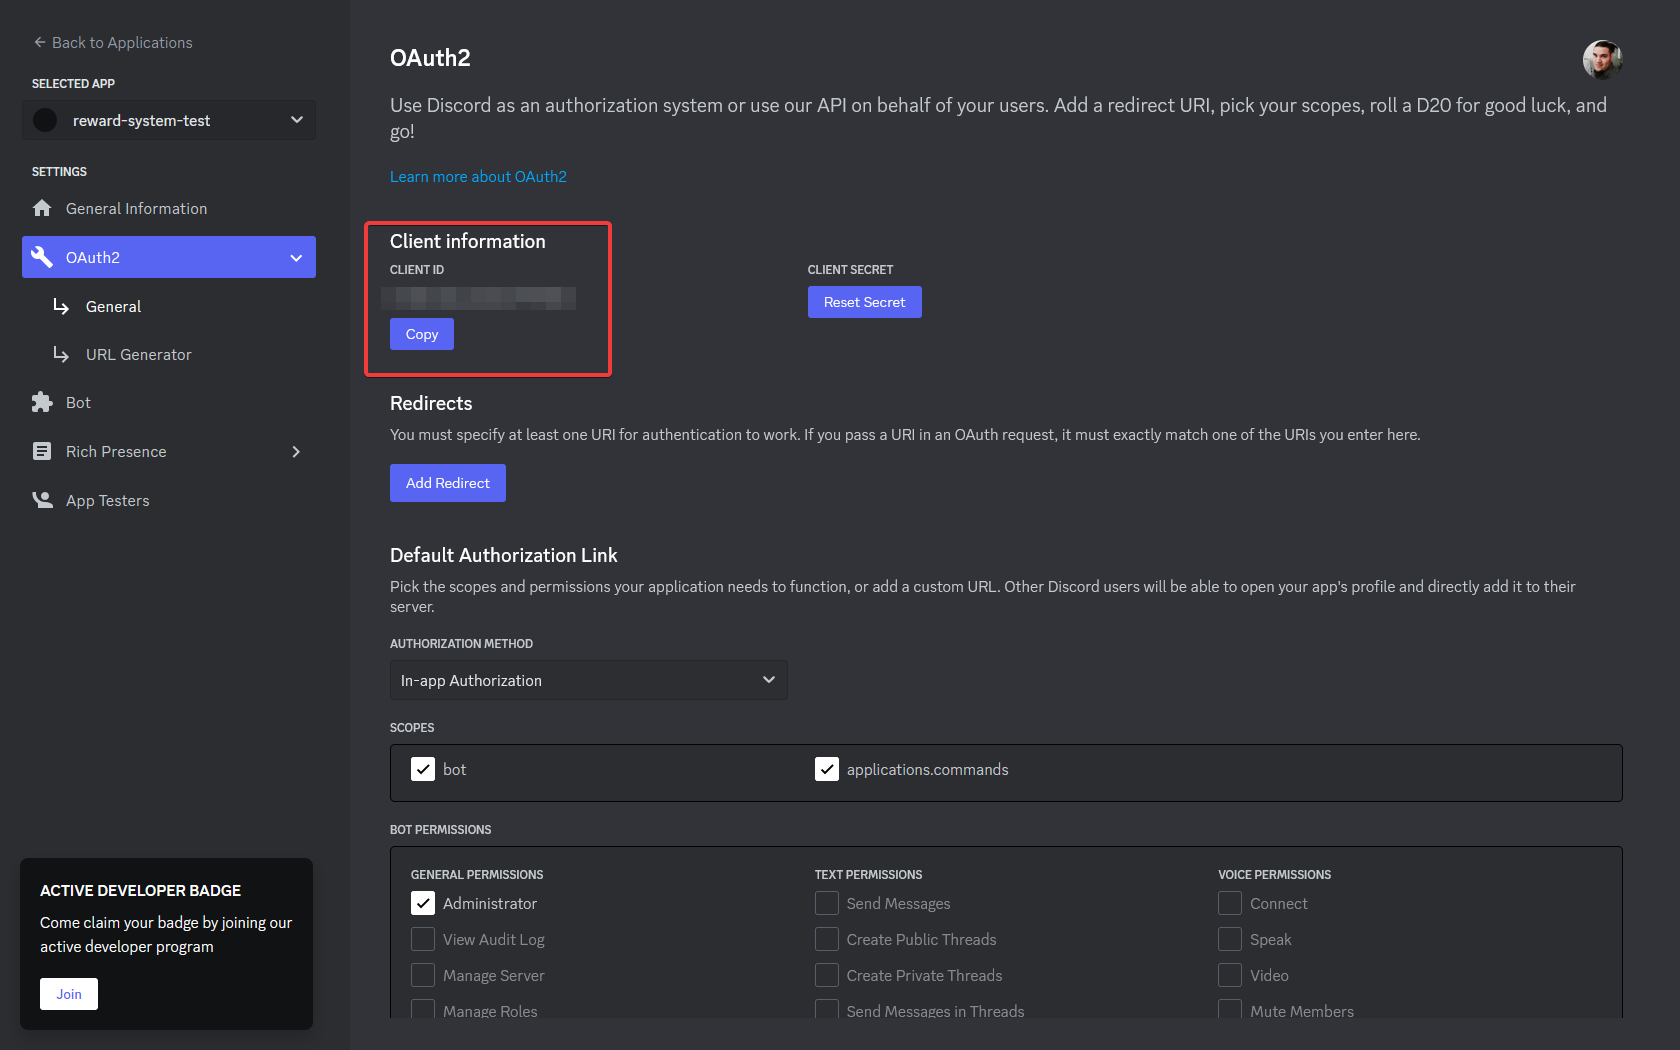
Client Secret: DISCORD_CLIENT_SECRET="your_client_secret_here"
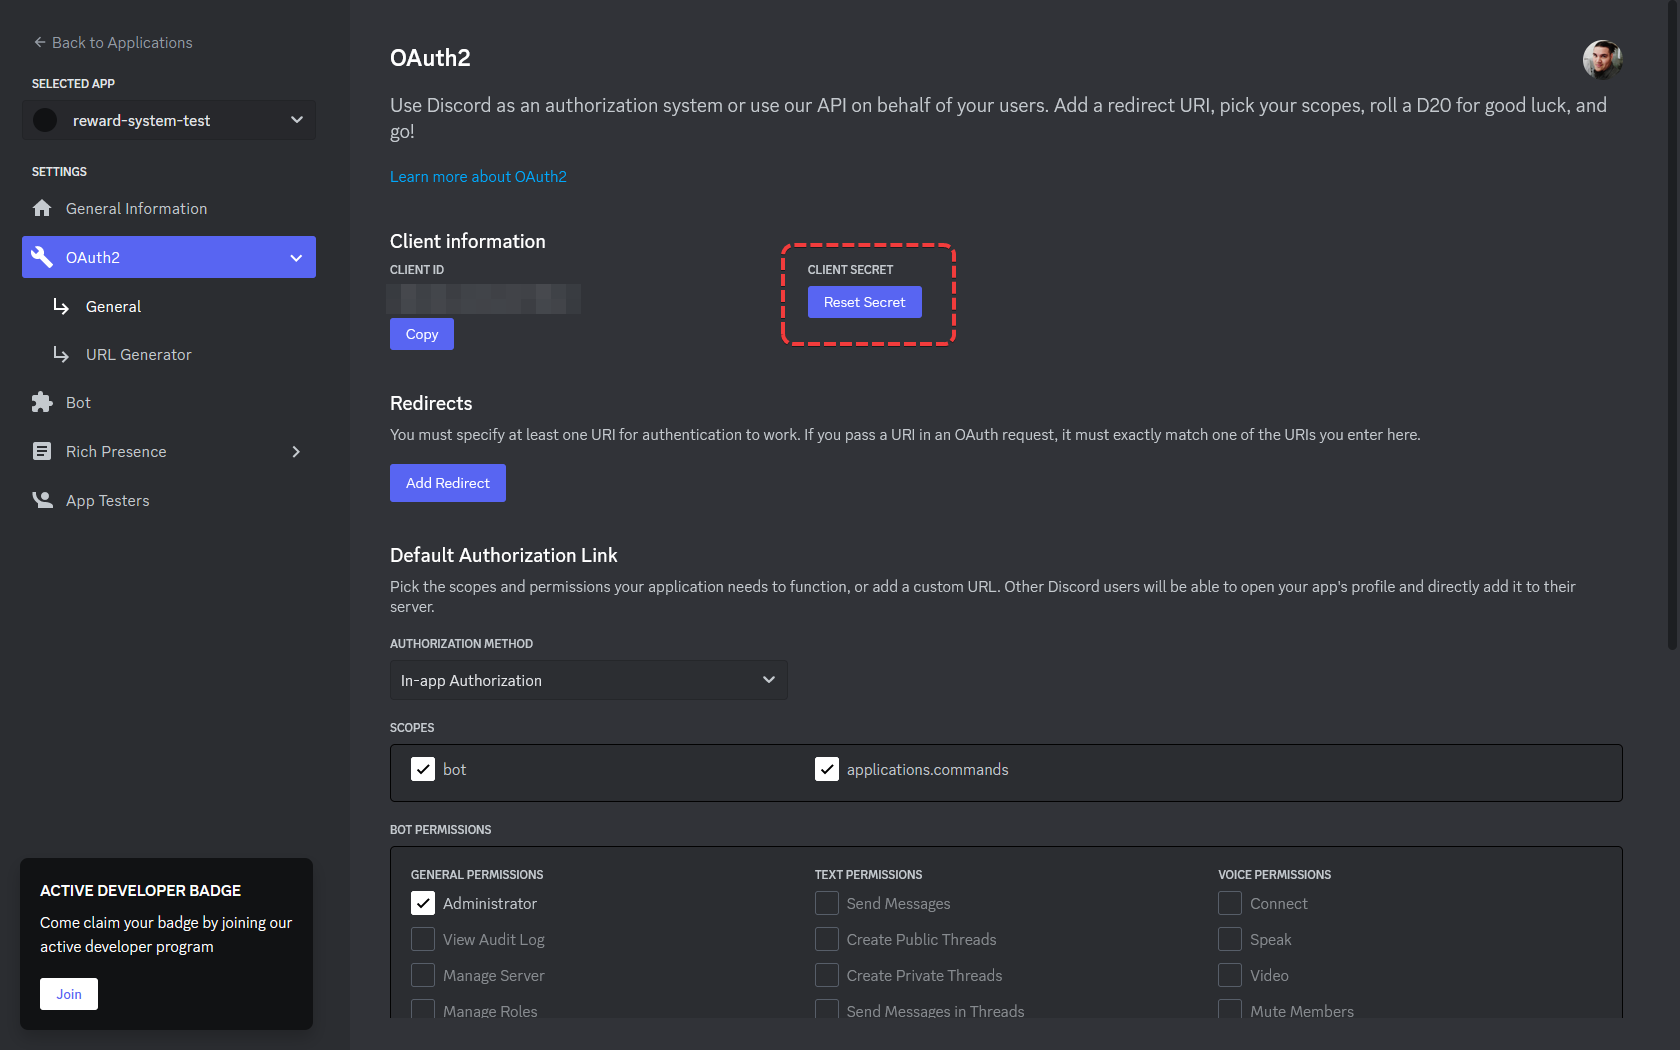
3. Click the blue “Reset Secret” button.
-
Click “YES” button.
-
You’ll also see a “Token” and a blue link you can click called “Copy”.
If you need additional help, consult the Discord Developer Documentation.
- Go to your Discord server where you want to add the webhook.
2. Click on the channel where you want to send the webhook messages.
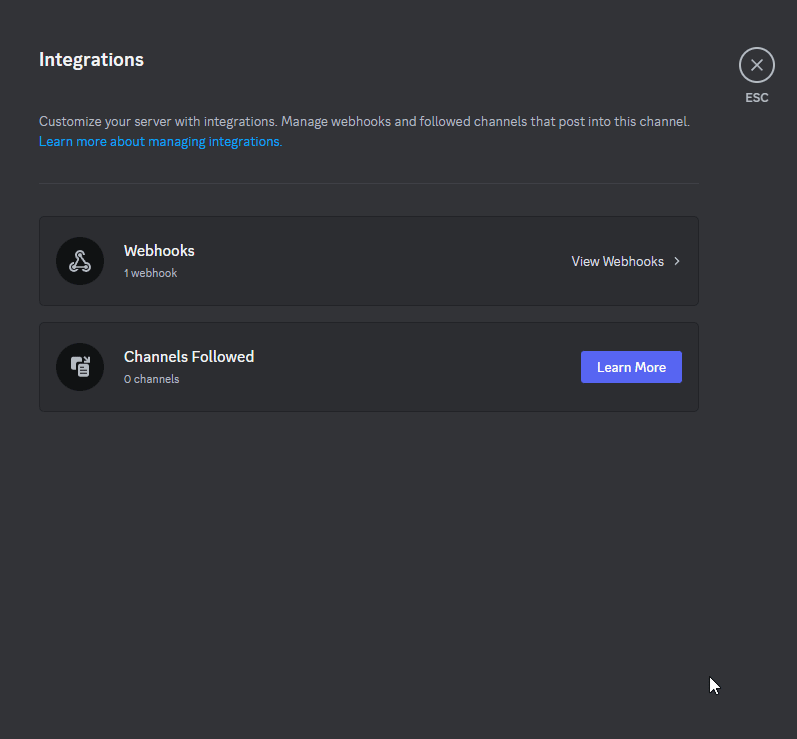
3. Click on the settings icon and select "Integrations".
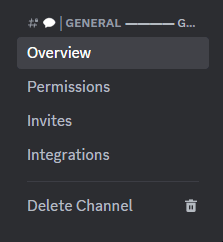
4. Click the "Create Webhook" button and enter the webhook name and select the channel you want to send messages to.
-
Copy the webhook URL and set it as an environment variable in your project:
-
DISCORD_WEBHOOK_URL="https://discord.com/api/webhooks/your_webhook_id/your_webhook_token"
-
Save the changes and restart your server to make the changes take effect.
We welcome contributions from anyone who would like to help improve our project. Whether you're an experienced developer or just starting out, there are plenty of ways to get involved.
If you need help using our project, please visit our SUPPORT.md file. This document provides information on how to get help from the community, how to report issues, and where to find additional resources.
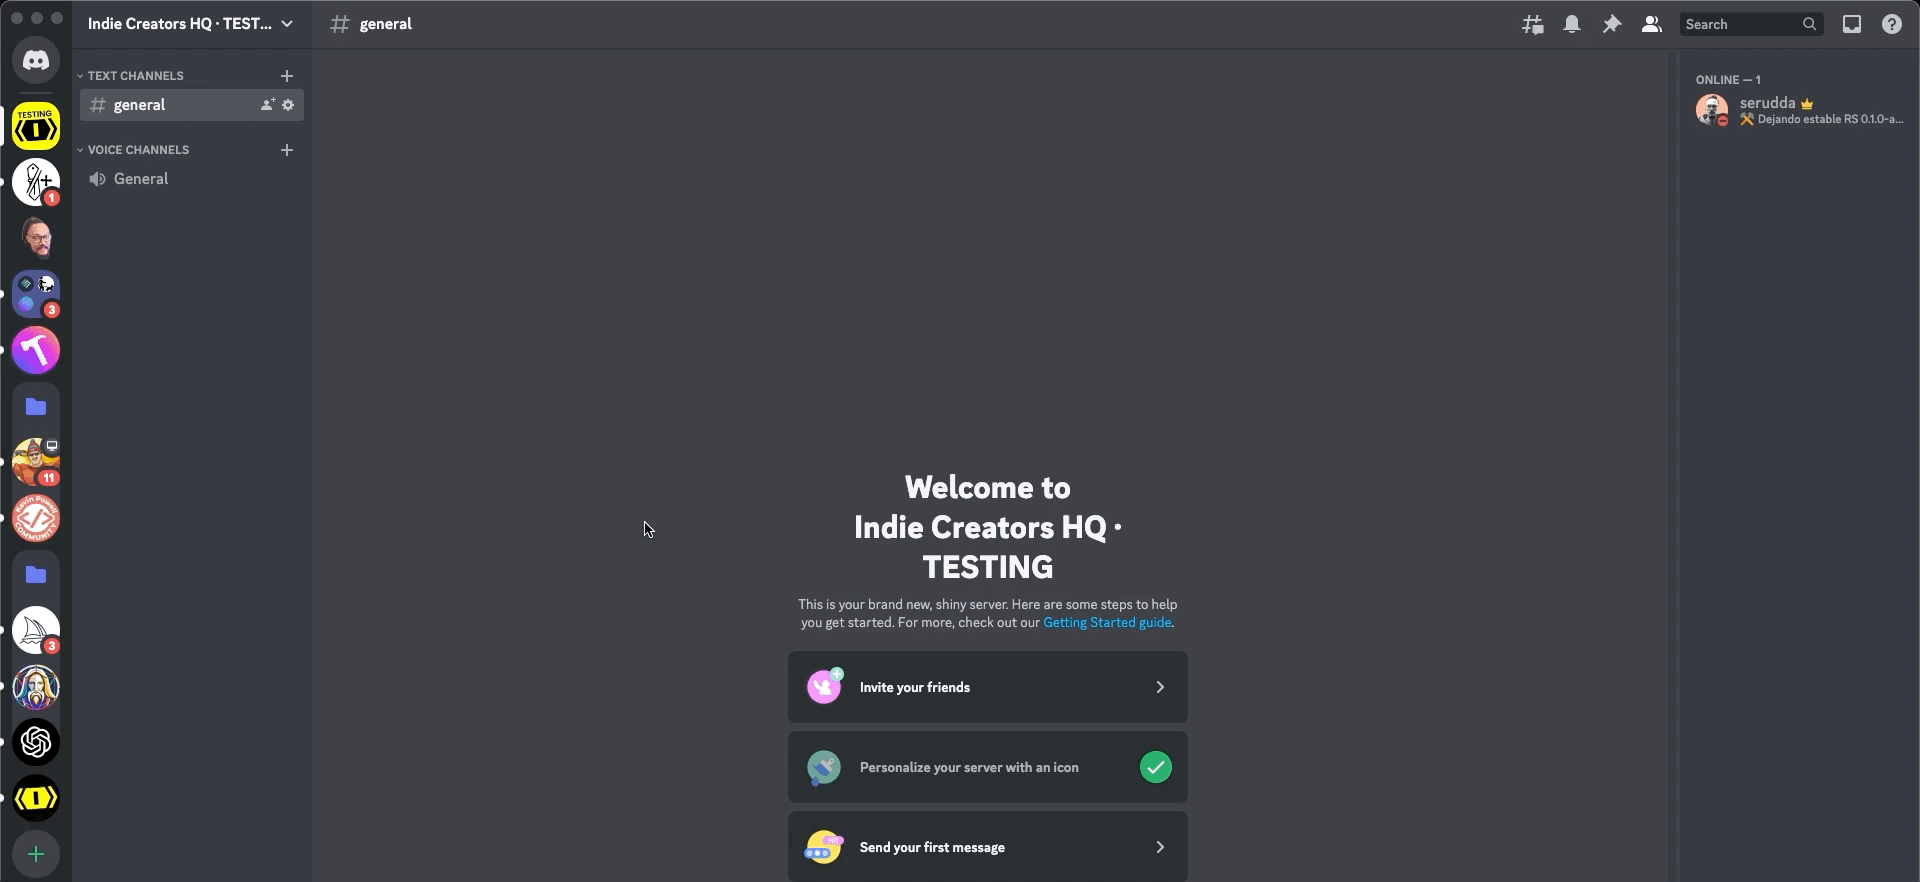
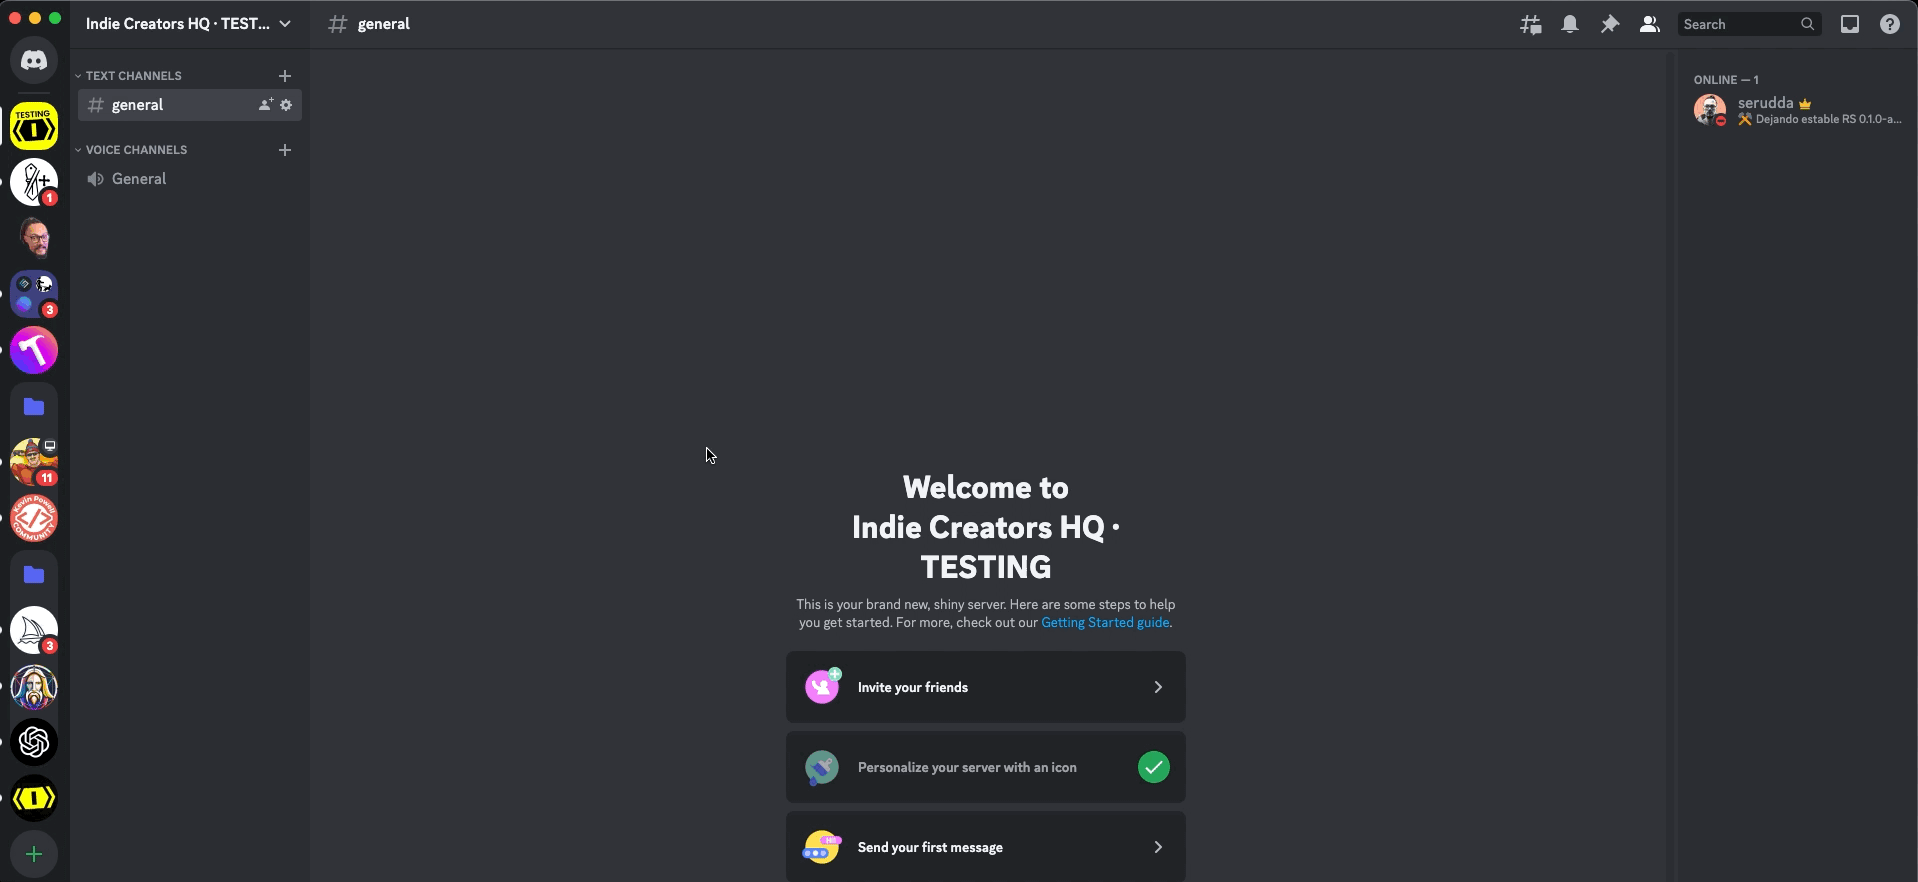
Join our Discord community to connect with other contributors and get help from the maintainers. This is a great place to ask questions, get feedback on your ideas, and collaborate with others on the project.
Before you start contributing, please read our CONTRIBUTING.md file. This outlines the contribution guidelines and provides instructions for setting up your development environment, submitting pull requests, and more.
We appreciate all contributions, big and small. Thank you for helping to make our project better!
We take the security of our project seriously. If you discover a security vulnerability, please let us know right away. We will investigate all legitimate reports and do our best to quickly address any issues.
To learn more about our security practices, please read our SECURITY.md file.
The stack originates from create-t3-app.
A blog post where I wrote how to migrate a T3 app into this
Test the Github GraphQL schema here
Made with contrib.rocks.
Folow us at