Collect and manage form data with serverless tech.
- React application using create react app
- Routing via react router 4
- State management via redux
- Talks to API Gateway via axios
- Auth via Auth0
- Hosted on Netlify
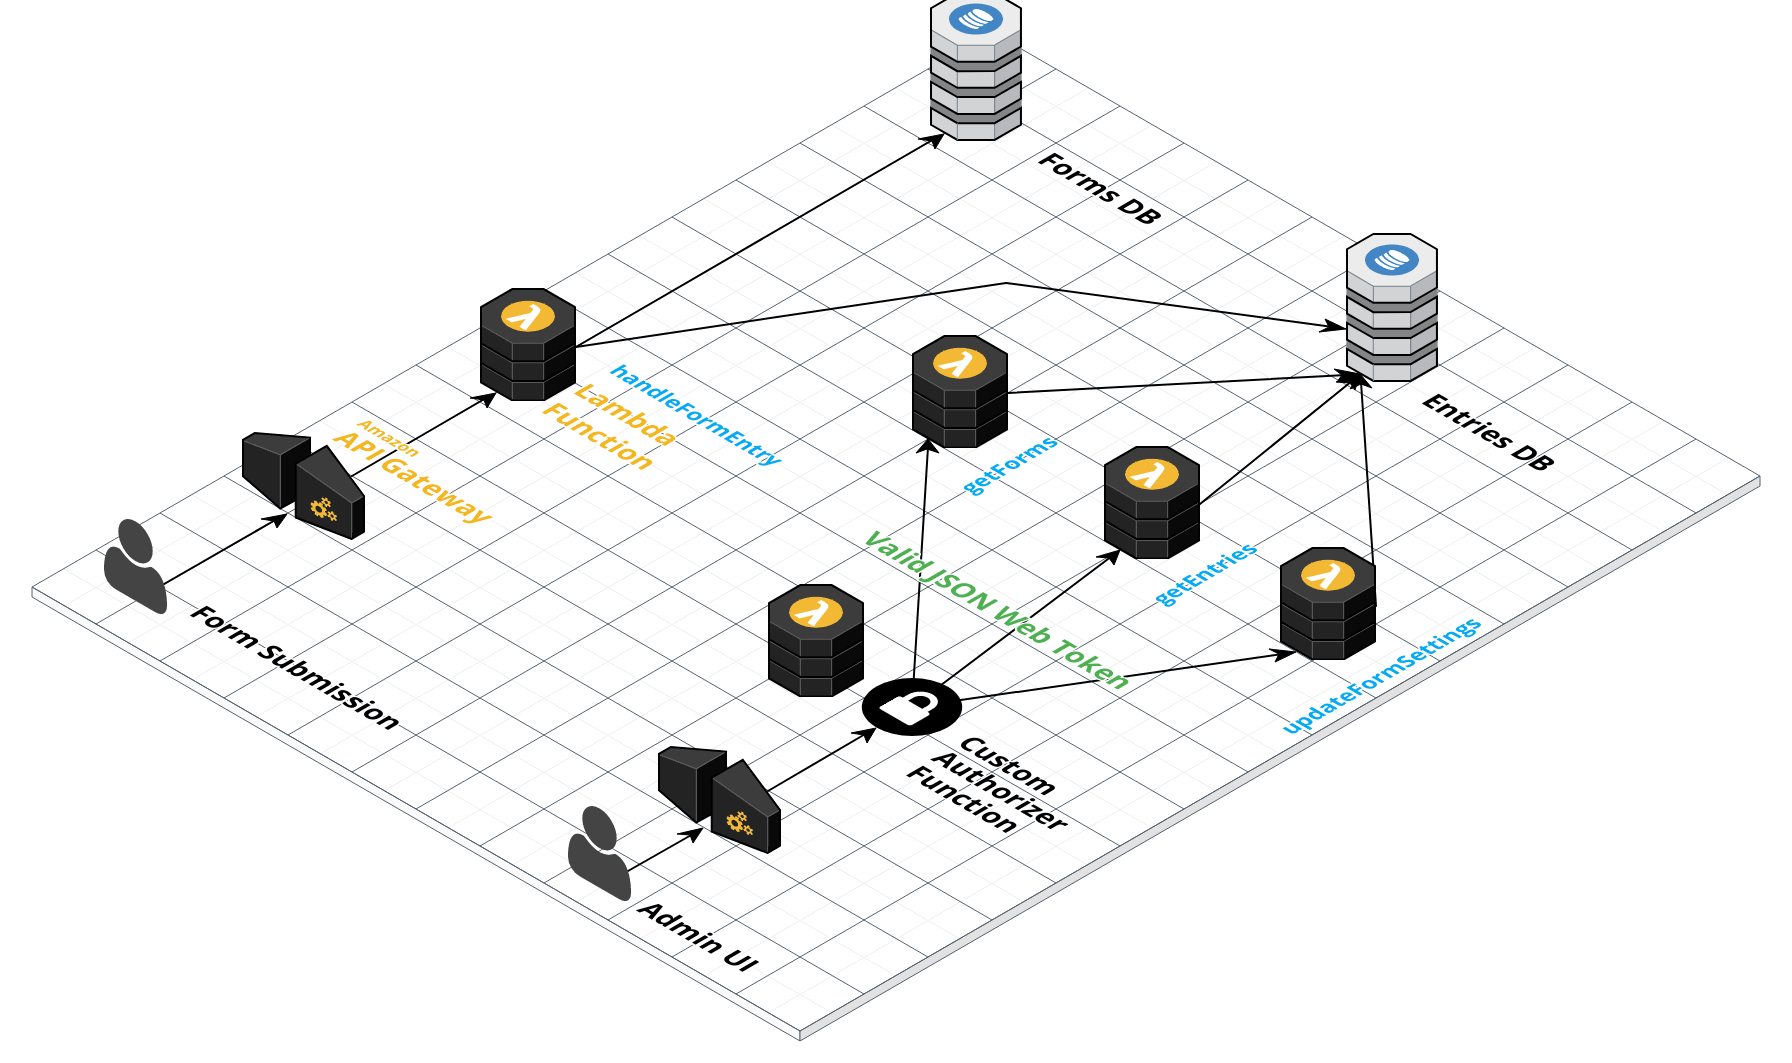
- Node backend running in AWS Lambda Functions
- DynamoDB noSQL for database
- Authorization via API Gateway Custom Authorizer Function
- Clone down the repo and install the dependencies
# install frontend dependencies
cd frontend && npm i

# install backend dependencies
cd backend && npm i-
Setup auth0 client. See Auth0 Setup below
-
Then deploy the backend application. (install
serverlessif you haven't already)
cd backend

serverless deploy- Add the API values to
src/_config.jsand bootup the frontend!
cd frontend

npm start
Connect your repo to netlify and add the build command cd frontend && npm install && npm run build
-
- Choose Single Page web app
- Grab your auth0 domain and clientID from your auth0 client settings
- plug those values into the frontend and backend config
-
Install the Auth0 Authorization extension in your auth0 account
-
Add an auth0 rule that will attach user roles to your JWT token
function (user, context, callback) {
  if (context.clientID === 'your-auth-client-id') {
    // Update namespace with your namespace
    var namespace = 'https://serverless.com/';
    // console for debug purposes
    console.log('user.roles', user.roles);
    // add role to JWT token
    context.idToken[namespace + 'roles'] = user.roles;
  }
  callback(null, user, context);
}
-
Add your auth0 values to
/frontend/src/_config.js