Setting Up a Host Machine
The following document describes in detail how we are configuring our host machines at Shape.
These details are provided as guidance both for ourselves so we can remember how to replicate ourselves and for people who want to be taken through the entire process of configuring a host machine. That said, these steps are not stricly needed for configuring Tartelet as your setup may vary.
We rent our machines from MacStadium.
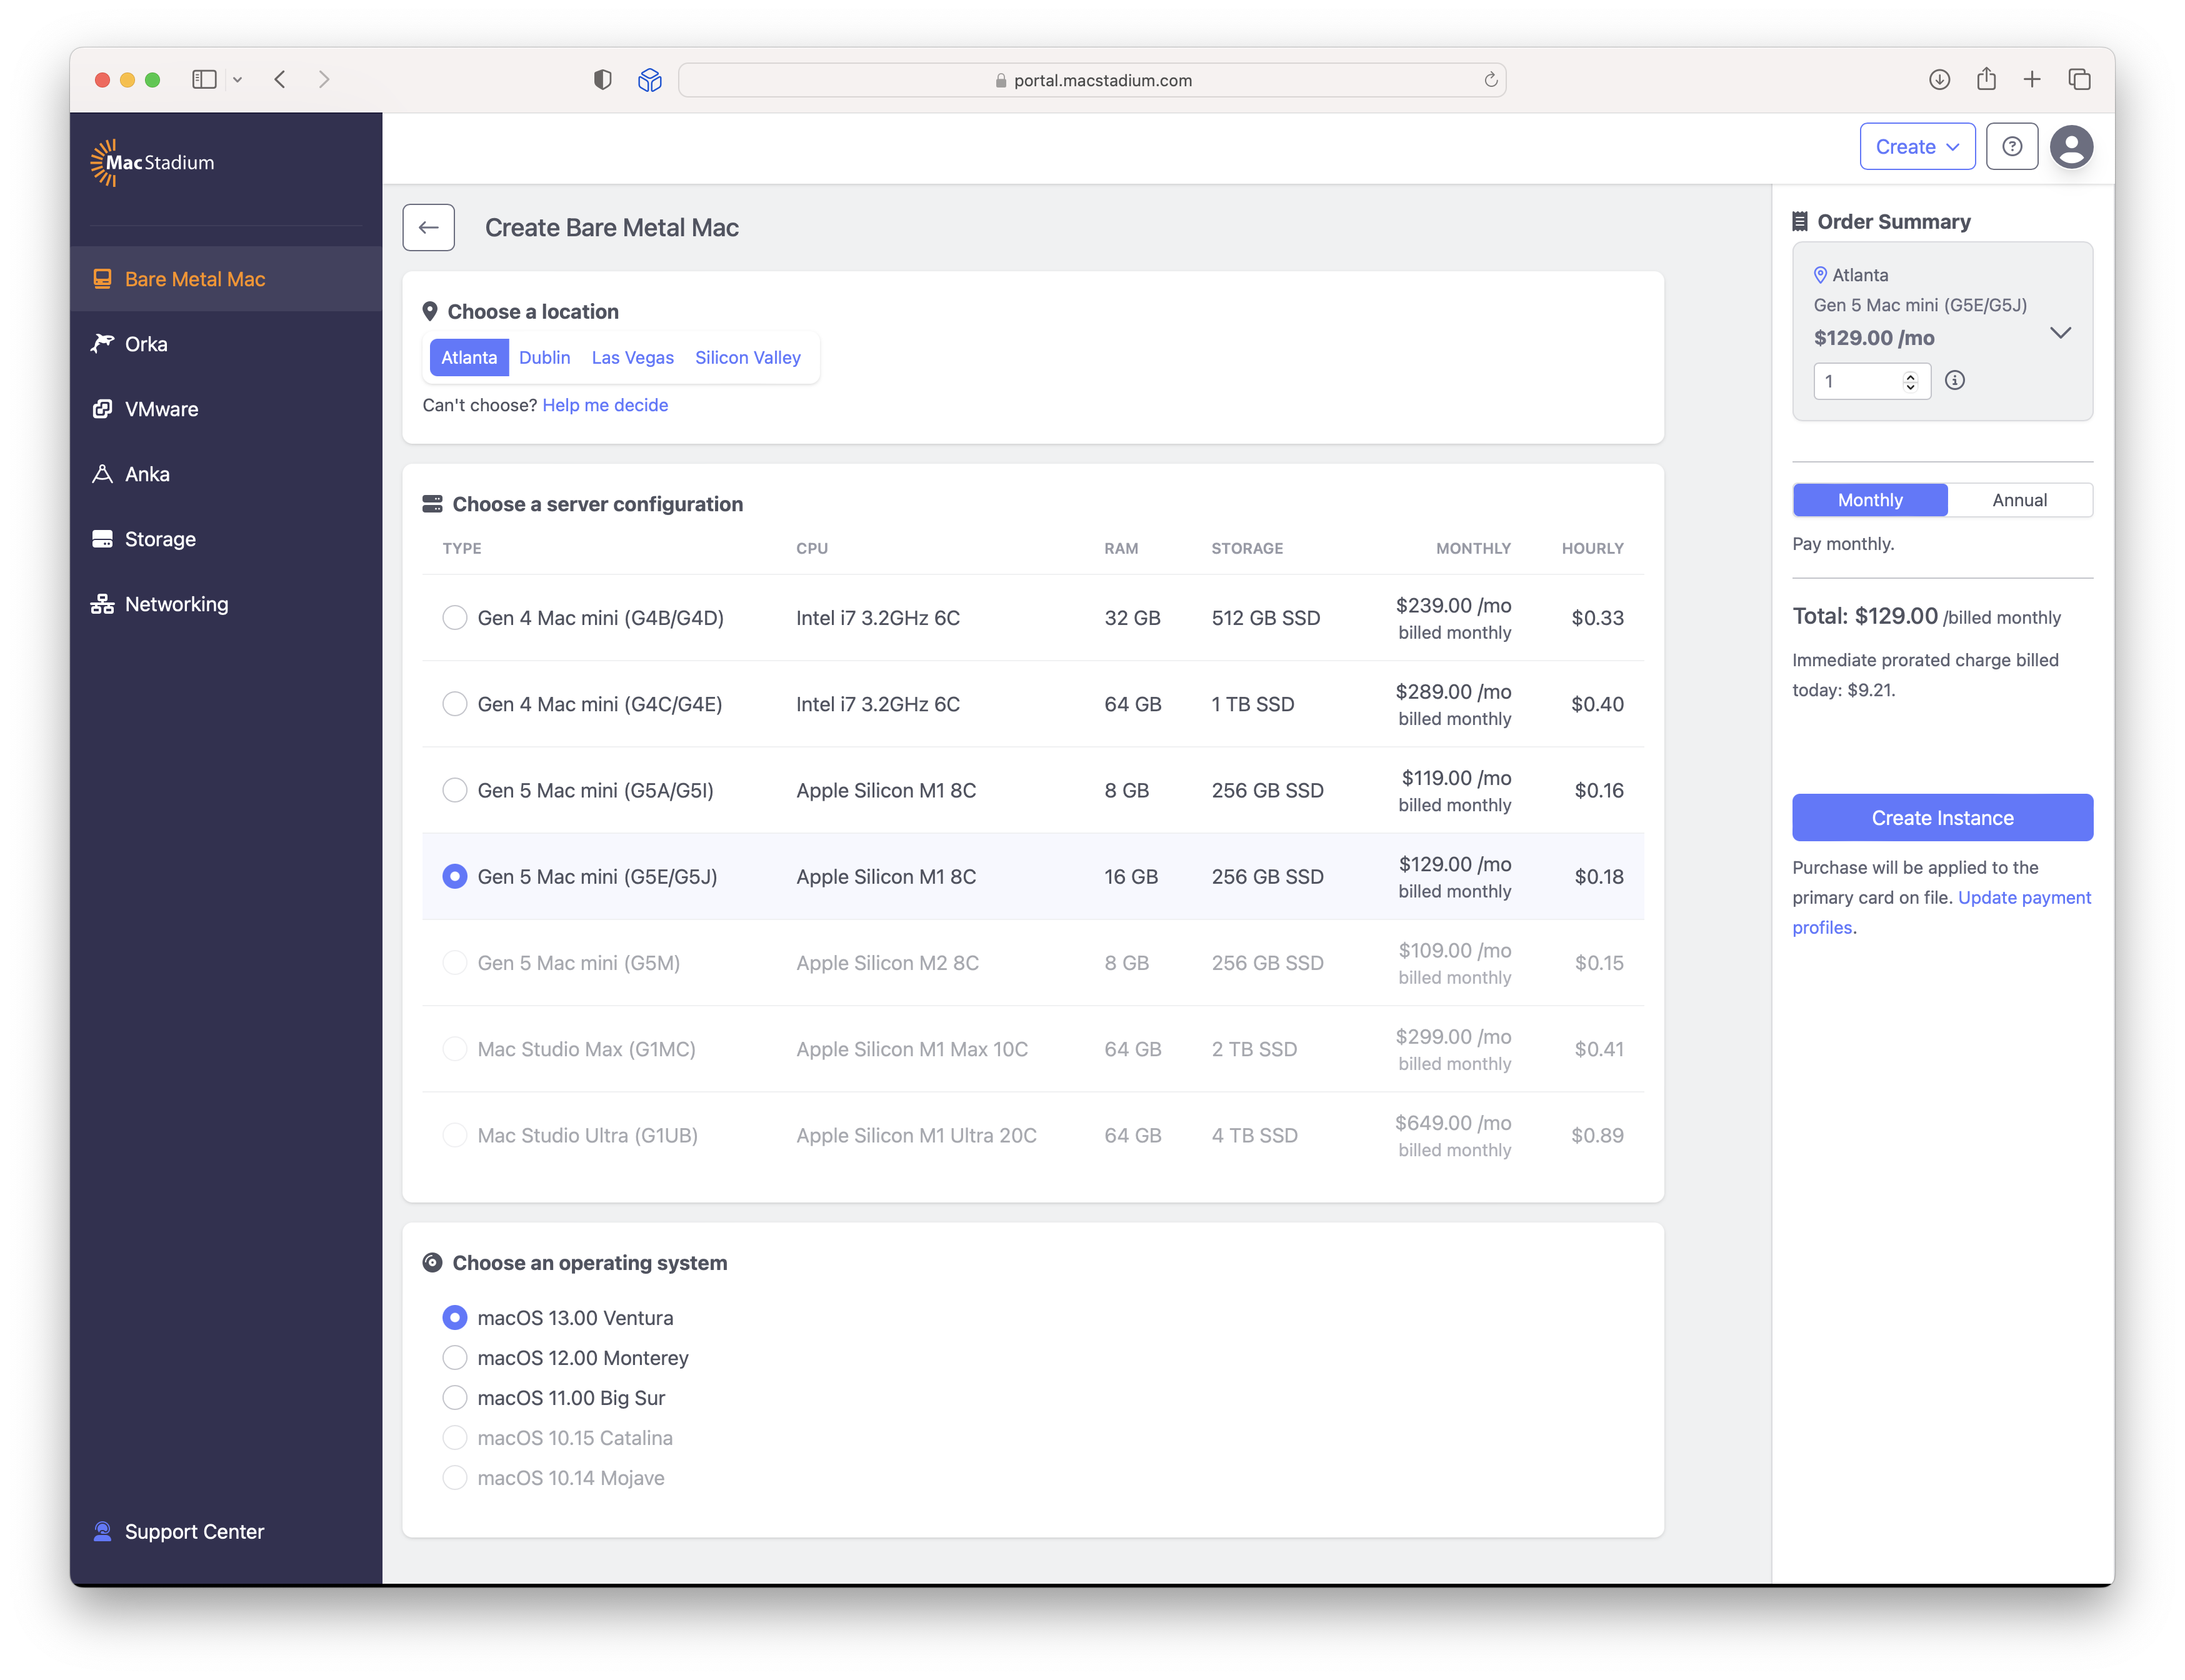
The location of the machine does not matter much but out of the options offered by MacStadium, we have the lowest latency from Copenhagen to Dublin. However, it may be that your preferred machine is not available in Dublin. In this case Atlanta is the next best choice.
Make sure to choose a machine with an Apple Silicon chip.
Note
We have found the M2 machines to be up to 30% slower than the machines with an M1 chip. This decrease in performance is likely due to the slower read/write speed of the SSD in the M2 machines.
When renting a machine, make sure to choose a machine with an Apple Silicon chip and have the latest version of macOS pre-installed on the machine.
Make sure to rename the machine so it is distinguishable from other machines. We name our machines after characters in the Frozen Disney movie.

You should have received an e-mail with the details of the new machine, including it's static IP address and the username and password used to connect to the machine in the following steps.
We store these credentials in a vault in 1Password. It is important that the password of the administrator account on the new machine is changed. We will do this later in this guide.
💡 Tip
Add the IP address to your /etc/hosts file with the name chosen in step 4 to avoid remembering the IP address and using the name of the machine when connecting to it going forward.
127.0.0.1        localhost
123.456.123.456  olaf
The following section describes the nitty gritty details of configuring the machine. We follow these steps closely so all of our machines are configured in the same way.
All changes in the following section are made while logged onto the administrator account on the host machine.
Use Finder to connect to the machine using VNC. Open Finder and select Go -> Connect to Server (⌘K) in the menu bar. Enter vnc://administrator@{YOUR IP ADDRESS} in the address field. You will be asked to enter the password of the administrator account.
You should now se the screen of the rented machine and it will ask you to login using the administrator account. Enter the password to login.

It is important to change the password of the administrator account as you have just received it in plain text in an e-mail. Do this through the Users & Groups pane in the System Settings app.
Change the name of the machine by following the steps below.
- Select the General pane in the System Settings app.
- Select About.
- Click the name of the machine.
- Enter the new name. This should be the same as the name assigned to the machine on MacStadium.
Changing the name of the machine makes it easier to identify the machine, for example when connecting to it through VNC.
Create an account named "runner" through the Users & Groups pane in System Settings. This can be a standard account; that is, it does not need to be an administrator account. We will use this account to run the Tartelet application.
The account details are listed below.
| Field | Value |
|---|---|
| New Account | Standard |
| Full Name | runner |
| Account Name | runner |
| Password | Create a secure password using 1Password and make sure the credentials are stored in 1Password. |
| Verify | Re-enter the password |
| Password Hint | Leave blank |
We will not configure this account just yet. First we finalize all configuration that needs to be done while logged into the administrator account and then we make the configurations needed on the runner account.
Change the avatars of both the administrator and the runner accounts. We use the following avatars for the two accounts.
| Account | Avatar |
|---|---|
| administrator | 👑 Crown emoji on a red background |
| runner | 🤖 Robot emoji on a blue background |
Both avatars can be created using the emojis and colors in the avatar picker.
In case the machine is restarted, we want it to automatically log in as the newly created runner account. Follow the steps below to enable that.
- Navigate to the Users & Groups pane in the System Settings app.
- Select "runner" for the "Automatically log in as" setting.
- Enter the password of the administrator and runner accounts when asked to do so.
Enable fast user switching to show the account name in the menu bar. This is another way to easily see which account we are logged into. Follow the steps below to add fast user switching.
- Navigate to the Control Center pane in the System Settings app.
- Scroll down to the Fast User Switching settings.
- Select "Account Name" for the "Show in Menu Bar" setting.
Disable automatic software updates by following the steps below.
- Navigate to the General pane in the System Settings app.
- Select Software Update.
- Select the info icon next to "Automatic updates".
- Verify that "Check for updates" is enabled.
- Verify that "Download new updates when available" is enabled.
- Verify that "Install macOS updates" is disabled.
- Verify that "Install application updates from the App Store" is disabled.
- Verify that "Install Security Responses and system files" is enabled.

Ensure Remote Login is enabled for all accounts. This enables us to log into the runner account using SSH. Follow the steps below to enable Remote Login for all accounts.
- Navigate to the General pane in the System Settings app.
- Select Sharing.
- Verify that Remote Login is enabled.
- Select the info icon next to Remote Login.
- Select "All users" for the "Allow access for" setting.

Change the wallpaper of the administrator account. We use the following wallpapers for the accounts.
| Account | Wallpaper |
|---|---|
| administrator | Red wallpaper with the name of the machine and the account name written on it. |
| runner | Blue wallpaper with the name of the machine and the account name written on it. |
Writing the name of the machine on the wallpaper and the account name on the wallpaper makes it easy to identify a VNC session when multiple are active at the same time and reduces errors when managing multiple machines.
We use this Sketch template to create the wallpapers for both accounts. Once a wallpaper is created, it can be exported and dragged onto the VNC session to transfer it to the host machine. Then right-click the image to set it as wallpaper.
We will change the wallpaper of the runner account later.
Remove all applications from the Dock except Finder. Then add System Settings and Terminal to the Dock. This reduces the clutter in the Dock and ensures we have the applications we need at hand.

Keep the Dock clean by removing recent applications. Follow the steps below to remove recent applications from the Dock.
- Navigate to the Desktop & Dock pane in the System Settings app.
- Disable the "Show recent applications in Dock" setting.
Ensure that the computer does not go to sleep by running the following command in the Terminal app.
sudo pmset -b sleep 0; sudo pmset -b disablesleep 1We also need to ensure that the computer does not sleep when connected over VNC by following this guide. The necessary steps in the guide are listed below.
Start by finding the UID of the file located at the path /Library/Preferences/com.apple.PowerManagement.{UID}.plist. You can do this by autocompleting the path in the terminal.
Then run the following command to disable System Sleep Timer altogether.
sudo defaults write /Library/Preferences/com.apple.PowerManagement.{UID}.plist "AC Power" -dict-add "System Sleep Timer" 0And run the following command to disable Display Sleep Timer altogether.
sudo defaults write /Library/Preferences/com.apple.PowerManagement.{UID}.plist "AC Power" -dict-add "Display Sleep Timer" 0Before we start configuring the runner account we will need to add it to the sudoers file as we will install software that requires sudo permissions.
Open the Terminal app and run the following command.
sudo visudoScroll down until you see the following three lines.
# root and users in group wheel can run anything on any machine as any user
root            ALL = (ALL) ALL
%admin          ALL = (ALL) ALL
Edit the lines to look as below.
# root and users in group wheel can run anything on any machine as any user
root            ALL = (ALL) ALL
runner          ALL=(ALL:ALL) ALL
%admin          ALL = (ALL) ALL
As recommended in Tart's FAQ we will reduce the DHCP lease time from 86,400 seconds (one day) to avoid exhausting the DHCP server's pool of IP Addresses. We reduce it to 7200 seconds (two hours).
sudo defaults write /Library/Preferences/SystemConfiguration/com.apple.InternetSharing.default.plist bootpd -dict DHCPLeaseTimeSecs -int 7200We are done making changes on the administrator account and will not configure the runner account which is responsible for running the Tartelet app.
Log out of the administrator account and into the runner account on the host machine.
The first thing you will be presented with after logging into the runner account is macOS' flow for setting up an account. Go through the flow by selecting the following options.
- "Not Now" when asked about Accessibility settings.
- "Continue" when informed about Data & Privacy.
- "Set Up Later" when asked to log in with an Apple ID.
- "Skip" when asked if you are sure that you want to skip signing in with an Apple ID.
- "Set Up Later" when asked to setup Screen Time.
- "Light" and then "Continue" when asked to choose the look of macOS.
Change the wallpaper of the runner account. The wallpaper should have been created when setting up the administrator account. Refer to "Change the wallpaper" step of "Configuring the Administrator Account" for details.
Follow the steps below to disable the screen saver.
- Navigate to the Lock Screen pane in the System Settings app.
- Select "Never" for the "Start Screen Saver when inactive" setting.
Enable fast user switching to show the account name in the menu bar. Refer to "Enable fast user switching" step of "Configuring the Administrator Account" for the steps.
Install Homebrew by following the official instructions. The instructions will ask you to run the following command in the Terminal app.
/bin/bash -c "$(curl -fsSL https://raw.githubusercontent.com/Homebrew/install/HEAD/install.sh)"Make sure to follow the instructions printed in the Terminal app after installing Hoembrew.
Use Homebrew to install Tart by running the following command in the Terminal app.
brew install cirruslabs/cli/tartInstall Tartelet on the host machine by following the steps in the Installing Tartelet guide.
Remove all applications from the Dock except Finder. Then add System Settings, Terminal, and Tartelet to the Dock. This reduces the clutter in the Dock and ensures we have the applications we need at hand.

Keep the Dock clean by removing recent applications. Refer to "Remove recent applications from the Dock" step of "Configuring the Administrator Account" for the steps.
The host machine is now ready to run Tartelet. Please refer to Configuring Tartelet for more information on setting up Tartelet.