Usage
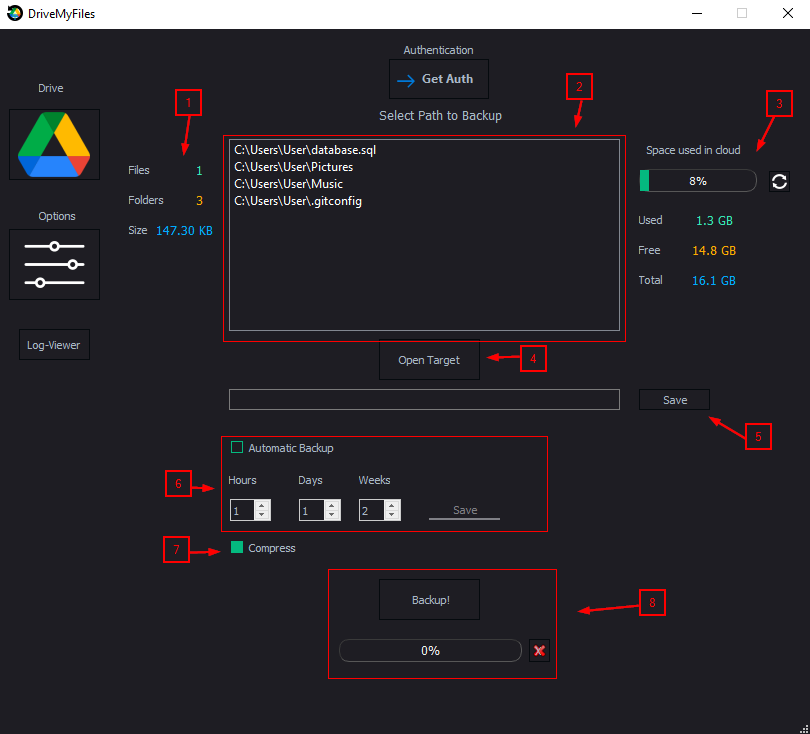
1 - Local metrics of number of files, folders and size
2 - List of selected directories and files to backup
3 - Indicator of free, used and total space in the Google Drive cloud
4 - button to open file explorer
5 - Button to save the selected path/paths in the file explorer
6 - Selector of the automatic backup frequency
7 - Check to compress or not the files before uploading the backup
8 - Button to start a manual backup and button to cancel the backup in course
We have already detailed the steps to follow to get the code that allows us to link your Google Drive account to our application.
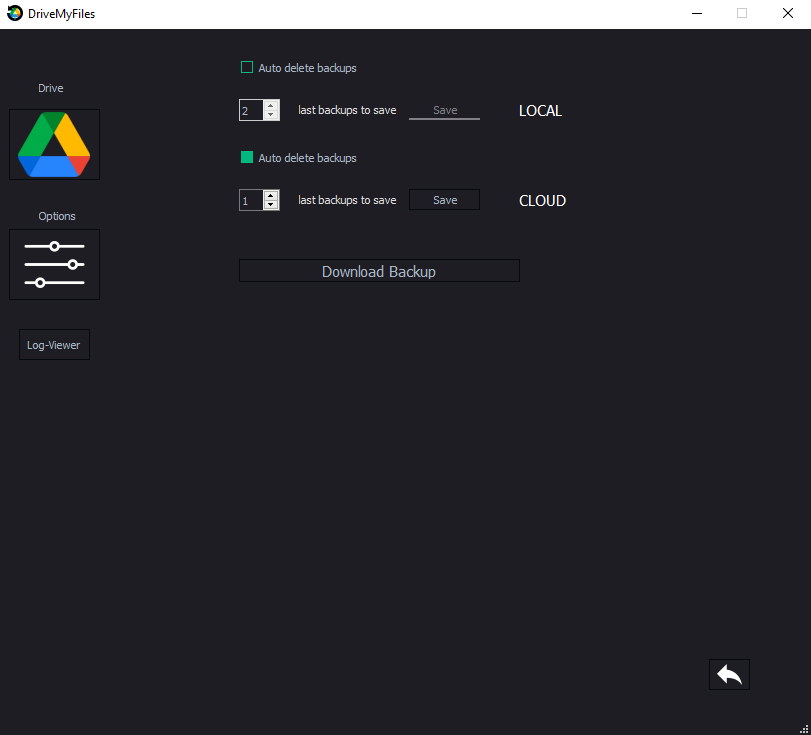
In this menu we find 3 options:
1st option "Auto delete backups" for the local side, where we select how many backups we want to keep on the hard disk.
2nd option "Auto delete backups" for the cloud side, where we can select how many backups we want to keep in the cloud.
3rd option "Download Backup" where we can select the backups we want to download manually.
For more info go to How to download my backups
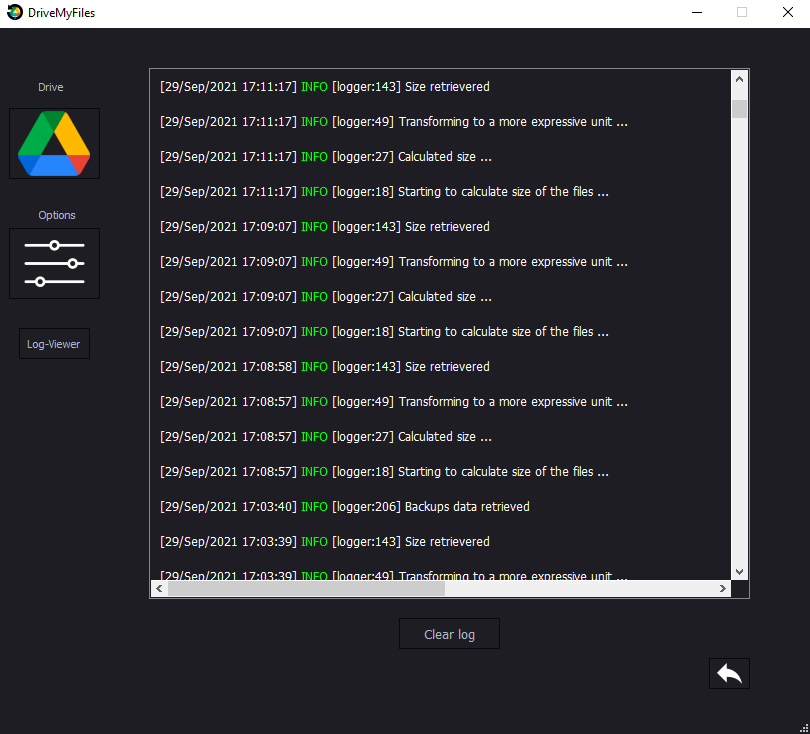
We can review the application logs, with the option to clean the log.
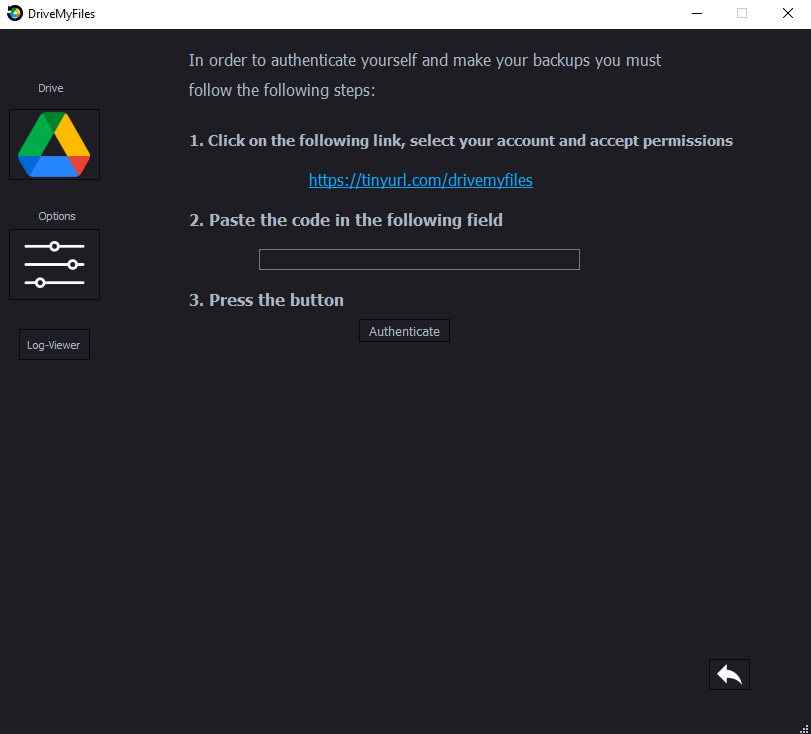
- Push the button "Get Auth" on the top of the main menu
- Access the following link: https://tinyurl.com/drivemyfiles
- Select the account you want to use, authorize the app and copy the code obtained
- Paste the code in the field and press the button "Authenticate".
- Once your Google Drive account is linked to the app, select the files or directories you want to backup and save the paths (check the next section).
- Choose whether you want to compress the files (Highly recommeded)
- Press "Backup!"
Local backups are placed in the "Temp" directory.
Pressing the "open target" button will open a file explorer, you can select 1 or several files or folders.

Once selected press the "open" button, this will cause them to be written to the bottom bar of the list of selected folders in the main menu.

Once they are there, just press the "save" button and the folders will be loaded and displayed in the path list, plus the size they occupy in the local metric area will be displayed.
If you right click on a directory/file you have selected you will have several options:
- Delete: Remove the directory/file so that it does not enter the backup.
- Edit: Update the selected directory/file with a new one.

If you leave the main menu while making a backup, it will continue to be done in the background but the updated progress bar will not appear, this also happens if the application is closed
Once your Google Drive account is linked and you have selected your files, check the "Automatic Backup" checkbox.
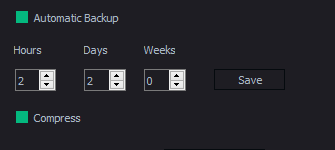
- Check the "Automatic Backup" checkbox
- Choose the backup frequency
- You can express the frequency in hours, days and weeks respectively:
- Ex: 1 0 0 means 1 time every hour.
- Ex: 2 2 0 means that the backup will be done every 2 days and 2 hours.
- You can express the frequency in hours, days and weeks respectively:
- Press the "Save" Button
The "save" button enables automatic backup
To disable an automatic backup just uncheck the option
It is not necessary to make a manual backup to enable this option, but the first time is recommended to check that there is no problem when making backups and everything is correct.
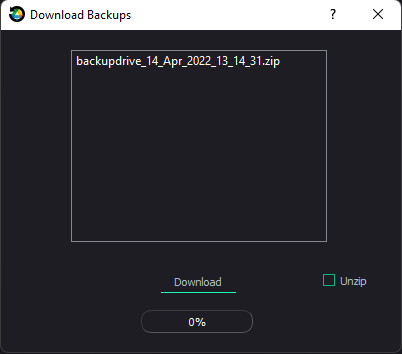
Go to "Options Menu" in the lateral sidebar from the main menu and press the "Download Backup" button
- Select the backup you want to to download, based on the date in which it was uploaded (they are sorted from most recent to oldest)
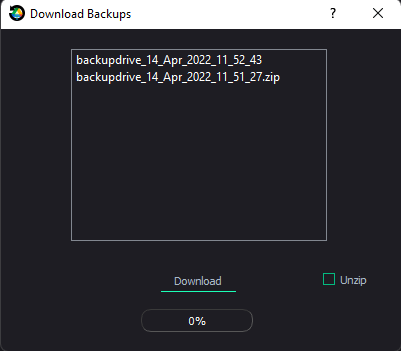
- Choose if you want to unzip the backup by checking the "Unzip" checkbox.
- Press the "Download" button.
Downloads will be placed in the "Downloads" directory.