
Favoriot offers an IOT platform specifically designed for any Internet of Things (IoT) projects. The platform is developed to support the integration of data from sensors and actuators on the internet. Collecting and storing data from IOT devices become much easier. Moreover, the platform also helps developers in building vertical applications without worry about the hosting.
This article will present a step by step example how to upload analog value of a potentiometer from ESP32 development board to Favoriot IoT platform. Watch video below (or click here) for its demonstration, then follow these instructions to start building your project with ESP32 & Favoriot.

To build this project, you need the following items:
- 1 ESP32 board (I'm using NodeMCU 32S)
- 1 breadboard
- 1 potentiometer
- some jumper wires
- Arduino IDE (download here)
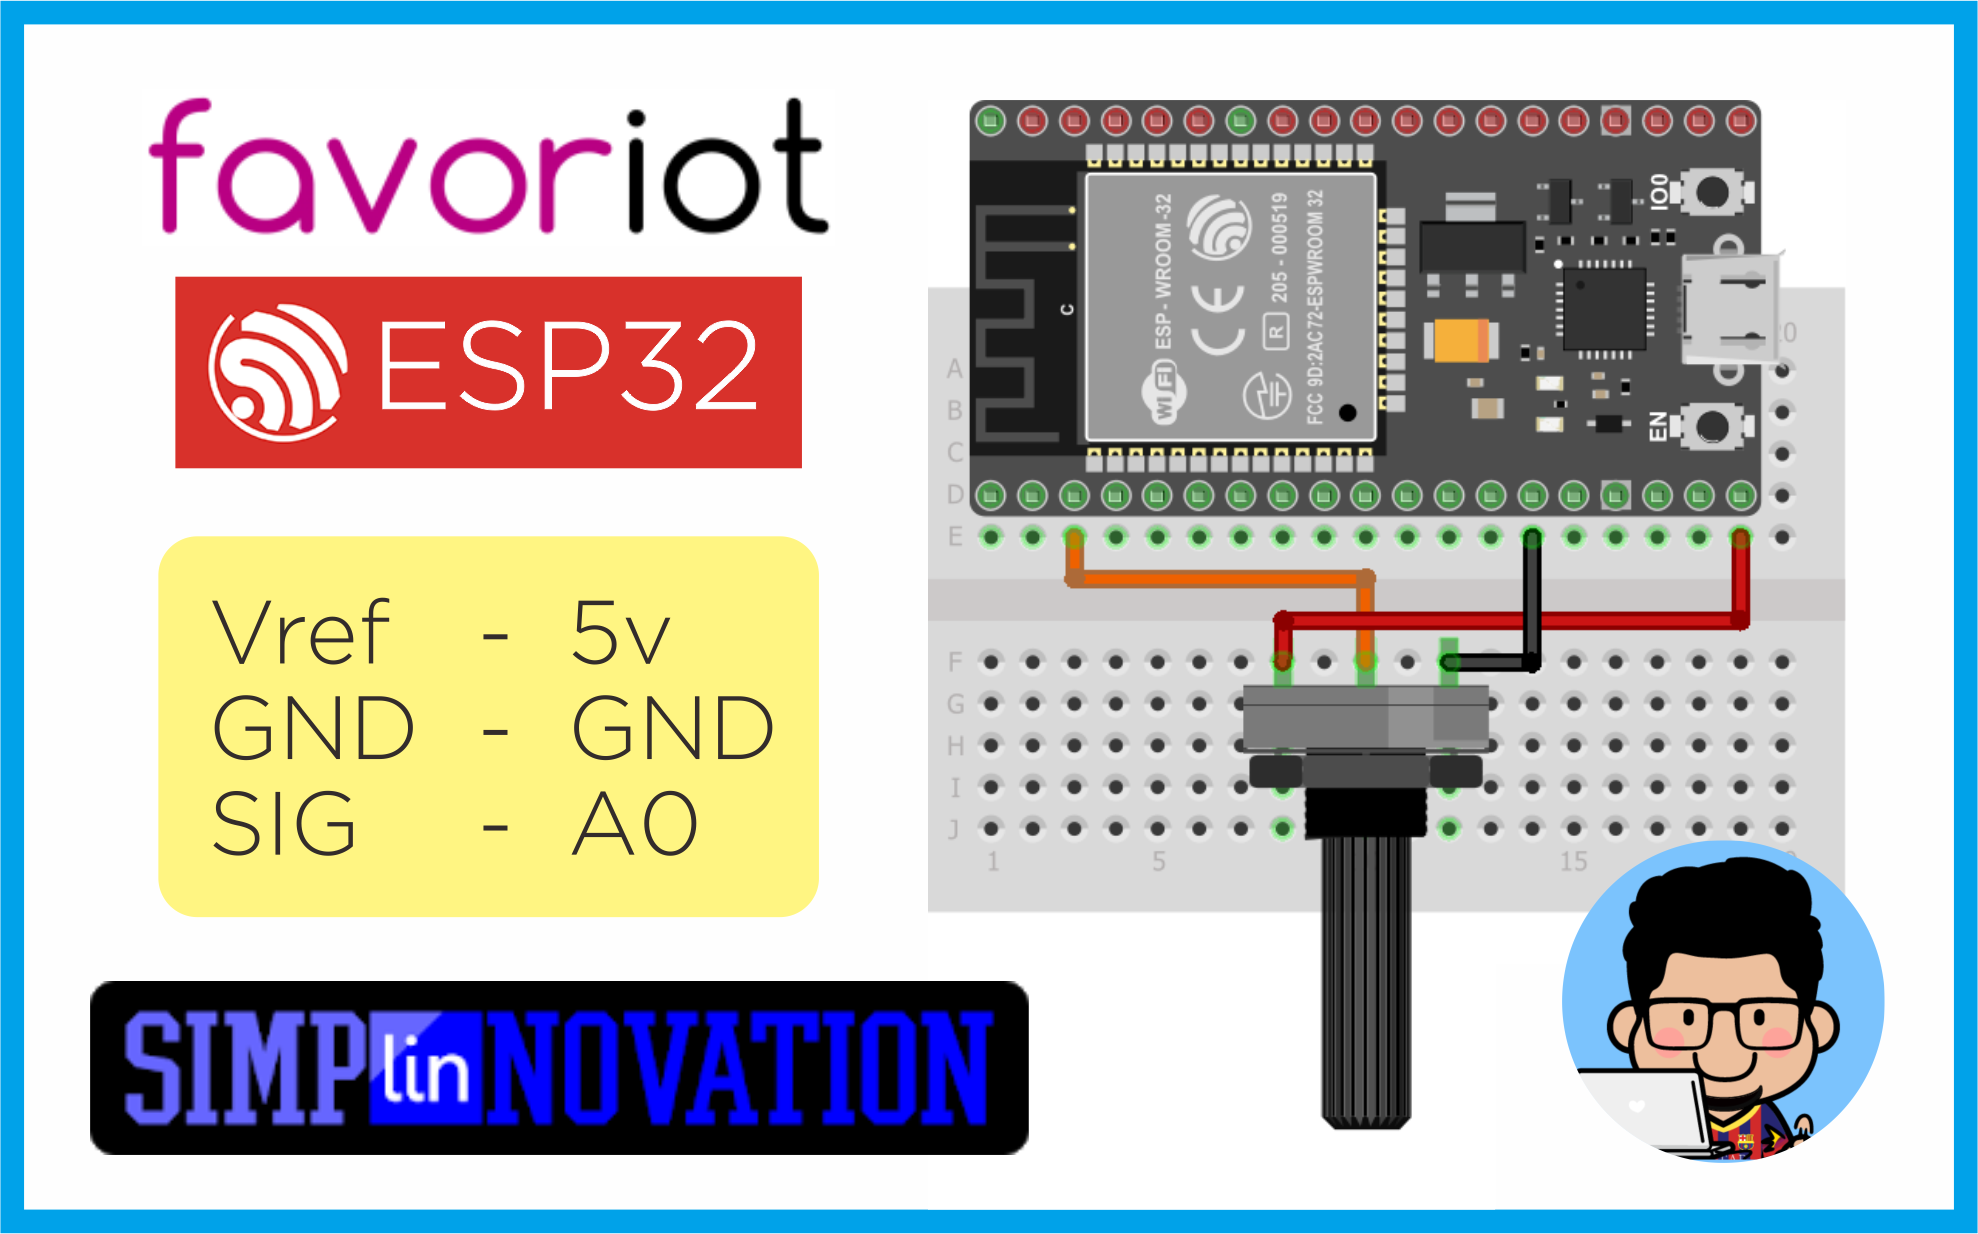
Gather your parts then follow the schematics below.
-
Device Developer ID
Signup & login to Favoriot. If you are registered in Favoriot, you have a default device already created for you. Go to right platform on https://platform.favoriot.com and see the device panel to see the devices that are present. Basically you need the
device_developer_idthat might be something likedefaultDevice@myusername. But if you want, you can create a new device and use it in this example. -
API Key
Now, go to your Favoriot Account Setting which is available on the top right corner in the dropdown and check your API key. You need this API key to complete this example. It's a big alphanumeric token like:
'986673a6377ef1fde2357ebdcb0da582lintang150b00cabcd5a0d83045425407ab4'
First you need to install ESP32 platform on Arduino IDE, follow these instructions: click here. Copy sketch below to your Arduino IDE. Make sure you have chosen the right option for Board and Port under Tools menu, then upload to your Arduino board.
#include <SPI.h>
#include <WiFi.h>

char ssid[] = "your_network_SSID";      // change it!
char pass[] = "your_network_password";  // change it!
const String yourDevice = "deviceDefault@your_Username"; // change it!
int status = WL_IDLE_STATUS;
char server[] = "api.favoriot.com";
WiFiClient client;

void setup() {
  Serial.begin(115200);
  WiFi.disconnect();
  Serial.println("Connecting...");
  WiFi.begin(ssid,pass);
  while((!(WiFi.status() == WL_CONNECTED))){
    delay(300);
    Serial.print("...");
  }
  Serial.println(WiFi.status());
  Serial.println("Connected!");
  Serial.println("");
}

void loop() {
  String myData = String(analogRead(A0));
  String json = "{\"device_developer_id\":\""+yourDevice+"\",\"data\":{\"Data\":\""+myData+"\"}}";
  Serial.println(json);
  if (client.connect(server, 80)) {
    client.println("POST /v1/streams HTTP/1.1");
    client.println("Host: api.favoriot.com");
    client.println(F("apikey: your_API_key"));  // change it!
    client.println("Content-Type: application/json");
    client.println("cache-control: no-cache");
    client.print("Content-Length: ");
    int thisLength = json.length();
    client.println(thisLength);
    client.println("Connection: close");
    client.println();
    client.println(json);
  }
  while (client.available()) {
    char c = client.read();
    Serial.write(c);
  }
  if (!client.connected()) {
    client.stop();
  }
  delay(5000);
}
To upload multiple values, use this:
String json = "{\"device_developer_id\":\"deviceDefault@User\",
\"data\":{ \"Sensor_1\":\""+sensor1+"\",
           \"Sensor_2\":\""+sensor2+"\",
           \"Sensor_3\":\""+sensor3+"\" }
}";Now you can monitor your potentiometer value every 5 seconds on Favoriot dashboard. For more information about Favoriot, read its full documentation: click here.
My other tutorials on Favoriot:
Lintang Wisesa 💌 lintangwisesa@ymail.com
Facebook | Twitter | Google+ | Youtube | :octocat: GitHub | Hackster