
Ultrasonic Flying Game is a simple Arduino & Processing project that visualize the value of distance from ultrasonic sensor into altitude of a plane image. First, I wanna say big thanks to Mr. Roux Benjamin from France, for his basic instructions and fast respond replying my questions. Watch the video below (click here) to see its action, then follow the instructions below to build your own Ultrasonic Flying Game!
To build this project, you need the following items:
- 1 Arduino Uno board
- 1 HC-SR04 ultrasonic sensor
- 1 proto board shield or any breadboard
- some jumper wires
- Arduino IDE (download here)
- Processing IDE (download here)
Gather your parts then follow the schematics below.
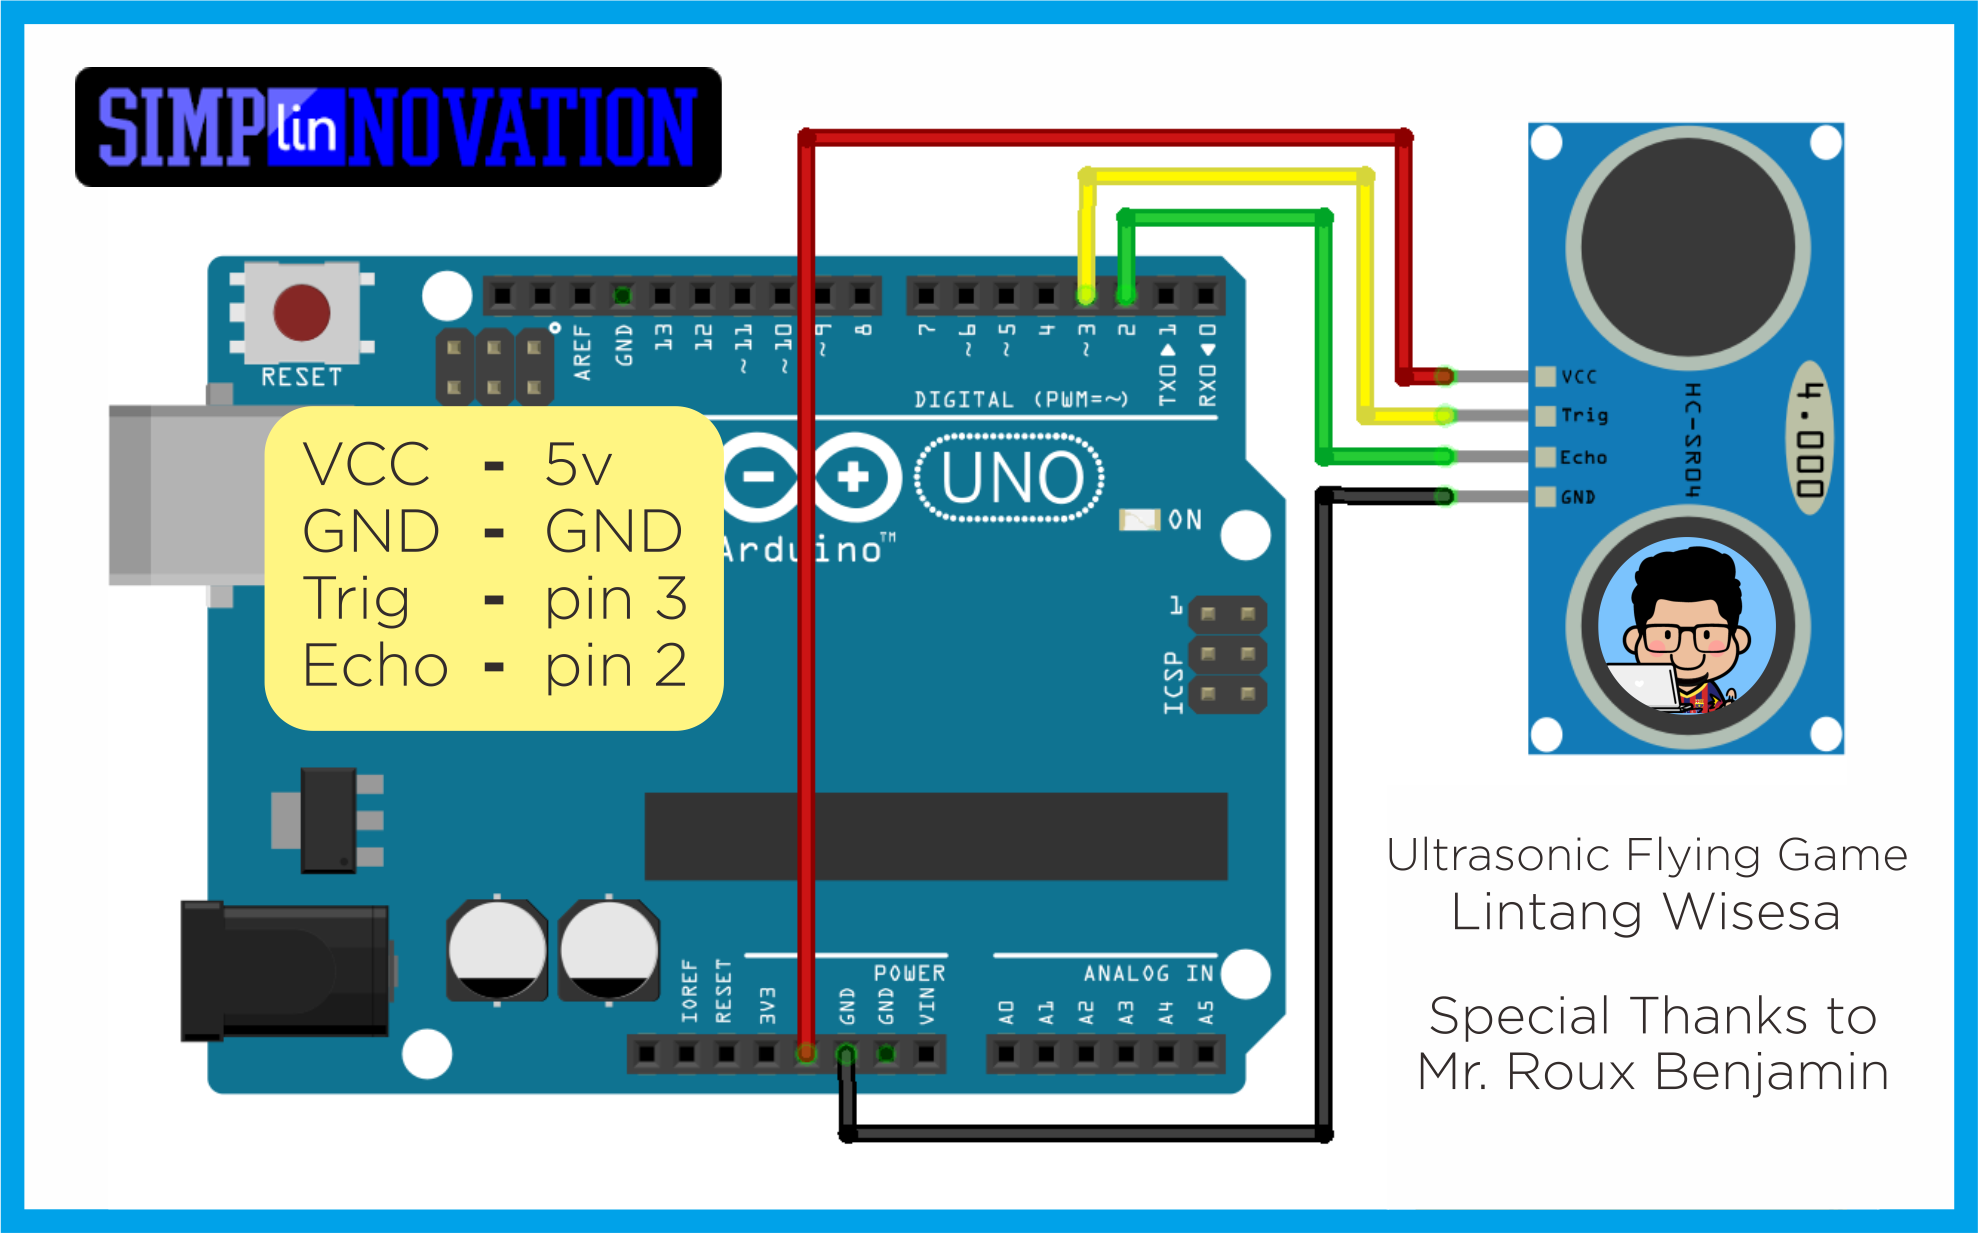
-
Open Arduino IDE then copy sketch below. Make sure you have chosen the right option for Board and Port under Tools menu, then upload to your Arduino board.
 int echoPin = 2;
 int triggerPin = 3;
 unsigned long waktu = 0;
 unsigned jarakNow = 0;
 unsigned jarakOld = 0;

 void setup (){
     pinMode (echoPin, INPUT);
     pinMode (triggerPin, OUTPUT);
     Serial.begin(9600);
 }

 void loop(){
     digitalWrite(triggerPin, LOW);
     delayMicroseconds(100);
     digitalWrite(triggerPin, HIGH);
     delayMicroseconds(100);
     digitalWrite(triggerPin, LOW);
     waktu = pulseIn(echoPin, HIGH);
     jarakNow = waktu / 58;
     delay(10);
     if (jarakOld != jarakNow) {
         Serial.println(jarakNow);
         jarakOld = jarakNow;
     }
     delay(50);
 }
-
After Arduino sketch uploaded to your Arduino board, open Processing IDE then copy sketch below. Before you run this code, pay attention to this line:
myPort = new Serial(this, Serial.list()[0], 9600);
-
Edit
[0]with[your__port]. Read on Processing documentation to know how to find the right corresponding port. Then run sketch below.int i, j; float Tinggi; float Sudut; int Jarak1; int Jarak2; float BurungX; float BurungY; float RumputX; String DataIn; float [] AwanX = new float[6]; float [] AwanY = new float[6]; PImage Awan; PImage Burung; PImage Pesawat; PImage Rumput; import processing.serial.*; Serial myPort; void setup() { myPort = new Serial(this, Serial.list()[0], 9600); // change '[0]' with '[Arduino_port_on_Processing]'! myPort.bufferUntil(10); frameRate(30); size(800, 600); rectMode(CORNERS); noCursor(); textSize(16); Tinggi = 300; Awan = loadImage("awan.png"); Burung = loadImage("burung.png"); Pesawat = loadImage("pesawatku.png"); Rumput = loadImage("rumput.png"); for (int i = 1; i <= 5; i = i+1) { AwanX[i]=random(1000); AwanY[i]=random(400); } } void serialEvent(Serial p) { DataIn = p.readString(); Jarak2 = int(trim(DataIn)); println(Jarak2); if (Jarak2 > 1 && Jarak2 < 100) { Jarak1 = Jarak2; } } void draw() { background(0, 0, 0); Ciel(); fill(5, 72, 0); for (int i = -2; i <= 4; i = i+1) { image(Rumput, 224*i + RumputX, 550, 224, 58); } RumputX = RumputX - cos(radians(Sudut)) * 10; if (RumputX < -224) { RumputX = 224; } text(Sudut, 10, 30); text(Tinggi, 10, 60); Sudut = (18- Jarak1) * 4; Tinggi = Tinggi + sin(radians(Sudut)) * 10; if (Tinggi < 0) { Tinggi=0; } if (Tinggi > 600) { Tinggi=600; } TraceAvion(Tinggi, Sudut); BurungX = BurungX - cos(radians(Sudut))*10; if (BurungX < -30) { BurungX=900; BurungY = random(600); } for (int i = 1; i <= 5; i = i+1) { AwanX[i] = AwanX[i] - cos(radians(Sudut))*(10+2*i); image(Awan, AwanX[i], AwanY[i], 300, 200); if (AwanX[i] < -300) { AwanX[i]=1000; AwanY[i] = random(400); } } image(Burung, BurungX, BurungY, 72, 46); } void Ciel() { noStroke(); rectMode(CORNERS); for (int i = 1; i < 600; i = i+10) { fill( 49 +i*0.165, 118 +i*0.118, 181 + i*0.075 ); rect(0, i, 800, i+10); } } void TraceAvion(float Y, float SudutInklinasi) { noStroke(); pushMatrix(); translate(400, Y); rotate(radians(SudutInklinasi)); scale(0.5); image(Pesawat, -111, -55, 400, 196); popMatrix(); }
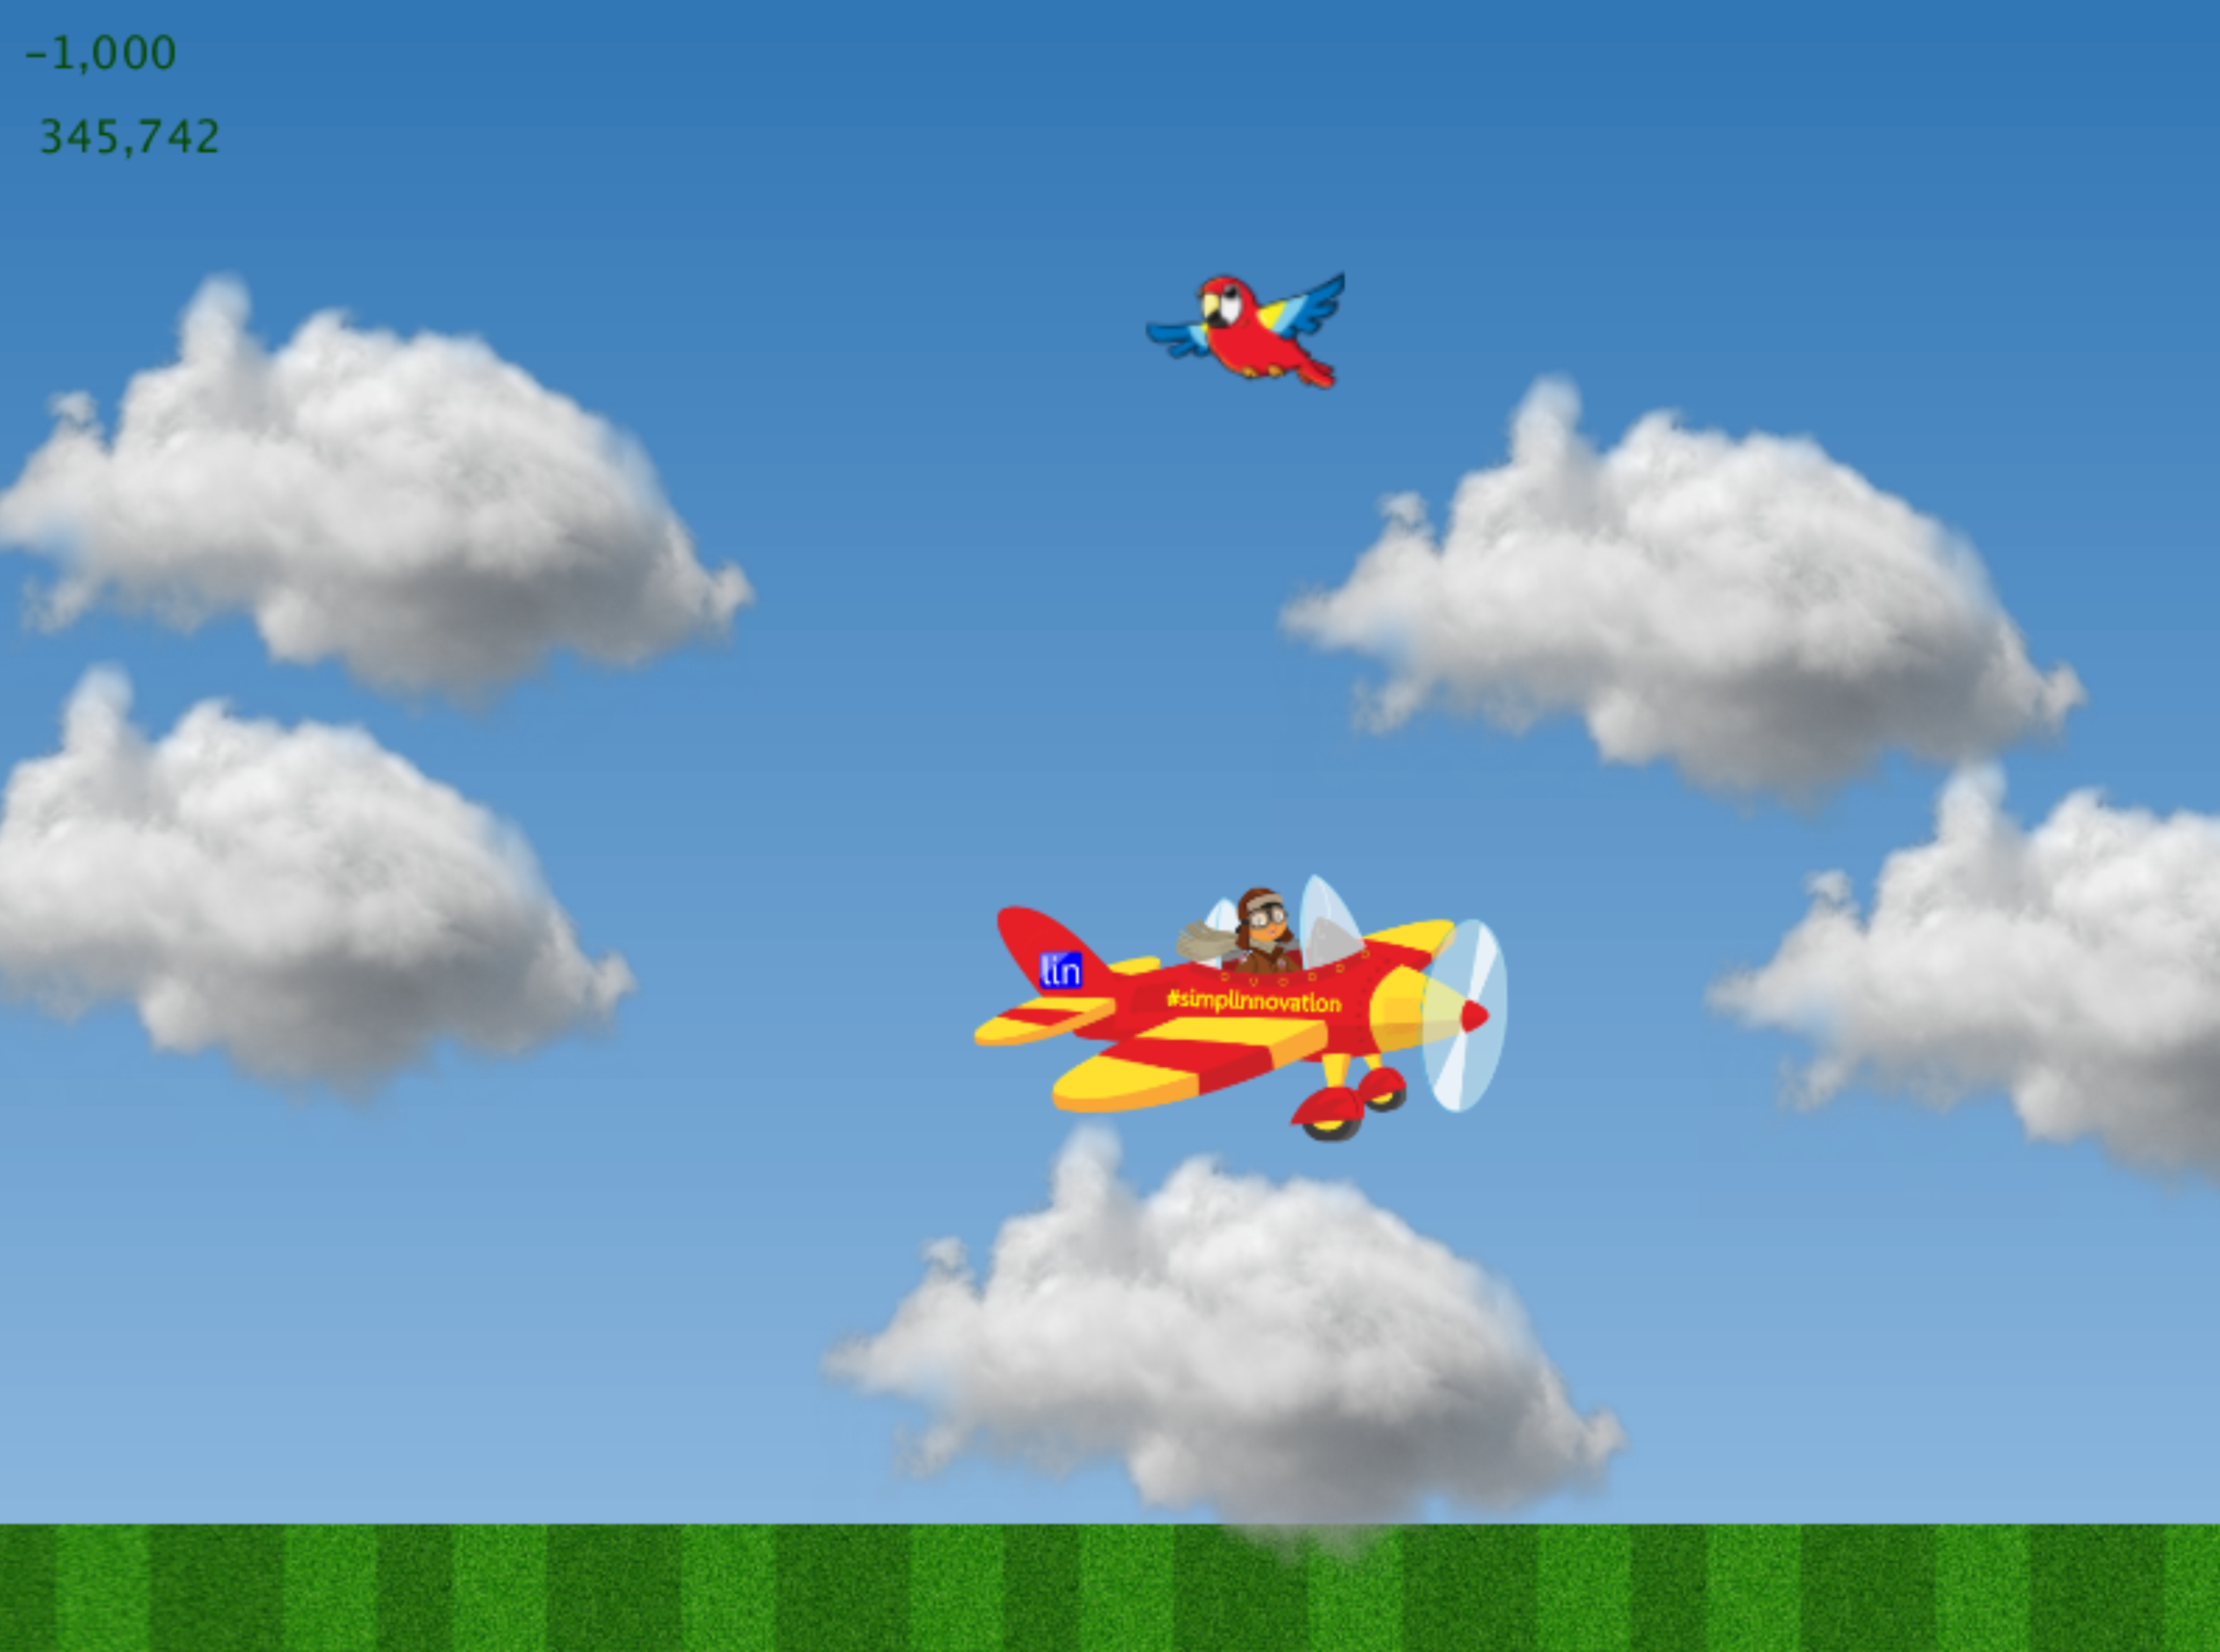
- If everything goes well, now you can control the plane's altitude by set our hand's above the ultrasonic sensor. Enjoy!
Lintang Wisesa 💌 lintangwisesa@ymail.com
Facebook | Twitter | Google+ | Youtube | :octocat: GitHub | Hackster