-
Notifications
You must be signed in to change notification settings - Fork 0
(Guide) How to cut recorded videos with Adobe Premiere Pro CS5.5
- Preparation
- Start the application
- Windows in Adobe Premiere Pro CS5.5
- Sequence
- Import new videos
- Synchronize and cut videos
- Set positions
- Improve overlapping borders with color-settings and brightness
- Export results
- HandBrake Converting
The computer, we use for cutting videos, is the iMac 27". First ask a lab-member for the password, then login with the user-account sitcomlab.
Before you start cutting and merging the videos, you should create 5 folders, e.g. on the desktop. Name them like:
- Project_yourName <!-- Mainfolder -->
------ SD CARD 1 (Left) <!-- Subfolder -->
------ SD CARD 2 (Center)
------ SC CARD 3 (Right)
------ results
Load the videos from the SD Cards into their corresponding folders. In the last folder results you will export your final results.
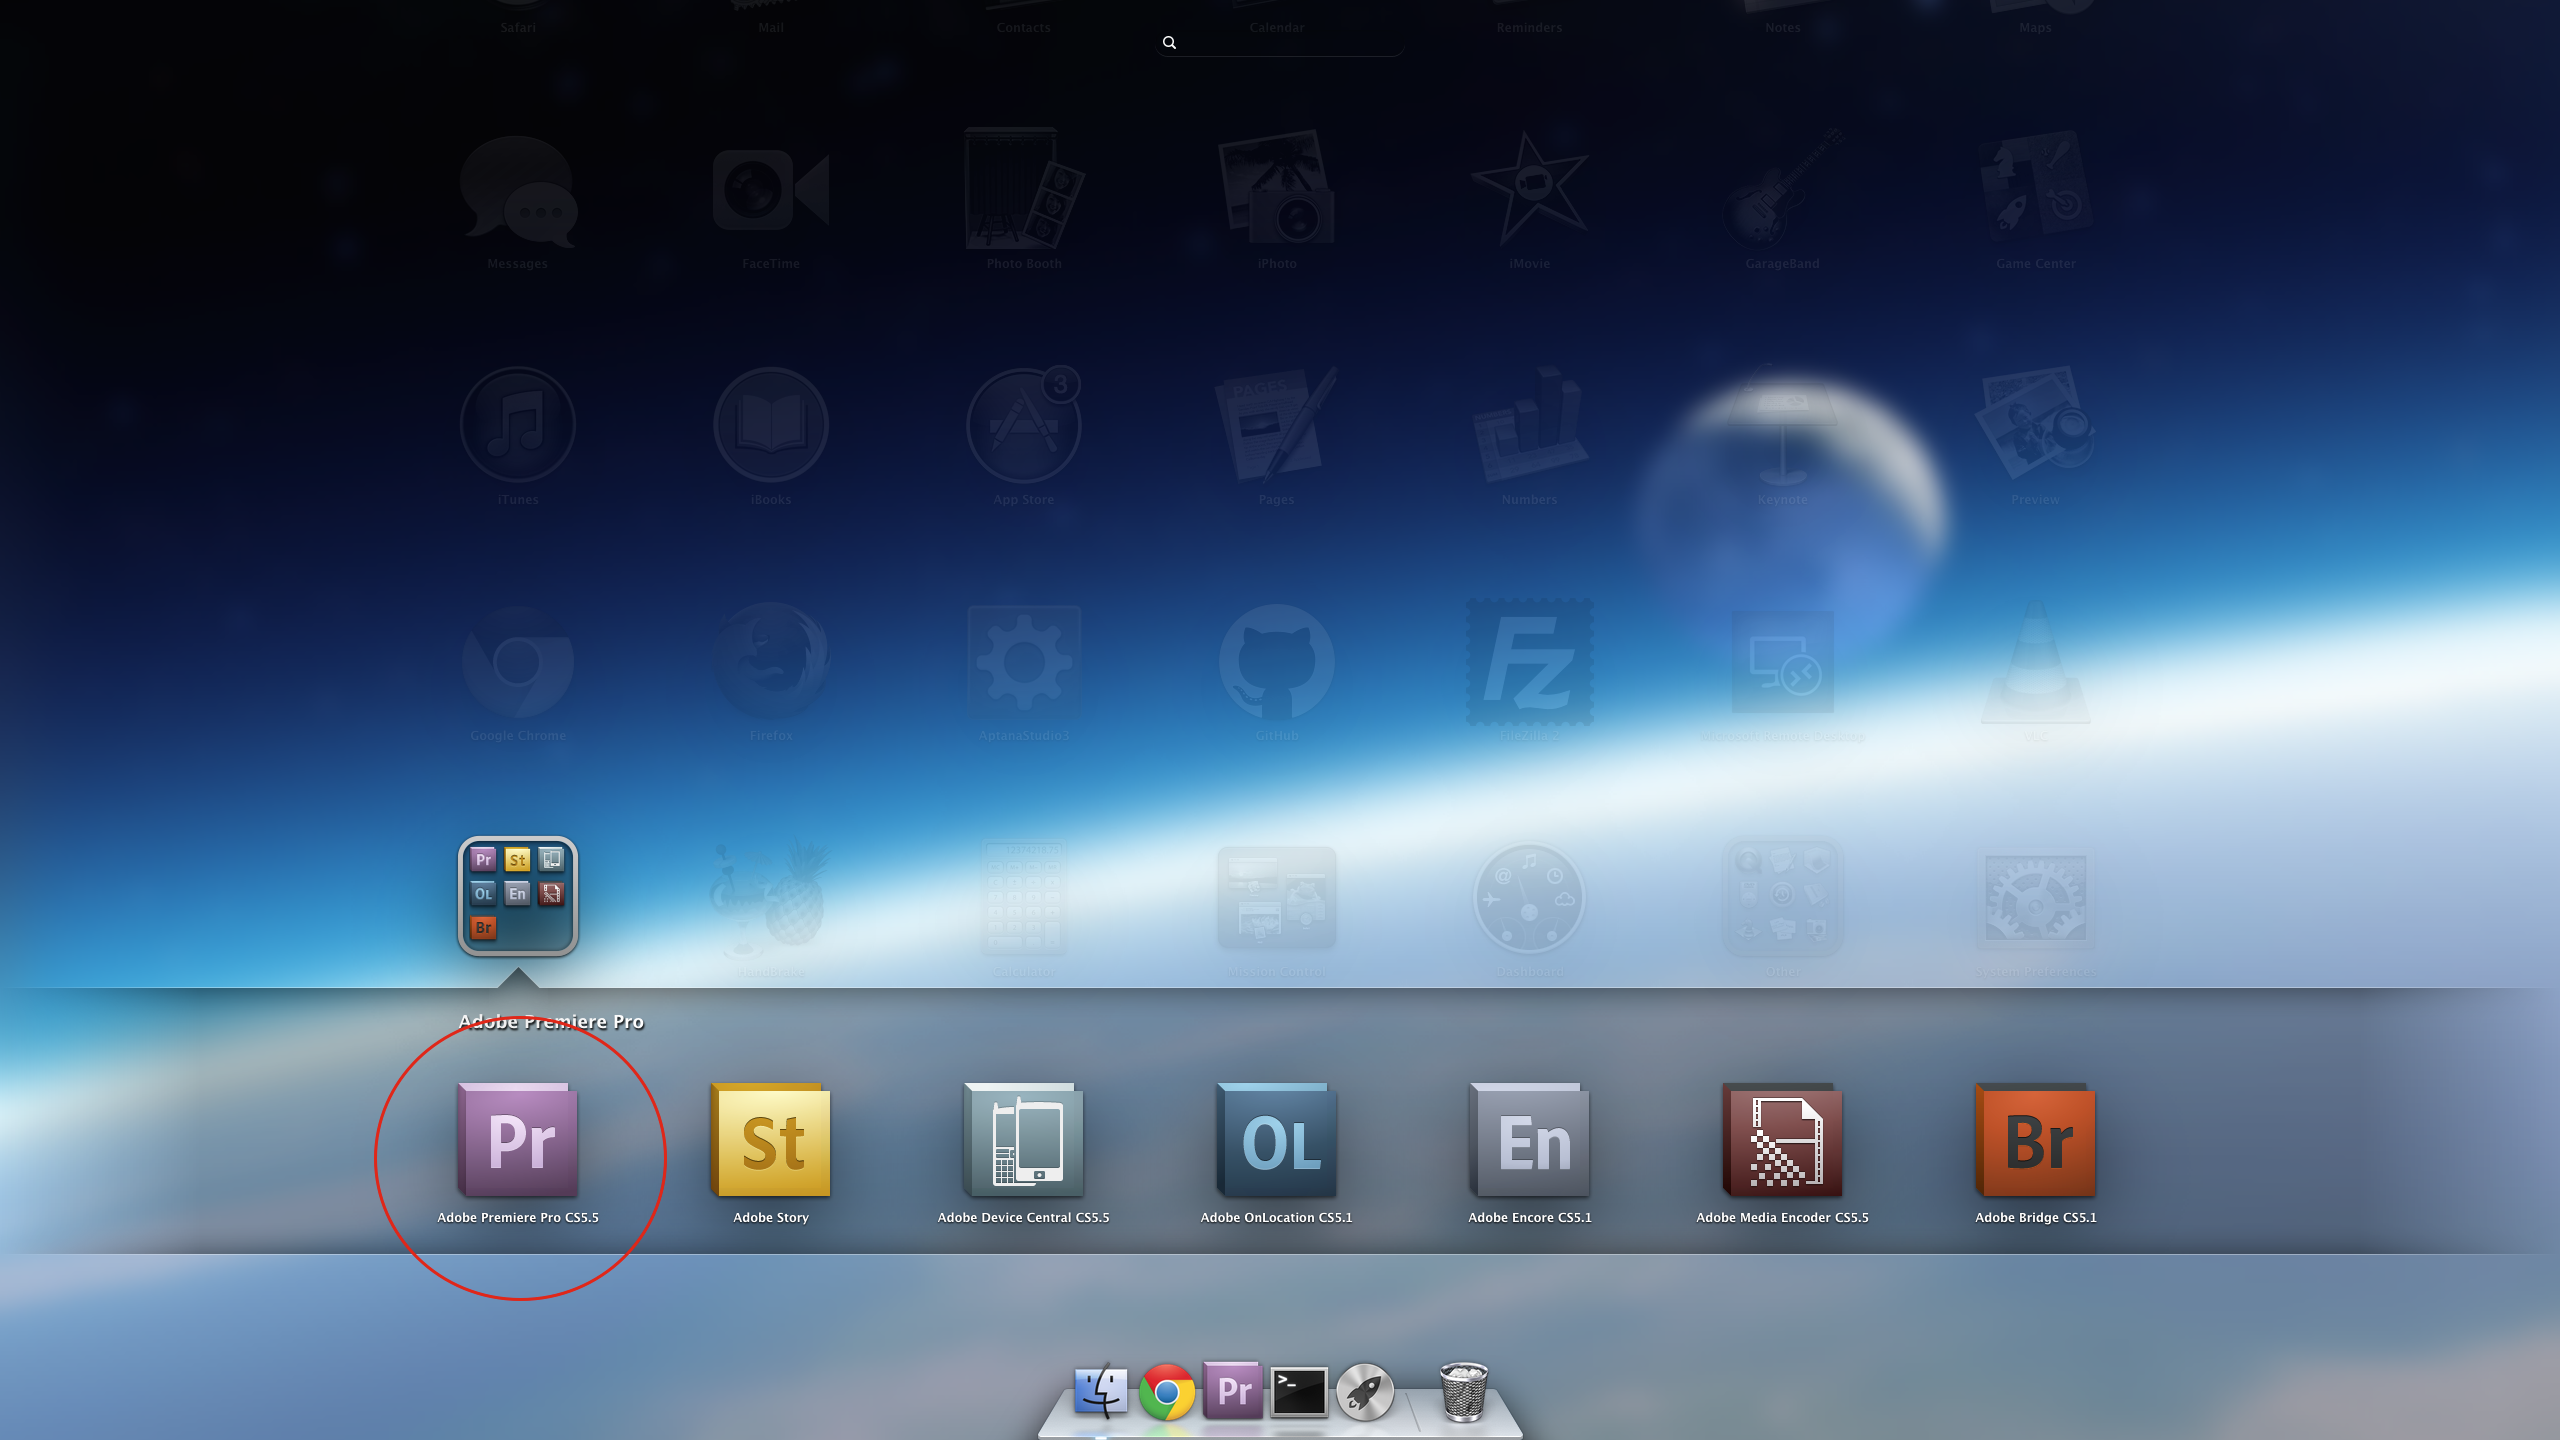
- Now you can start Adobe Premiere Pro CS5.5. The screenshot shows you, where you can find it:
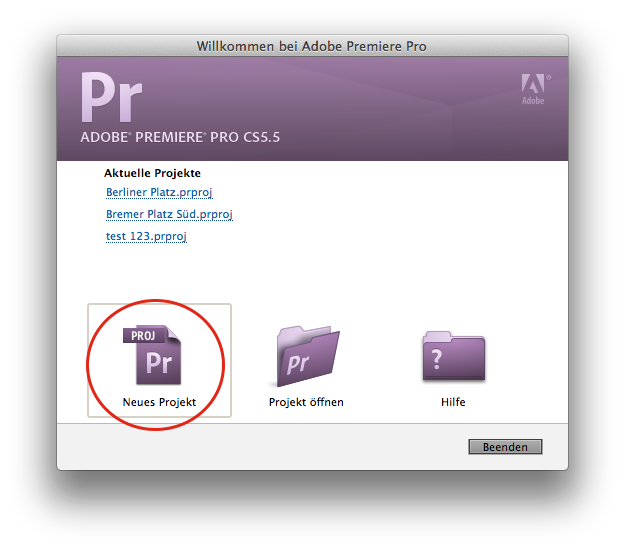
- Create a new Project ...
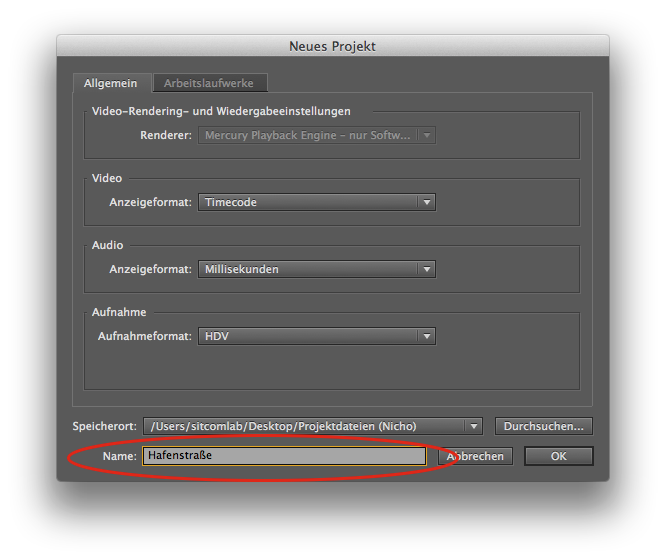
- ... and name it (e.g.
StreetName) ...
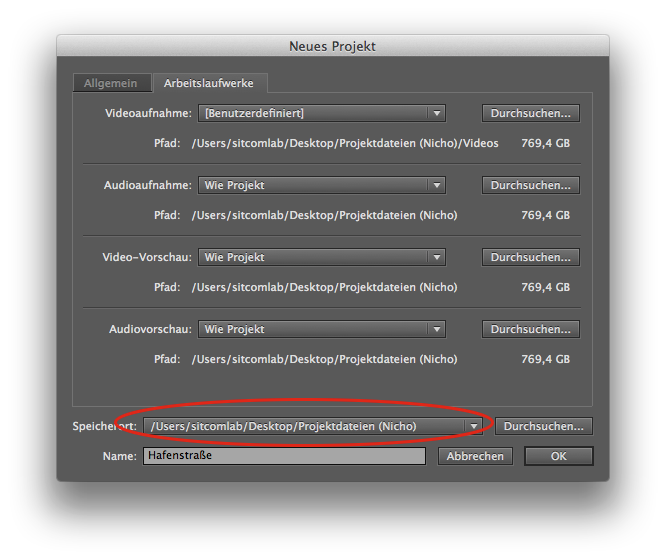
- ... then save it in your main-folder
Project_yourName
- The application will create a new project and ask you in a new window for requirements. Should the requirements not already set, please choose: Eigene Vorgaben - IPED Videos.
(If you can't see the requirements, you can find them in the GitHub-Repository in the foldersettings/Adobe Premiere Pro/iPED-Video.sqpreset. Insert this file in the folder:sitcomlab/Documents/Adobe/Premiere Pro/5.5/Settings/Eigene/iPED-Video.sqpreseton the Mac. After that start the application again.
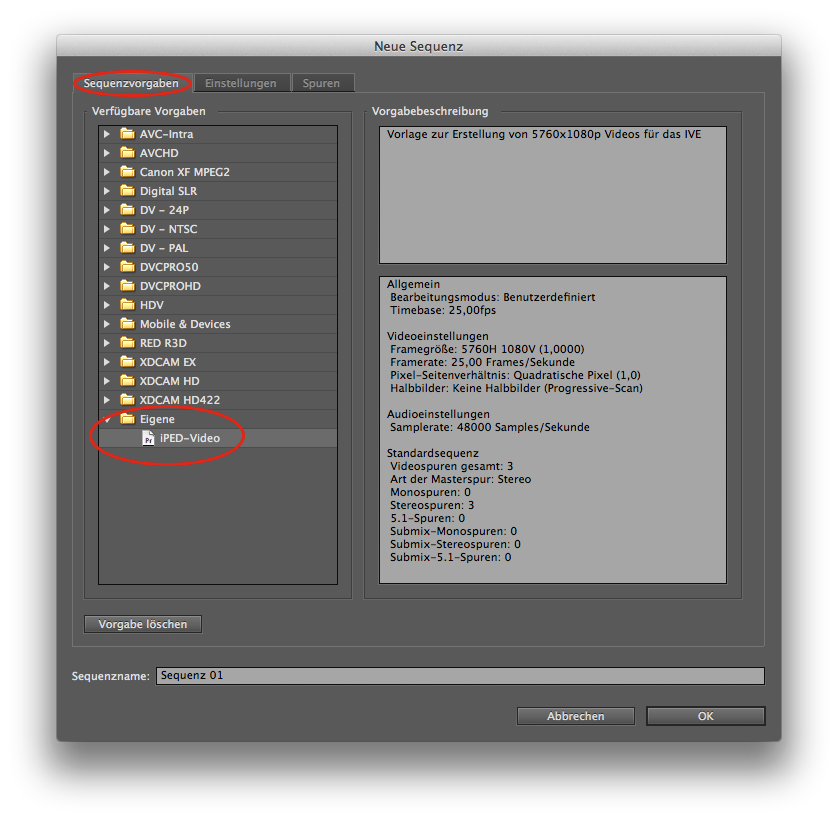
- Please make sure that the settings are the same like in the following screenshots:
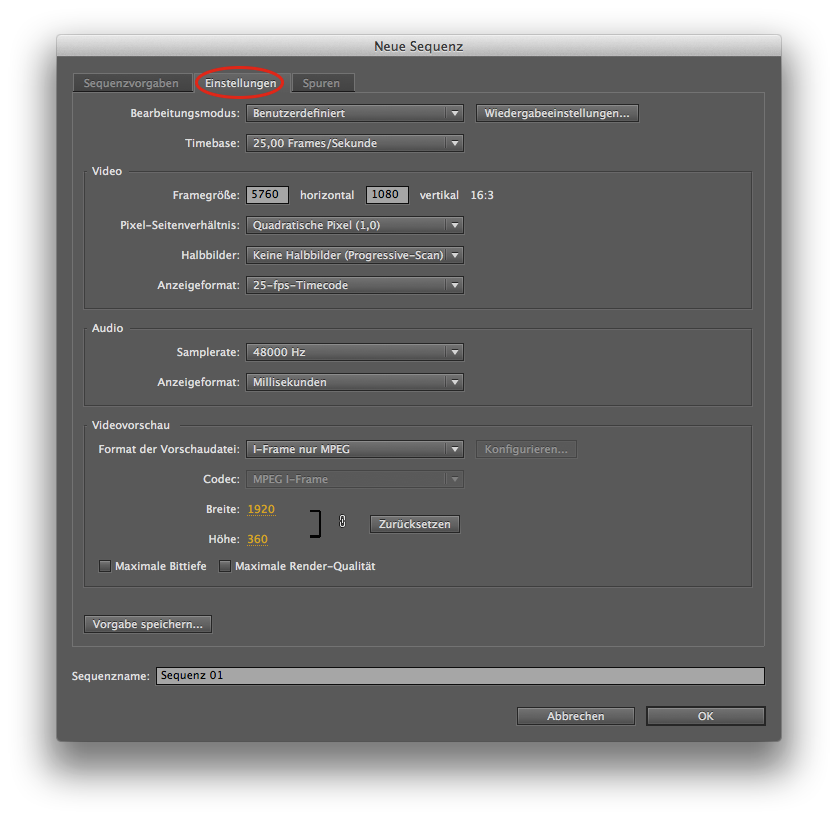
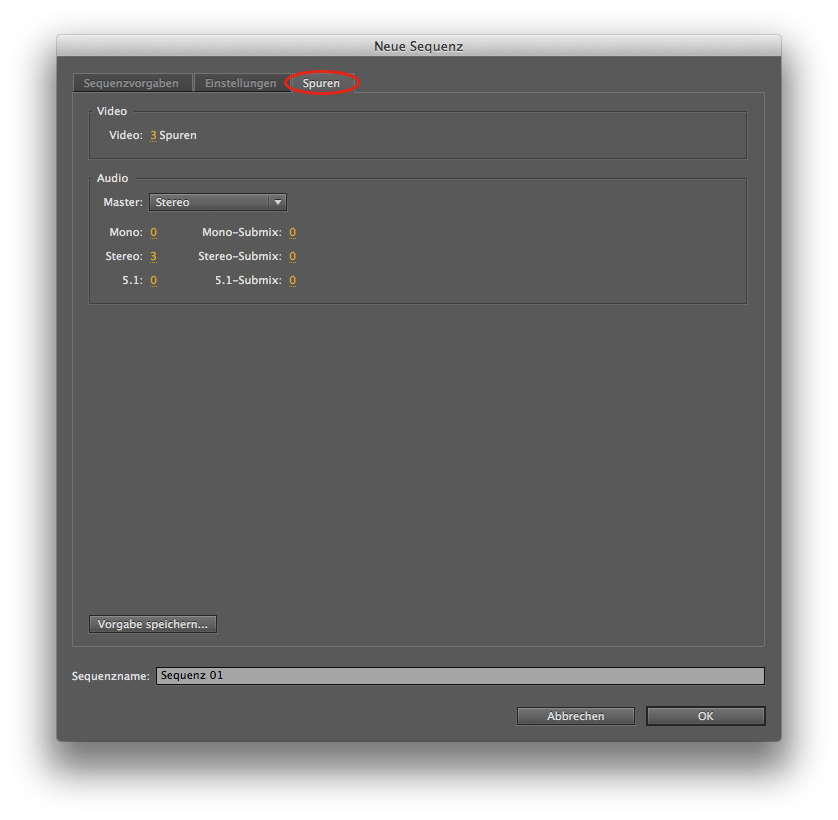
- Please check before you continue, if you can see all windows/toolpanels of the application. Adobe Premiere Pro CS5.5 should look like the following screenshot:
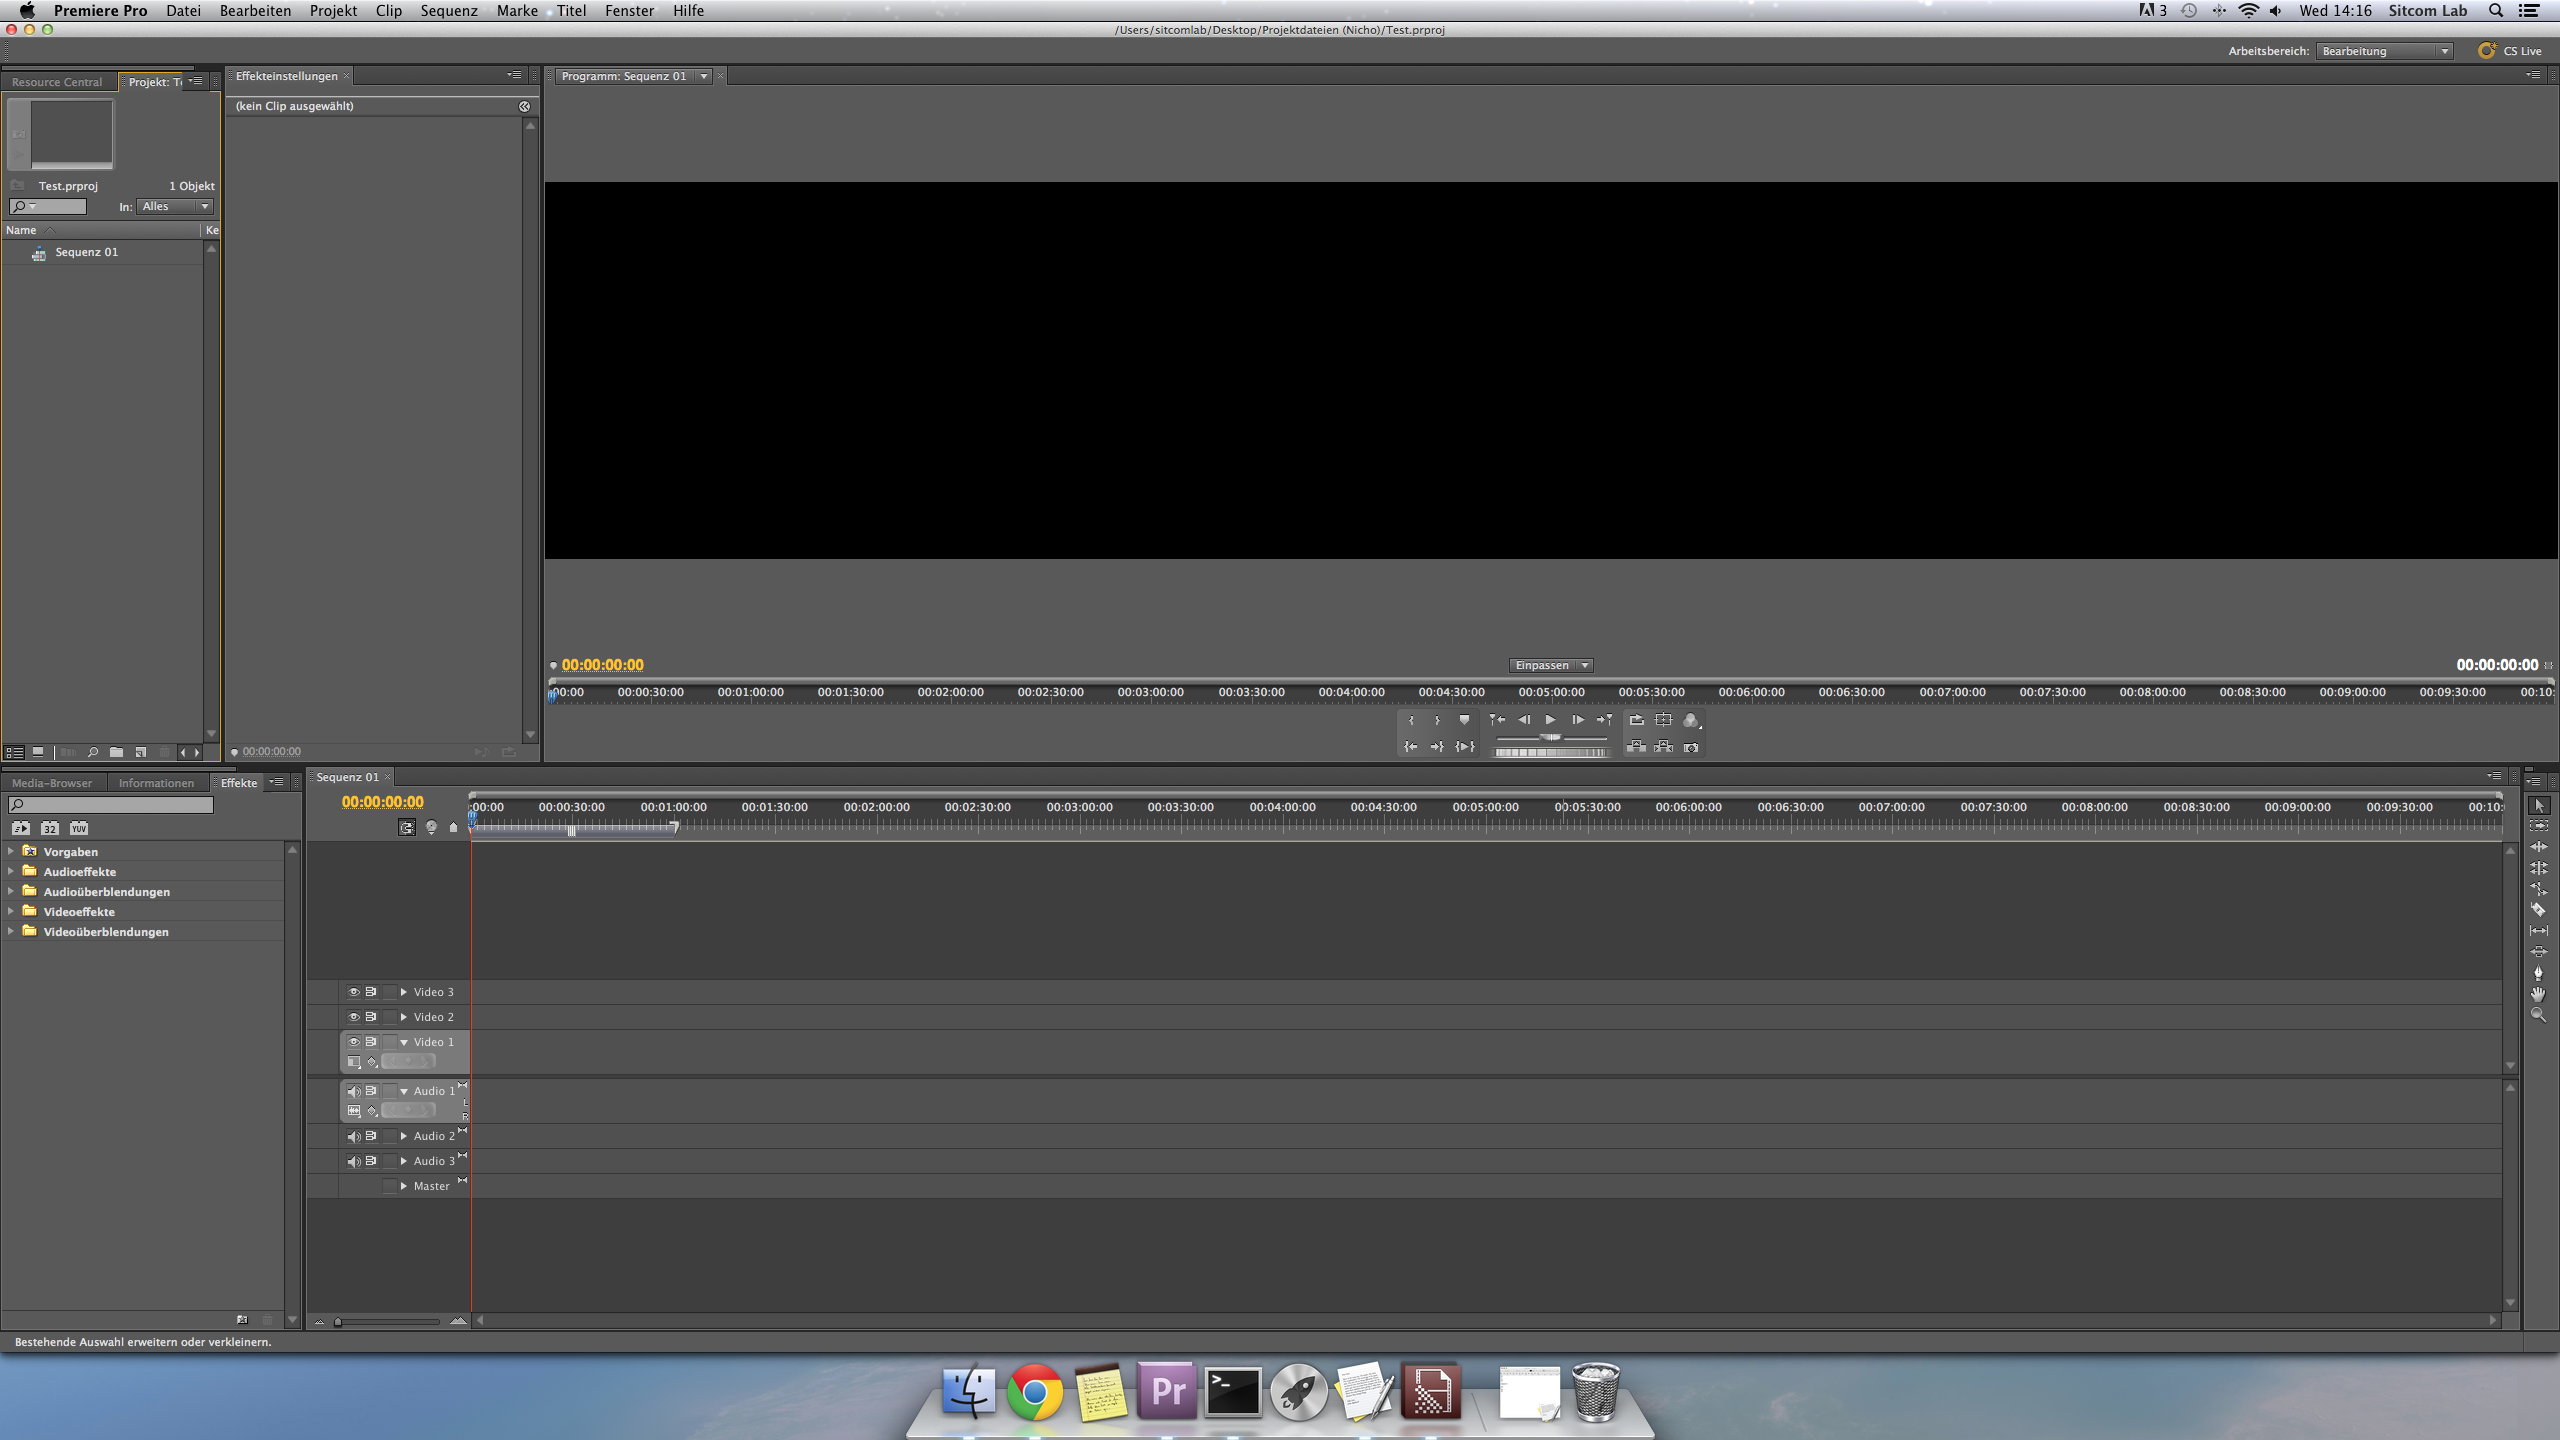
- If you can't see all windows/toolpanels, here is a list of the required elements. You can find them in the headerbar on the option
windows(fenster). The list should contain the following selected windows:
| Window | (Fenster) |
|---|---|
| Effects | (Effekte) |
| Effectsettings | (Effekteinstellungen) |
| Options | (Optionen) |
| Programmonitor or Programview -> SequenceName | Programmmonitor or Programmansicht -> SequenzName |
| Project | (Projekt) |
| Tools | (Werkzeuge) |
- After that you can change their postions via Drag & Drop by using this button on the upper right corner of a window:

Blue areas show you possibilites to fix the window.
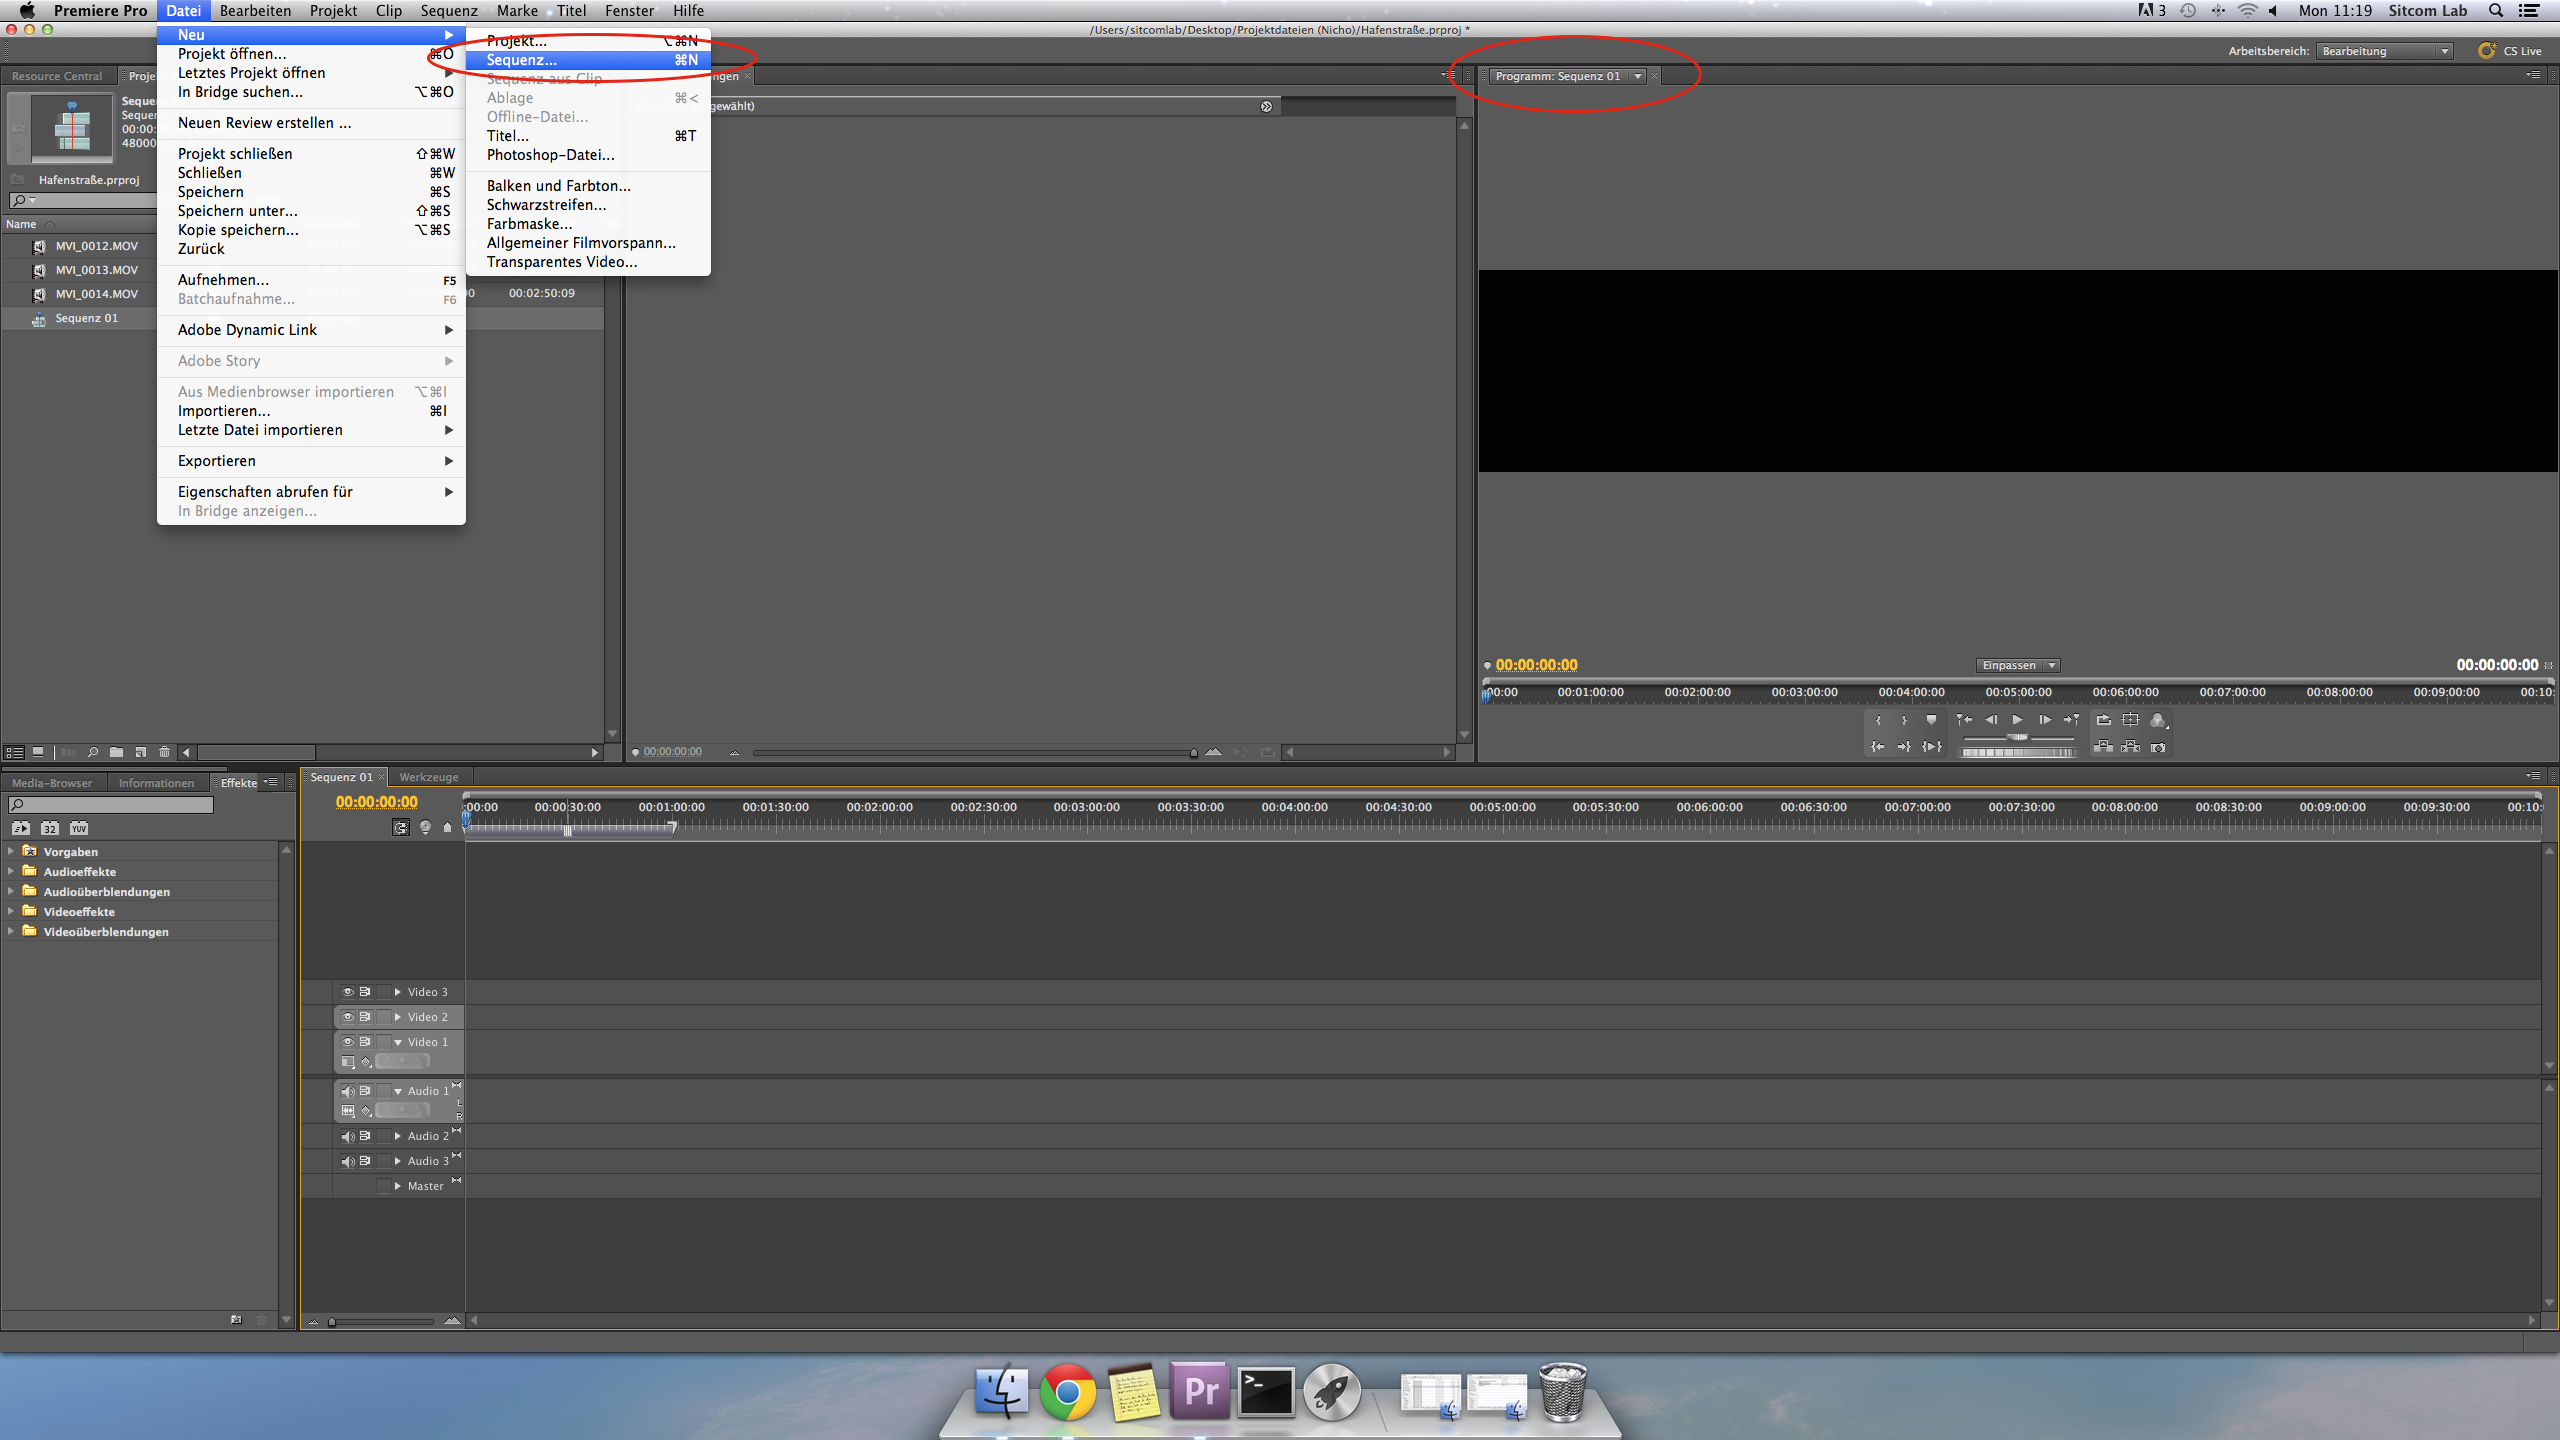
- If Adobe Premiere Pro shouldn't already created a new sequence for you, you can create one by yourself. Click
Datei -> Sequenz. The sequence should be created with the corresponding requirements (see: 2. Start (Adobe Premiere Pro CS5.5)).
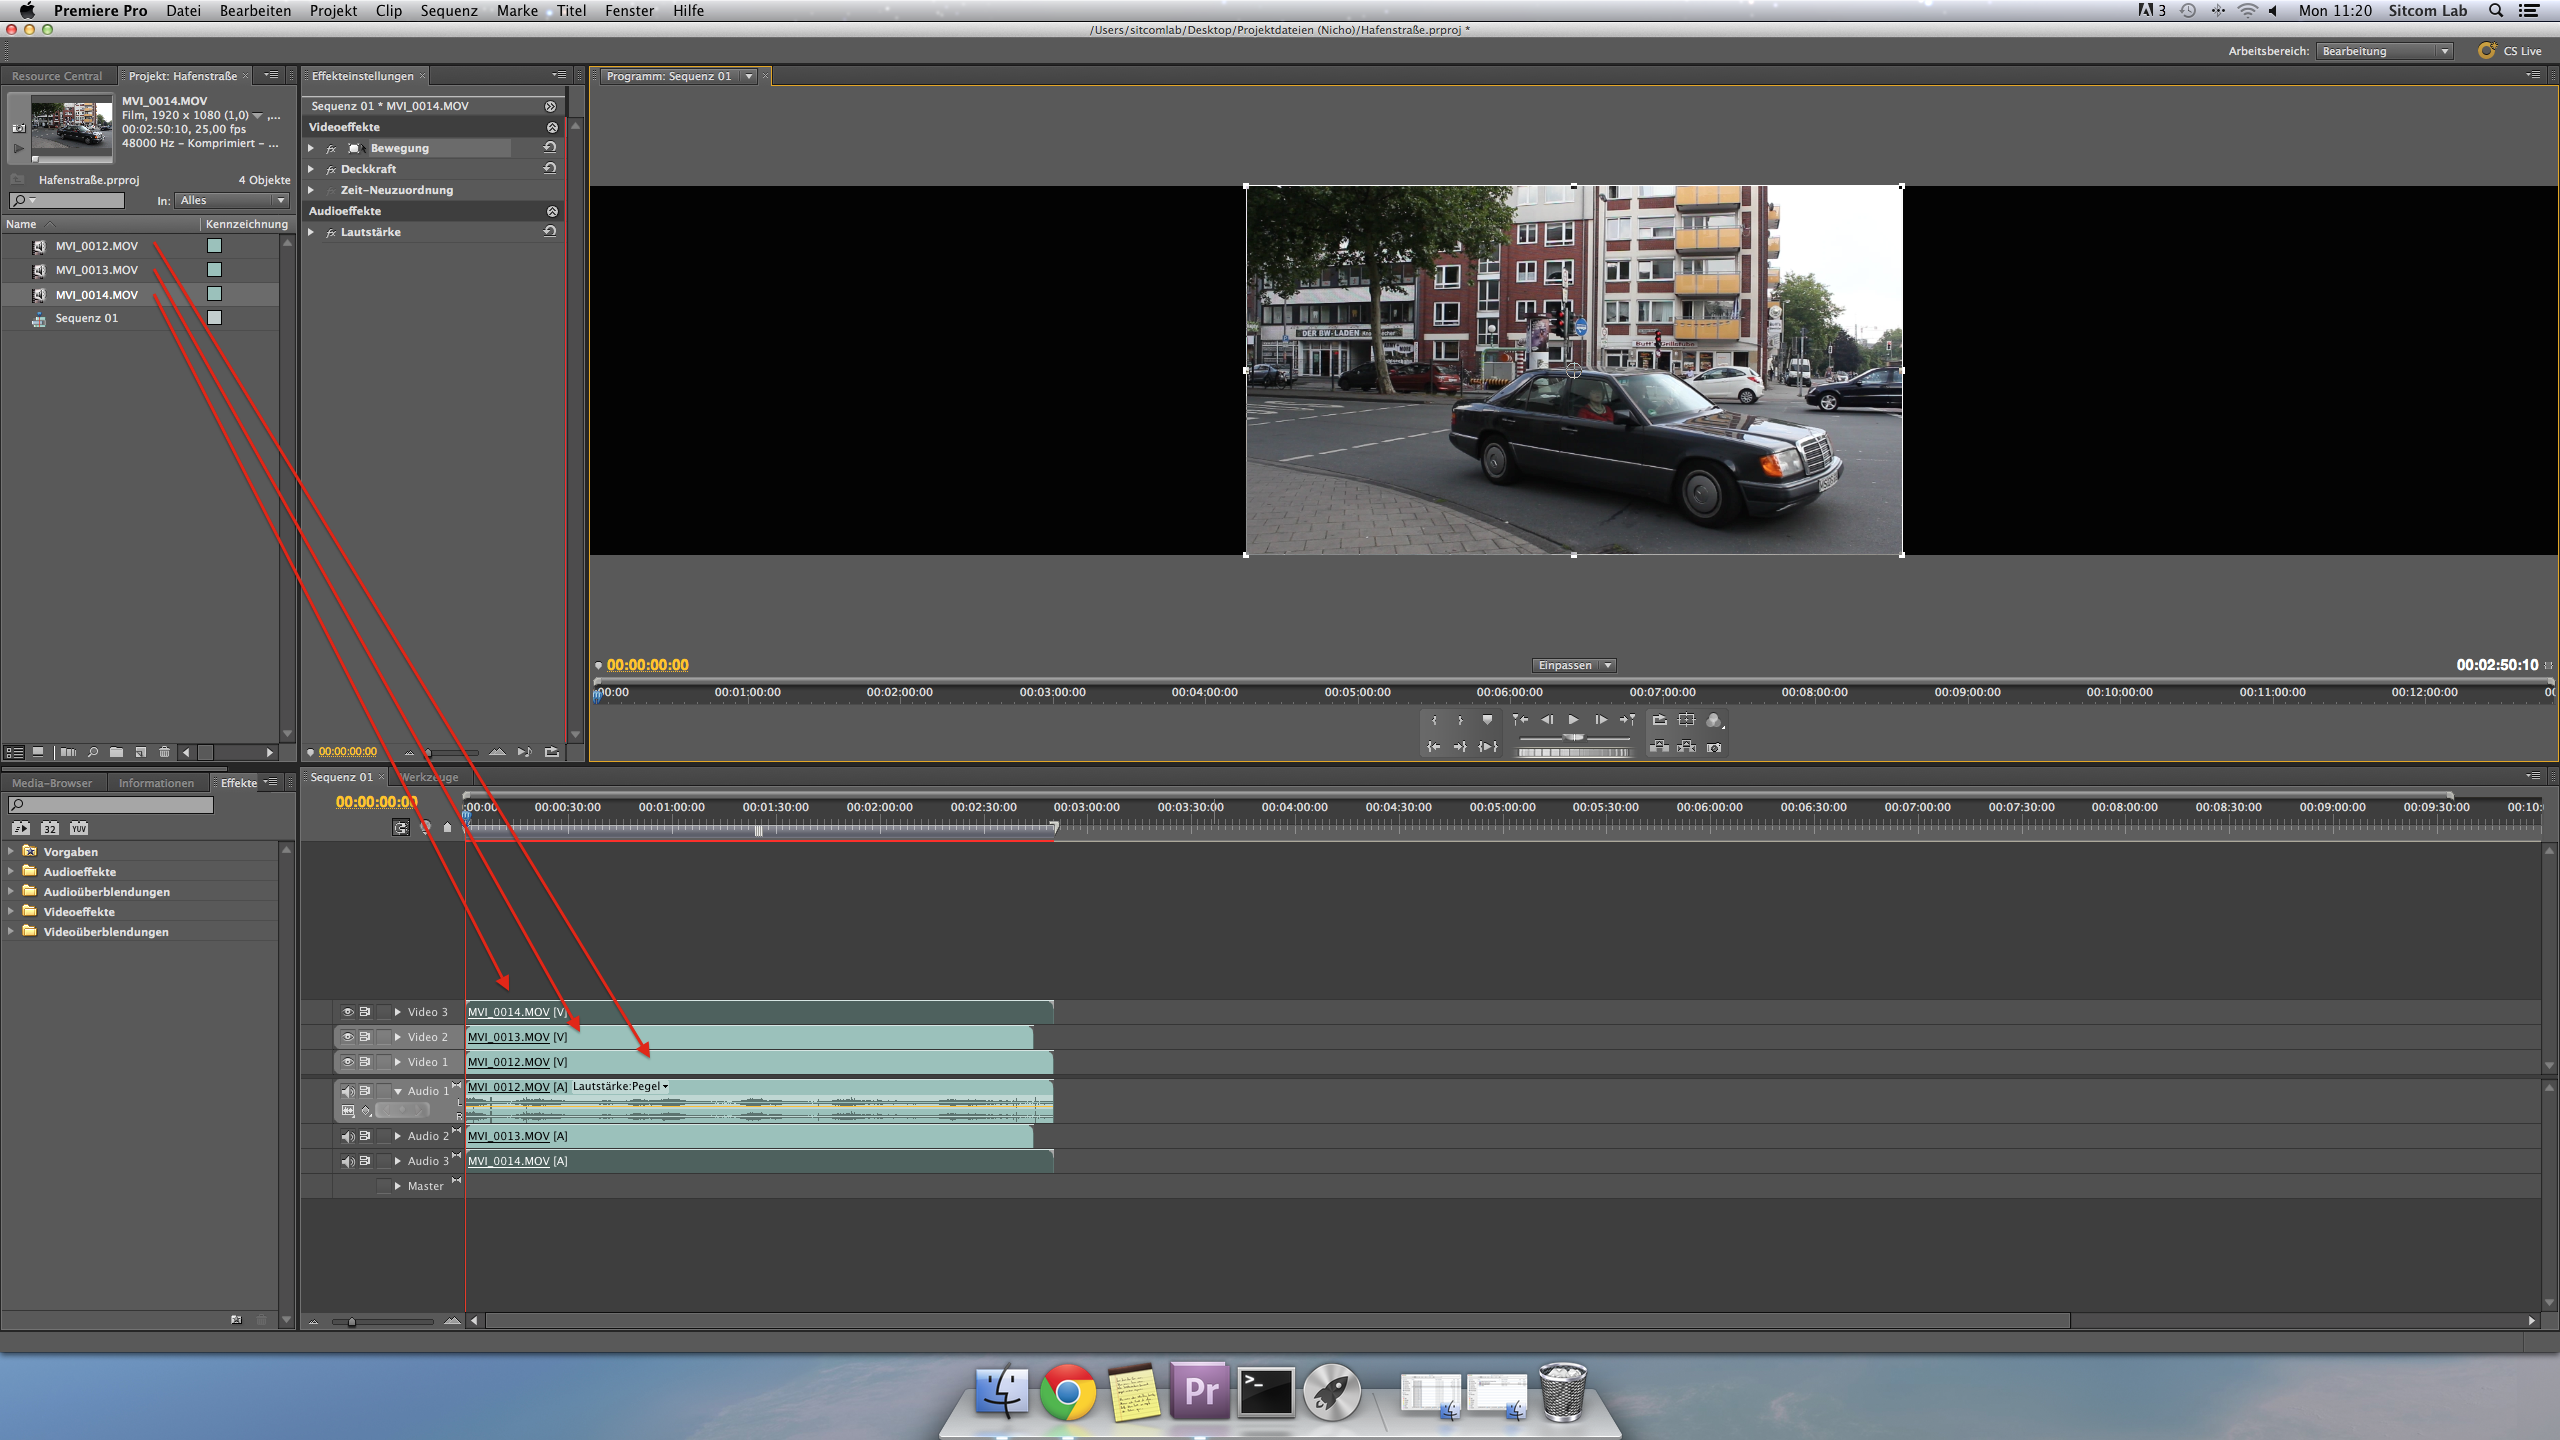
- Open the Finder on the Mac and navigate to your video-folders. Insert them via Drag & Drop to the upper left window Projekt: of Adobe Premiere Pro.
- Then you can easiely add them via Drag & Drop to the sequence-window:
-
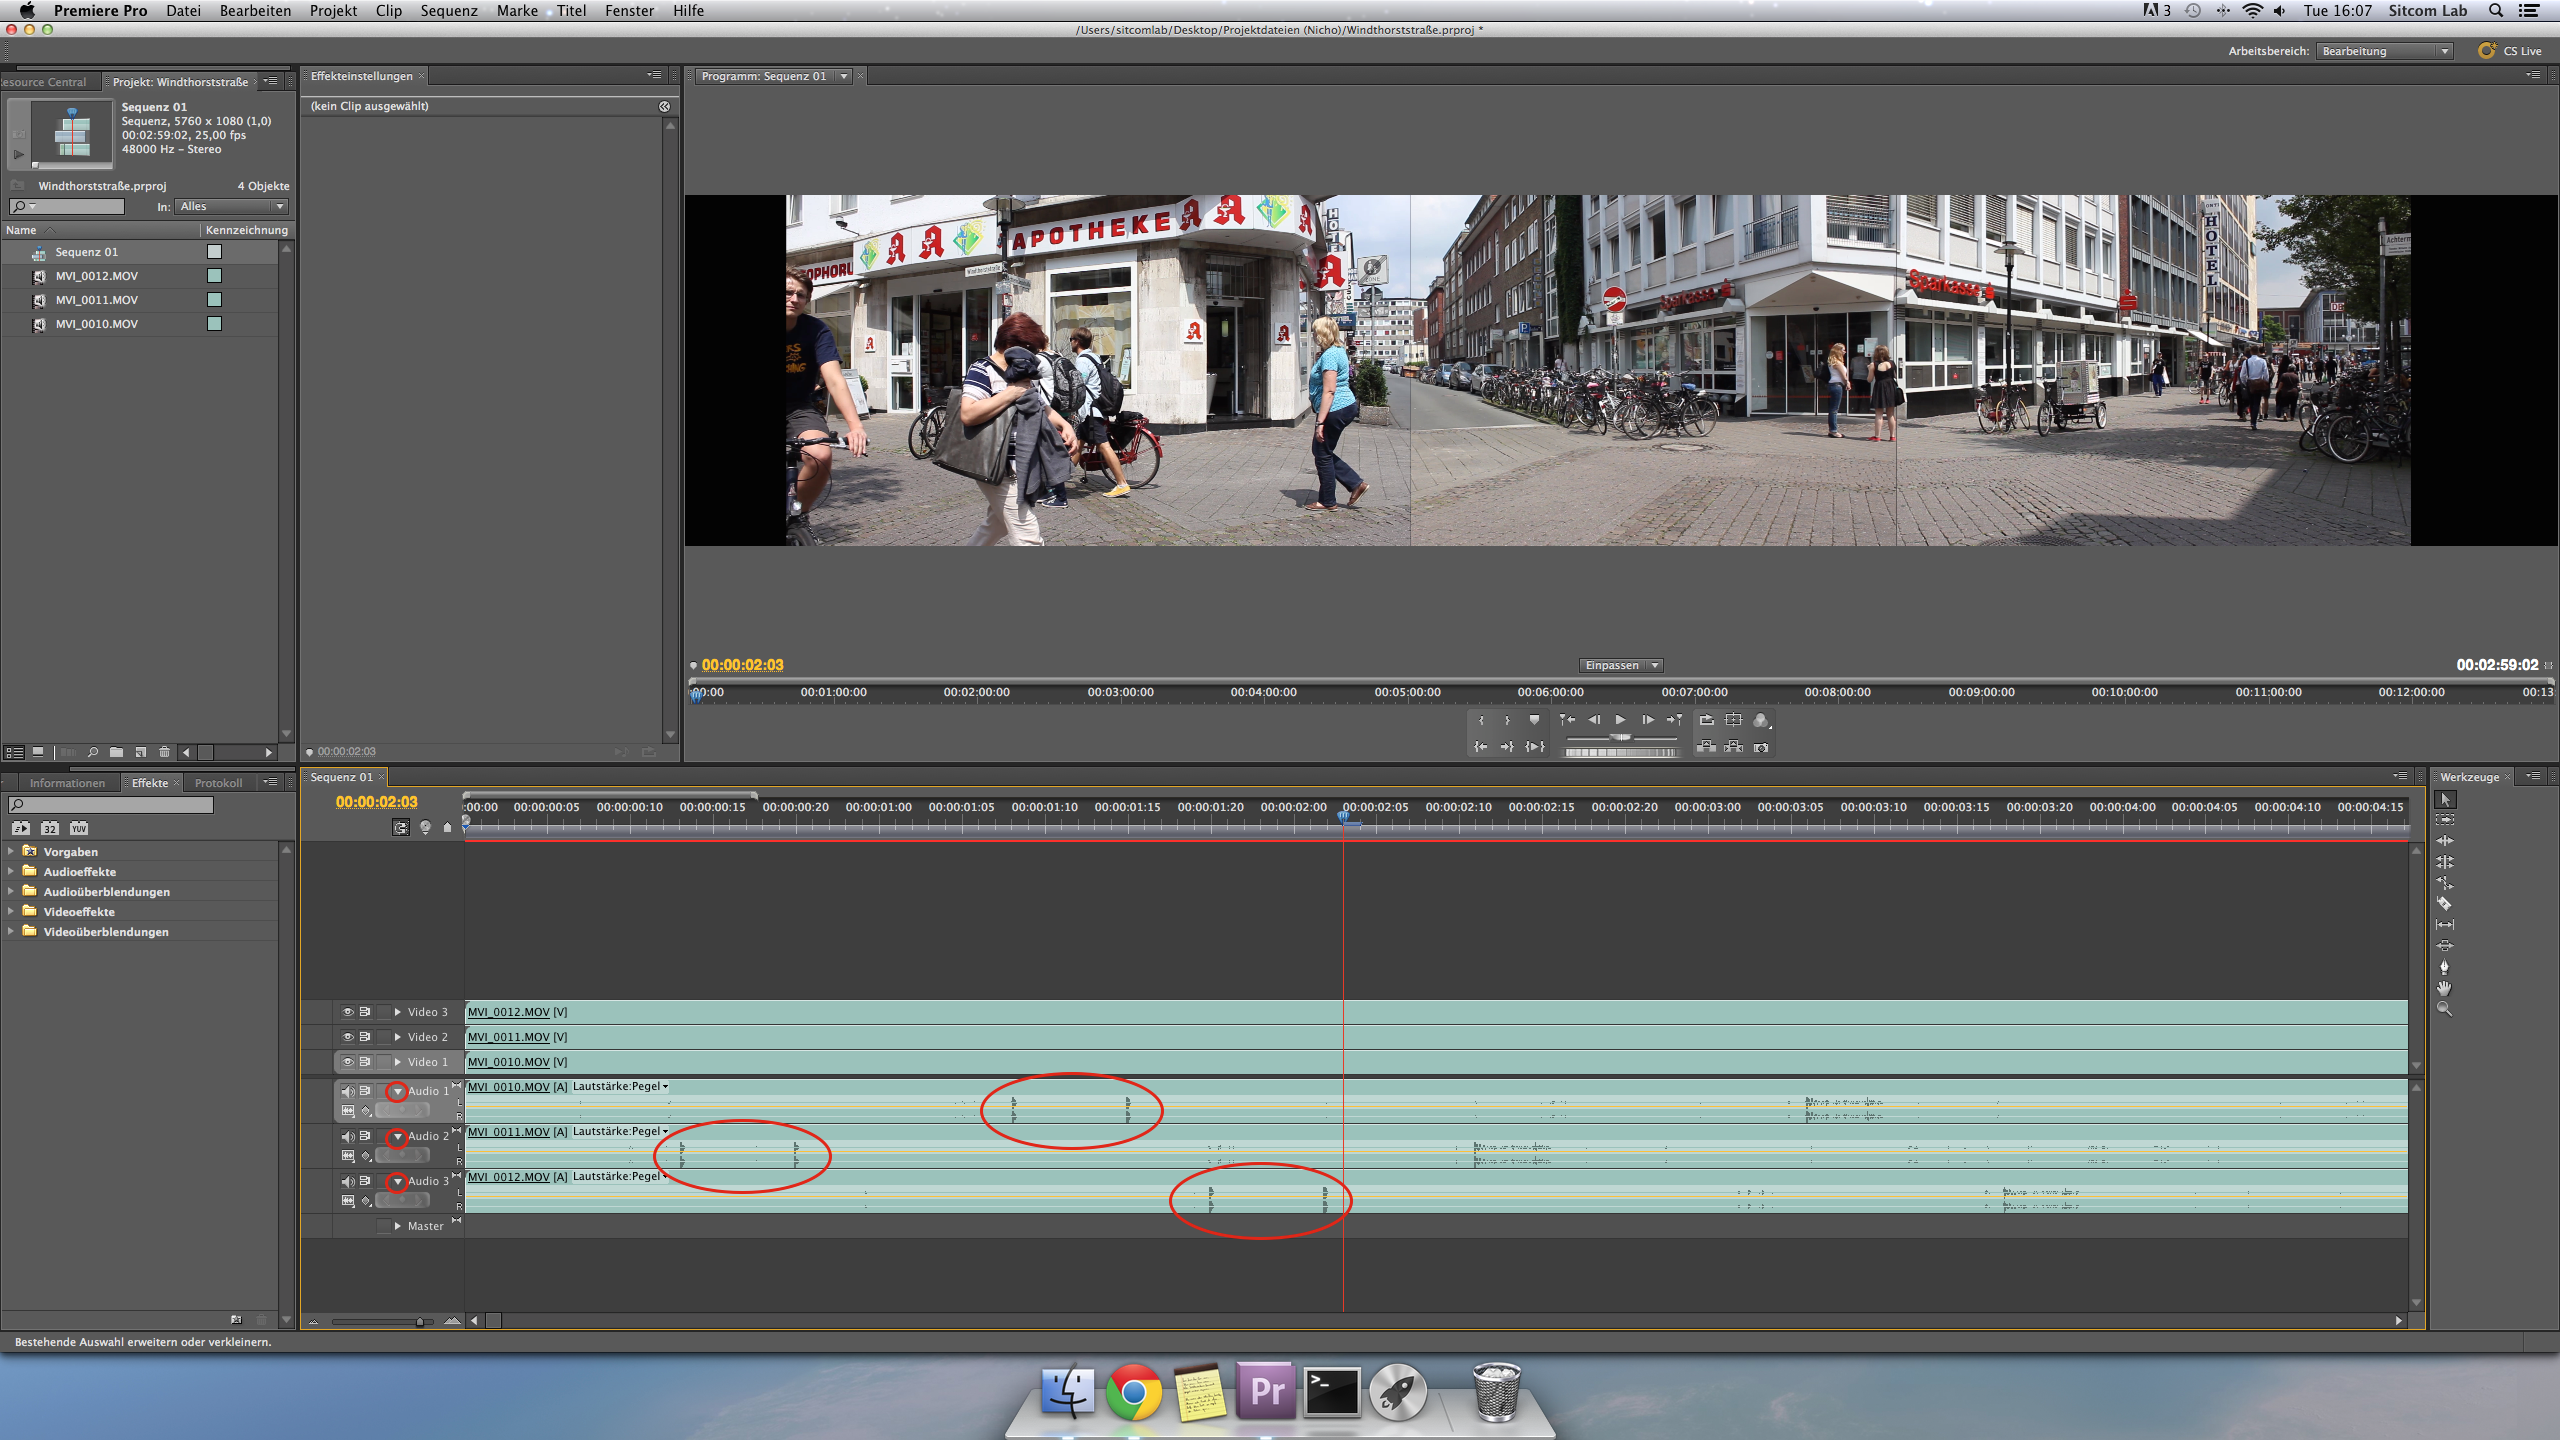
The next step is to synchronize the 3 videos. Expand the audio-sequences by clicking on the little triangles and press
CTRL & +(CTRL & -) on your keyboard to zoom in (zoom out) the audiotracks. An alternative is to use the toolbox on the rigth upper corner. With the hand you can navigate through a video-/audio-sequence, with the magnifying glass you can zoom in and for selecting or moving a video-/audio-sequence choose the cursor on the top of the toolbar:

-
Now it is very easy to find your hand clapping-signals which you made when you recorded the videos:
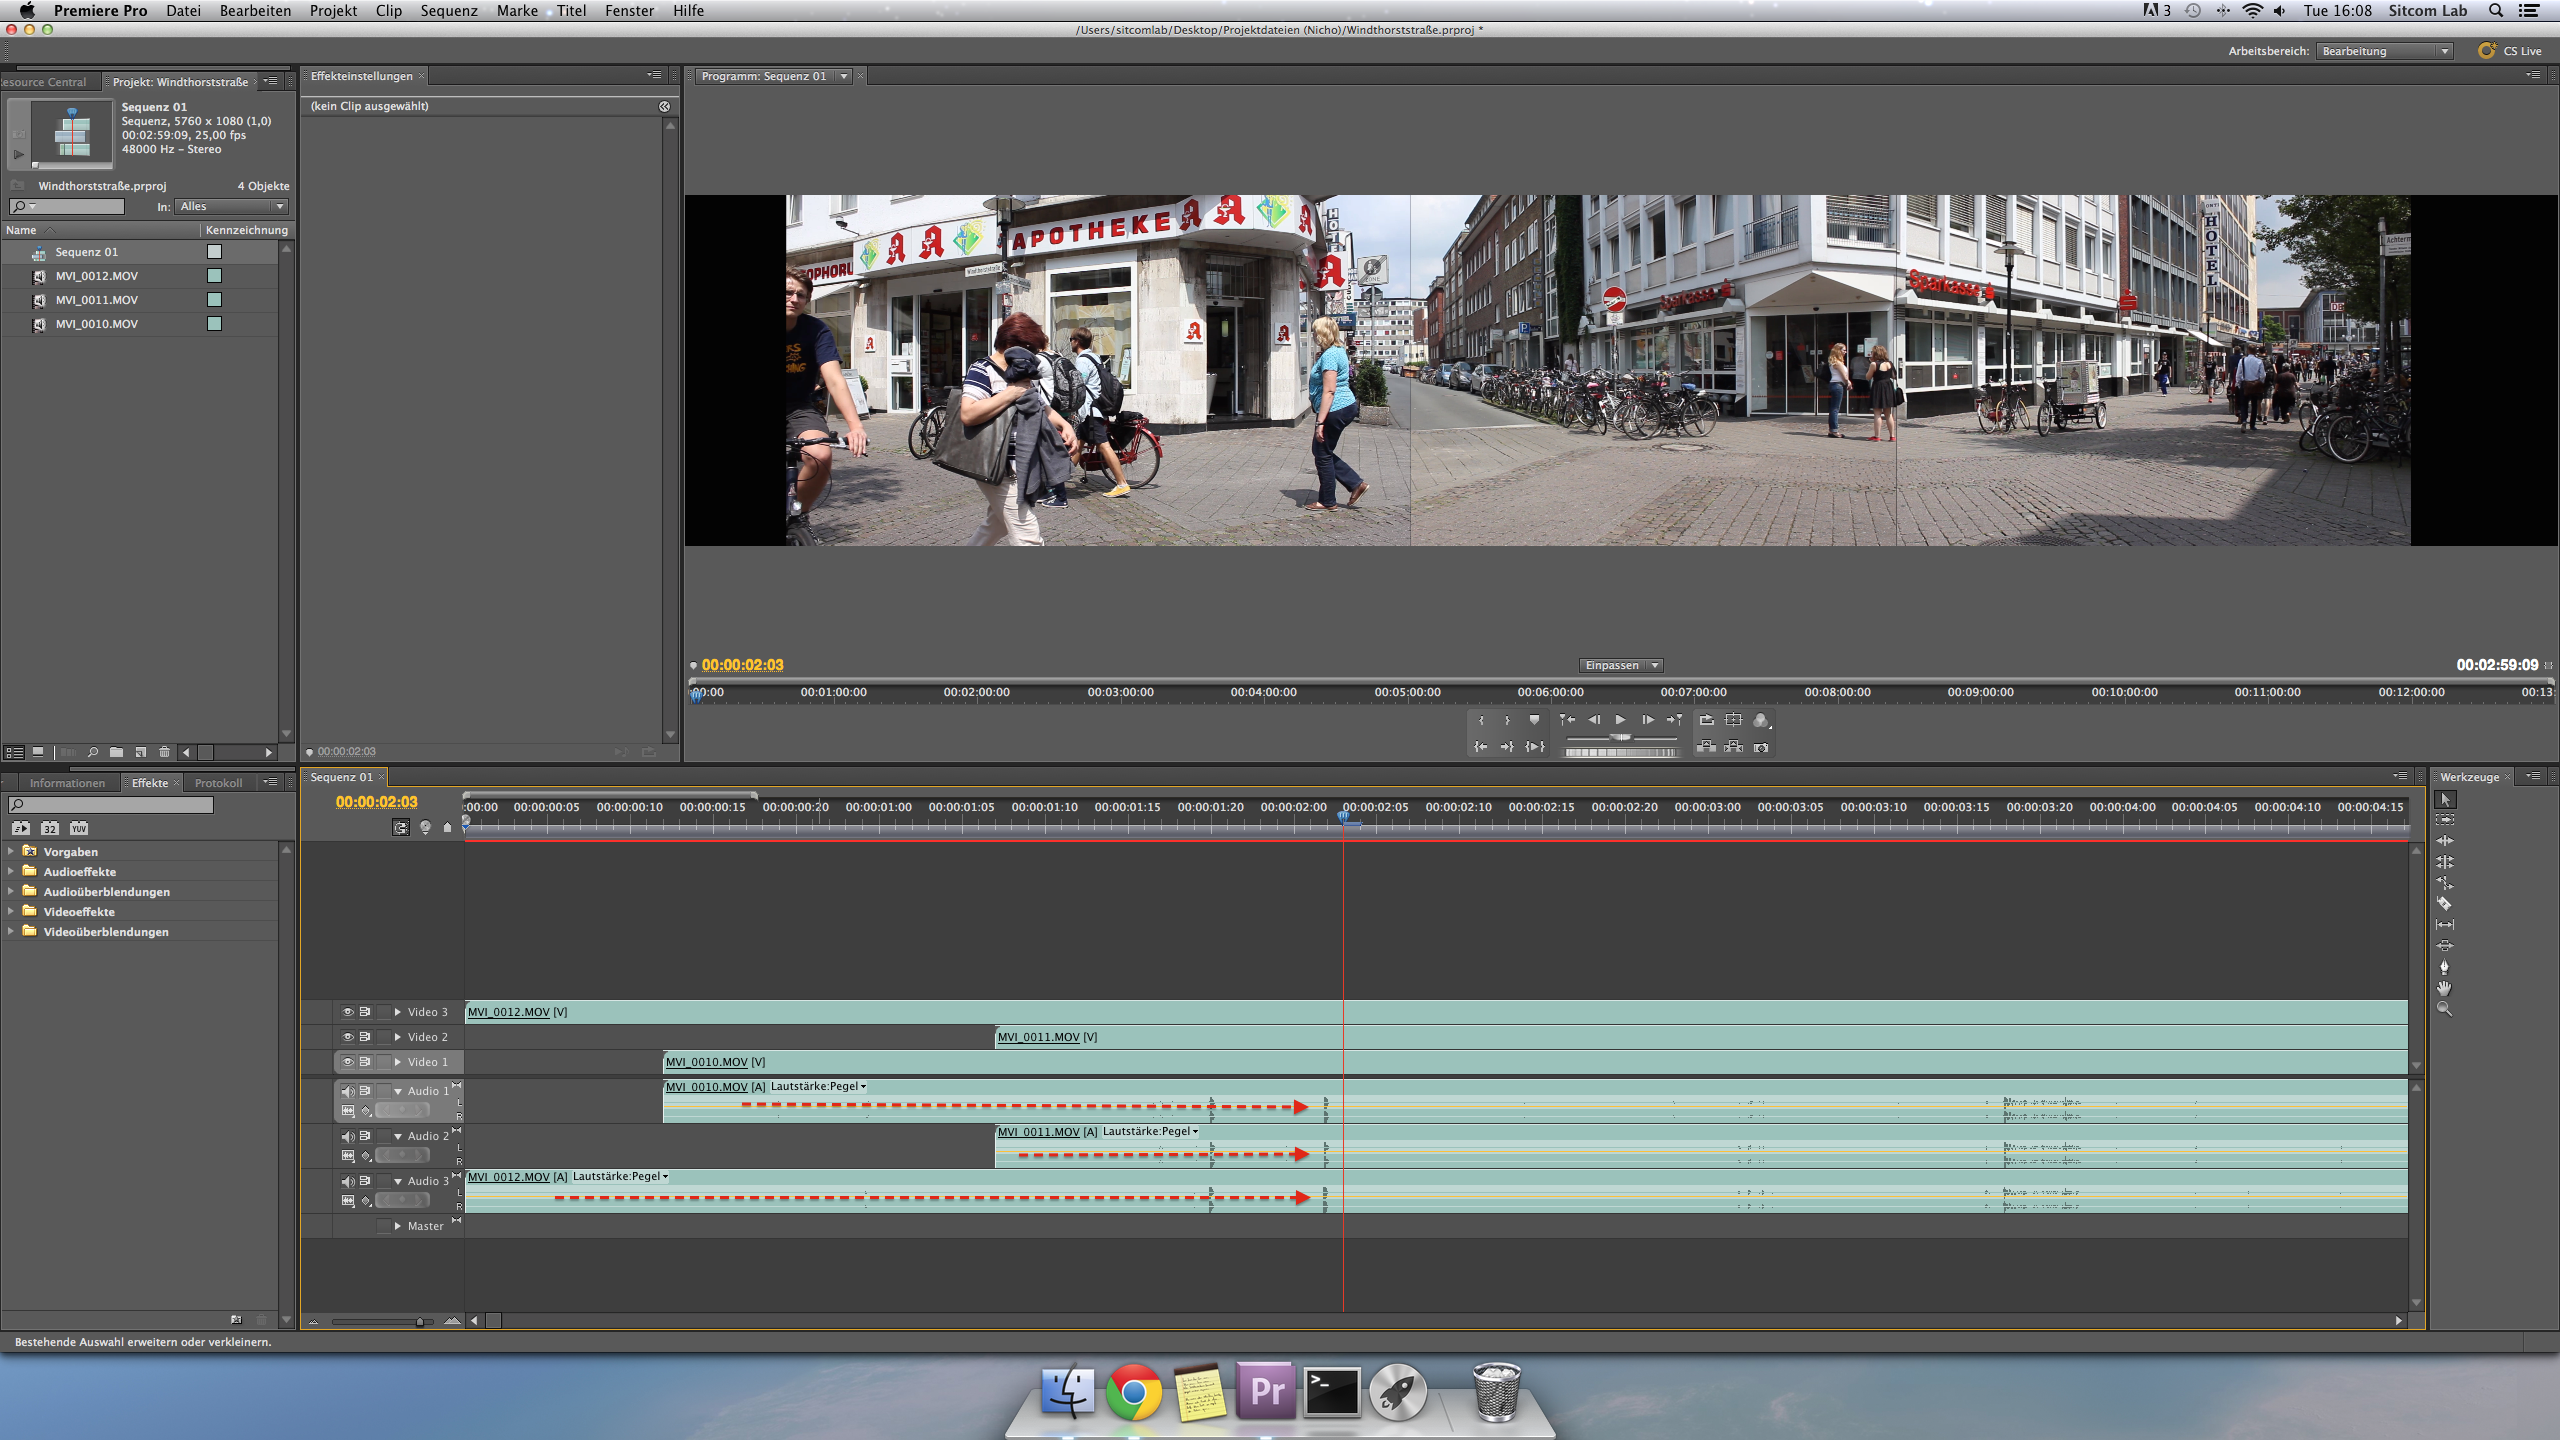
- After that set the red line at the end of the latest hand clapping signal and move all other video-/audio-sequences so that they stand in one line (synchron):
- Cut all videos until the red line, by using the little triangles on the video-sequences:
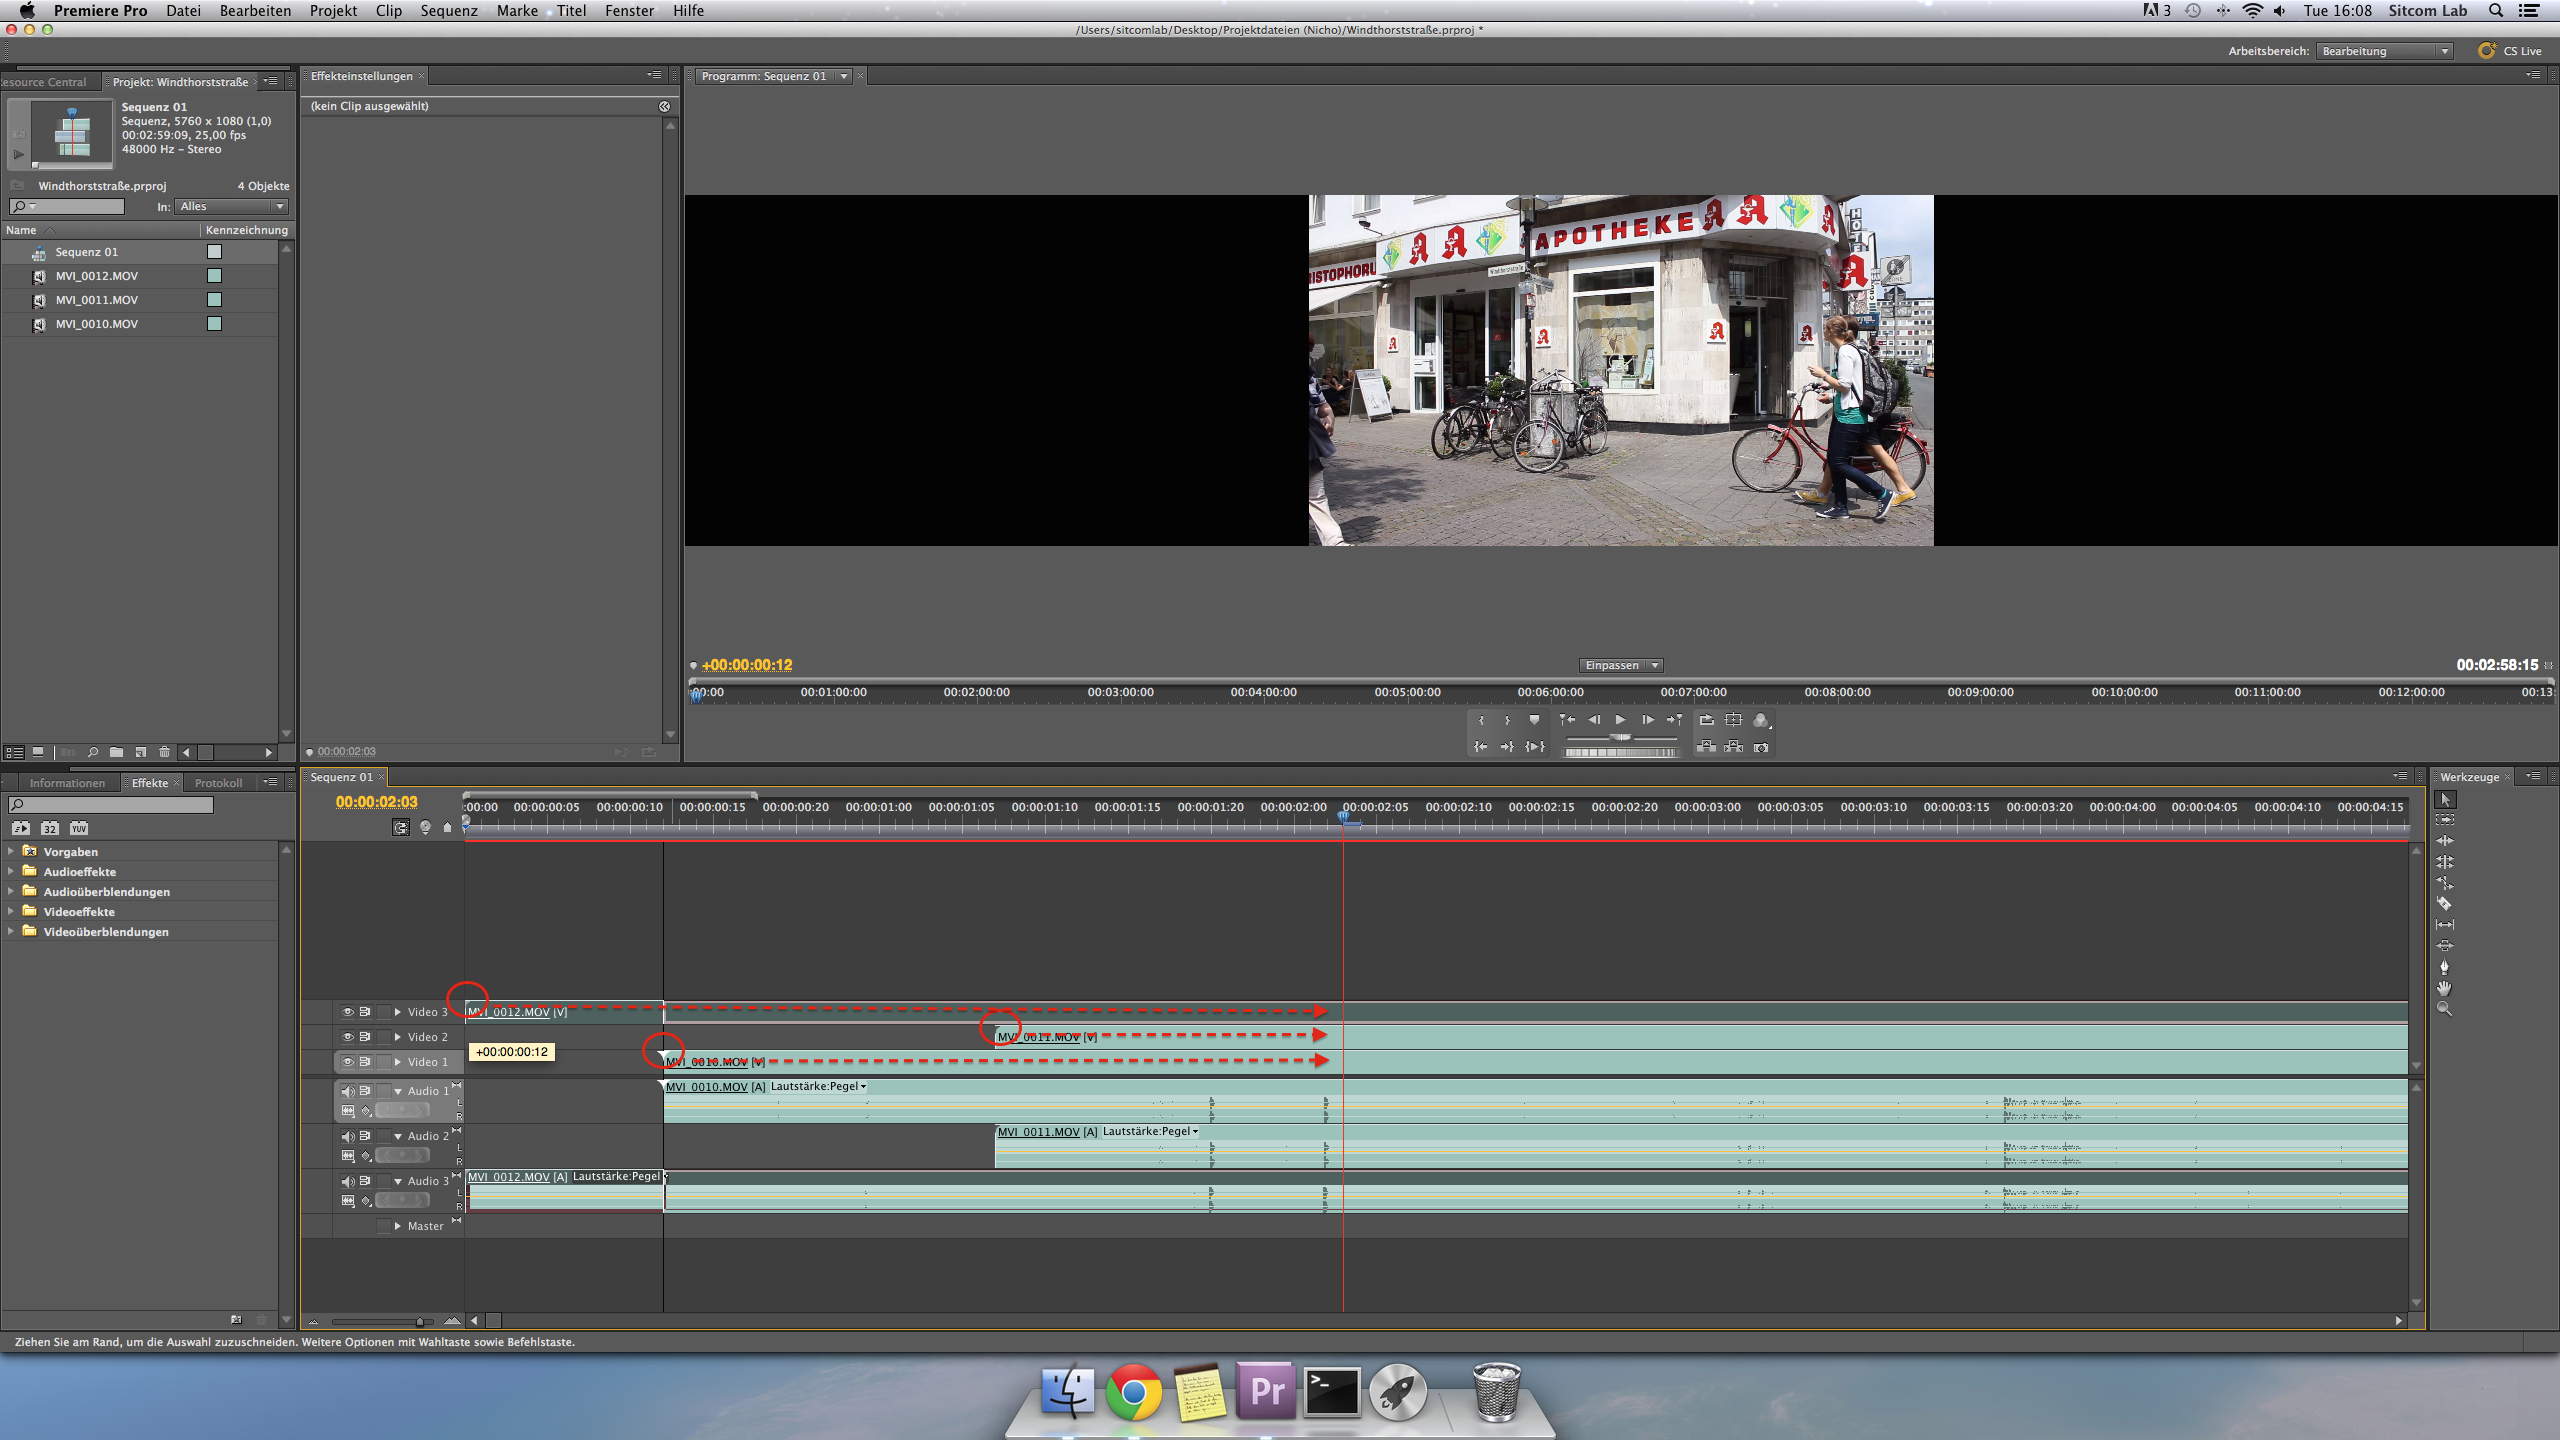
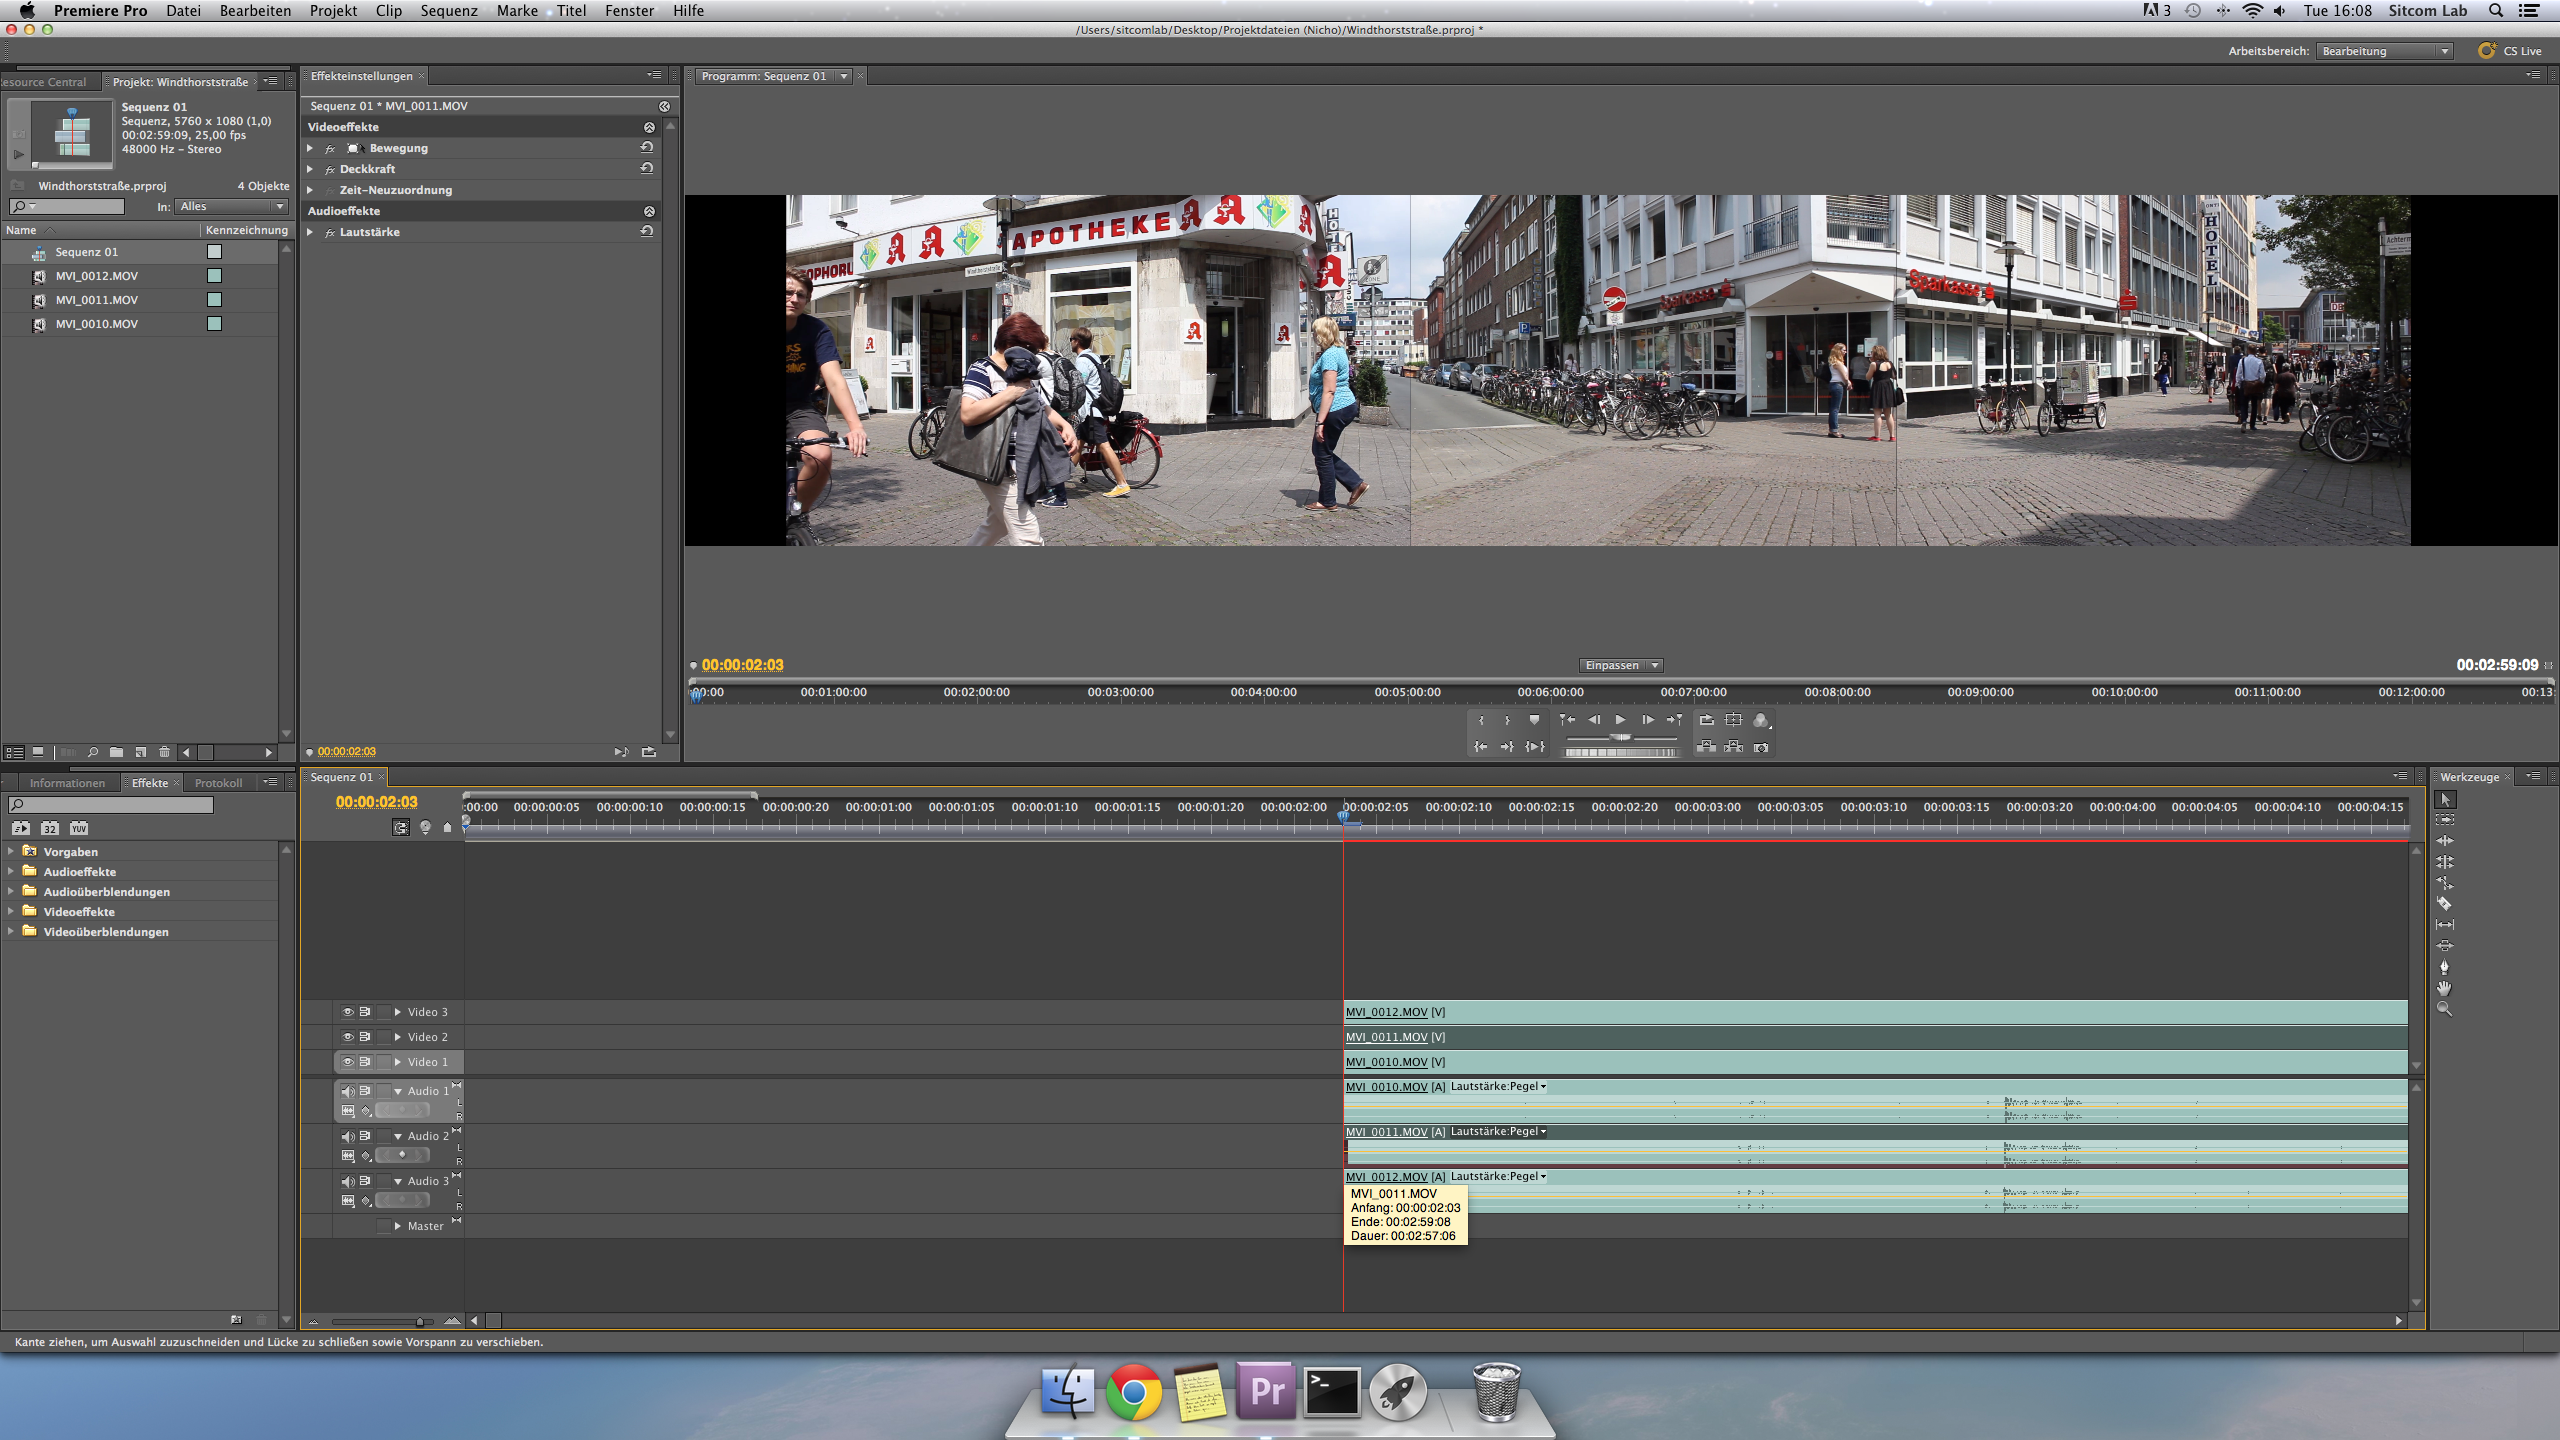
- Next mark all videos-sequences, by clicking and holding the
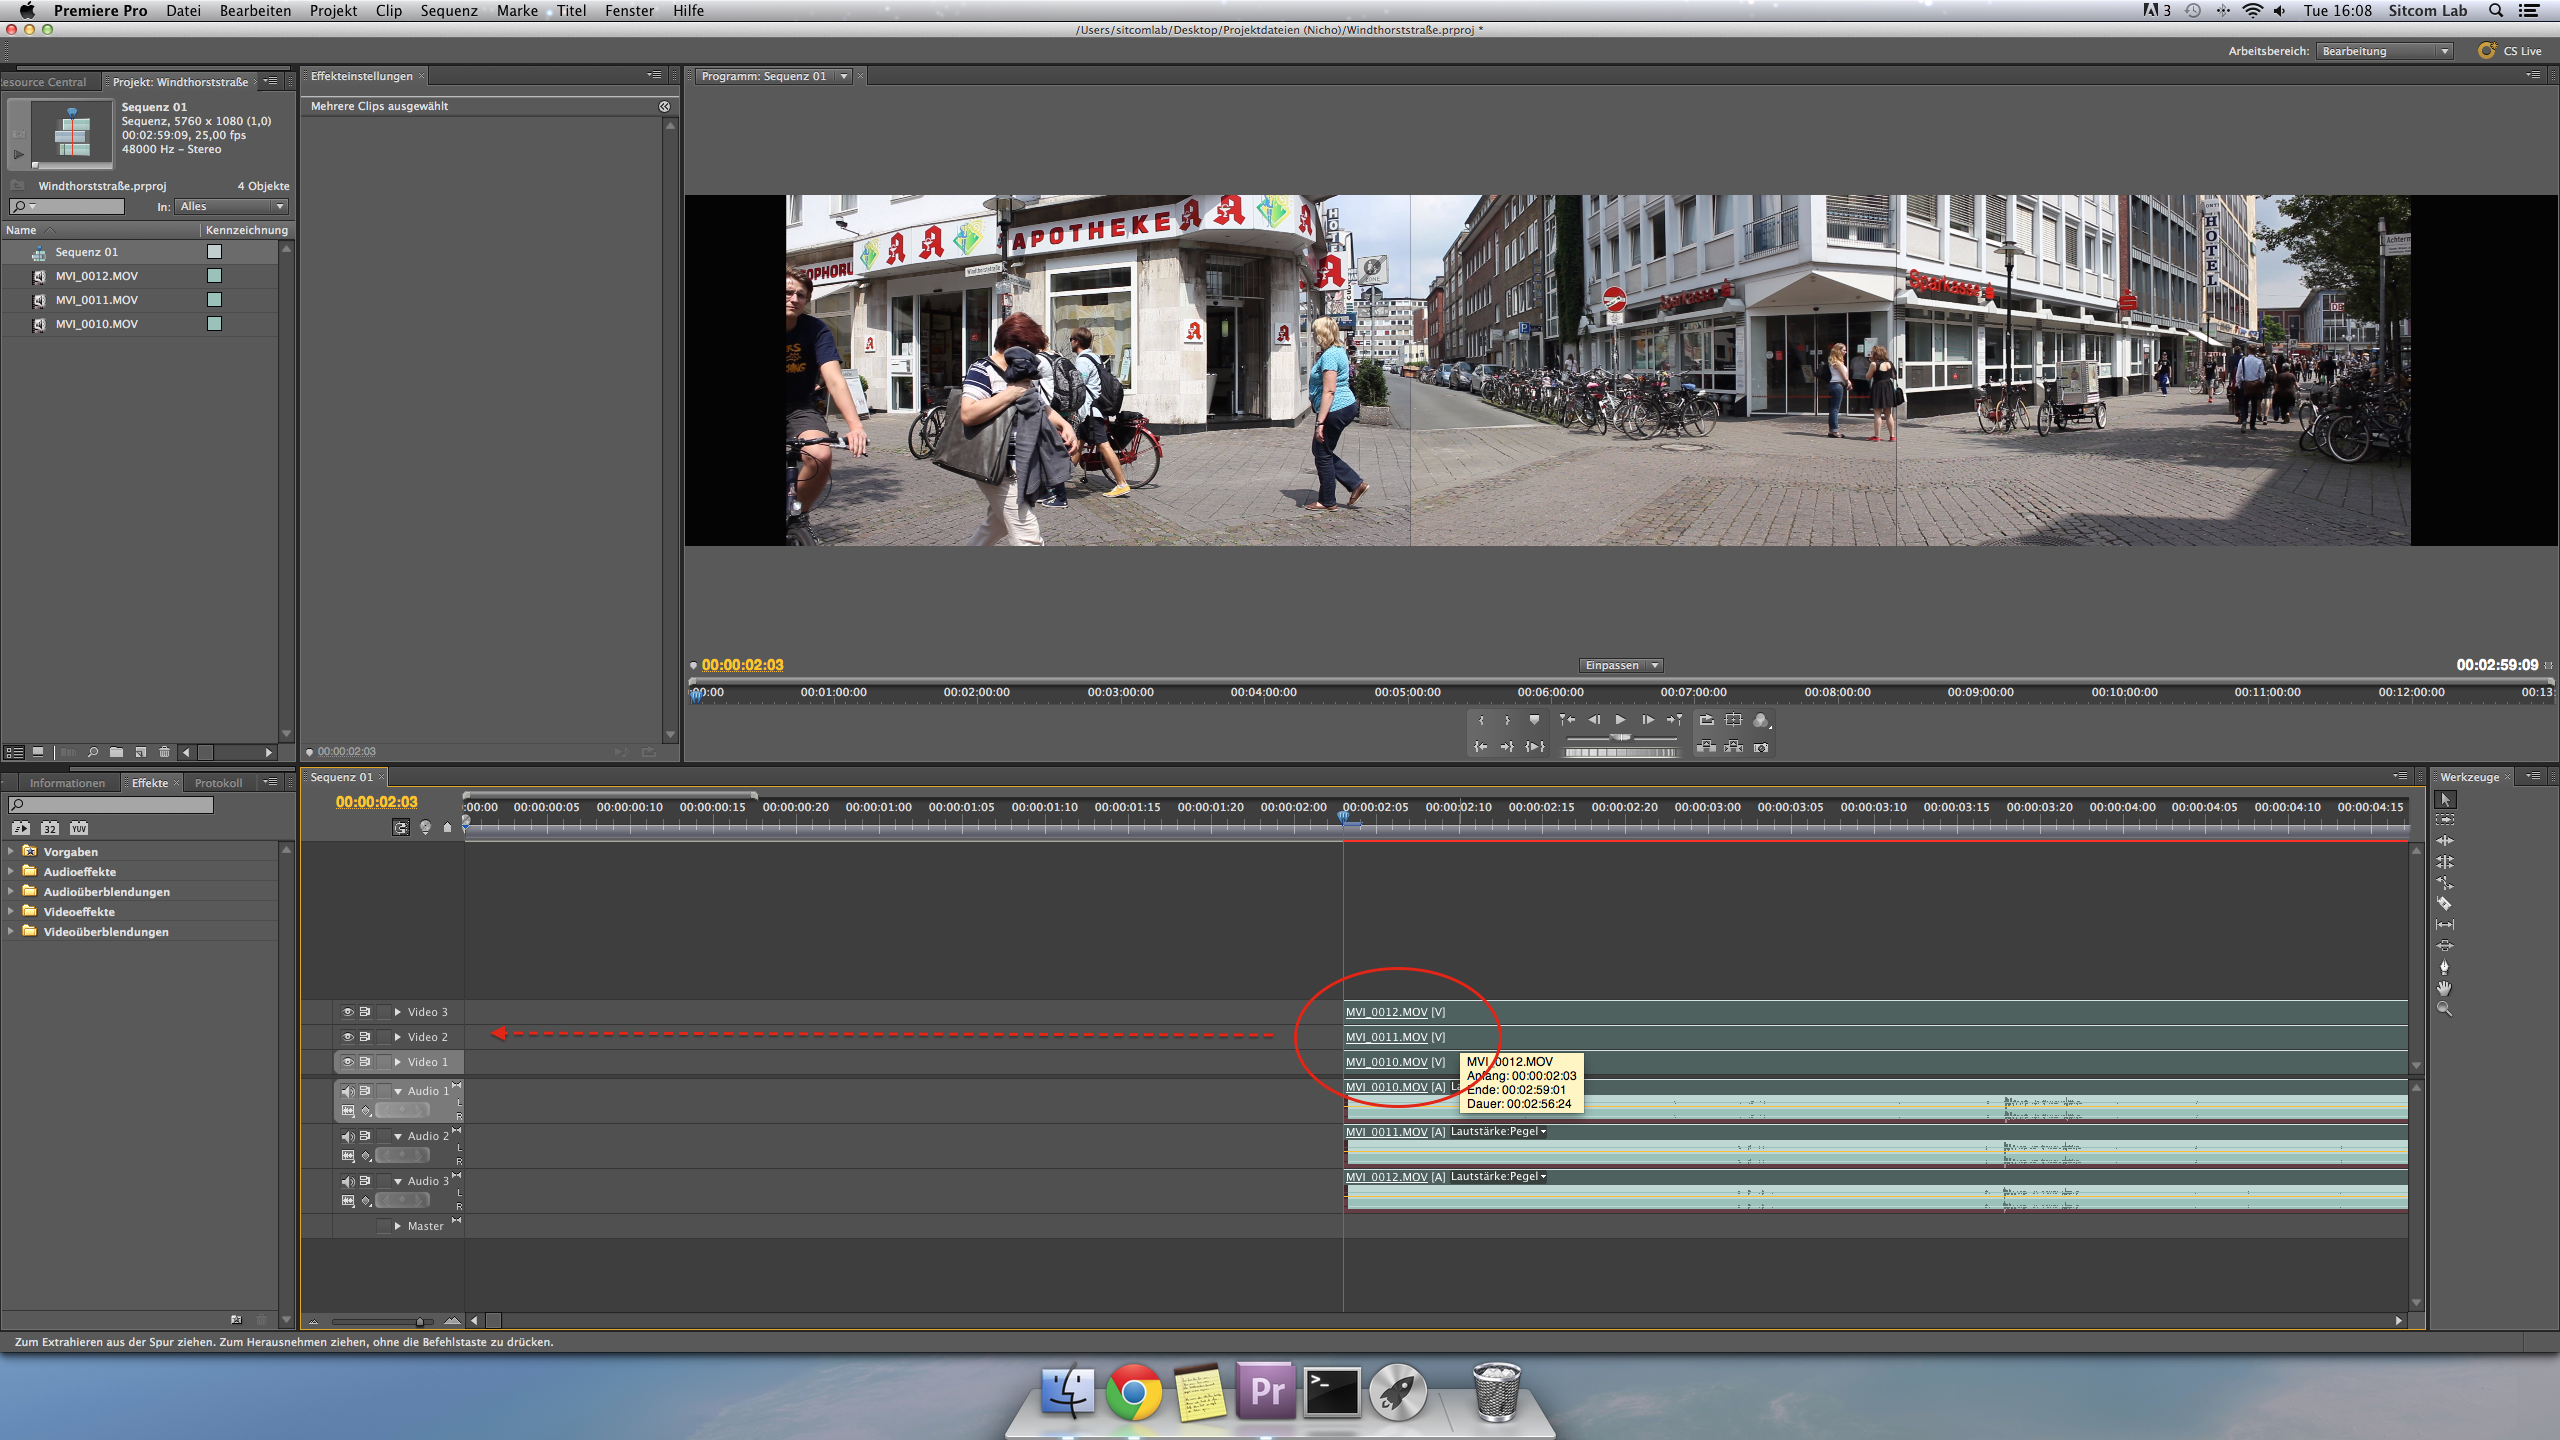
SHIFT-key on your keyboard and move them back to the begin of the main-sequence:
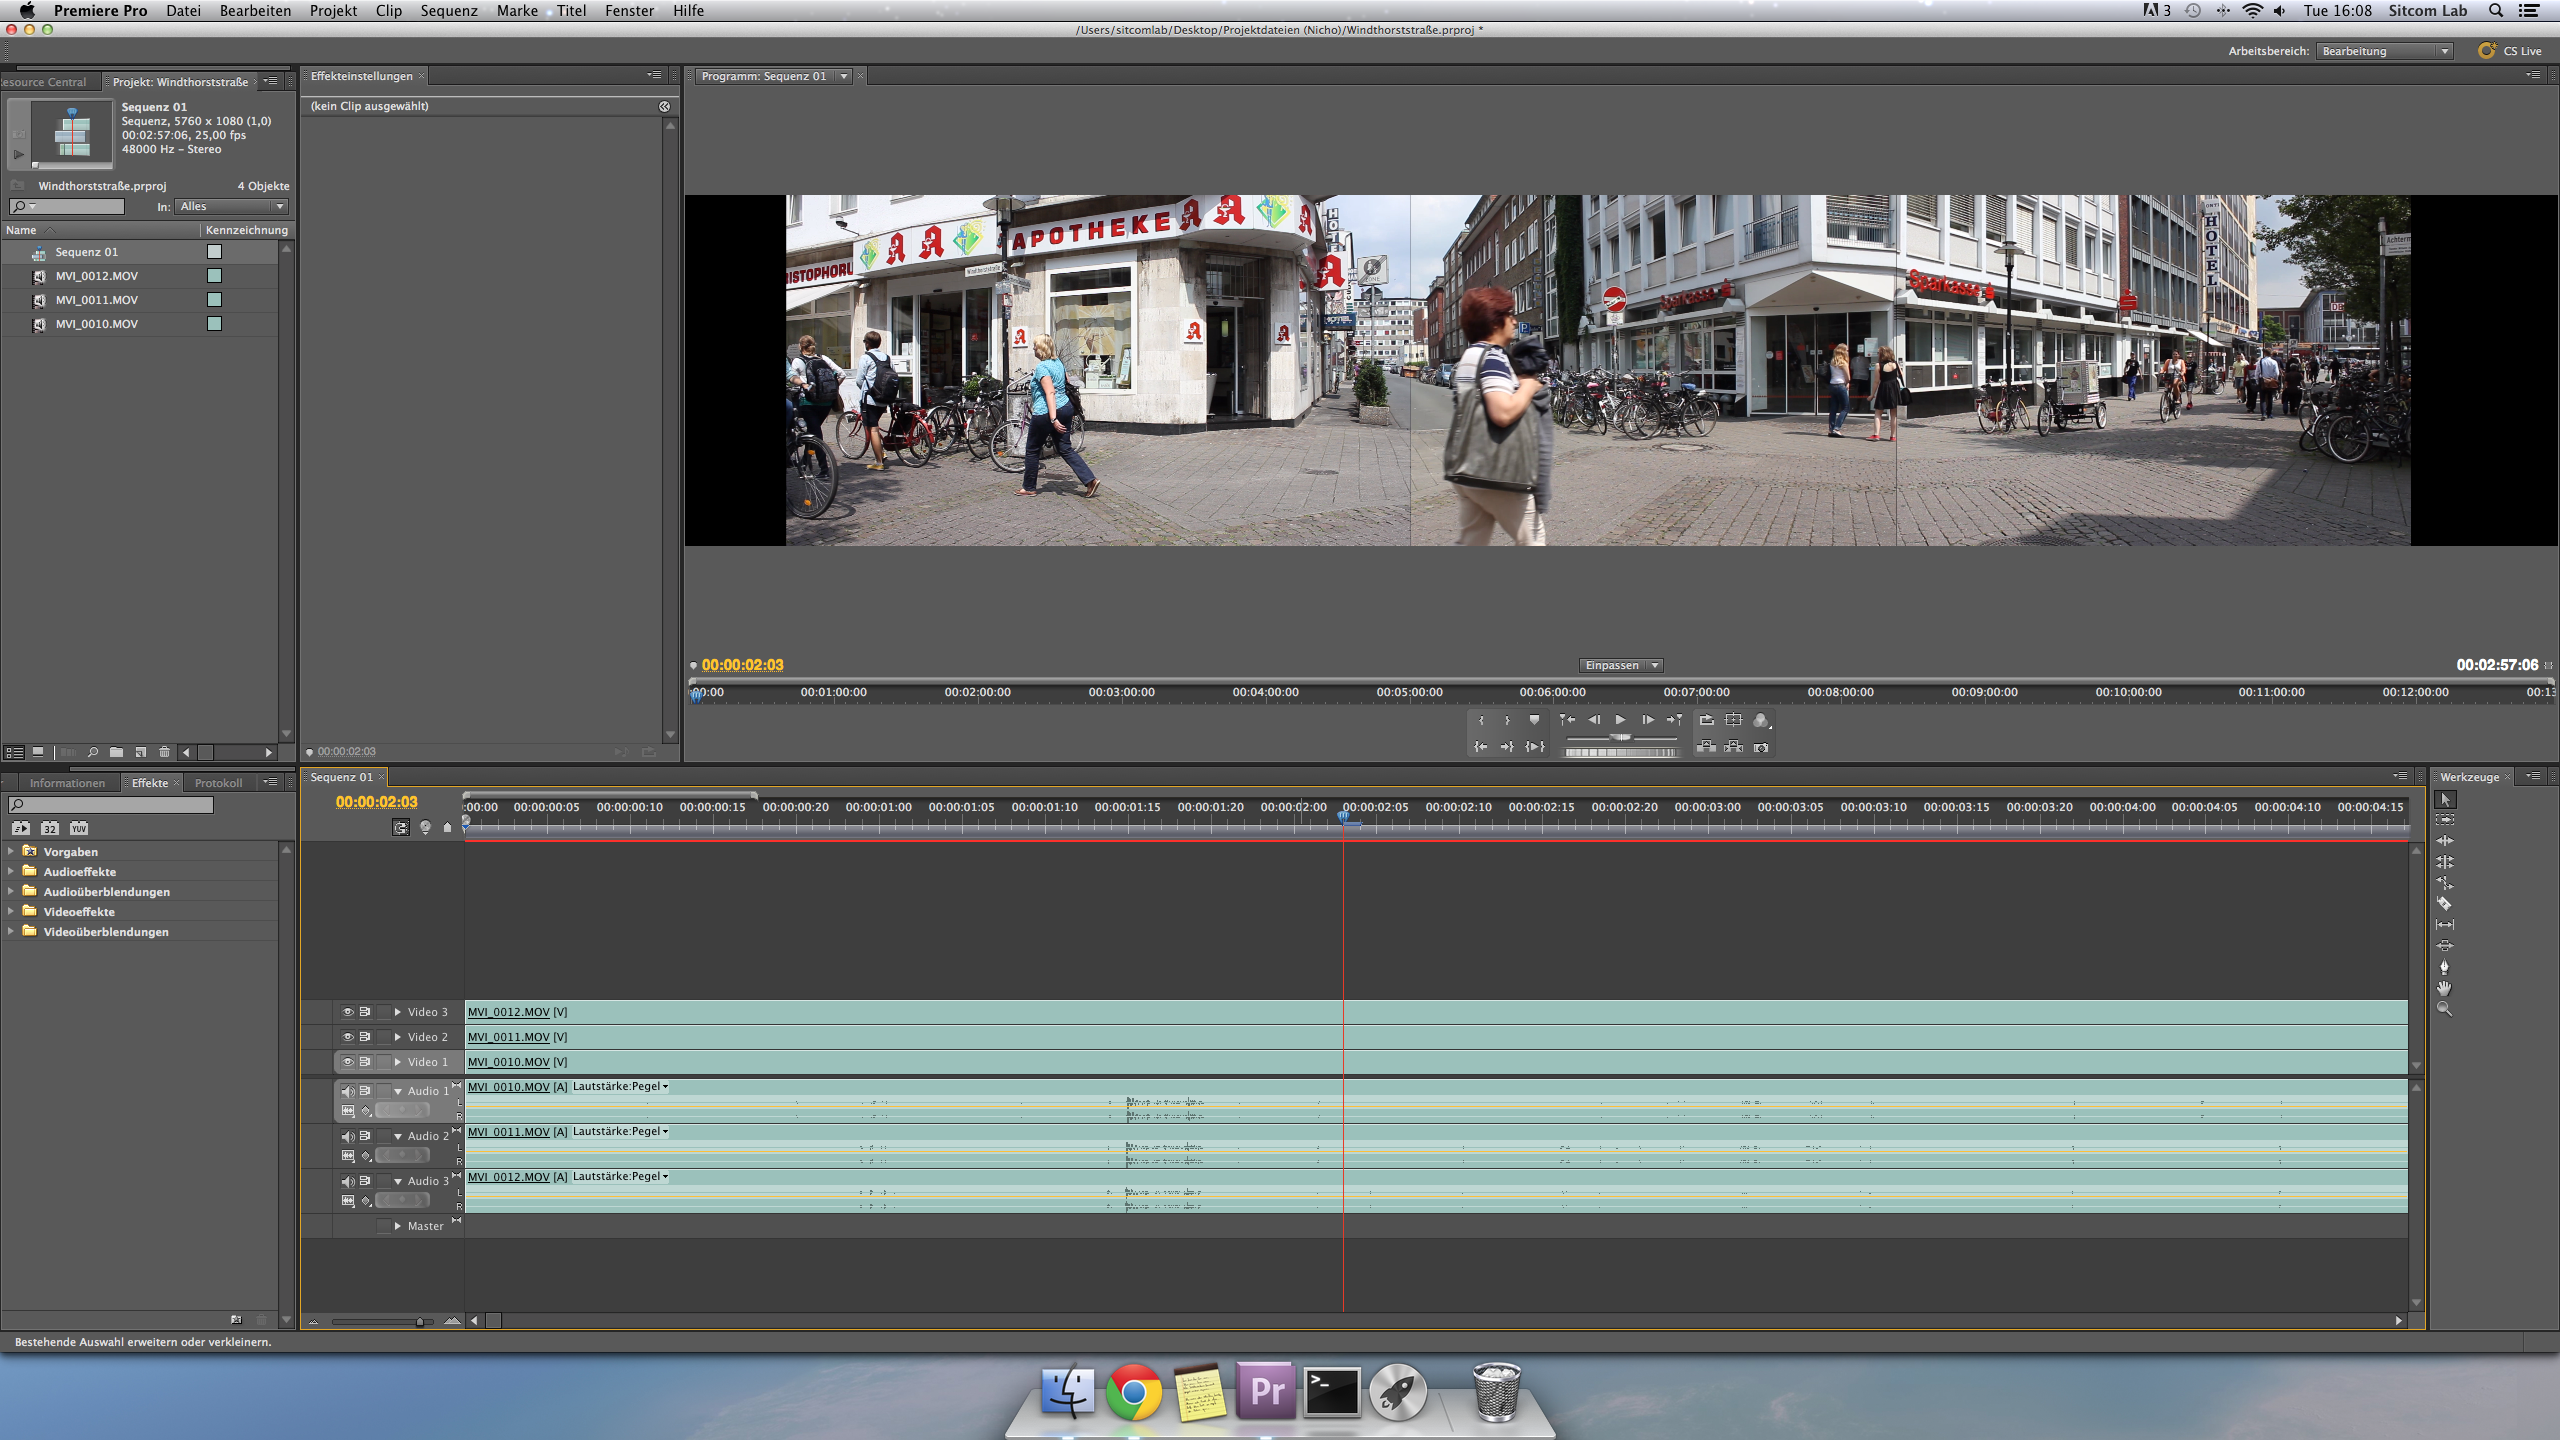
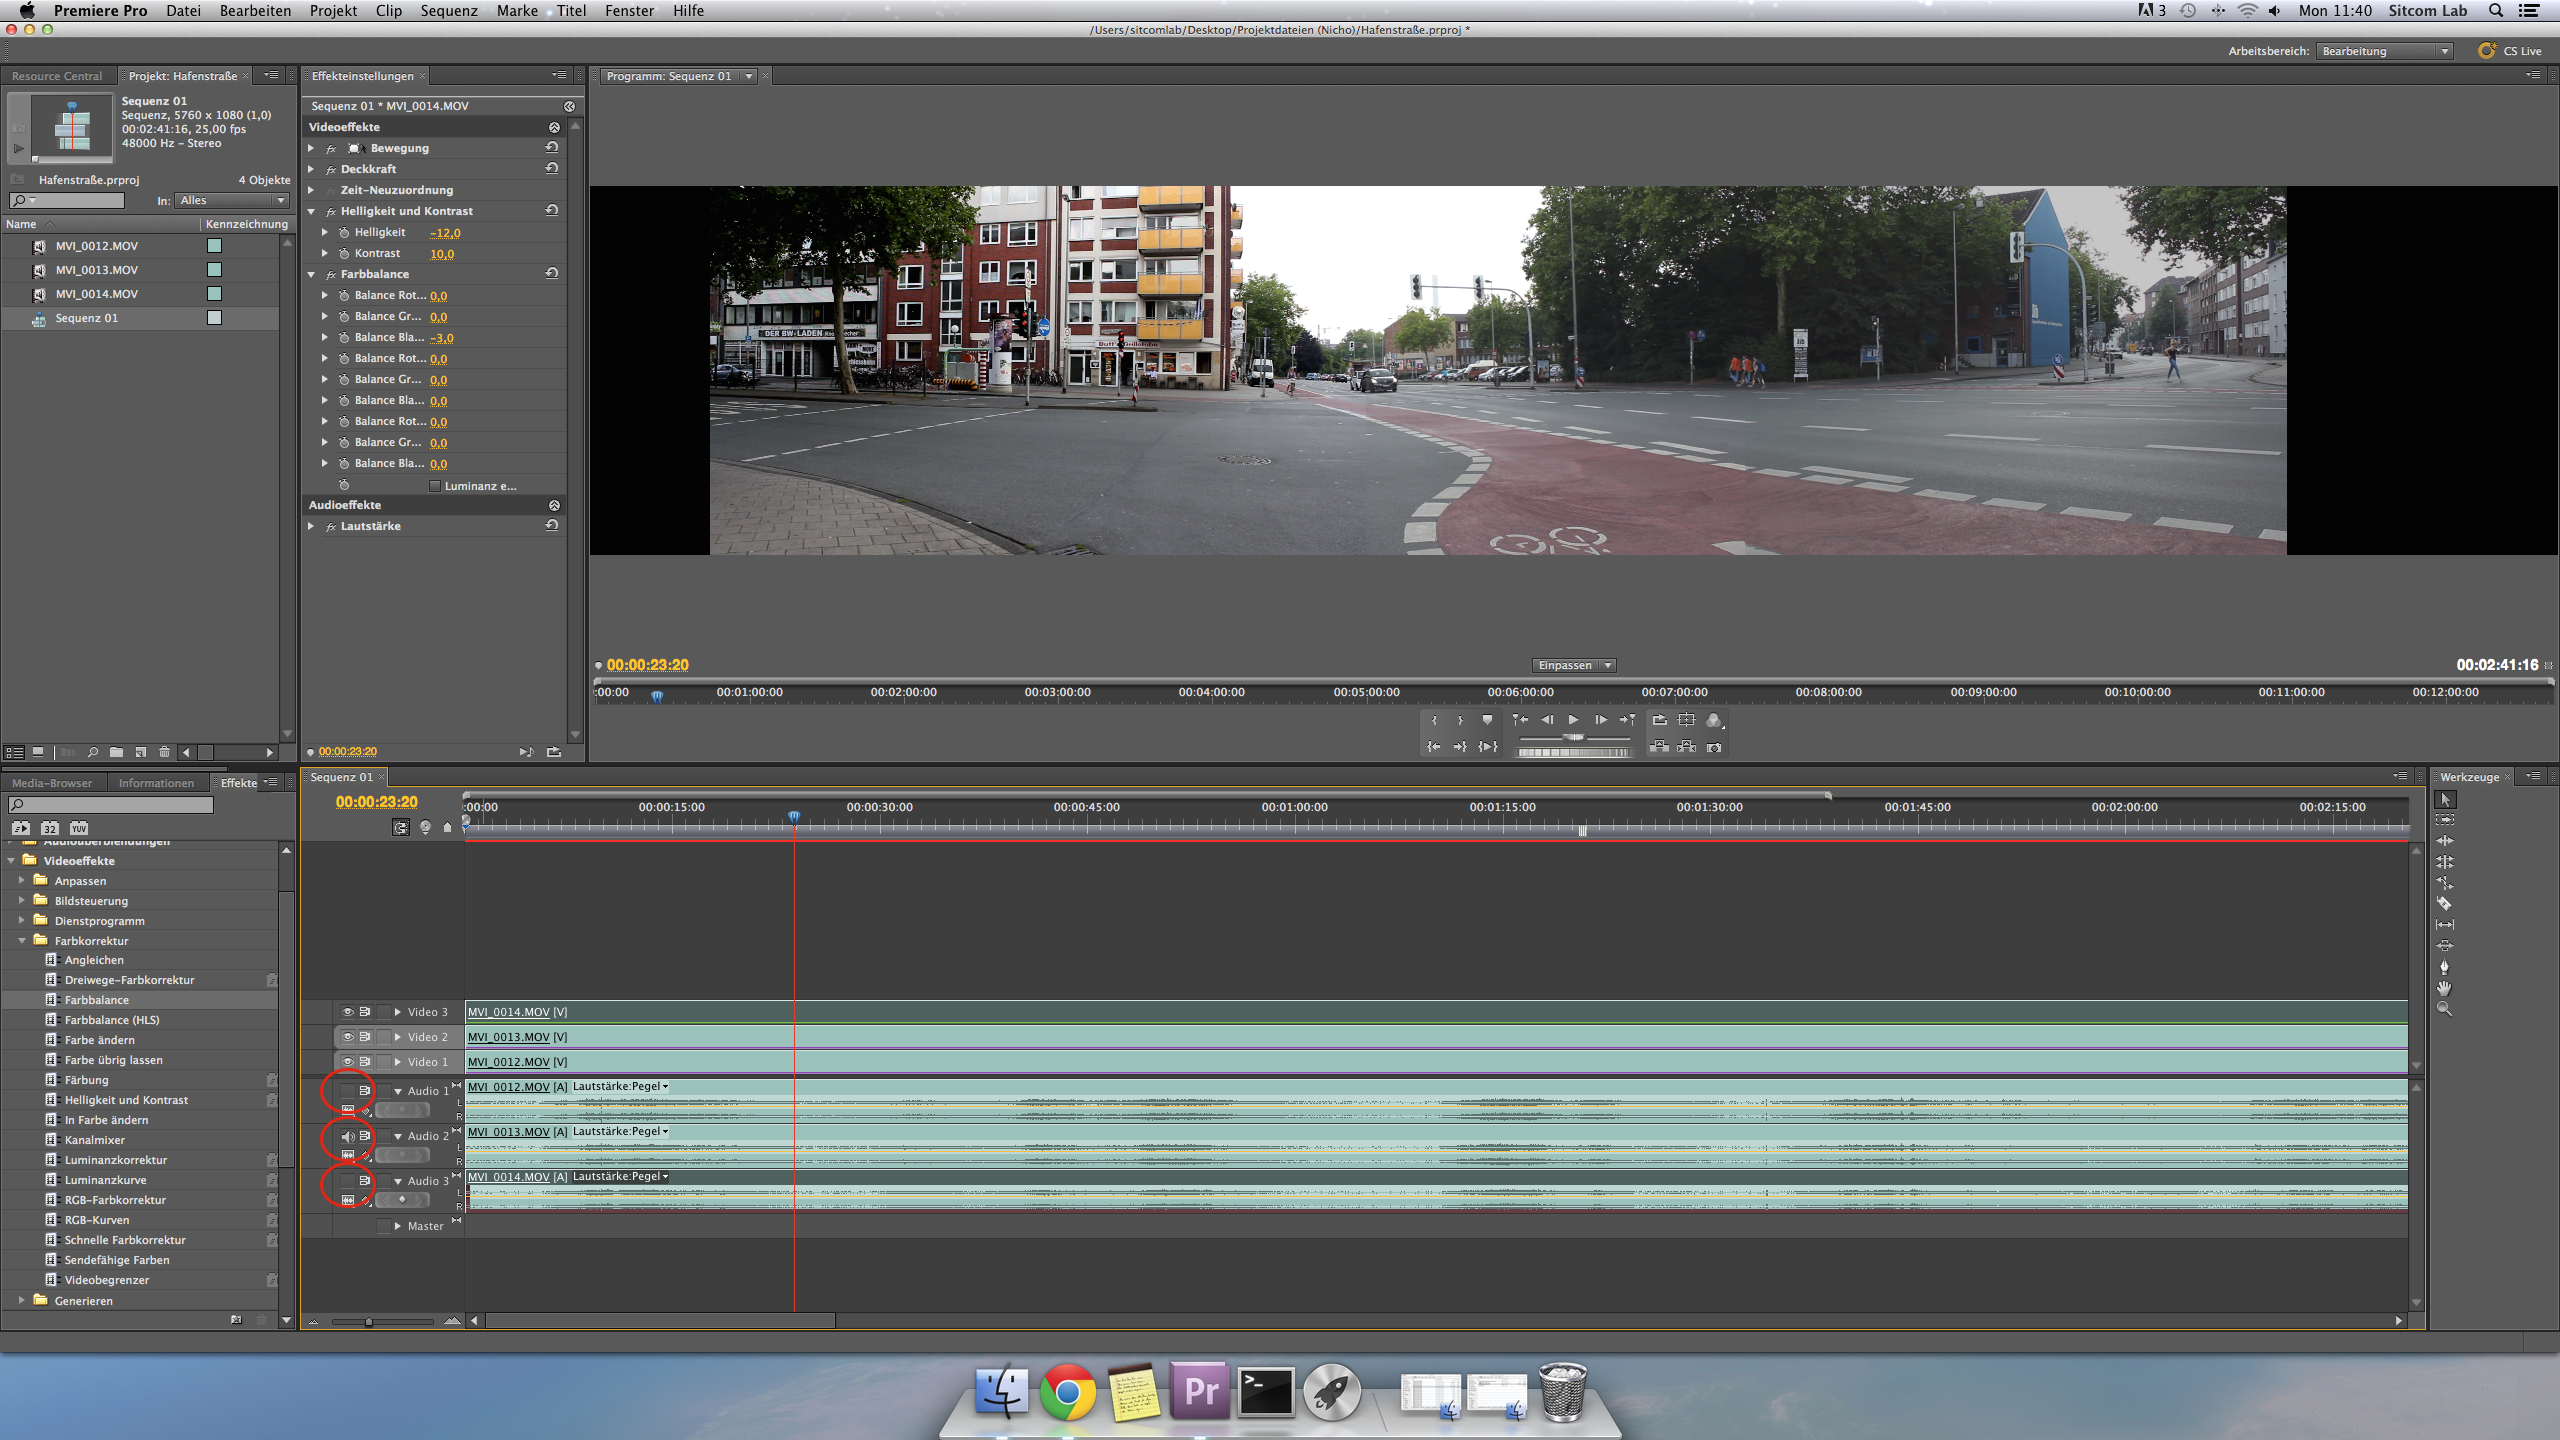
- Because we have 3 audiotracks, don't forget to deactivate the left and right audiotrack, so that no audio problems occors in the final result because of audio overlapping:
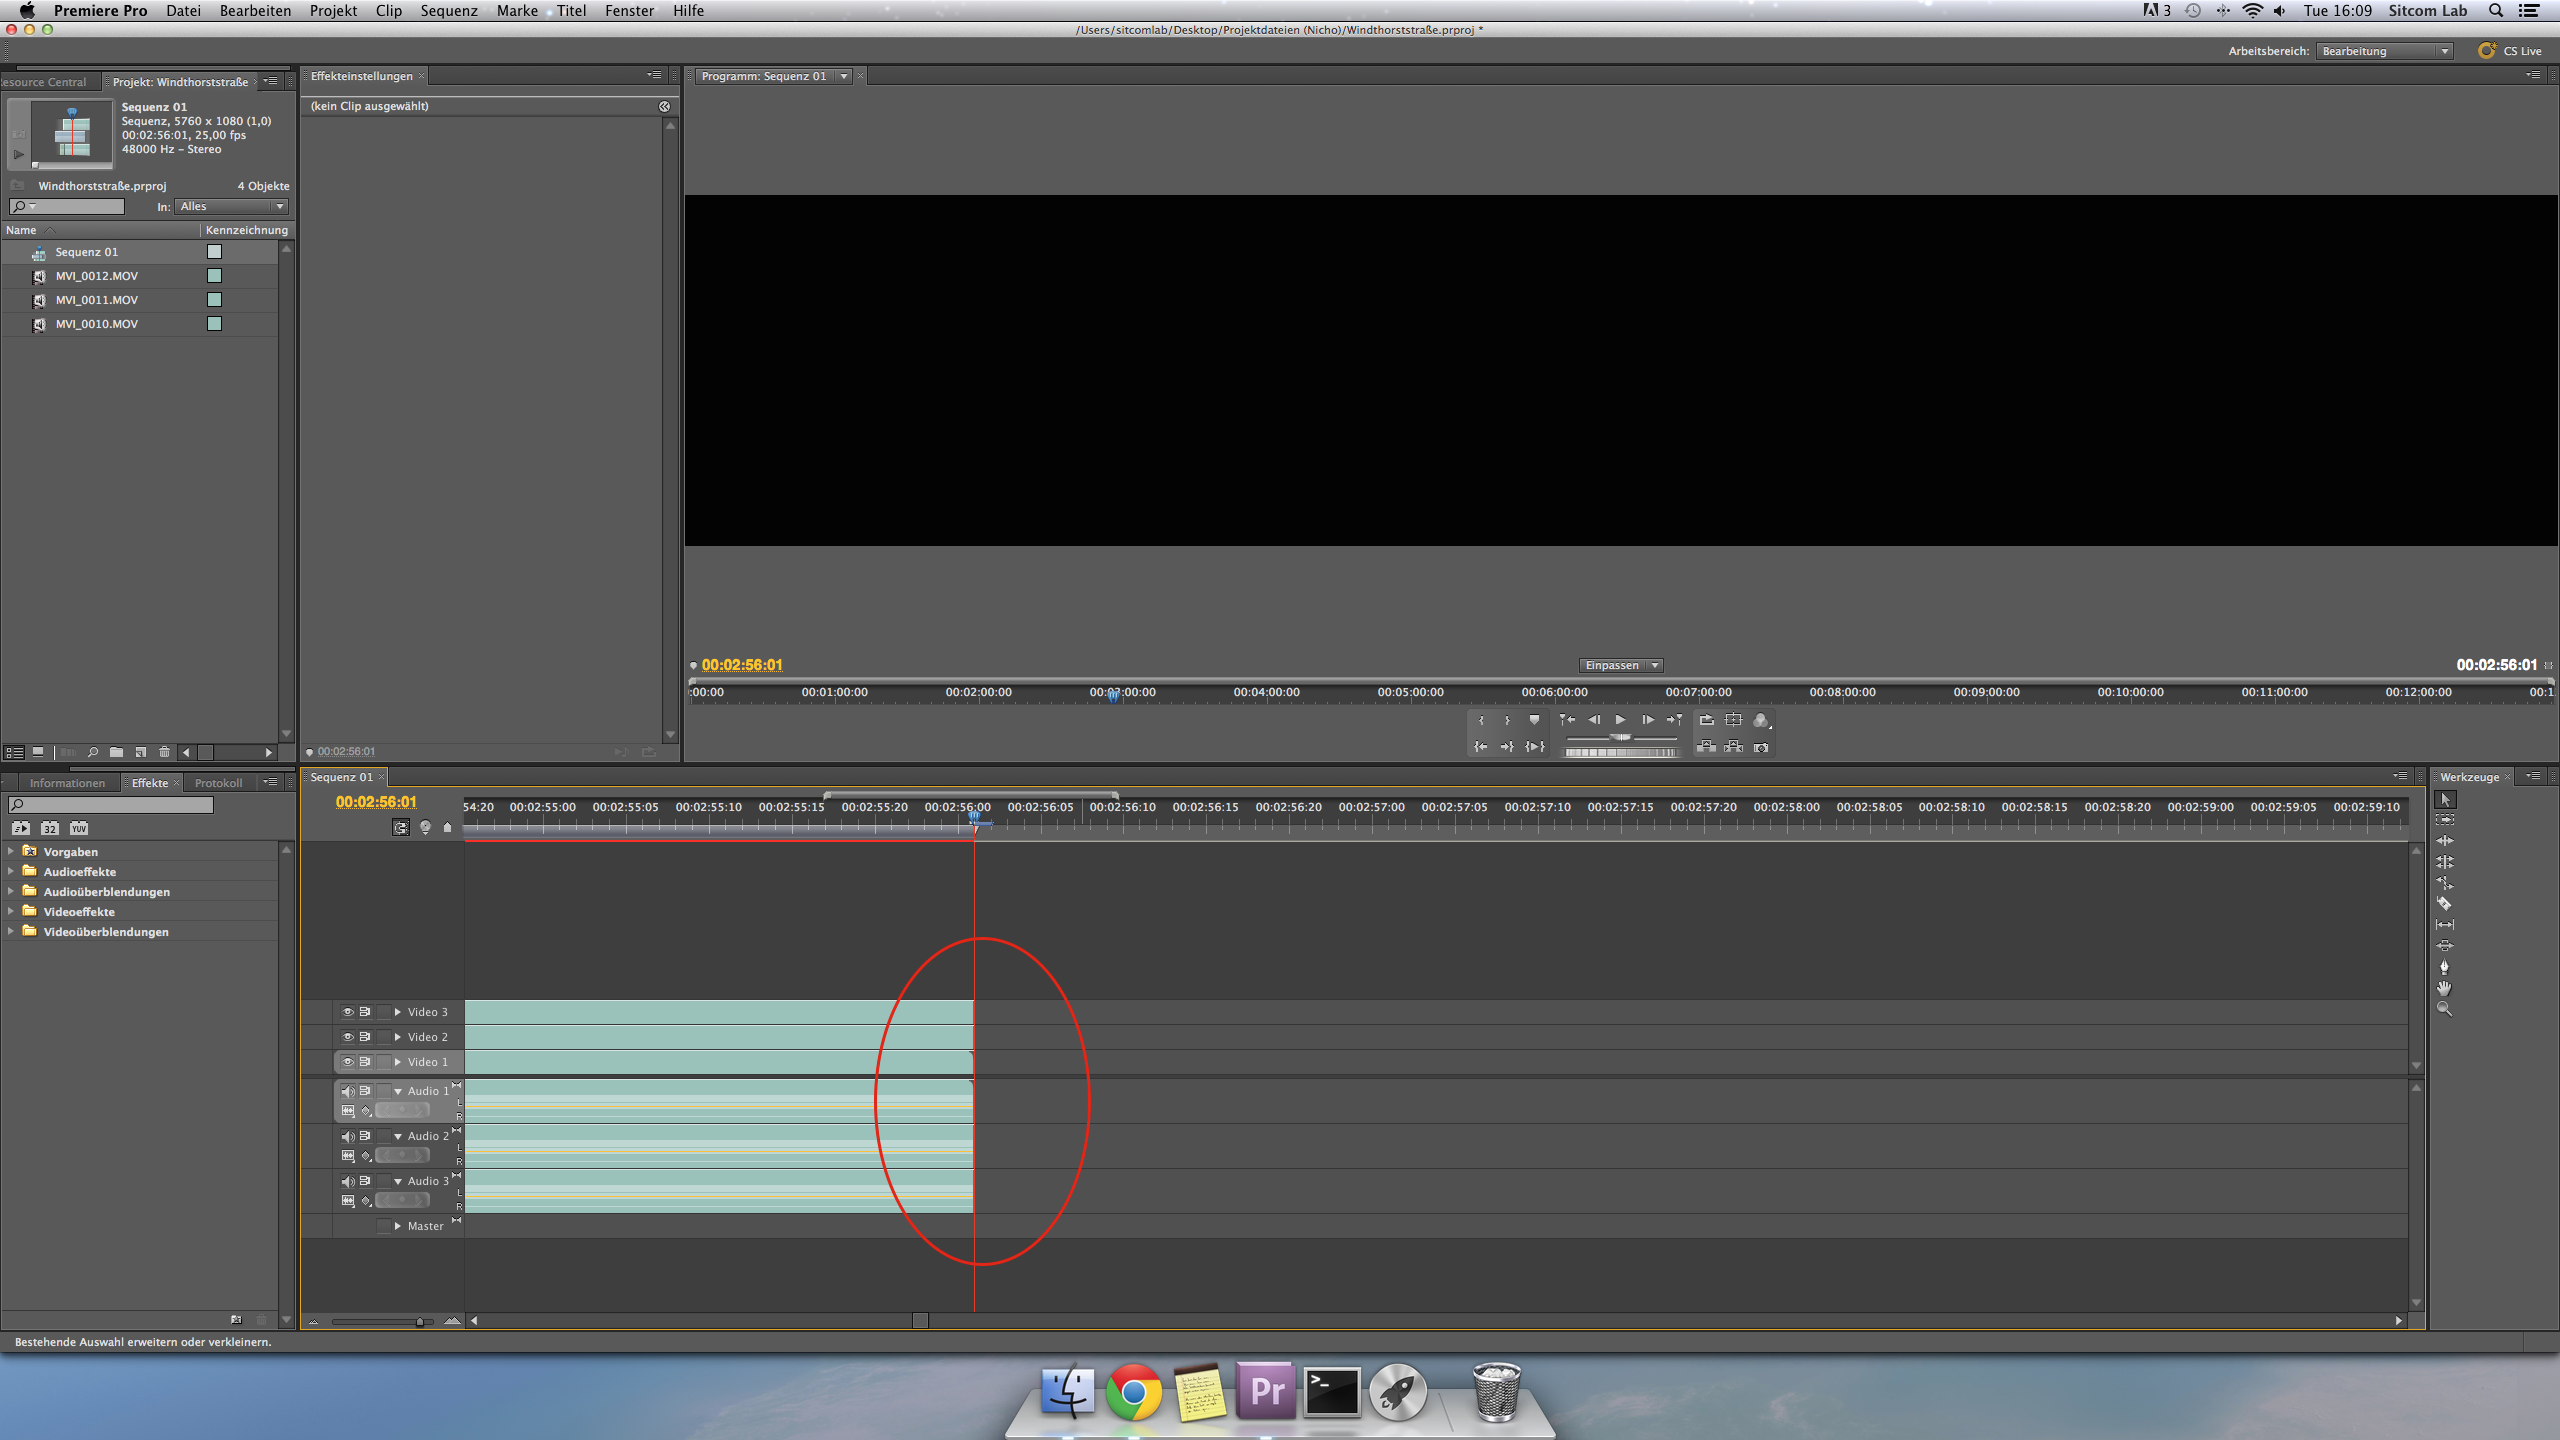
- After that, do the same cutting technique for the end of the video-sequences:
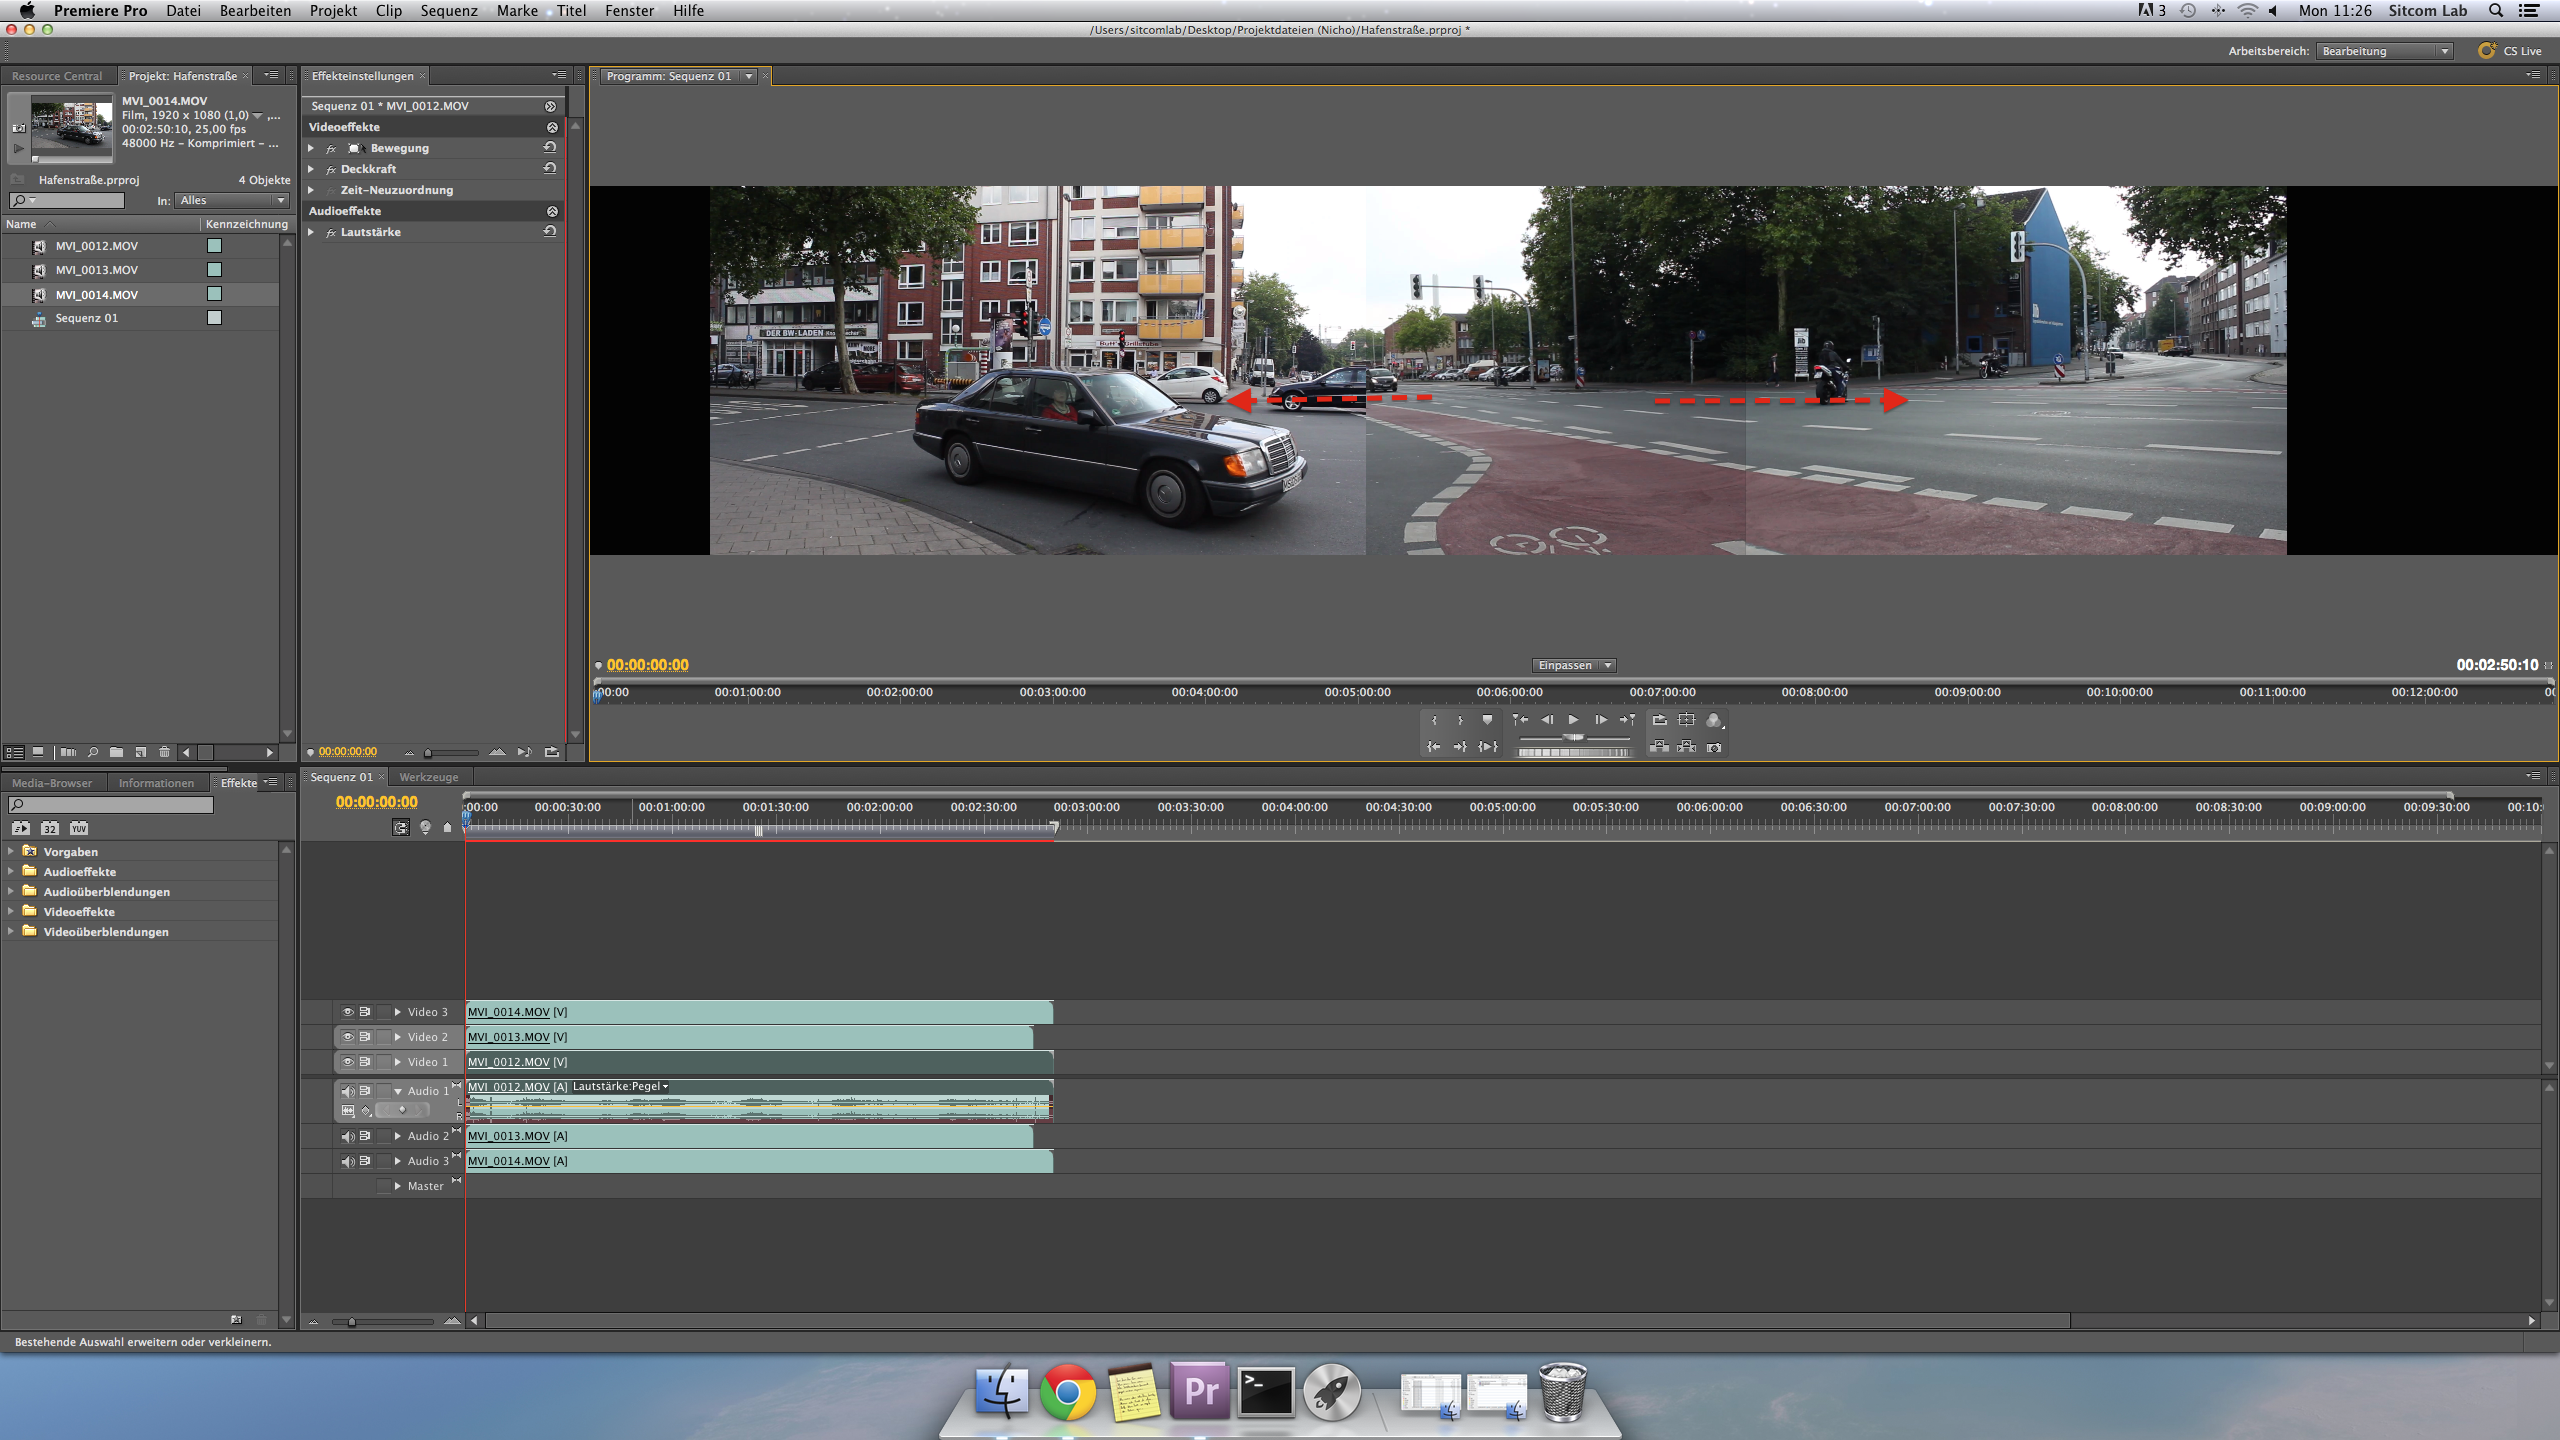
- Now it's time to place the videos to their right position via Drag & Drop in the programview-window
- You can easily move, rezise and rotate the videos by using on the white videoframe in the programview-window
- Try to optimize your overlapping borders with less distortions:
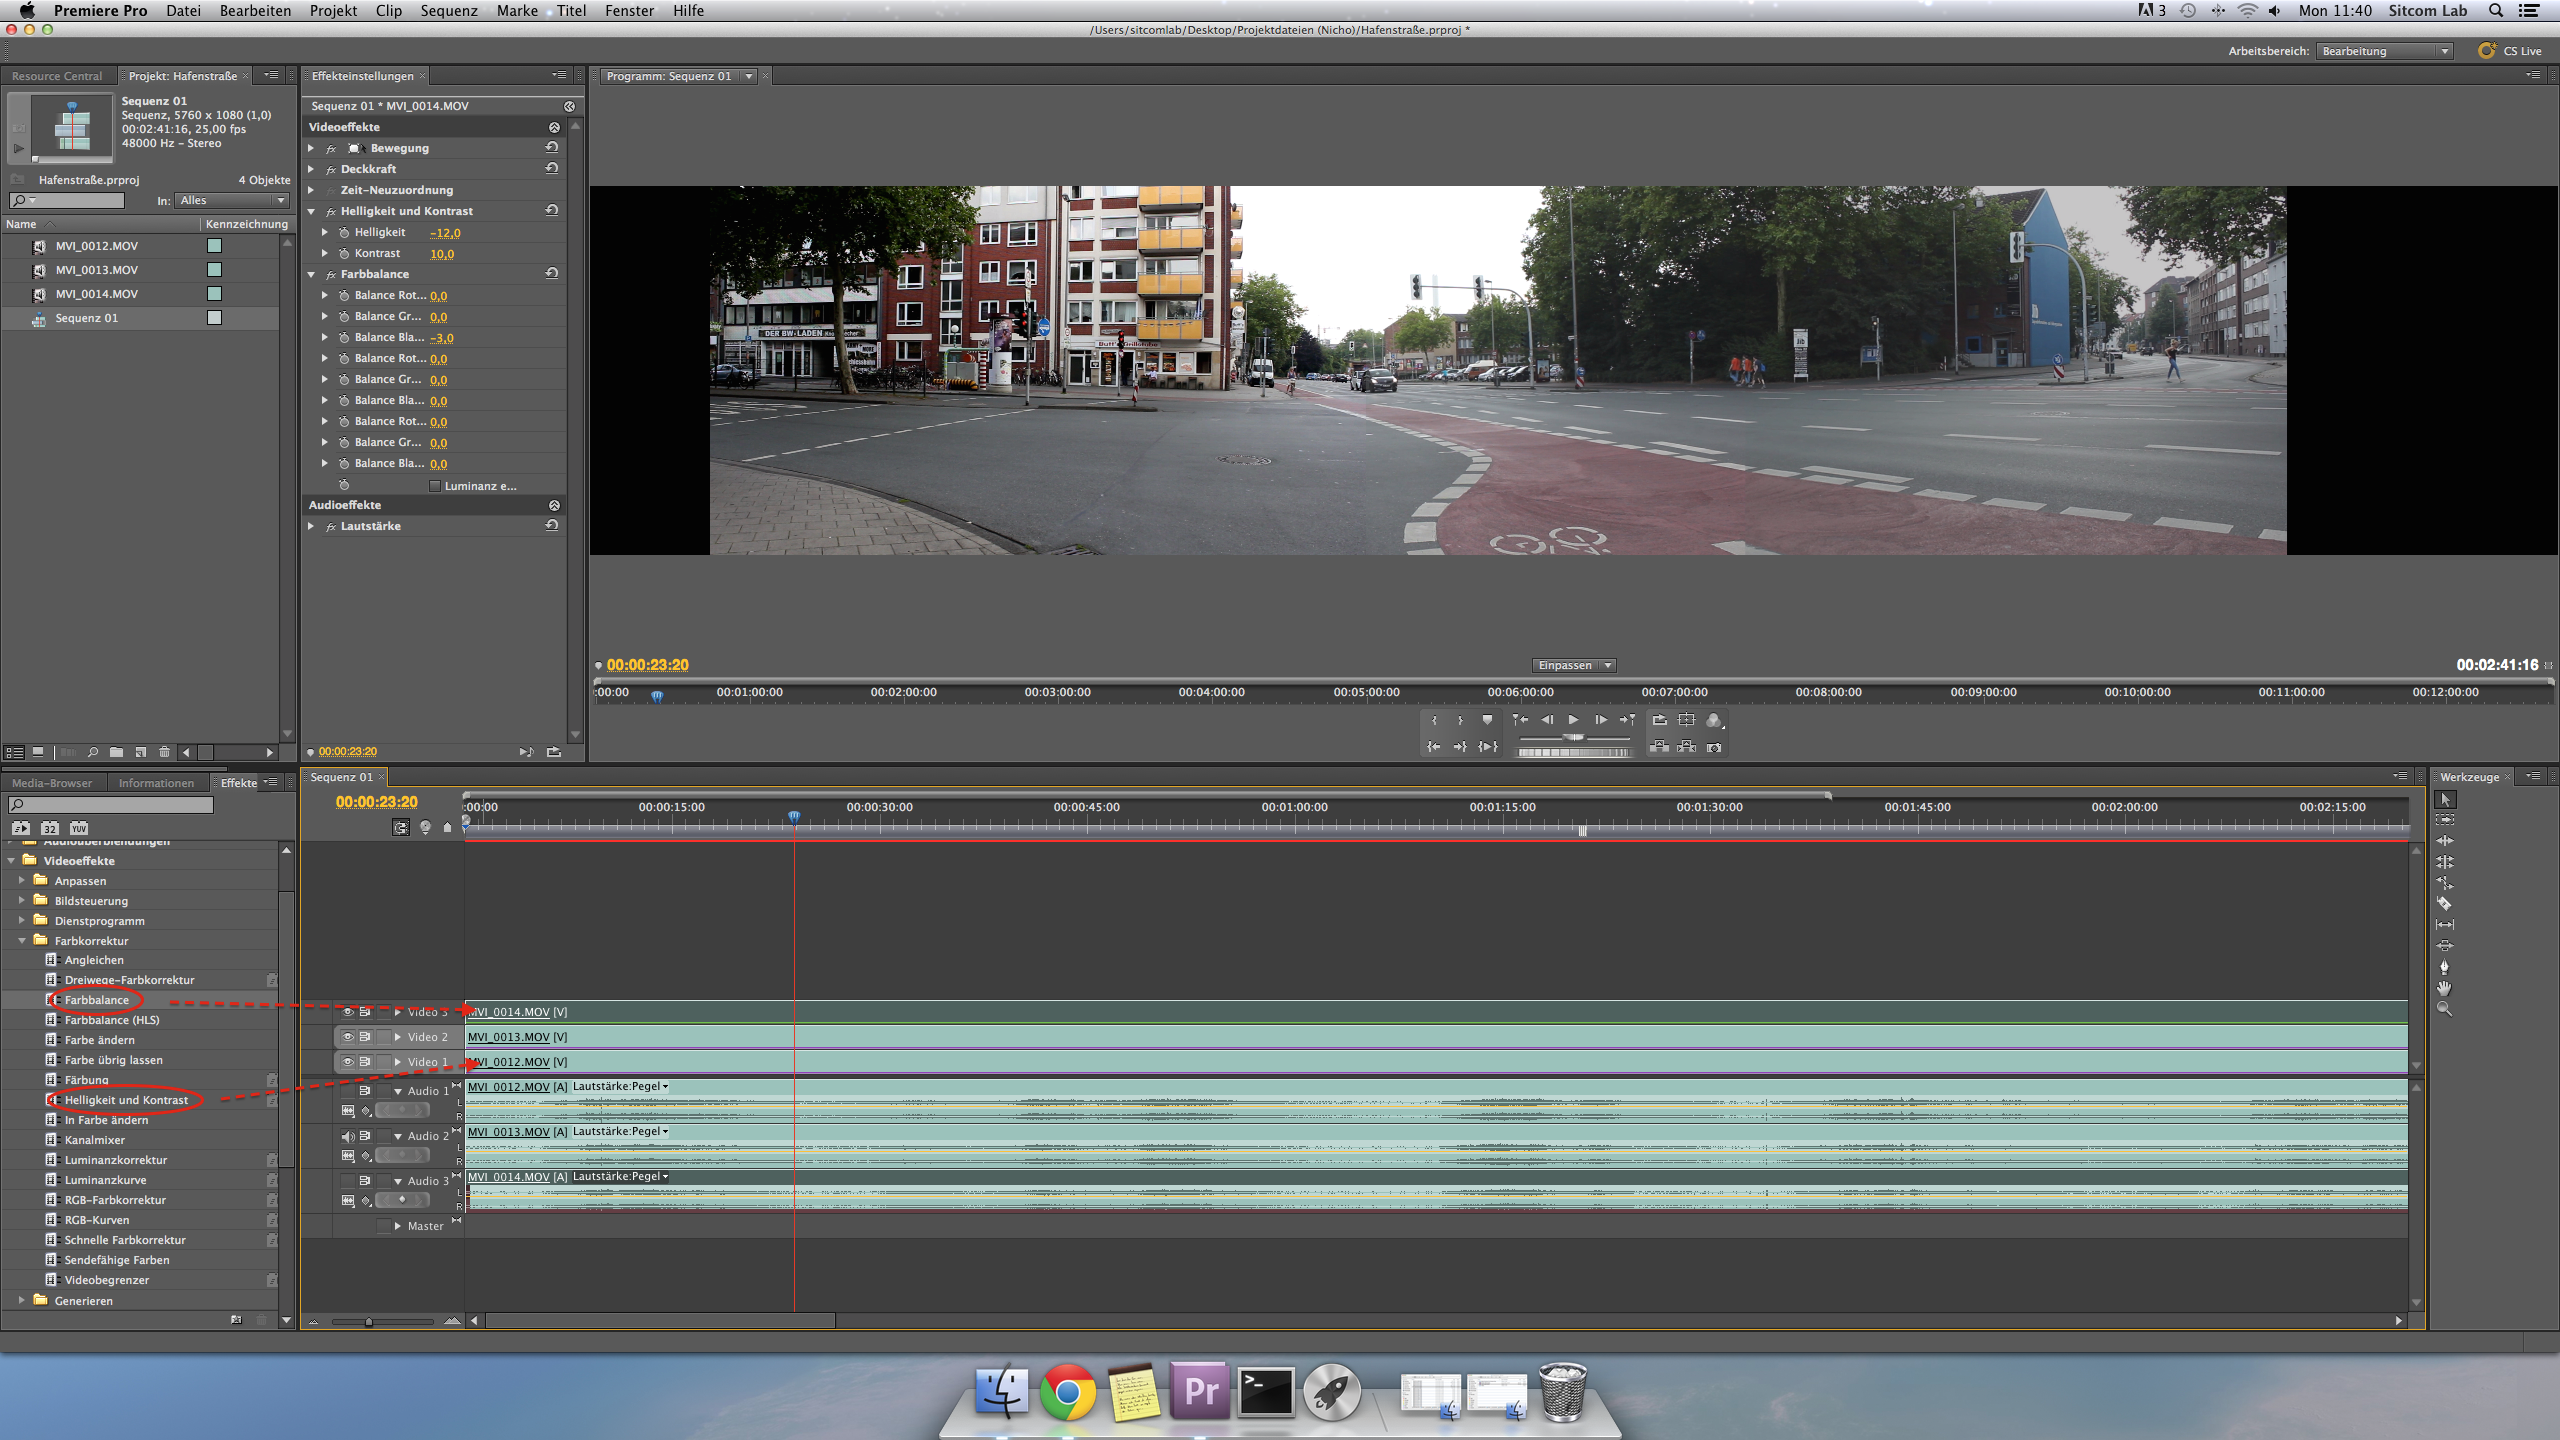
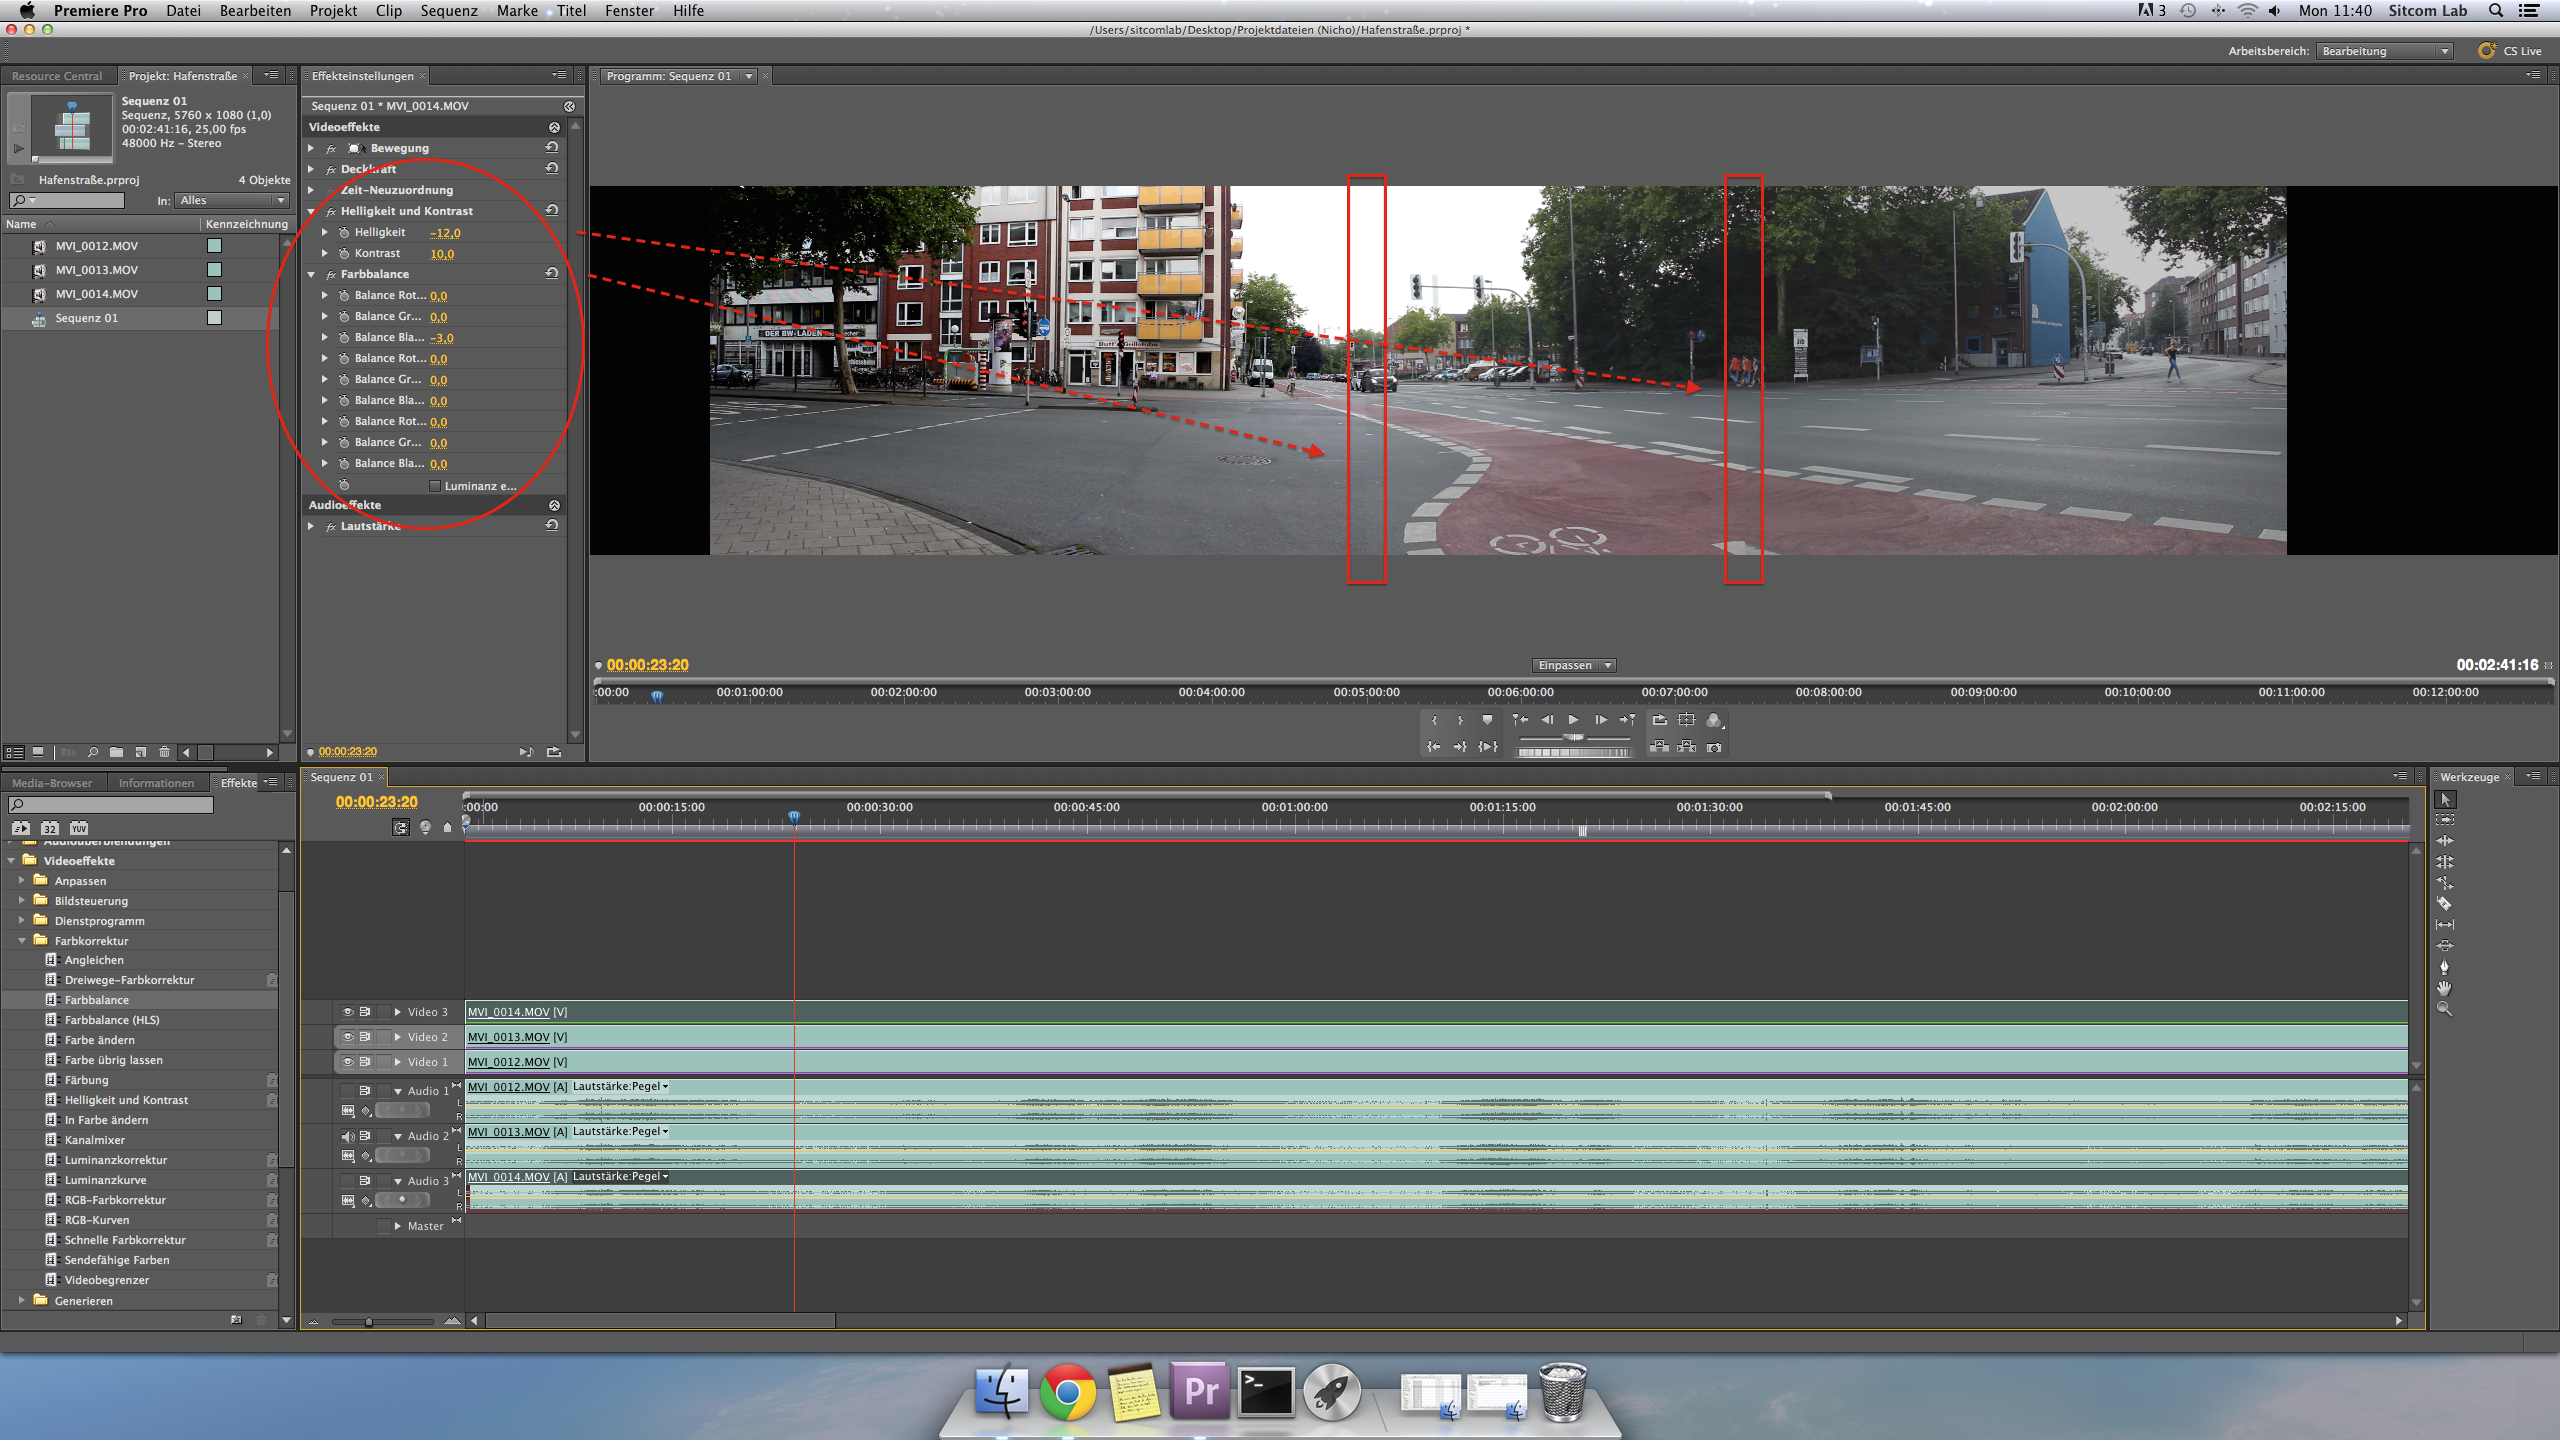
- If you're done with the previous step, it's time for fine tuning. In the under left window Effects expand the Videoeffects -> Colorsettings (Videoeffekte -> Farbkorrektur) and set Brightness and contrast (Helligkeit und Kontrast) and color balance (Farbbalance) via Drag & Drop to each video-sequence:
- Then click on a video-sequence and correct for example the brigthness, so that the video-borders approximately disappear:
- When you finished all steps, don't forget to save your project! You can use the shortcut
'CMD' + 's'on your keyboard, if you want.
- Before you start the exportation, please make sure, that you saved your project! You can use the shortcut
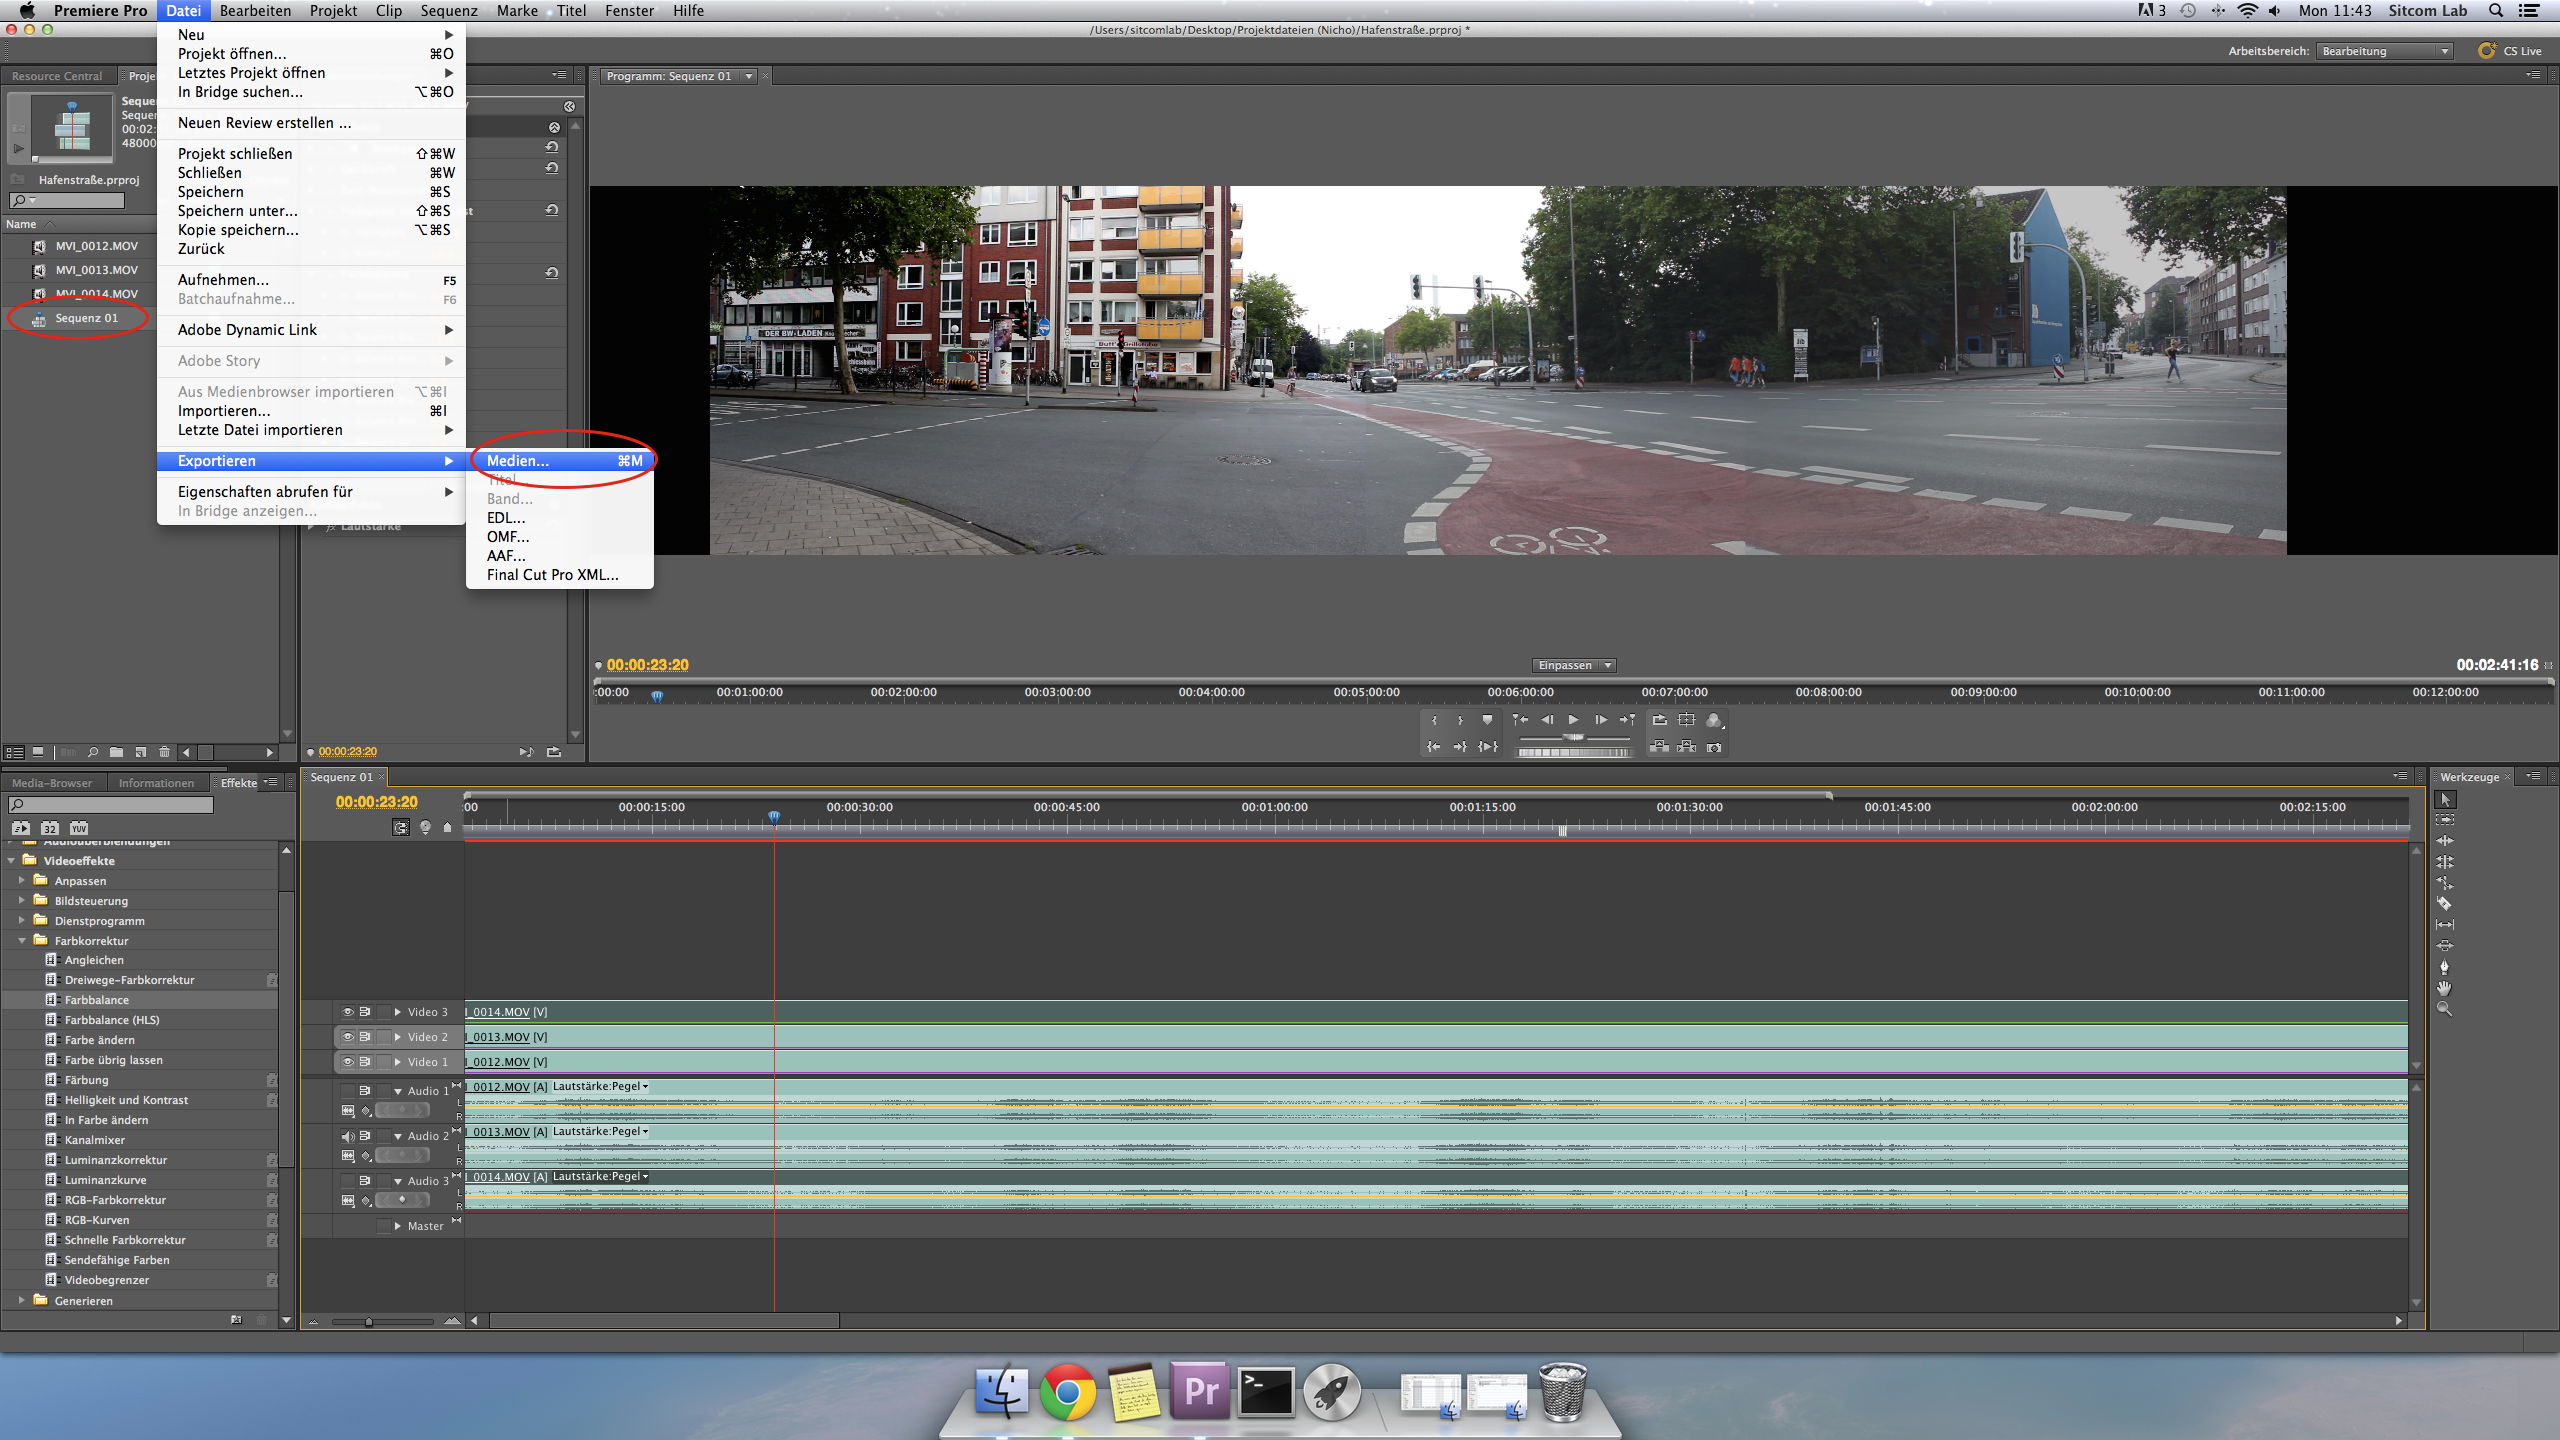
'CMD' + 's'on your keyboard, if you want. - Next click on the sequence in the project-window to mark it.
- Then click on the headerbar
Datei -> Exportieren -> Medien
- Adobe Premiere Pro opens a new window.
- Because the browsers need different video-formats/video-codecs you have to export your result twice.
- First set the video-format to Quicktime and choose the requirement IPED (MP4) and check if all settings are the same like in the following screenshot:
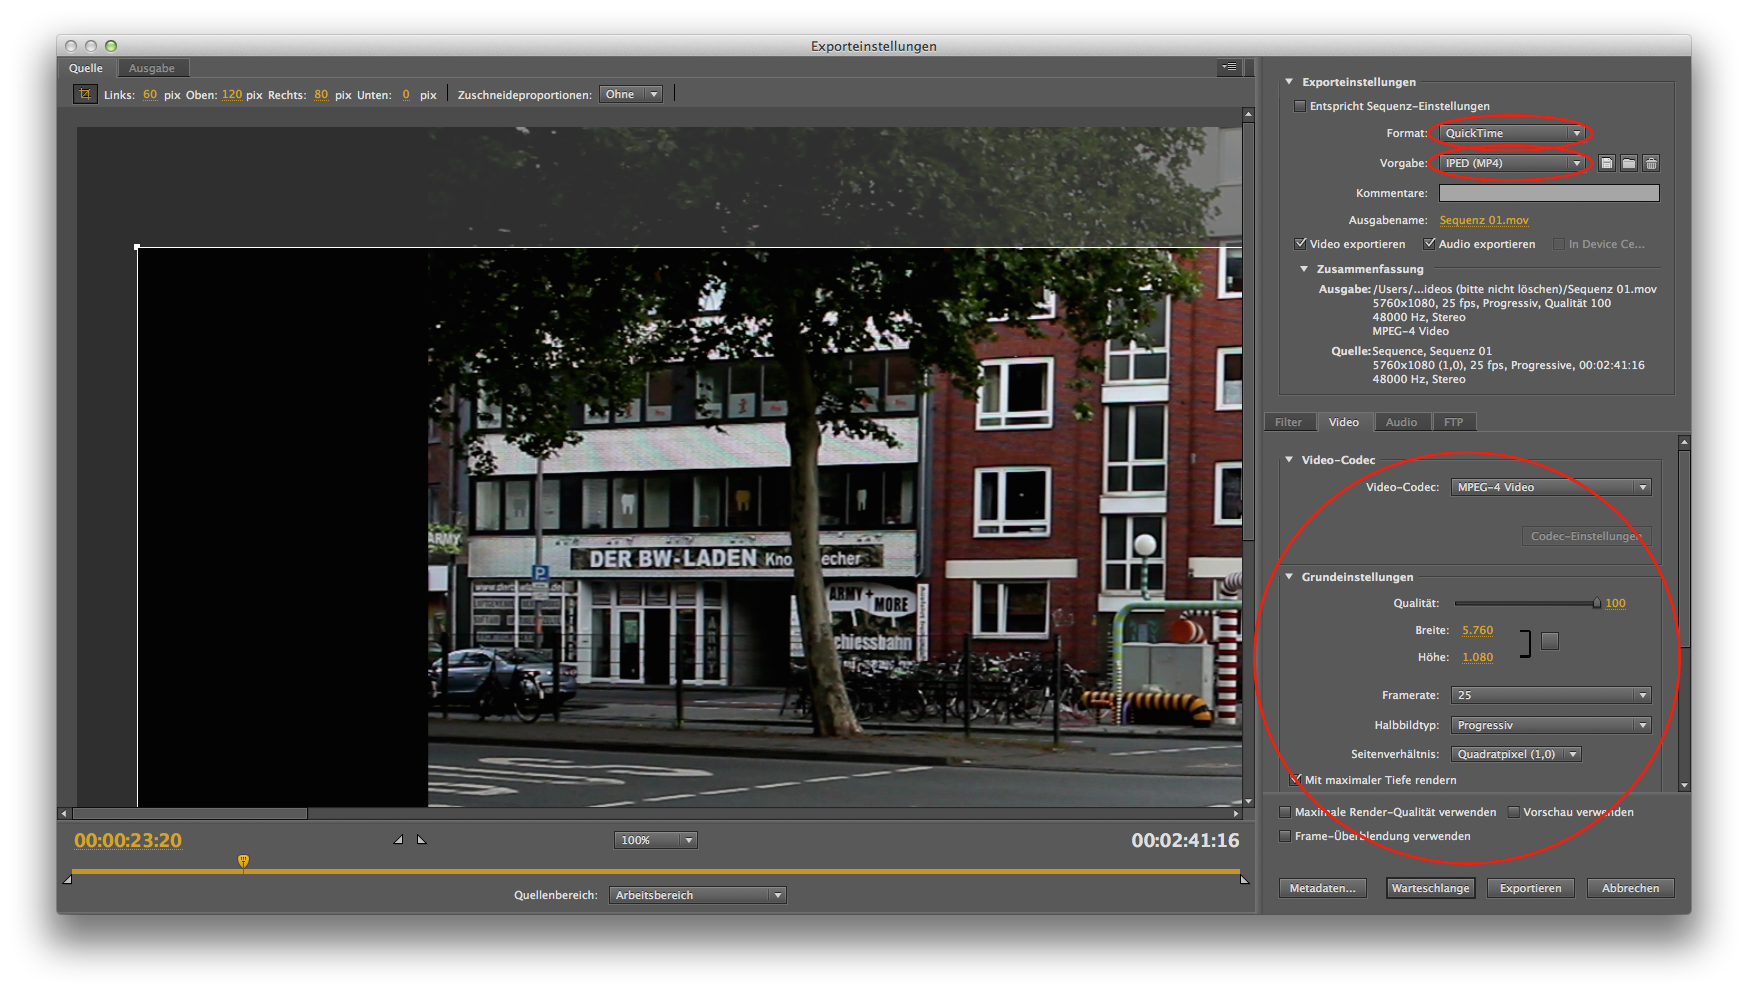
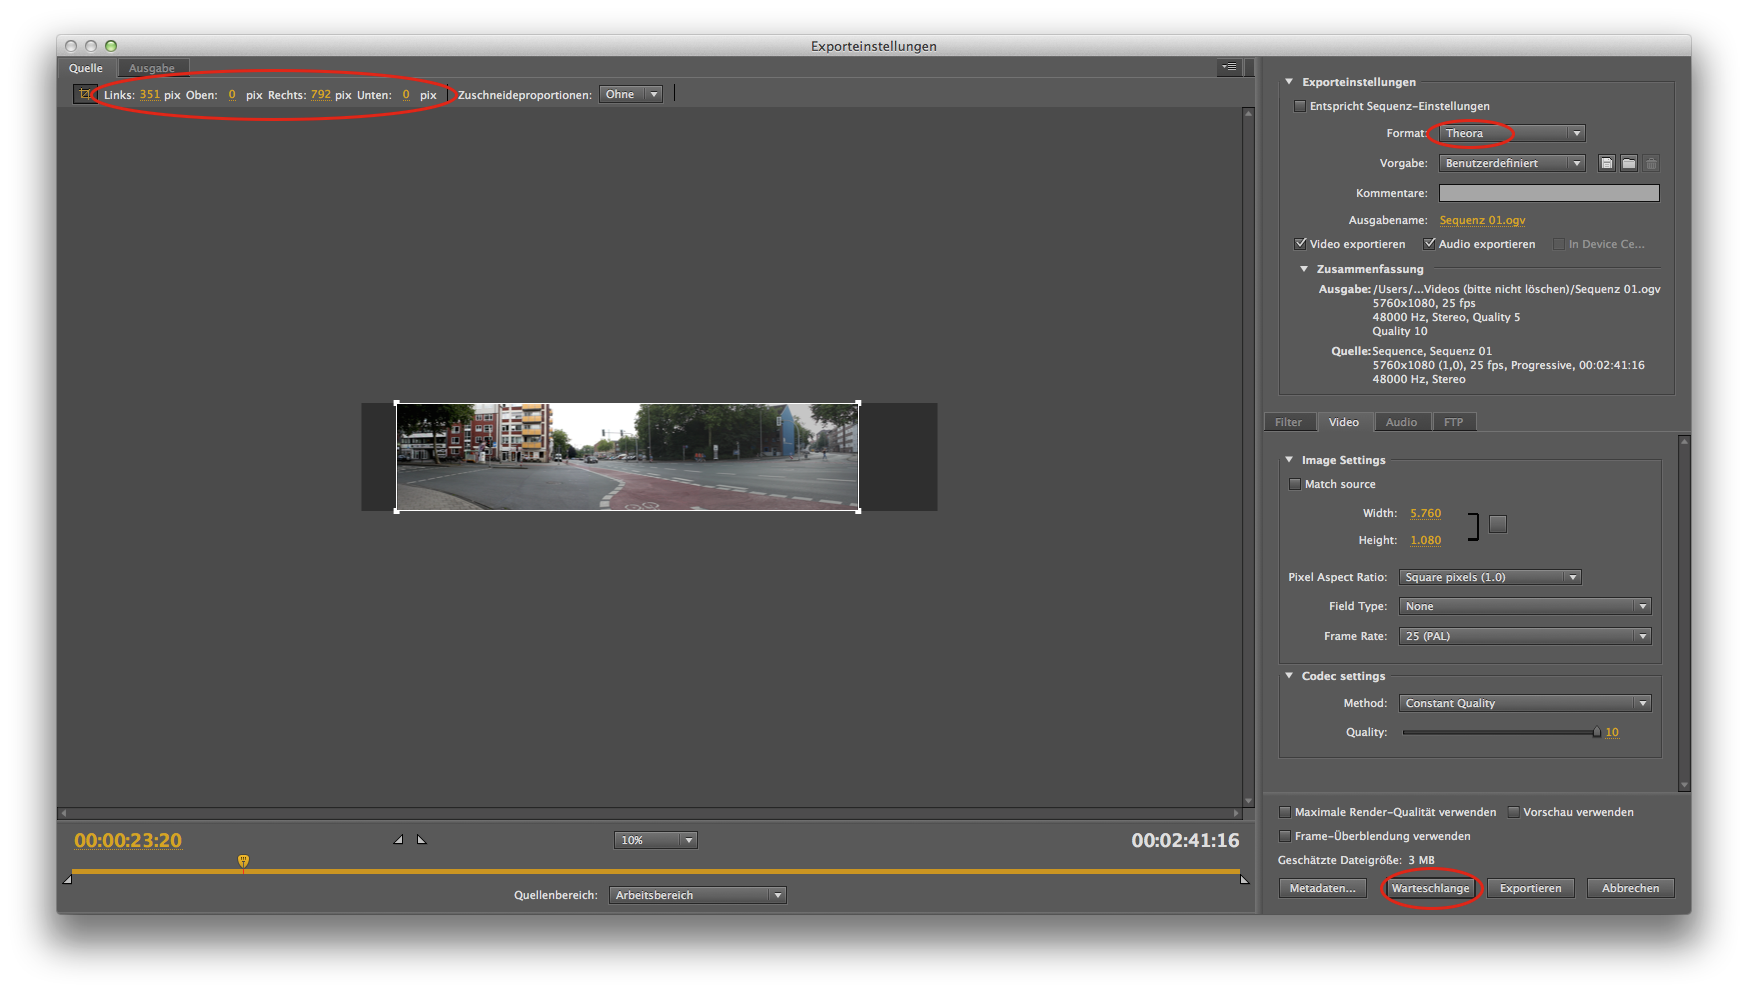
- Next, select/cut the video. Cut all black borders using the white rectangle. For a better view, e.g. to see the pixels/borders, you can zoom in/out over the middle dropdownmenue, which is located under the videoframe:
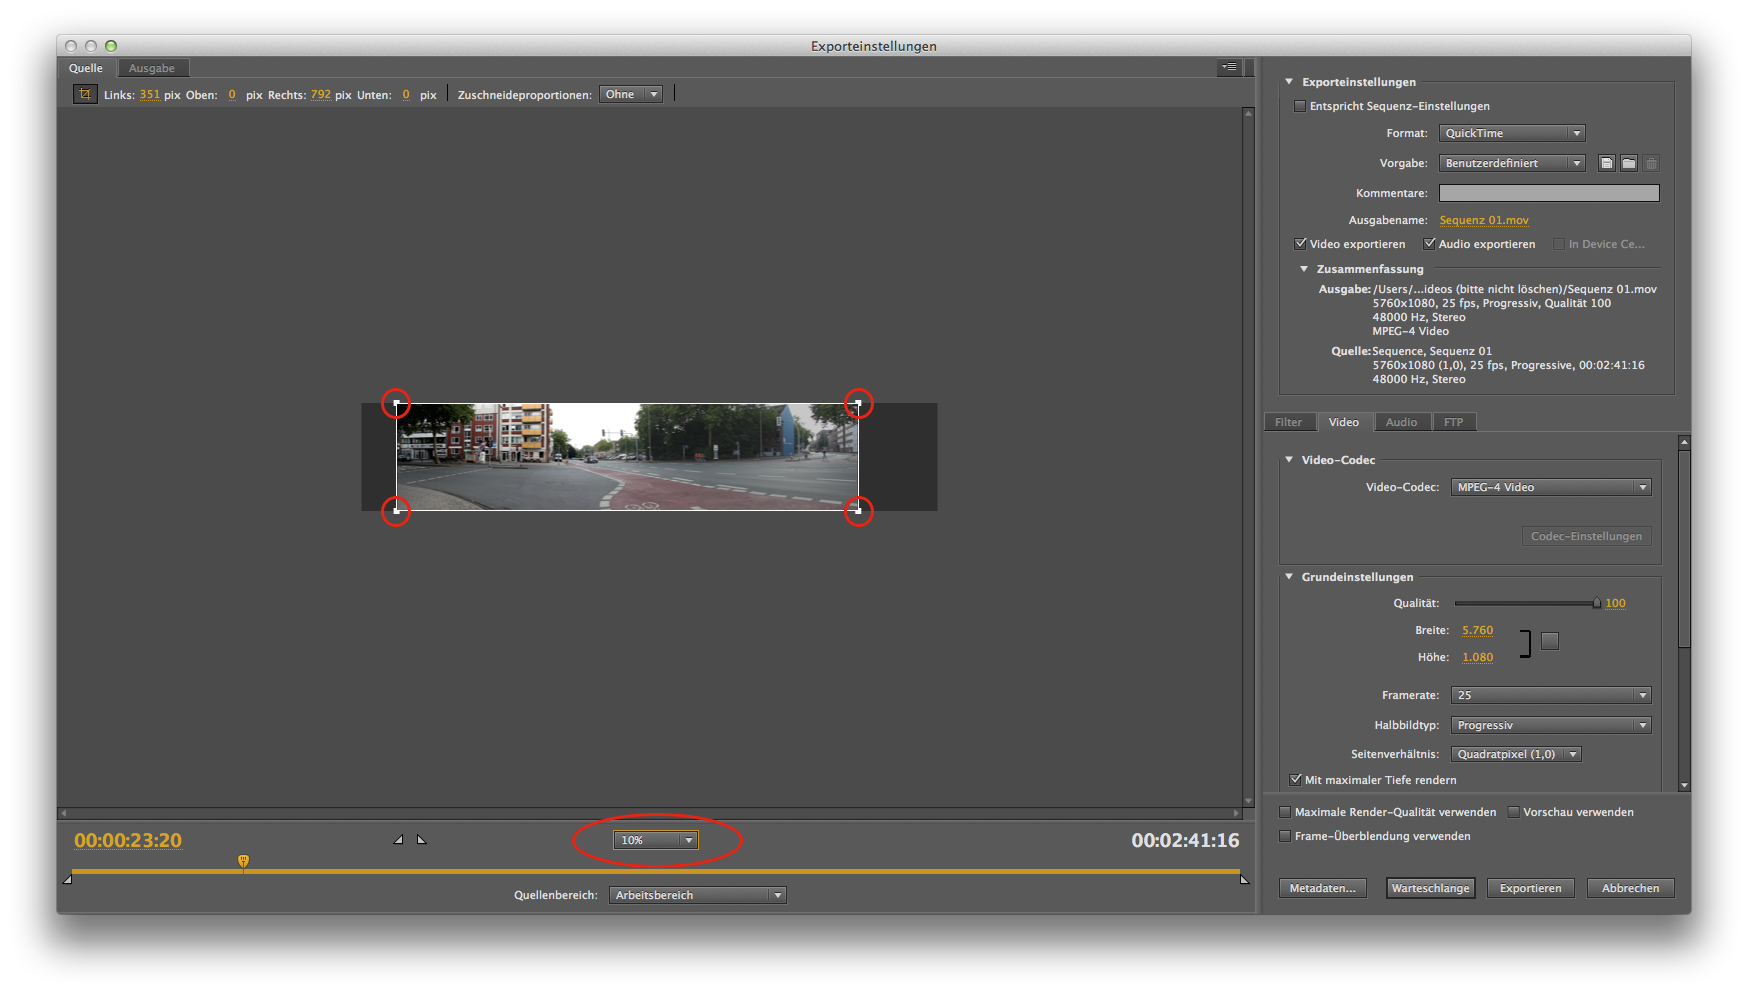
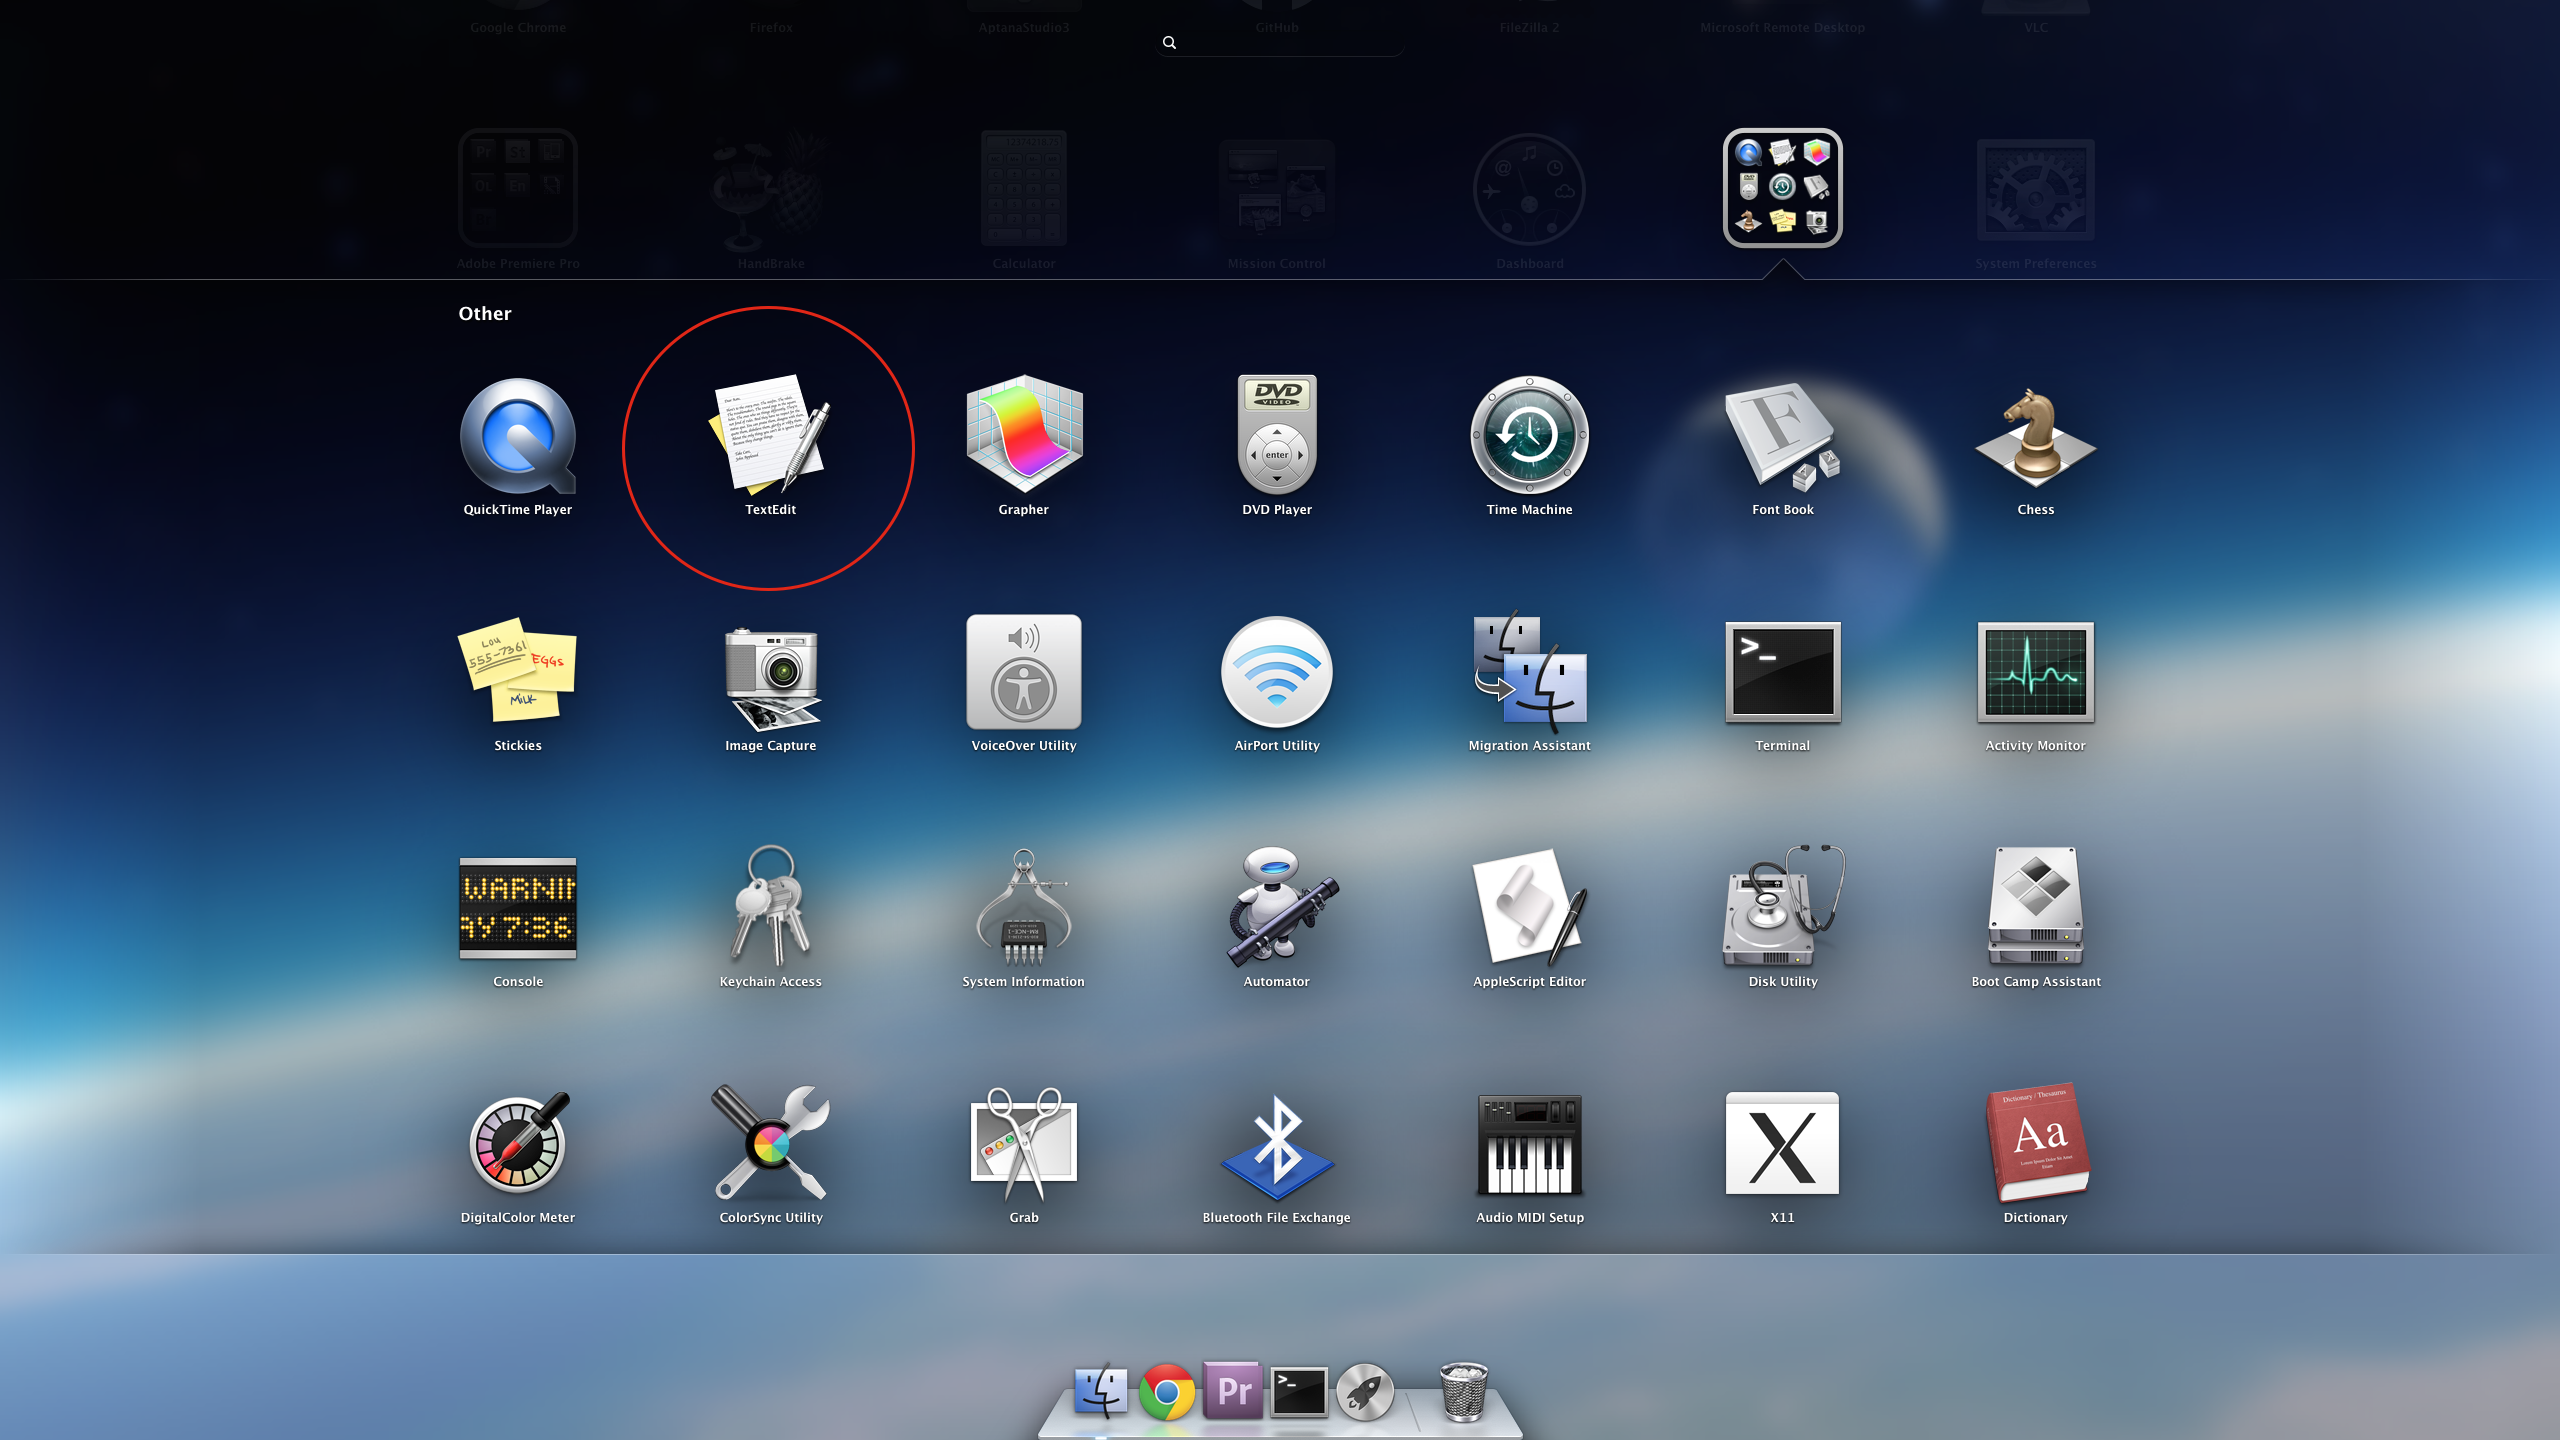
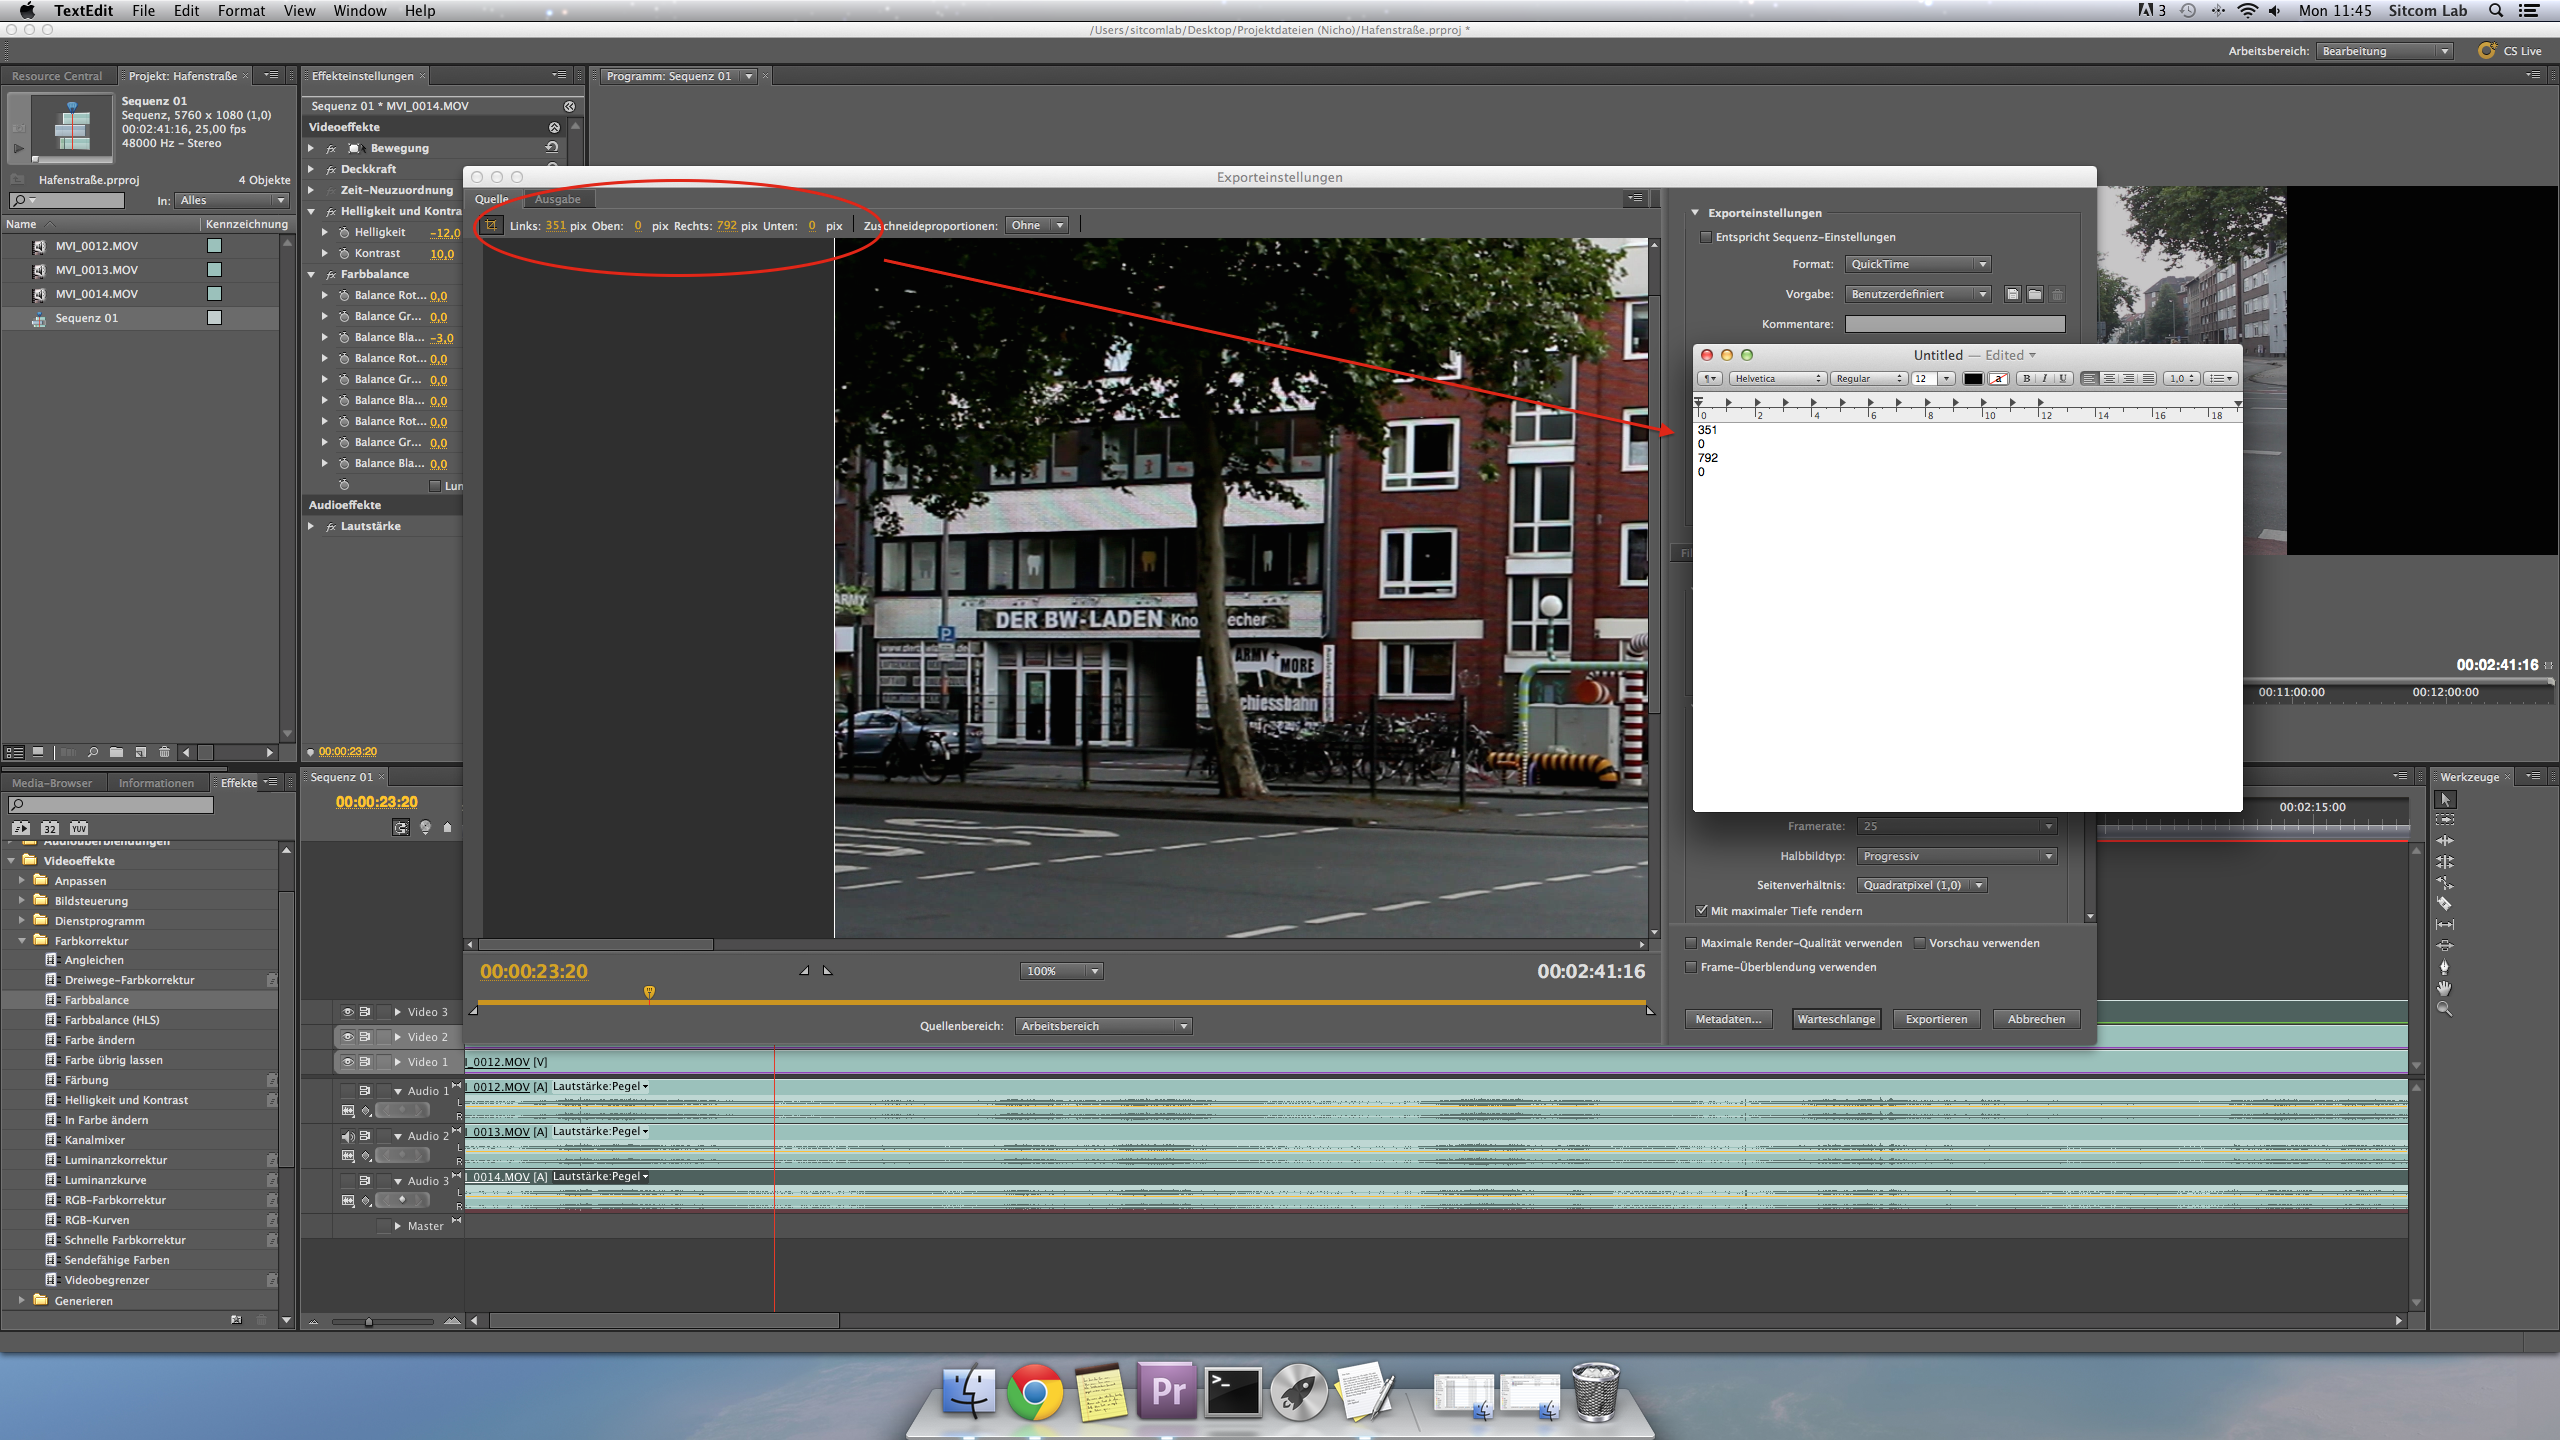
- You don't need to select the video-size a second time (for the other video-format), so open a texteditor like Textedit on the Mac and note down the Crop values:
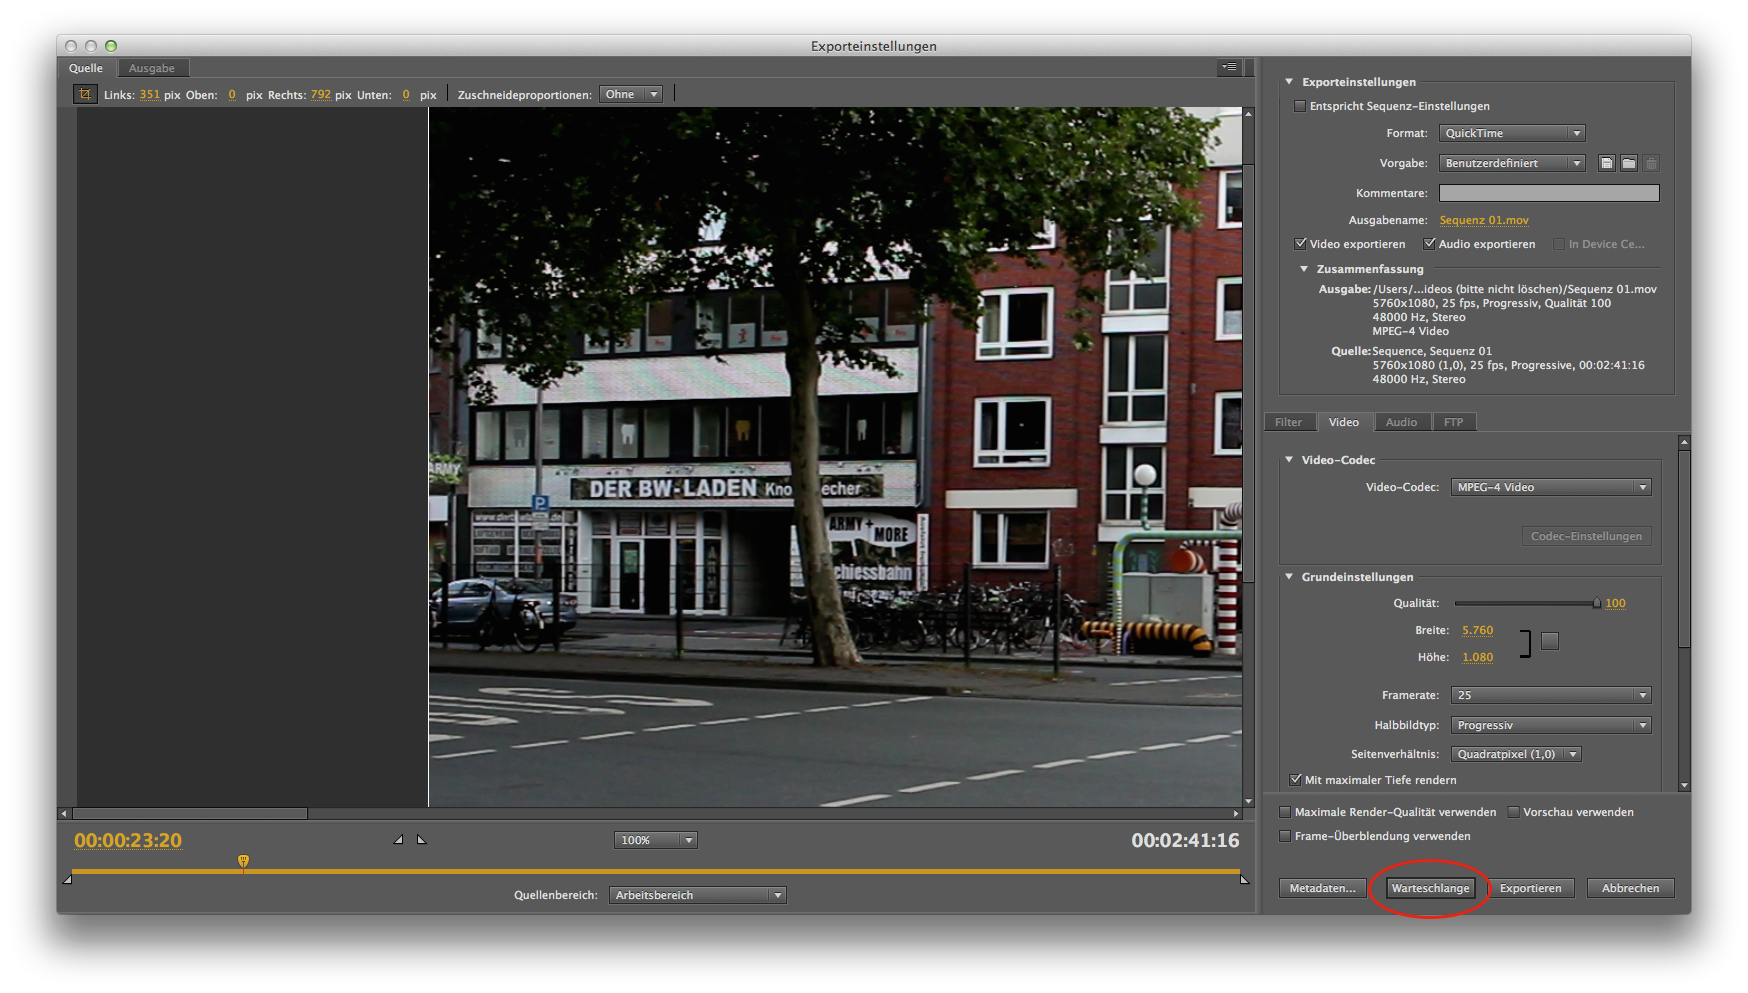
- After that click on Warteschlange.
Attention: Don't export it directly, because the application requires many resources to render the video and could delay, so that you will not be able to continue your work:
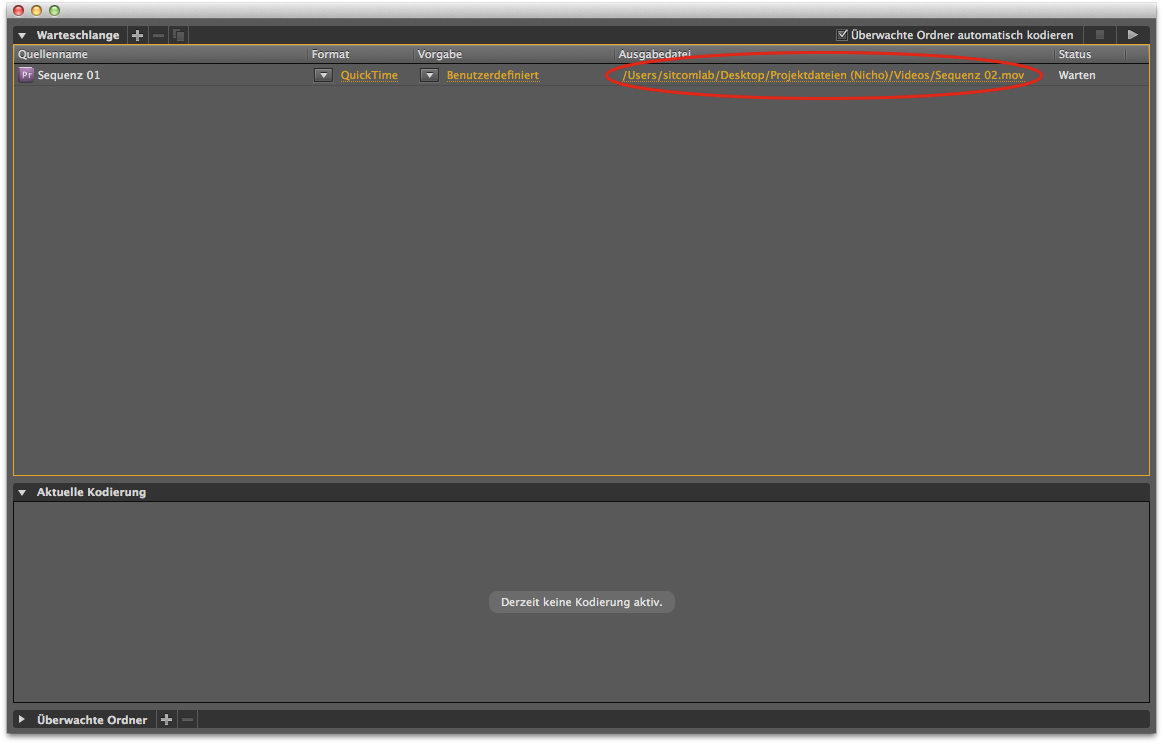
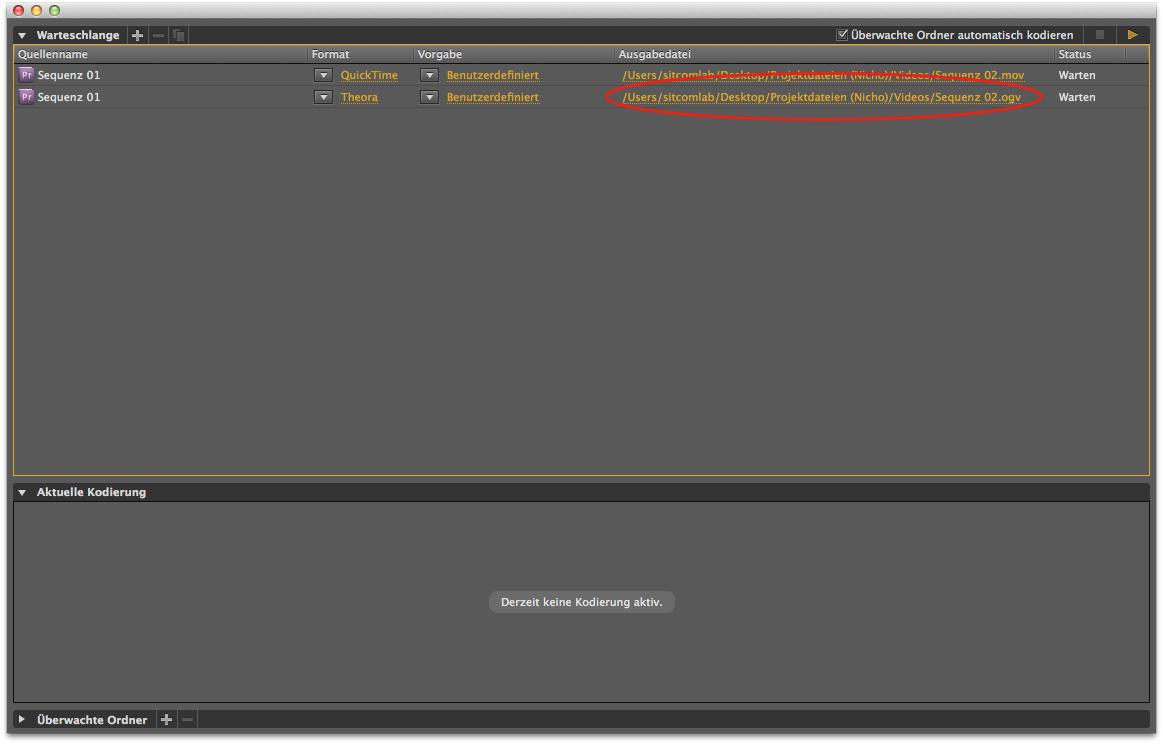
- Adobe Premiere Pro opens a new application called Adobe Media Encoder CS5.5, where you can set your output-path and an output-name:
- Remember, don't start the export process before you haven't add the second videoformat to the queue. So go back to Adobe Premiere Pro and click on
Datei -> Export -> Medienagain. - Choose Theora as video-format and as requirements IPED (Theora).
- Then type in your noted crop values and add the export task to the queue:
- Set an output-path and an output-name for this video:
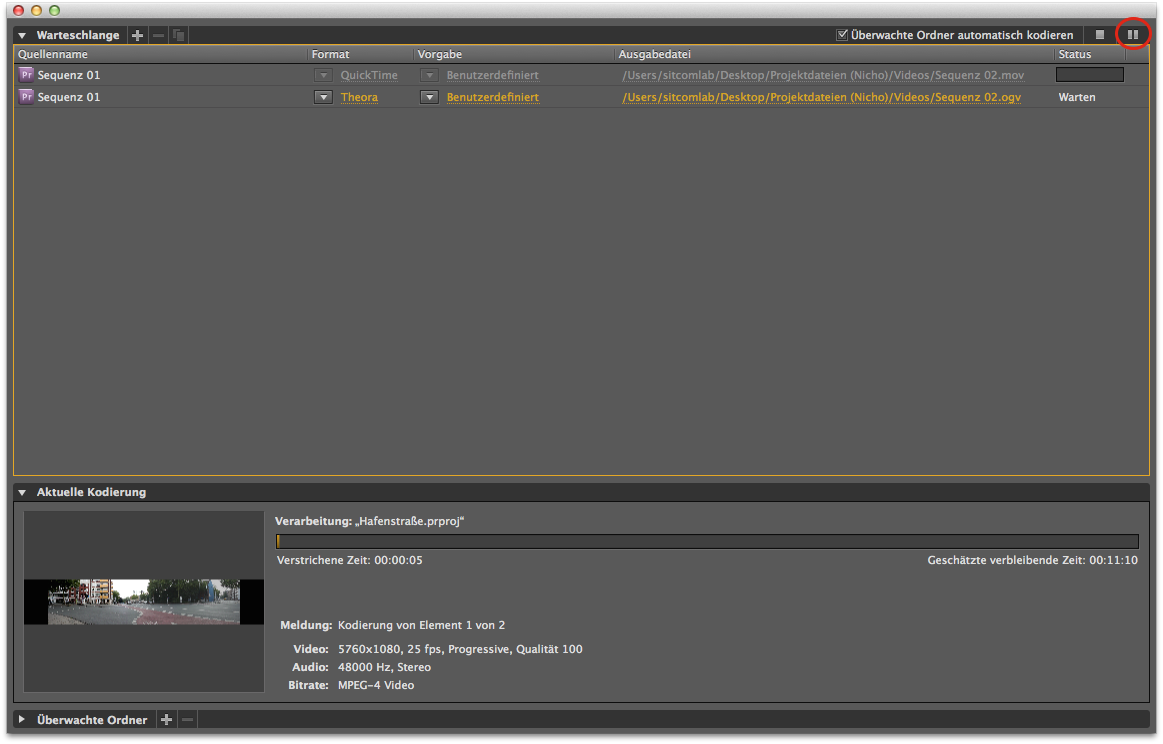
- And finally start the rendering process with the Playbutton (This may take a while... so enjoy a coffee or a nap ;) ):
- After the rendering process, don't forget the last step!
- Because of better Browser support, we need to convert the created
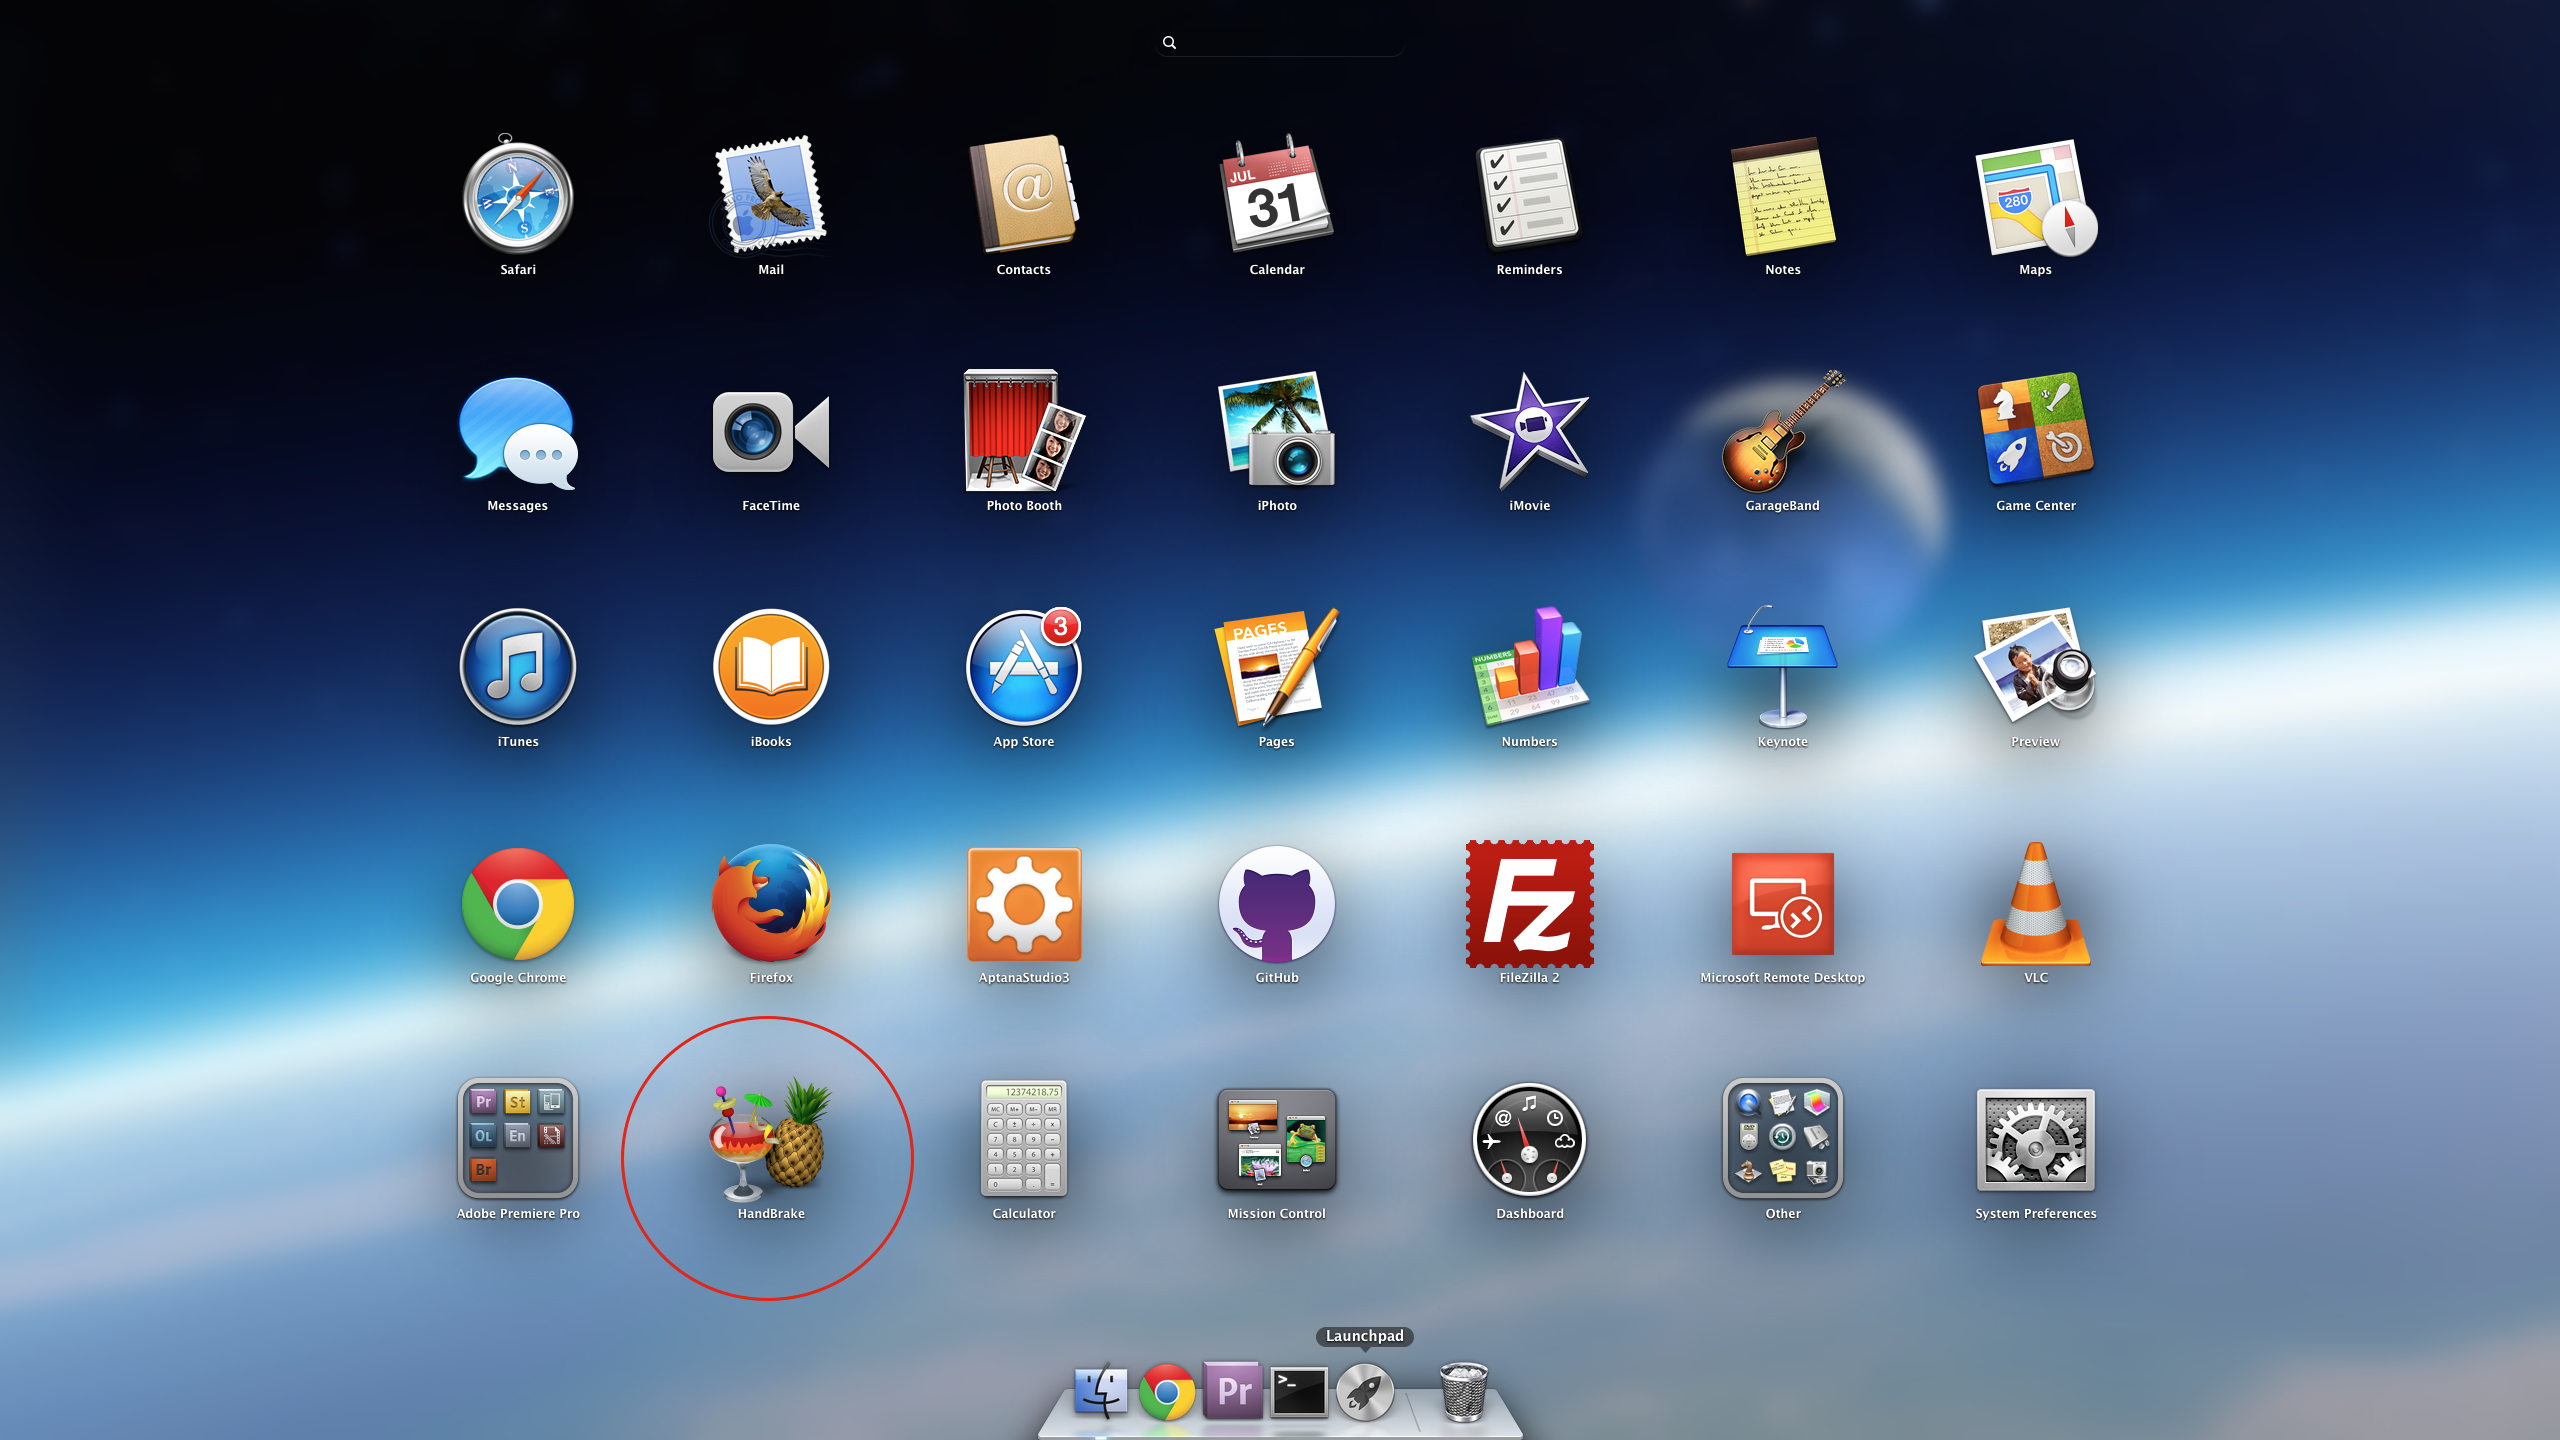
.mov-files to.mp4-files. - So open the application HandBrake:
- Click on Source and choose an exported
.mov-file. Then click on Browse... and set the output-path and output-name:
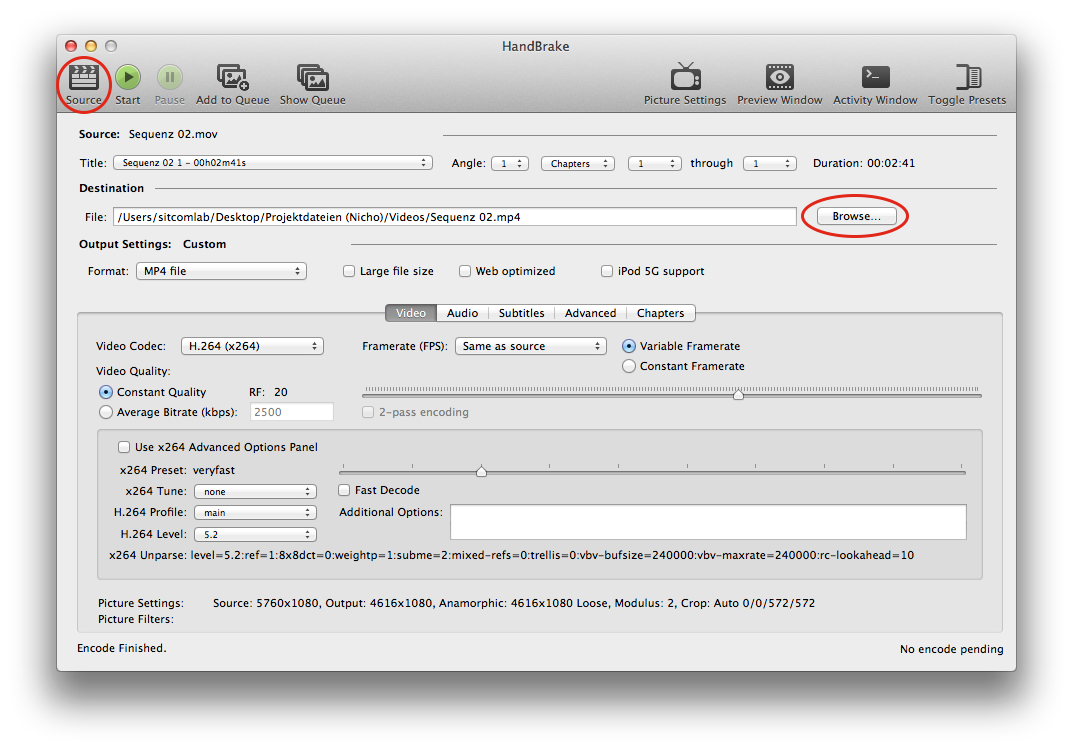
- Next set the Video-Codec to
H.264 (x264), - the Framerate (FPS) to
Same as sourcewith aVariable Framerate - and the H.264 Level to
5.2. - After that open the Picture Settings
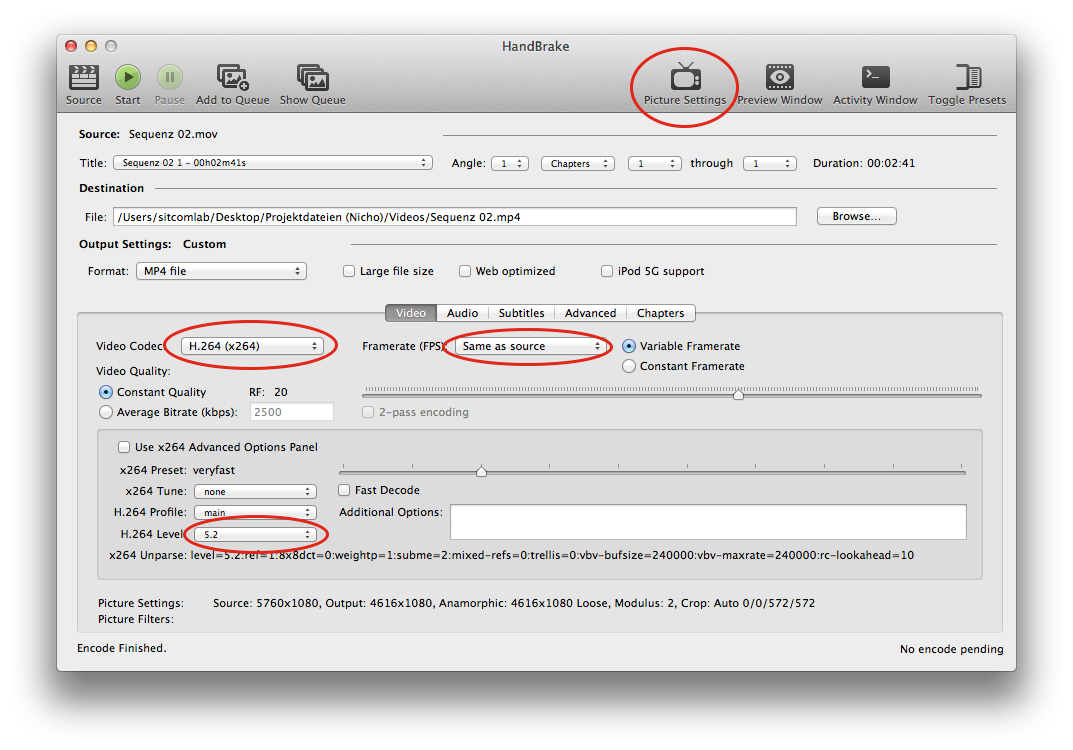
- In the popup set the Anamorphic option to
Customand make sure that the checkbox Keep Aspec Ratio ischecked:

- Then change the Display Width to the width of the source, e.g.
5760.00:

- Then increase the Width to the width of the source (or display width), e.g.
5760. Not sure why, but you have to set this value manually by using the up-arrow:

- After that
uncheckthe checkbox Keep Aspec Ratio. - Then increase the Height to the height of the source, e.g.
1080. Not sure why, but you have to set this value manually by using the up-arrow:

- Make sure that the PAR Width and PAR Height have the same values like the Width. If there is an other value, something was wrong. Then do the previous steps again:

- If everything was okay, continue with Cropping. Choose
Customand decrease all values to0. Not sure why, but you have to set this value manually by using the down-arrows:

- When you're done, you can close the window Picture Settings:
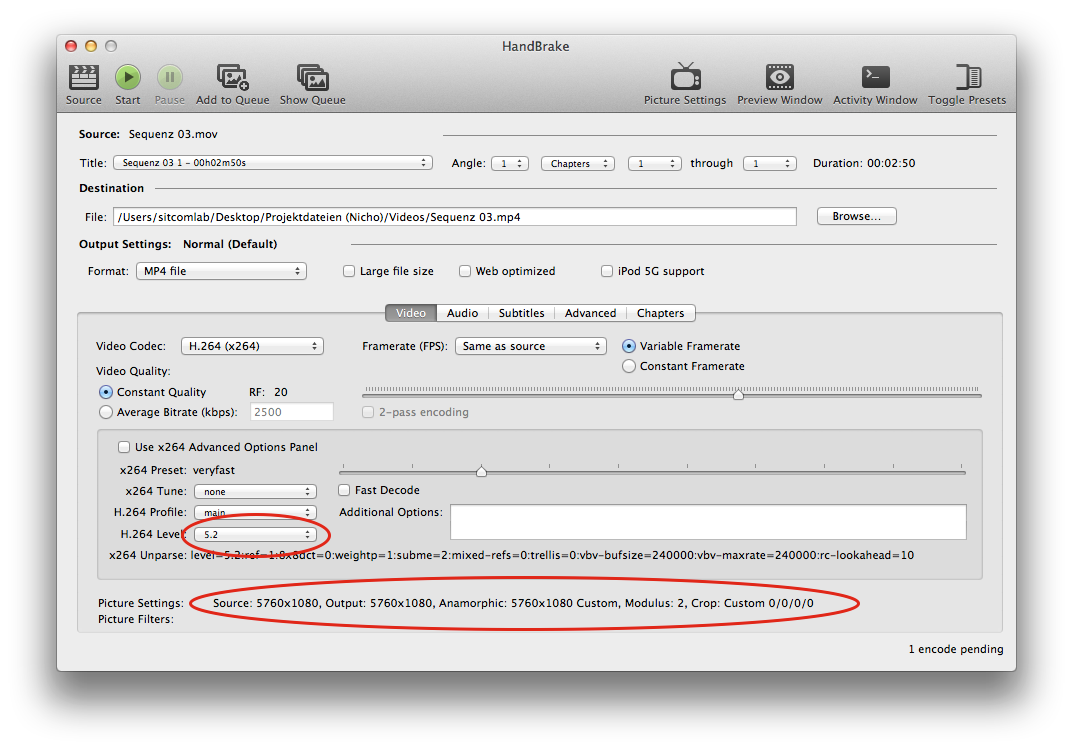
- Make sure that all settings are correct, see Picture Settings at the bottom of the window. There should be something like the following screenshot:
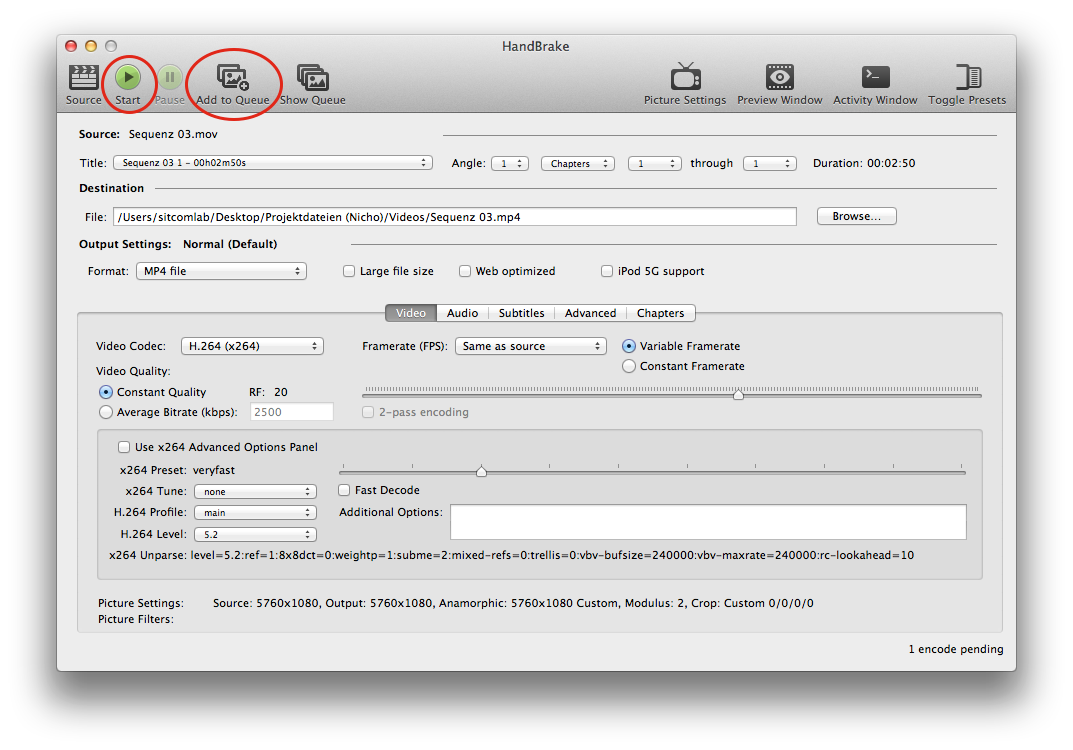
- Finally you have the possibility to Add this task to Queue and do it for an other video or Start the conversion directly:

Sitcom Lab Documents 2014 Sitcom Lab, Institute for Geoinformatics, University of Muenster