Join the class on the World Videophone using the following link:

- Download Unity
- Course Notes (out of date!)
- Assignment
- Unity Quick Reference
- Markdown Tutorial
- git Tutorial
- Past Papers
- The Metaverse That Can Be Named Is Not The Metaverse
- Recording of the class
- Open up the Physics2 scene from the repo and write code for the methods CreateTower and CreateCar
- Watch this tutorial
- Install Probuilder into your project
- Make a model
OR Do this old lab exercise:
- Write a physics integration function from scratch
- Use trigonometry
- Make a path following AI
Today lets use the Seek steering behaviour as inspiration to make this little scenario:

- Make a Path MonoBehaviour that has a public List of Vector3. Use trigonometry to create the elements of the vector. You can also add gizmos so that the path can be seen in the Unity editor. This class does not need an Update method. It is just a container for the waypoints
- Make a PathFollower MonoBehaviour that has a public field for the path (that you can drag the Path onto) and another public field for the current waypoint. This class should have an Update method that steers the gameobject towards the current waypoint. When it gets close it should advance to the next
- Make a prefab consisting of a Cube with a TrailRenderer attached. Attach the Pathfollower
- Make a Spawner that spans the prefabs and assigns the path. You can offset the current waypoint for each one that you spawn
My popular Quaternions in Unity Video:

An ode to Quaternions
A quaternion is like a vector, but with a "w"
To construct one, use an axis and an angle, that's what we do
For rotations it must be normal, or otherwise its pure
So we normalise, divide by length, just to be sure
To invert a normal quaternion, we negate x, y and z
Multiply quaternion, vector, inverse quaternion and it rotates don't you see
A rotation of 0 radians is the same as two pi
To convert a quaternion to a matrix, we use the API
So here's a health to old Hamilton, your inventor it would appear
And to imaginary numbers floating in the hypersphere
- Dr Bryan Duggan
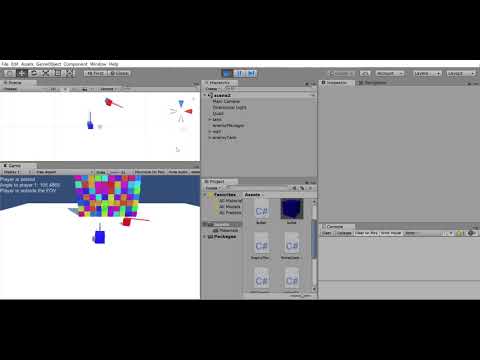
Today lets make this system:
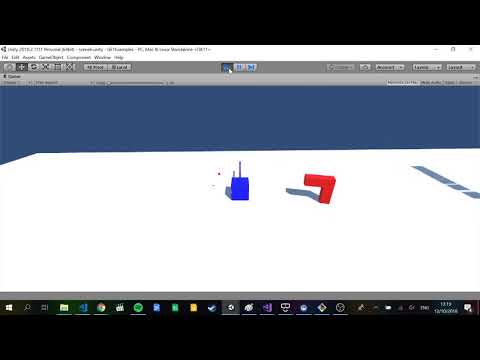
The system is a turret AI system for a game such as a tower defence game. In the video below, the red "tower" will turn to face the players tank and start shooting as soon as the player comes in range. To create this system:
- Make the turret from two cubes and set a spawn point for bullets on the turret
- Add a TurretController component to the turret. Add fields for rotationSpeed and fireRate (and any others you might need)
- Use a SphereCollider on the turret and set isTrigger to be true
- Override OnTriggerEnter and OnTriggerStay to detect the player
- Use quaternions to rotate the turret
- Use a co-routine to shoot multiple times per second
Update your fork and create a branch called lab6
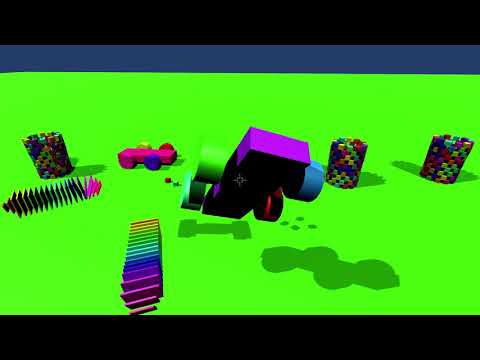
Lets make this:
What is happening:
-
The green tank is the player. The blue tanks are the "enemies"
-
Enemies spawn at a rate of 1 enemy per second
-
Enemies fall from the sky and land on the ground
-
There are a maximum of 5 enemies at any time
-
When the player hits an enemy it "explodes" (all the parts break apart)
-
To implement this you will have to do a few things:
-
Iterate over all the child transforms to get access to the turret using:
-
You could also use
transform.getChild(0) -
Add a rigidbody to the turret
-
Set the useGravity and isKinematic fields on the rigidbody appropriately
-
Add a random velocity
-
After 4 seconds, the parts sink into the ground. You can disable the collider on and set drag to be 1
-
After seven seconds, it gets removed from the scene
- Build a simple agent with perception
- Develop computation thinking
- Use trigonometry
- Use vectors
- Use the Unity API
- Practice C#
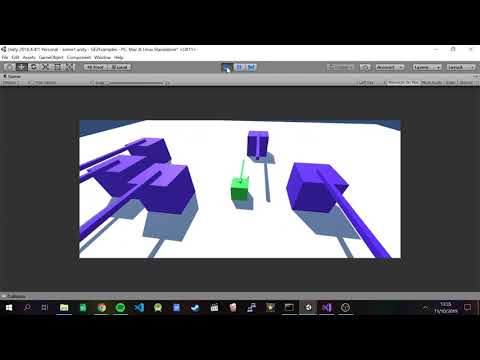
Today you will be making this (click the image for video):
To start, switch to the master branch of your fork, update your forks to get the starter code and create a new branch for your work today:
git checkout master
git pull upstream master
git checkout -b mylab4
If you are on a lab computer, you will need to clone your forks. I have updated my version of Unity to be the same as the version installed in the labs, so opening the project should be fast now!
Open the scene lab2 to get the starter scene and code for today.
What is happening:
- The red tank has a script attached called AITank that has radius and numWaypoints fields that control the generation of waypoints in a circle around it. These waypoints will be stored in a List. (Like an ArrayList in Java). It draws sphere gizmos so you can see where the waypoints will be.
- The red tank will move from waypoint to waypoint starting at the 0th one and looping back when it reaches the last waypoint.
- The red tank prints the messages using the Unity GUI system to indicate:
- Whether the blue tank is in front or behind
- Whether the front tank is inside a 45 degree FOV
- Use the Unity reference to figure out what API's to call!
I suggest you work on these tasks:
Add code to OnDrawGizmos in the script AITank.cs to draw gizmos for the waypoints. Use sin and cod to calculate the waypoints. Don't add them to the list here, just draw a sphere gizmos at the position where each waypoint should be
Write code in Awake that populates the waypoints List with the waypoints. Use a for loop, sin, cos and transform.TransformPoint.
Write code in Update to move the AITank towards the current waypoint. When it comes within 1 unit of the waypoint, you should advance to the next waypoint. You can use transform.Translate, transform.Rotate, transform.position =, transform.rotation = Quaternion.LookRotation. Look up the Unity documentation to see what these API's do
Write code in Update to print whether the player tank is in front or or behind the AI tank
Write code in Update to print whether the player tank is inside a 45 degree FOV of the AI tank and whether the player tank is in range of the AI tank. In range means that the player tank is < 10 units away from the AI tank
You will use the following API's in your solution:
Quaternion.Slerp
Quaternion.LookRotation
Vector3.Normalize
Vector3.Dot
Transform.TranslateUpdate your fork from master branch Create a branch called mylab3 for your work this week:
Make this procedural animation using a harmonic function :-) (click the image for video):
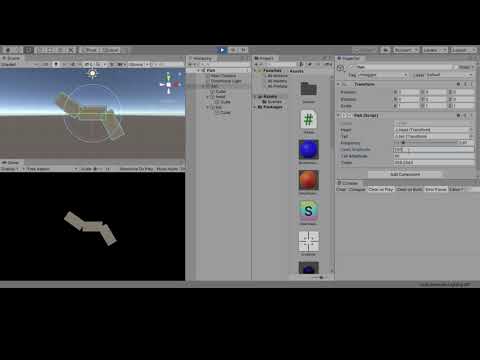
In your solution, you will use the following API's:
Mathf.Sin
Quaternion.AngleAxis
transform.localRotation- Make a procedural system in Unity
- Use trigonometry and vectors
- Use the Unity Editor & VS Code
- Make commits on your repo
- Use the Unity API's
For assessment purposes:
- Create a branch off master called lab2
- Attempt the lab exercise below
- Make at least two commits on the branch before Thursday 6th October
Here is a video of what you can make today (click the image for the video):

You can open the scene Lab1 and put your solution here.
- Create a dodecahedron prefab (from the model in the project) and set the material
- Attach the RotateMe script and add code to it
- Add code to the Generator script to instantiate the dodecahedrons from the prefab you made
I suggest you try and make a single circle of dodecahedrons first and then use a nested loop to make all the circles. You will be using the following Unity API calls in your solution:
Mathf.Sin(angle)
Mathf.Cos(angle)
GameObject.Instantiate()
transform.Rotate()
You will also need to know about the Unit circle and also how to calculate the circumference of a circle
git add .
git commit -m "message"
git push- Install Unity & git for Windows
- Get Unity running on the lab computers
- Set up the fork, clone it, merge the upstream, commit and push into your fork
- Create a little thing in Unity
- Install Unity on your laptop or get Unity going on the lab computers.
-
You will also need to go to Edit | Preferences and set the External Script Viewer to be VS Code
-
To get Unity running on the lab computers: Open File Explorer (Win Key + E)
Navigate to D:\Downloads\
In this folder you will find two files relating to unity Check-Unity-License.bat License-Unity.bat
As the file names suggest
File 1 (Check-Unity-License.bat) will check and display the Unity license, if it exists on the machine. Always run this file first. If no license exists, run file 2
File 2 (License-Unity.bat) will license Unity on the current machine for all users. It takes a few seconds to run and gives no feed back apart from the busy icon for a few seconds.
If in doubt that you ran file 2 or not; just run file 1 again to verify, as it should now display a valid license
You can now start Unity from the Desktop. It takes ages to start, so be patient.
-
- Create an account on github if you don't already have one and be sure to set up a personal access token as this is what you will have to use as a password now
- Fork the repository for the course (click the fork button above)
- Clone the repository and cd into the folder you cloned:
git clone http://github.com/YOUR_GIT_NAME/GE1-2022-2023
cd GE1-2022-2023- Check to ensure the remotes are setup correctly. You should see both origin and upstream remotes. The origin remote should be the url to your repo and the upstream remote should be the url to my repo
git remote -v- If you don't see the upstream remote, you can add it by typing:
git remote add upstream https://github.com/skooter500/GE1-2022-2023/- Switch to a new branch
git checkout -b mylab1- Now launch Unity and see if you can open the scene we made in class today and run it.
Make some changes and do a final commit