The install schematic will help you quickly add VS Code configuration to a new project. This schematic will:
- Adds recommended extensions
- Configures the Debugger for Chrome extension with VS Code to debug an application generated by the Angular CLI.
- Make sure to have version 6.0.0 or greater of the @angular/cli.
- Run the install schematic
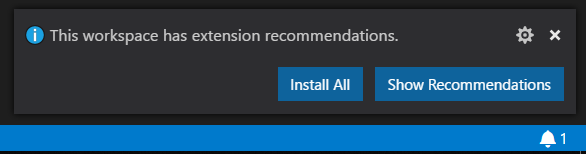
ng add @slupekdev/vscode- Restart VS Code. It prompts a user to install the recommended extensions when a workspace is opened for the first time. The user can also review the list with the Extensions: Show Recommended Extensions command.
-
Debugger for Chrome - Must have extension for Angular development. You can debug using chrome and add your breakpoints in VSCode. Tutorial on how to use can be found on VSCode docs.
-
TSLint - linter for the TypeScript language, help fixing error in TS code. By default auto fixing tslint errors on save is enabled.
-
Angular Language Service - provides a rich editing experience for Angular templates, very useful when working on Angular HTML template.
-
Angular 8 Snippets - Angular with TypeScript snippets.
-
Vscode-icons - provides lots of icons for Visual Studio Code.
-
EditorConfig for VS Code - EditorConfig Support for Visual Studio Code.
-
angular2-switcher - Easily navigate to typescript(.ts)|template(.html)|style(.scss/.sass/.less/.css) in angular projects.
alt+o(Windows) orshift+alt+o(macOS)- by default VSCode opens file not opened from file explorer in 'preview' mode. When using this extension, I also recommend the following setting:
workbench.editor.enablePreview": false
-
Auto Import - Automatically finds, parses and provides code actions and code completion for all available imports.
-
Auto Rename Tag - Auto rename paired HTML/XML tag.
-
Bracket Pair Colorizer - allows matching brackets to be identified with colours.
-
Sass Lint - integrates the sass-lint linter into VS Code.
-
Sort Typescript Imports - integrates the sass-lint linter into VS Code.
-
Use NPM to install Angular CLI version 6.0 or greater globally.
Please note: Dubugging may not function with other versions of Angular CLI.
npm install -g @angular/cli@">=6.0" -
Use Angular CLI to create a new Angular application.
ng new my-test-app -
Change to the newly created application directory and open VS Code.
cd my-test-app
code .
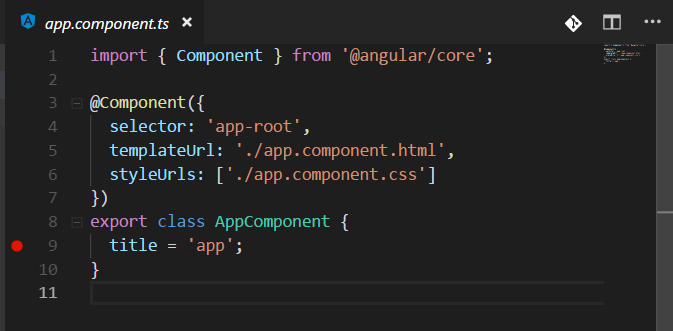
- Set a breakpoint in app.component.ts on the line that sets the
titleproperty ofAppComponent. To set a breakpoint, click on the gutter to the left of the line numbers. This will set a breakpoint which will be visible as a red circle.
-
Open a terminal at the root folder and serve the app using Angular CLI:
npm start -
Go to the Debug view, select the 'ng serve' configuration, then press F5 or click the green play button.
-
The app will be shown in a browser, but in order to hit the breakpoint you'll need to refresh the browser.
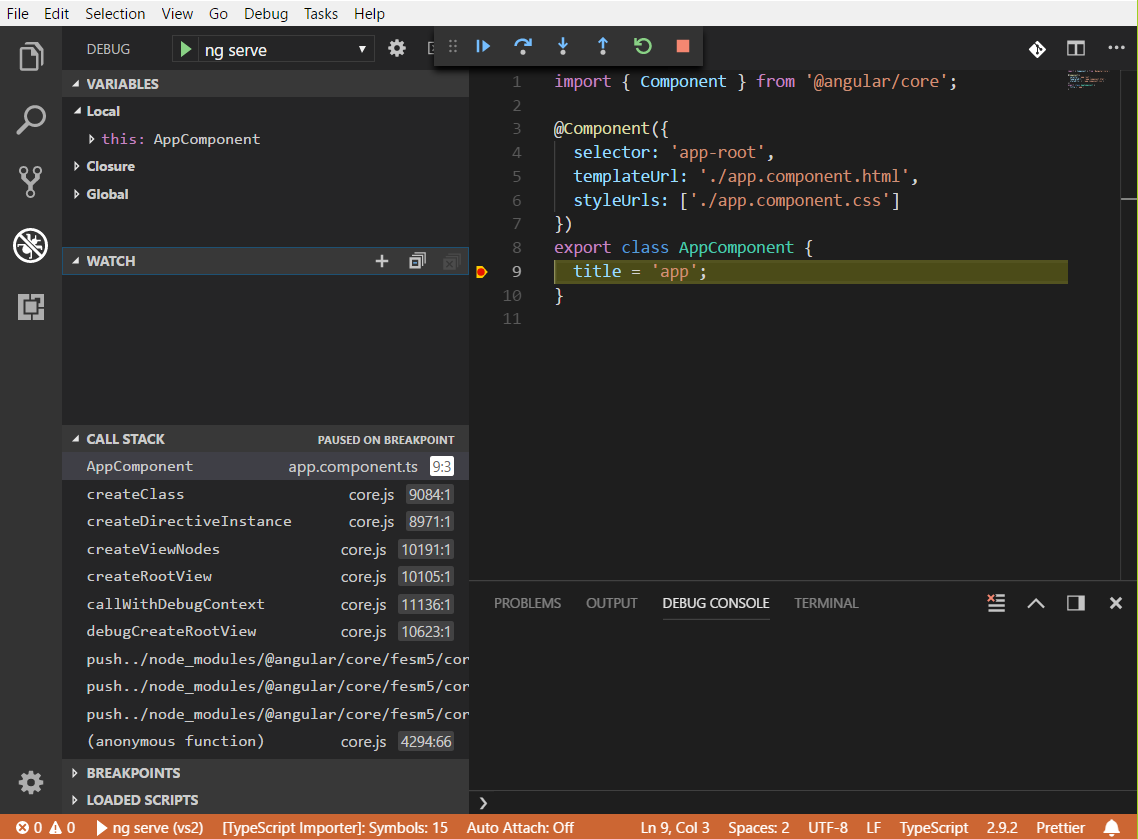
- You can step through your source code (F10), inspect variables such as AppComponent, and see the call stack of the client side Angular application.
-
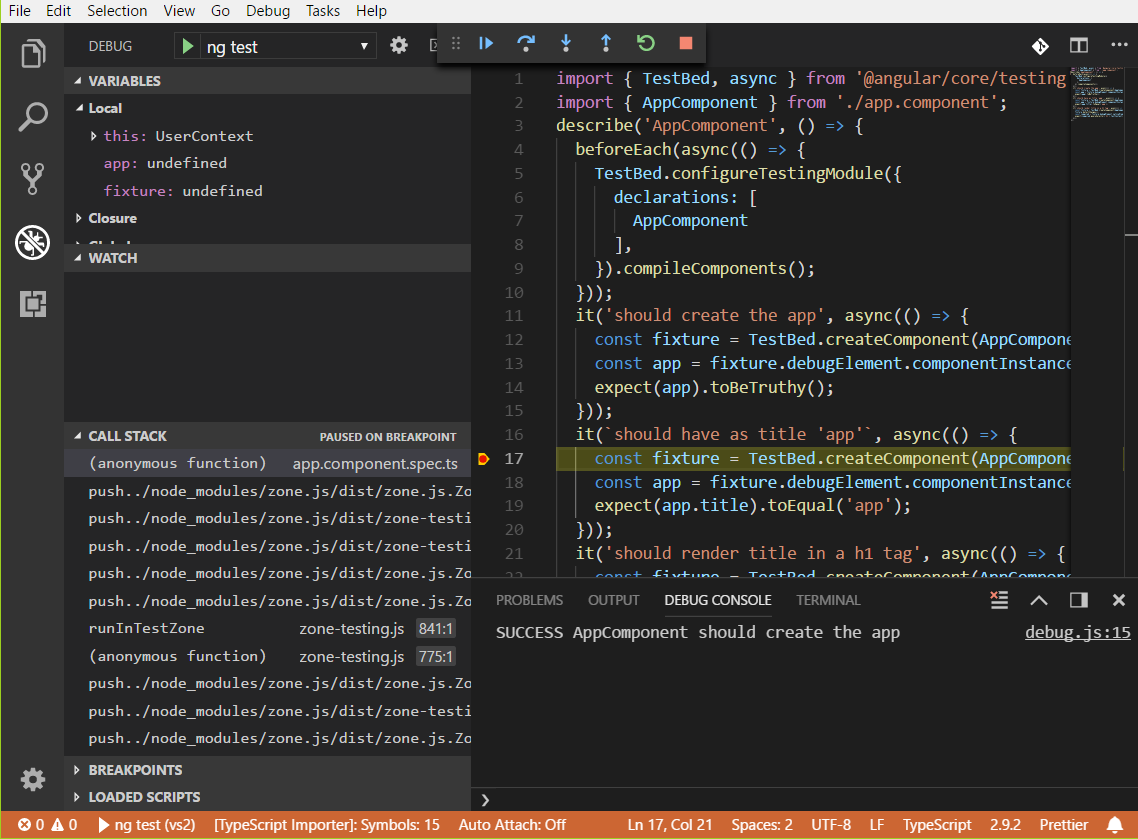
Set a breakpoint in app.component.spec.ts on a line in one of the unit tests.
-
Open a terminal at the root folder and run the tests using Angular CLI:
npm run test -
After the test run, go to the Debug view, select the 'ng test' configuration, then press F5 or click the green button.
-
When a browser opens with the test list, click the link for the test in which you placed the breakpoint. You should then hit the breakpoint: