How to import datasets
In this section you will be able to learn how to import datasets into PACOM. Basically a dataset in PACOM will come for a single input data file that is processed and imported. Then, in the Comparison Project Tree, the individual datasets can be combined and grouped in different levels.
PACOM offers a unique interface to import a single or multiple datasets.
From the first window of the tool, either:
- Go to the menu 'Import data' -> 'Go to import data' (ALT+E), or
- Click on 'Import data' round button.
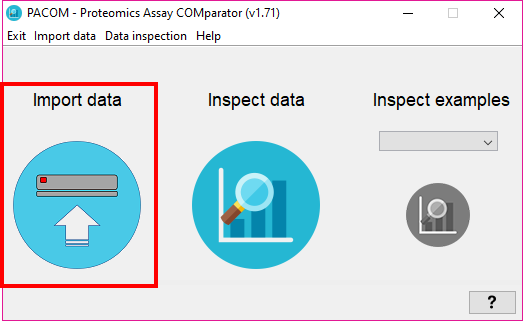
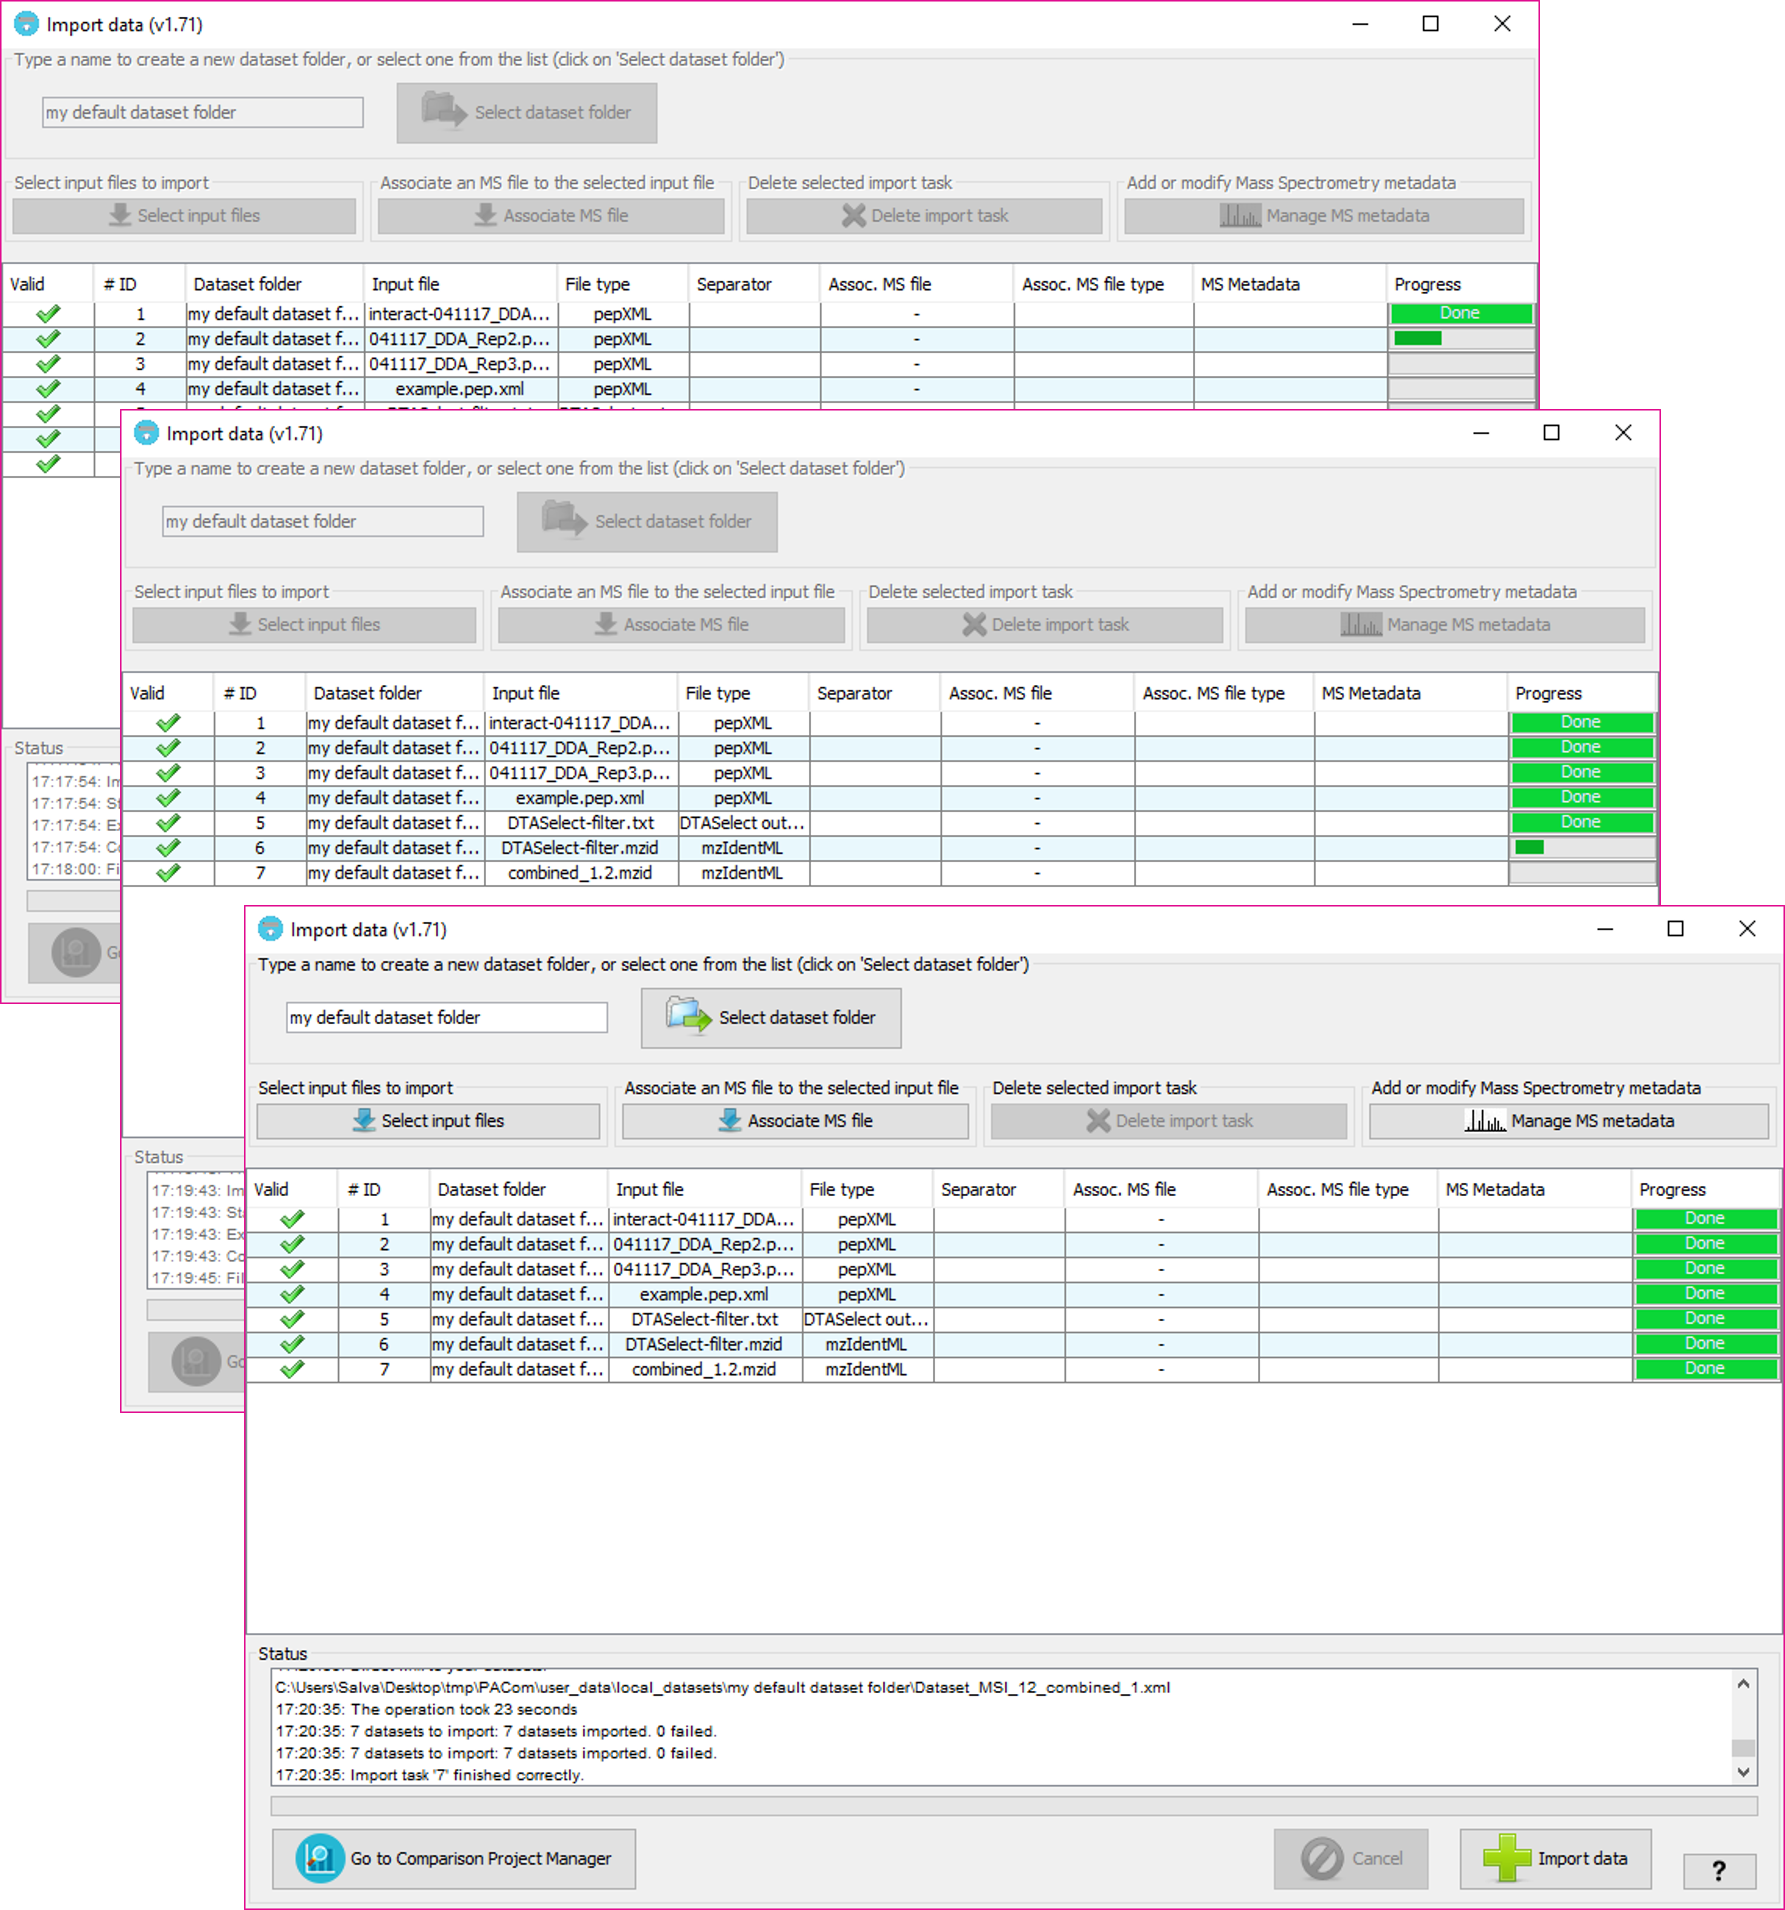
By selecting 'Import data' you will see the following window:
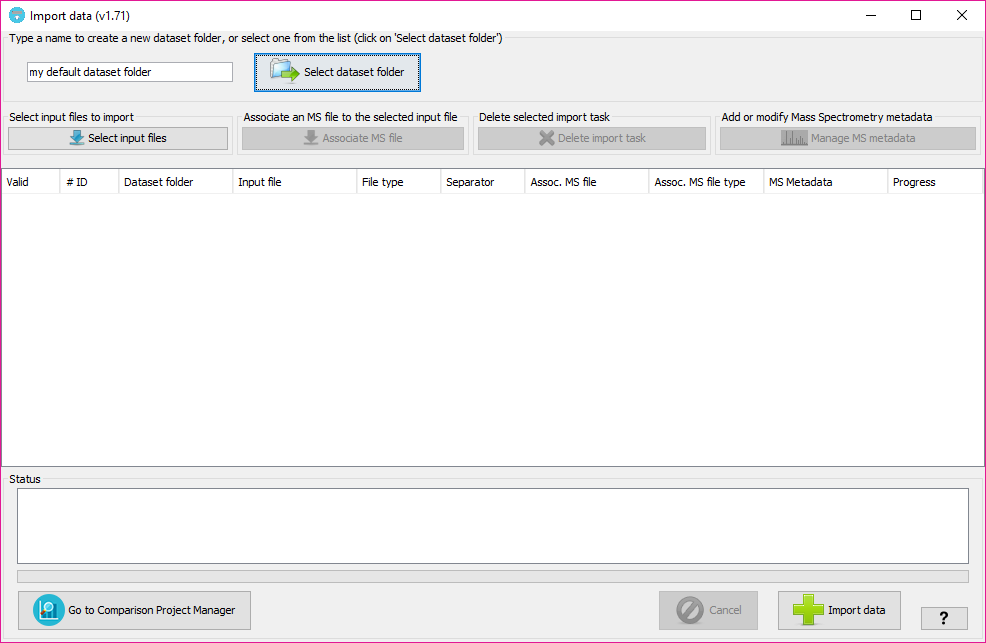
In that window, you will have to:
This will determine the internal forlder in which your datasets will be organized. Then, at the Comparison Project Tree creation, you will see the imported datasets organized by folders.
By clicking on the 'Sekect dataset folder' you will see all the dataset folders already available at the tool. Note: The dataset folders will be create at 'user_data/local_datasets' folder.
By clicking on the 'Select input files' button, you will be able to select one or more input data files. The following input data formats are currently supported: mzIdentML files (both v1.1.0 and v1.2.0 versions), PRIDE XML files, DTASelect output files, XTandem XML output file, pepXML files, ProteinPilot PeptideSummary.txt text files, and Table text files (see table text specification below).
For each one of the input files a new row will added to the table below.
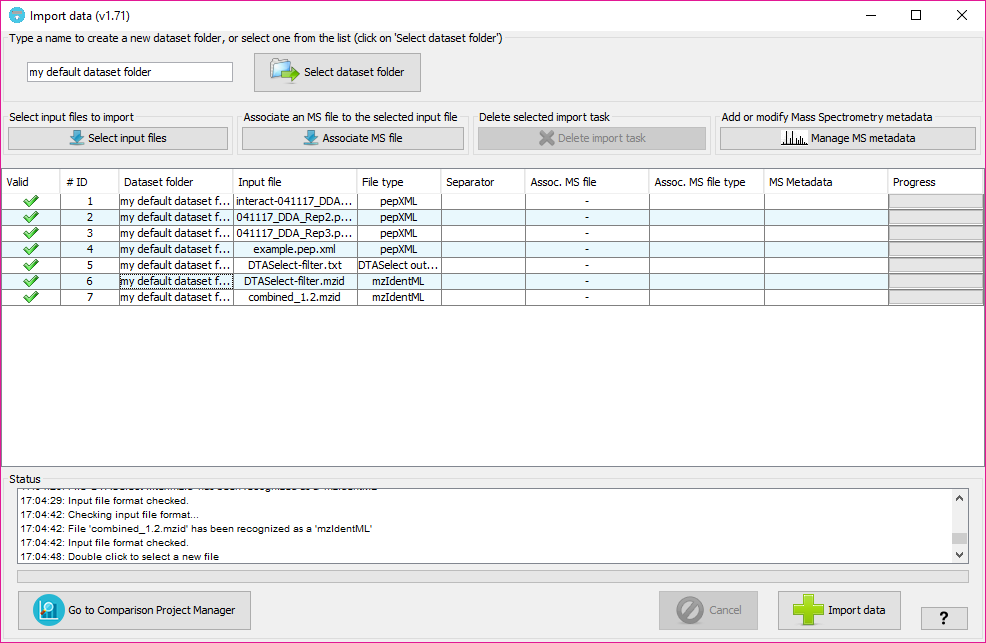
The input file format will be automatically inferred from the file, but we recommend to double check what is assigned in the 'File type' column for each input file.
The column 'Valid' will inform about whether PACOM needs some extra information or not in other columns. In case of some information is missing, the color of the row will be red and hovering on the 'Valid; column will tell you what is happening and how to fix it.
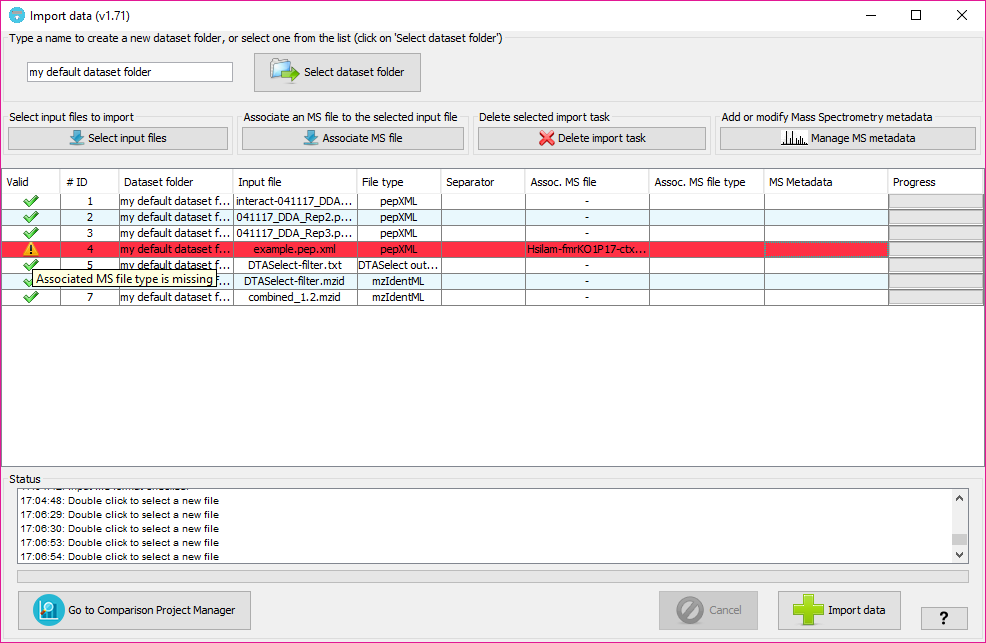
In order to subsequently export a PRIDE XML file containing spectra and MS metadata you can associate each of the input data files with mass spectrometry files (either mgf or mzML formats).
Note: If you don't want to create a PRIDE XML file containing the spectra associated to the identifications, skip this part, because it is not going to add any benefit besides that.
In order to do that, after adding at least one input file, click on 'Associate MS file' button (or double click on the column 'Assoc MS file' of the corresponding input file) and select the MS file from your file system. Then, you will have to specify its format in the corresponding cell of the 'Assoc MS file type' column.
Then, you will have to also associate some extra metadata about the mass spectrometry process, by selecting or creating a new MS Metadata template. To edit or create new MS Metadata templates, click on 'Manage MS metadata' button.
Note: The associated MS file would be the corresponding mgf or mzML that was use to search the data in the search engine. The idea is that in a well formed PRIDE XML file, the PSMs will be linked to the corresponding spectra and so, the references to the spectra found in the input file will have to match the spectrum identifiers found in the MS file.
Note '': You willl be able to create a PRIDE XML without spectra in any case, whether you associate an MS file or not in this stage.
Once you click 'Import data' button, PACOM will check again that all import tasks are valid and then the import process will beging from the first row sequentially to the last one.
At the end of the process, if everything went well, the new datasets will be imported and will be ready to be added to the Comparison Project Tree
Note: Depending on the file size, it will take more time to parse it and import it. However it shouldn't be too much.
In case of the table text files, they will be plain text files in which the values are separated by a separator (TAB, COMMA, SEMICOLON or COLON). You will have to specify the separator from the corresponding column in the table of import tasks. The input file will have several columns and they can be in any order, but they must have certain predefined headers in order to be recognized.
The following header names are allowed at the first row:
- ACC (mandatory) Column containing protein accessions. Any type of accession is valid, but some features will be only available in case of having UniprotKB accessions. It may contain several accessions in the same cell of the table, as long as they are separated by other type of symbol among: TAB, COMMA, SEMICOLON or COLON (and different than the separator of columns)."
- SEQ: (mandatory) Column containing peptide sequences. They may contain modifications strings inserted in the sequence such as SEQUE(+80.02)NCE.
- PSMID: (optional) Column containing an identifier for the PSM, so that rows with the same PSMID will be referring to the same PSM assigned to a different protein. If not provided, each row in the table will be considered as a new PSM.
- Z: (optional) Column containing the peptide charge state, which should be a positive integer.
- MZ: (optional) Column containing the precursor mass, which should be a real number.
- RT: (optional) Column containing the retention time of the peptide, which should be a real number.
- any other header name: (optional) will be recognized as a new score associated to the PSM, and values in that column should be real numbers. Here the user could insert any value, being a score or not, that want to evaluate looking to its distribution and looking how its value change between datasets for the same peptide.
- Lines starting by '#' will be ignored.