Jashboard is a web application that allows the user to set up dashboards to contain a variety of monitors that dynamically fetch and report any sort of information.
Jashboard works as a single page web application, where the client side is fully written in Javascript (AngularJS) and the server side is a simple Sinatra (Ruby) instance.
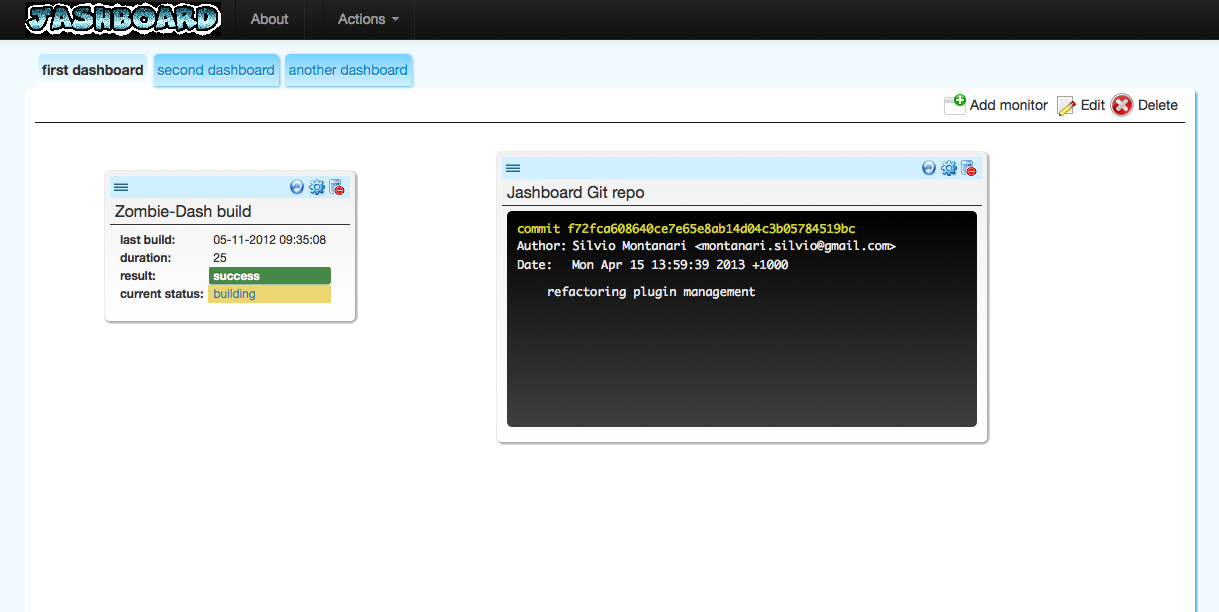 A generic multi-dashboard set up A generic multi-dashboard set up
|
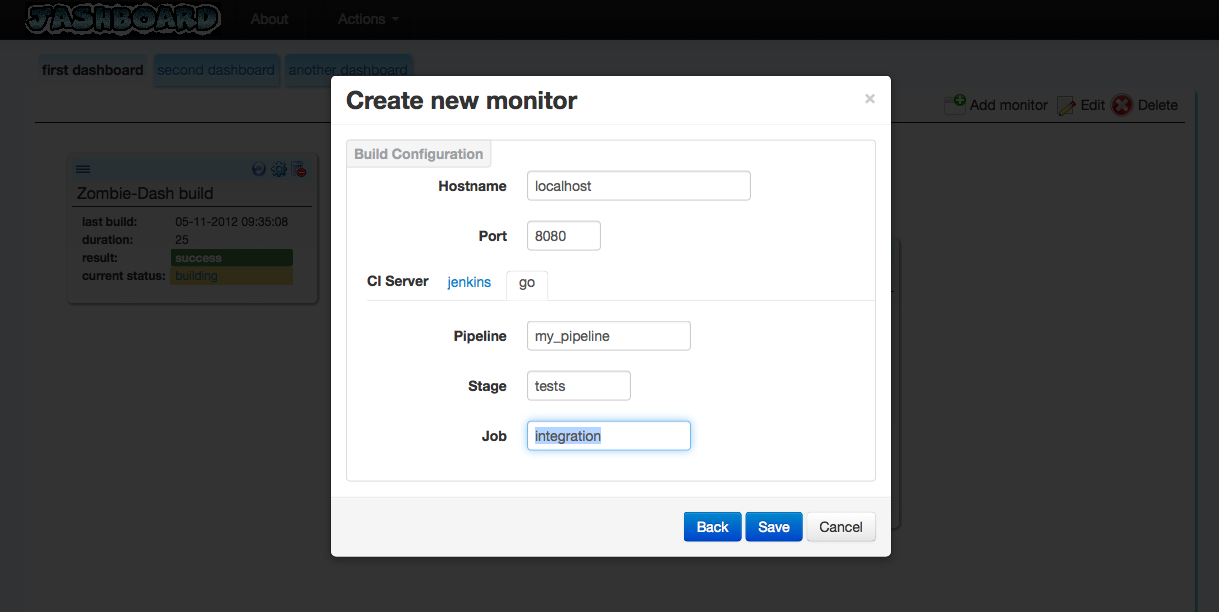 Form to create a Build monitor Form to create a Build monitor
|
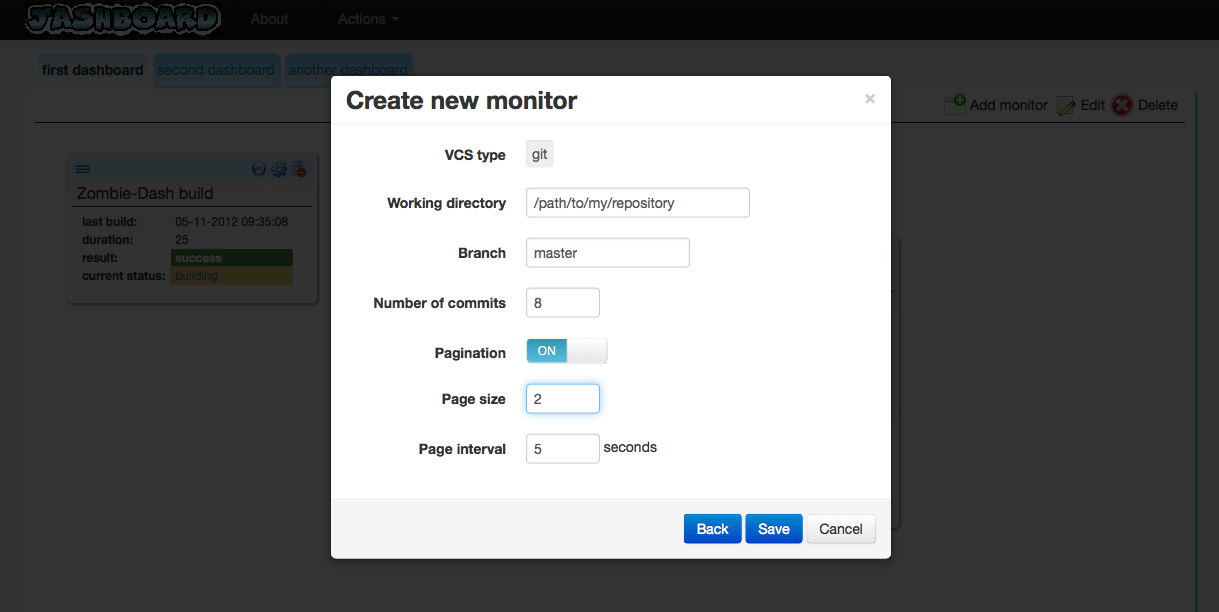 Form to create a Git monitor Form to create a Git monitor
|
Initially the idea was to create a CI build monitor web application (right, like we needed another one…), but then I expanded the concept to be more general purpose and provide the ability to quickly extend the application and include plugins for any type of monitor you can think of.
At the moment you can create and use the following type of monitors:
| Monitor type | Description |
|---|---|
| build/jenkins | monitor an existing Jenkins build |
| build/go | monitor an existing Go build |
| vcs/git | monitor the commits made to a git repository/branch |
| ipsum | random generator of sentences (inspired by the ipsum gem). This is more for demo purposes |
For the backend server you will need Ruby (~> 1.9.3) and Bundler installed on your machine. For the frontend you will need npm and Bower to manage the javascript libraries, dependencies and packaging.
$ cd deploy
$ rake install
This will generate a directory deploy/jashboard_app which will contain the full webapp with only production files, css and javascript minified, environment variables set to production etc. You can then copy that folder anywhere you like or just leave it there.
After the install complete (successfully), you can then start the Sinatra application from the installation folder:
$ ./start_server.sh
This will fire up a WEBRick server listening on port 8001. If you want a different port just change the config.ru script.
Now you launch your favourite browser (and I mean browser, not IE) and load the app at
http://<hostname>:8001/
This is more for test/development purposes, that is you want to modify the code, the web styles, add a new monitor plugin, etc. and then test your changes.
$ cd web
$ npm install    #install grunt and grunt plugins to build and run the tests
$ bower install

$ cd server
$ bundle install
$./start_server.sh
This will start the application in development mode (more details about customising your Jashboard are given below).
Note that nothing stops you from running the application in development mode and using it as a production instance.
The application is pretty straightforward to use.
- Start creating your dashboard using the "Actions/Create new dashboard" menu at the top of the page.
- Add a new monitor to your dashboard using the "Add monitor" button.
- Once the monitor is in the dashboard you can modify its layout (i.e. size and position), as well as change its configuration settings.
You can try out the application without starting the server and just by running the javascript client it in your browser.
You only have to open the web/index.html file directly in your browser passing a particular parameter in the url, as in:
file:///<path-to-the-repo>/web/index.html?smocker_scenario=demo
This way the application runs only on the browser, with simulated ajax responses from the server, and you can create/delete dashboards, monitors and get a glance of what the actual functionality would be like.
In order for this to work your browser needs to allow popups from your file:// domain and have permission to load files from the local file system. This should be fine for Firefox and Safari, but it might not work in Chrome. In that case you want to launch Chrome from the command line with a special flag:
chrome --args --allow-file-access-from-files
This is just a brief guide. More details will be put in the wiki (when I have the time).
Adding a new monitor type involves adding both a client side plugin and a server side plugin. You can look at the existing monitor plugins that I've written to get an idea of what needs to be done, but basically the steps to follow are:
-
Define a plugin type name. This may seem trivial, but the monitor type name is actually crucial for the application to work correctly.
Choose possibly a short name, with only alphanumeric characters, because it will be used both by javascript (client) and ruby (server) to dynamically invoke your plugin code.
-
Client side:
- javascript: this is where you write the logic to interpret the monitor runtime information and configuration
- Add your plugin type name in the array of plugins defined in
web/jashboard/plugins.js. - Create a folder with name equal to your plugin type name under web/jashboard/plugins i.e.
web/jashboard/plugins/<type_name>. This folder will contain your custom code. - Define a module (yes, I like modules even in javascript)
jashboard.plugin.<type-name>which will include all your objects, variables, functions, etc. - Add a
web/jashboard/plugins/<type_name>/MonitorAdapter.jsfile which will definejashboard.plugin.<type-name>.MonitorAdapter, your very Monitor type adapter function. - Add a
<type_name>_plugin.jsfile which will load your MonitorAdapter.js plus any other file necessary to run your plugin.
- Add your plugin type name in the array of plugins defined in
- html: this is how you render the monitor runtime information and configuration form
- Create a folder with name equal to your plugin type name under web/html/plugins i.e.
web/html/plugins/<type_name>. - Add a monitor_runtime_partial.html file which will be used to display the monitor runtime information.
- Add a monitor_form_partial.html file which will be used to display the monitor configuration form.
- Create a folder with name equal to your plugin type name under web/html/plugins i.e.
- styles[optional]: this is how you add custom styles for your view/html elements
- Add a less file under web/css/plugins i.e.
web/css/plugins/jashboard-plugin-<type_name>.less. - Add @import statement to the base less file
web/css/jashboard.lessto load your specific less file i.e.@import url('plugins/jashboard-plugin-<type_name>.less');.
- Add a less file under web/css/plugins i.e.
- javascript: this is where you write the logic to interpret the monitor runtime information and configuration
-
Server side:
- Create a folder with name equal to your plugin type name under server/app/plugins i.e.
server/app/plugins/<type_name>. - Add your own ruby plugin class, extending
Jashboard::Pluginand implementing aget_runtime_infomethod which will contain the logic necessary to fetch and return the monitor data.
- Create a folder with name equal to your plugin type name under server/app/plugins i.e.
Of course if you want to do things properly you should add tests for your monitor plugin, Jasmine and FuncUnit tests for the client/javascript side and RSpec and Cucumber for the server/ruby side.
The ipsum monitor plugin is a very simple example that you can look at as a starting point for adding a new monitor plugin. Have fun!
Jashboard consists of a RESTful backend communicating with a JavaScript client running in the browser. The two parts are thoroughly, independently tested, but I haven't bothered to write end-to-end tests to exercise the entire flow, because so far I haven't seen the necessity to do that.
The backend is a ruby application written in Sinatra.
Execute the tests from a terminal opened in the /server folder:
bundle exec rspec # unit tests

bundle exec cucumber # integration tests
Execute the unit tests from a terminal opened in the /web folder:
grunt jasmine # unit tests
Alternatively, the Jasmine specs can be executed directly in the browser by opening the file _SpecRunner.html.
Execute the unit tests from a terminal opened in the /server folder:
rake selenium_funcunit # selenium functional tests
Alternatively the functional tests can be executed directly in the browser by opening the file /web/funcunit.html (remember to disable any pop-up blockers).
Copyright © 2013-2015 Silvio Montanari. See LICENSE for details.