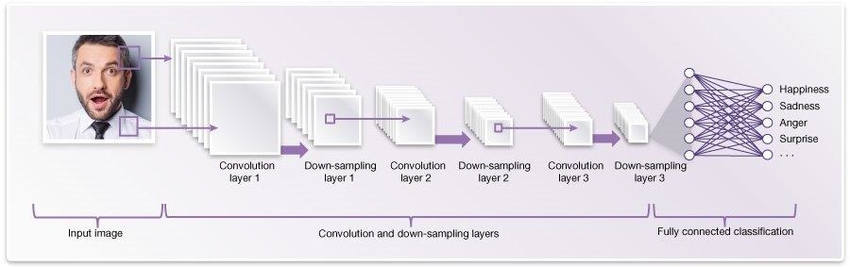
We created and deployed the Convolutional Neural Network for performing our image classification task. Our task basically consisted of recognition of emotion from human images and Deep CNN have been found to accomplish the task quite effectively. Moreover various researches have proved CNN to be an effective method for carrying out image classification jobs.
For a detailed explanation of how everything is happening in this project, please refer to minor project report document uploaded in word format.
You can obtain the dataset from the following link.(https://www.kaggle.com/c/challenges-in-representation-learning-facial-expression-recognition-challenge/data) . If they want a login for download ,just create an account for that and then you'll be able to do so.
The Six Classes of Emotions are:-
- Anger
- Fear
- Happy
- Sad
- Surprise
- Neutral
The complete overview of what all layers are involved in the creation of the CNN is present.
The performance of the model on various emotions is mentioned. There are Basically six emotions whose Confusion Matrix is as provided.

The Classification Report:

I've also provided some testing images for the model to test on so that you can also judge the performance yourself.
.png)
.png)
.png)
.png)
Train the model created in the python code on a cloud based GPU(google colab preferably) to download a trained weights files with the .h5 extension. Since it is a large file, download and keep it in the same directory as the project and accordingly adjust the pathnames in the vide_test and image_test code. The .h5 file is a trained weights file which actually contains the complete model trained which needs to be imported in the python files for the output to be same as depicted in the screenshots.
After downloading the .h5 file, to run the video_test.py file simply type python video_test.py( as in sample screenshot 1 on the terminal). It will open up the front camera of your laptop and start to determine. For the image do the same(as on sample screenshot 2 on the terminal) but also add the path of the image after the python command and it will generate the result. Also make sure, that python is set as your environment variable otherwise it may generate a non recognized statement error.